Integrate ShareX with Free Forever S3 Compatble Storage Solution - Tebi.io (25G Storage, 250GB Outbound Traffic) - NETSEC

Latest

Learning, Sharing, Creating

Cybersecurity Memo

Wednesday, April 26, 2023

Integrate ShareX with Free Forever S3 Compatble Storage Solution - Tebi.io (25G Storage, 250GB Outbound Traffic)

Tebi.io is a s3 compatible geographically distributed object storage solution. It is available with a free trial, or on a forever free plan. It features full S3 API compatibility, live replication, FTP protocol support, and other features supporting data delivery and accelerating cloud operations. Tebi.io is providing most generous free tier plan: 25GB storage with 250GB outbound transfer. 

ShareX is a fantastic tool for Windows that enables screen capture, file sharing, and much more. The most interesting part for ShareX is it can be integrated with many third party services like the Imgur, standard protocols like ftp/SFTP, as well as s3 compatbile services like Amazon AWS S3 and Backblaze B2. 

In this post, I am gonna show you how you can integrate 


Related Posts:


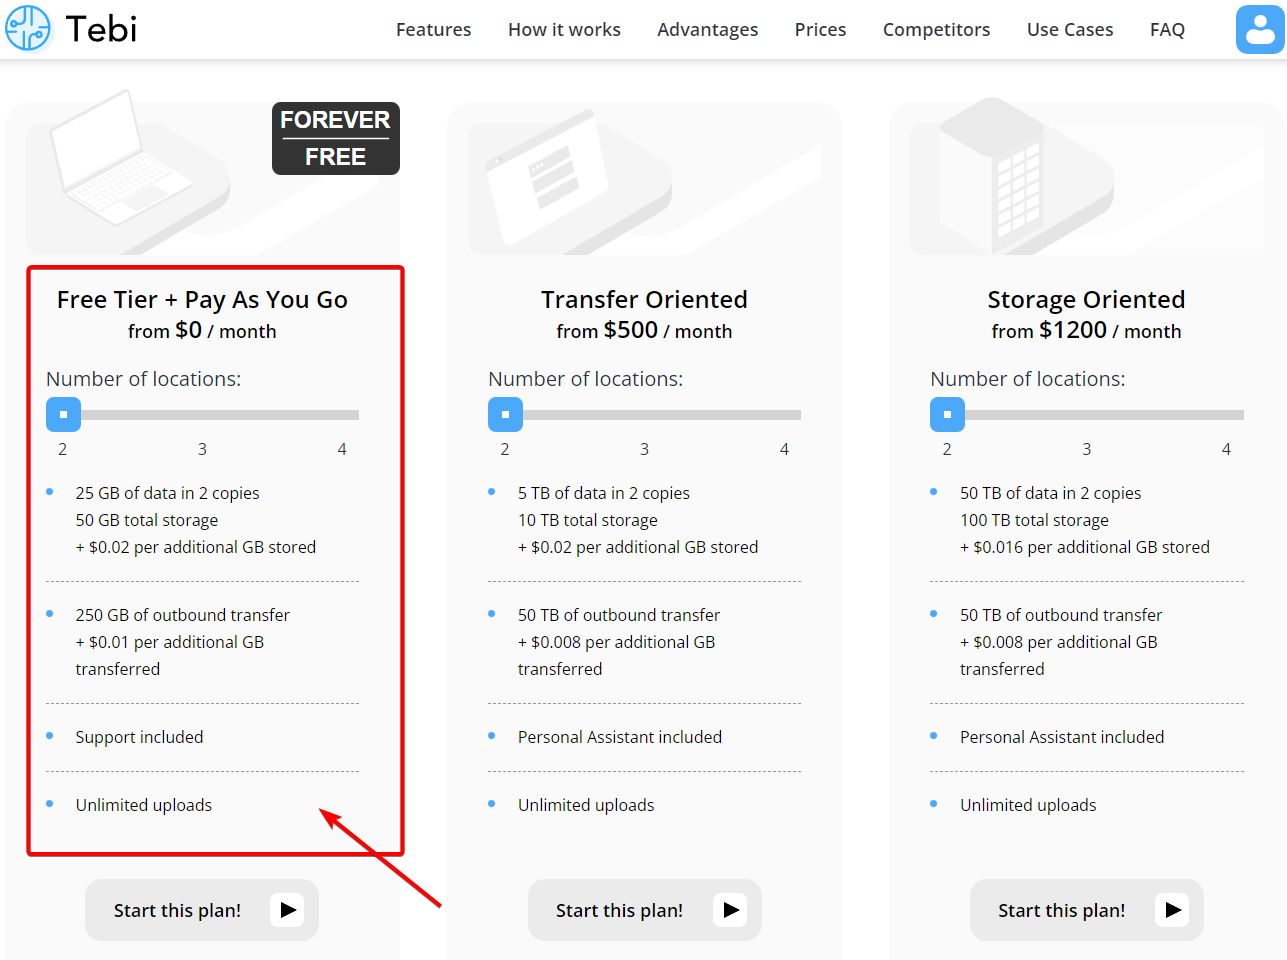
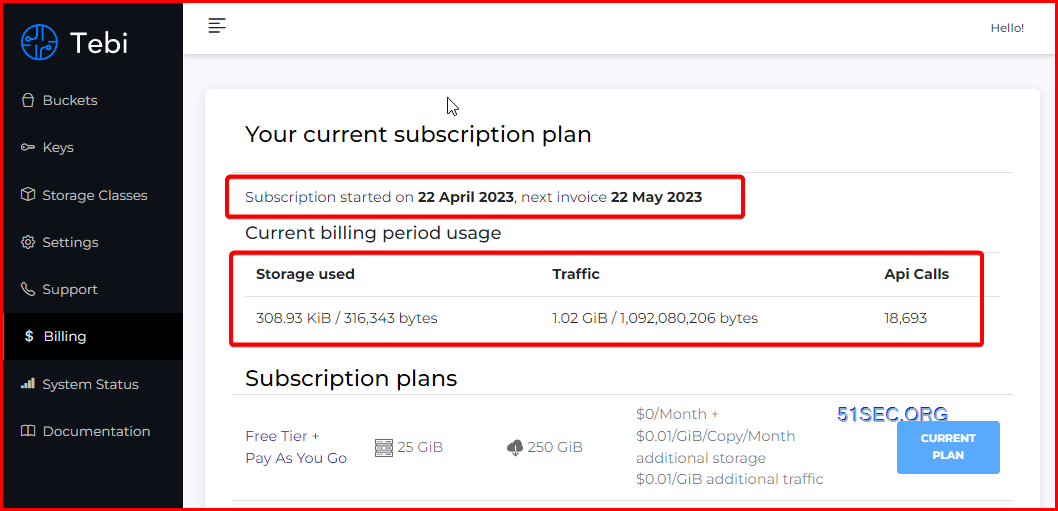
Register An Account and Log In

Since registration is very straighforward, there is no necessary to show all screenshots. 
Only thing you will need to do is to enter your credit card to get this free tier + Pay As You Go plan. 


Notes:
You will only have 14 days trial if you did not enter your credit card information.
You can remove your credit card later.
You can enter random numbers as your credit card. 


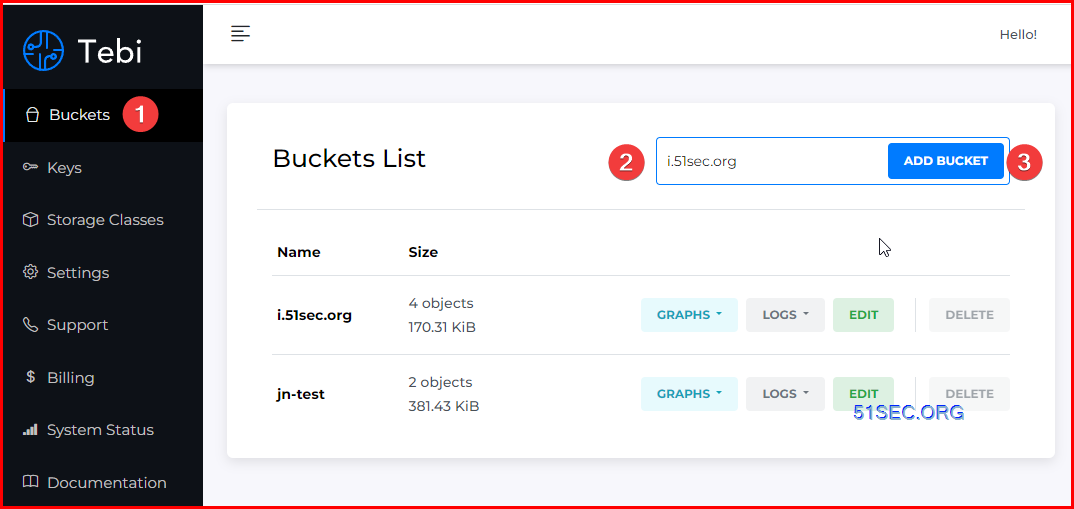
Create A Bucket & Key with Secret

Add a bucket

For example, we are creating a new bucket i.51sec.org, which is going to matching our future custom subdomain. If you are not planning using your own custom subdoman, you can use any bucket name as long as no one is using it, and matching S3 bucket name requirements


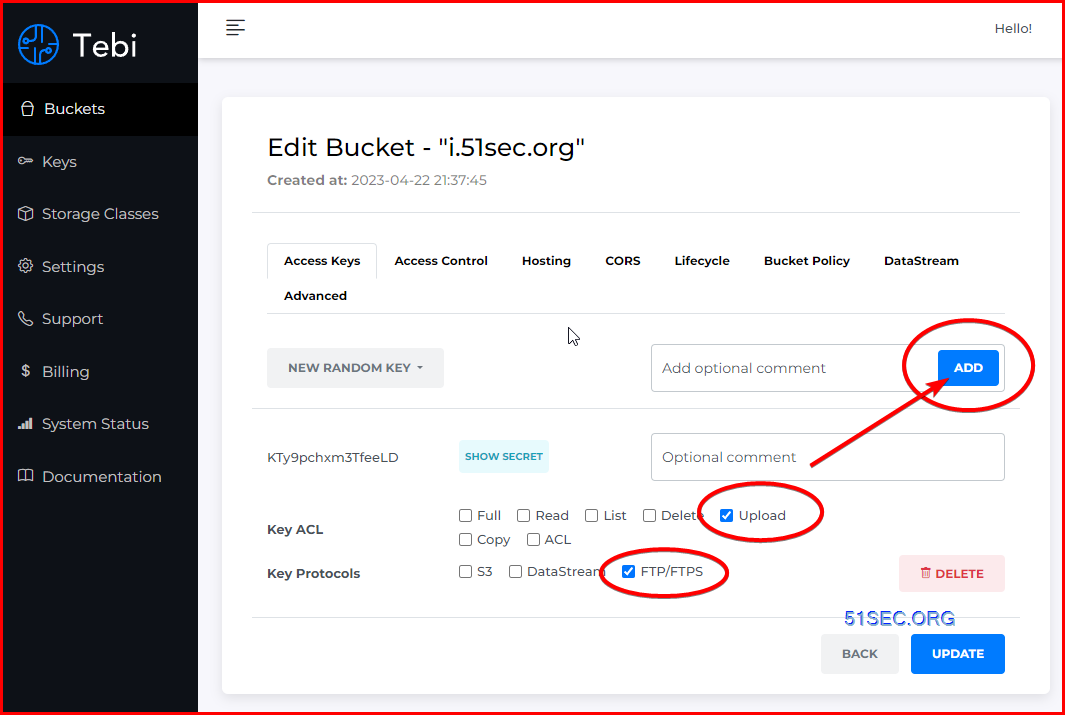
Add a key with least permissions
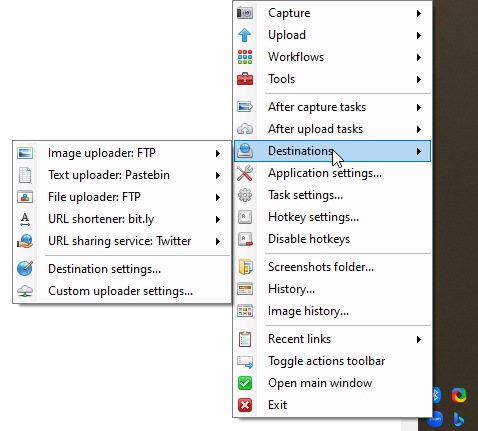
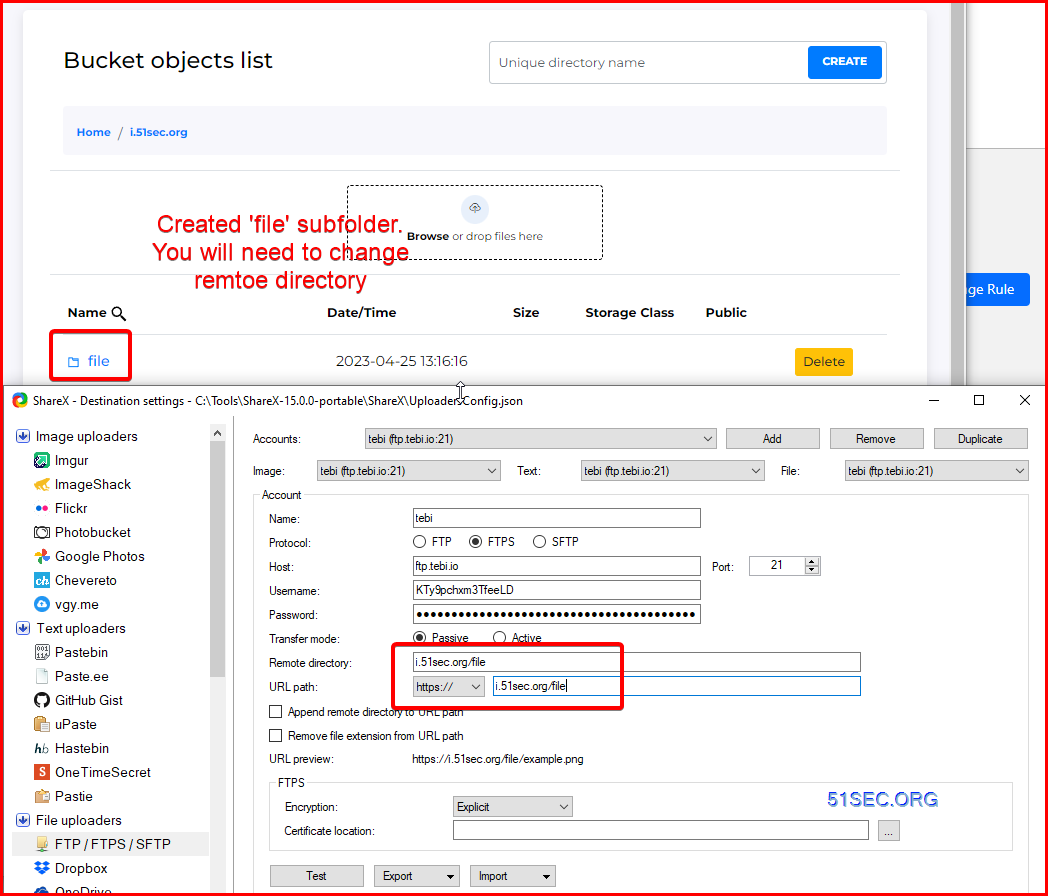


Configure ShareX

Make sure both image uploader and file uploader are using FTP as a method for uploading to.


You can use s3.tebi.io this domain for your configuration. Later in next section, we will change it to your own domain to use. 

Please refer FTP parameter documentation from : https://docs.tebi.io/intro/connection.html


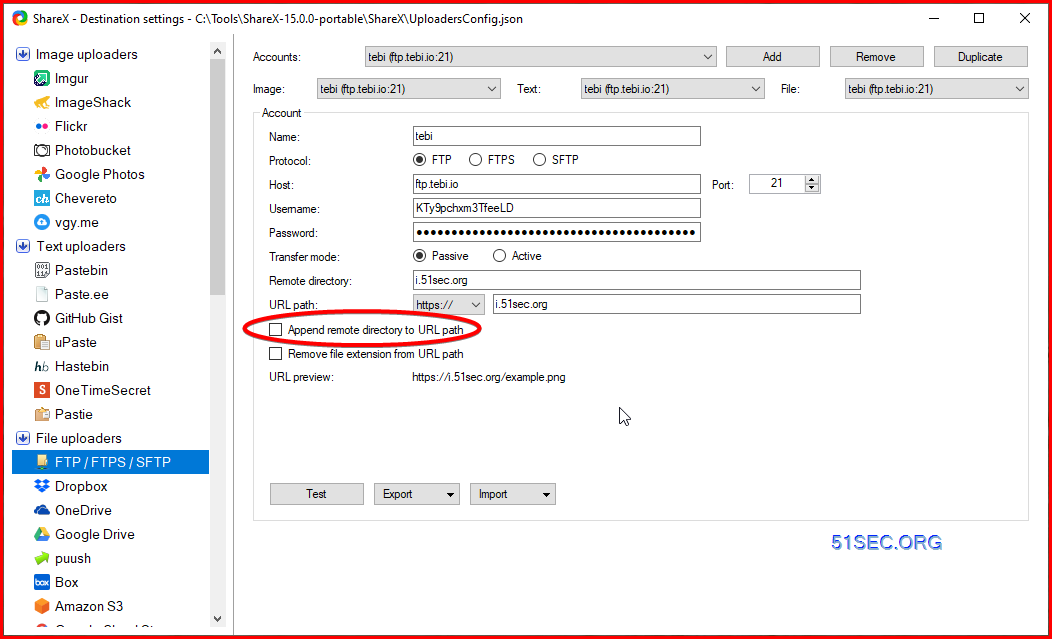
FTP/FTPS Protocols Connection Parameters:

The File Transfer Protocol (FTP) is a standard communication protocol used for the transfer of computer files from a server to a client on a computer network. Tebi supports both encrypted (FTPS) and not encrypted (FTP) versions.

Host

ftp.tebi.io

Protocol

FTP or FTPS

Login

Bucket Key

Password

Bucket Secret

In this example, we are using FTP protocol. You also can use FTPS for better security: 


Make sure FTP uploaded file is public accessible. 
Change FTP Default ACL configuration to Public. 


Bucket File List. You also will be able to create subfolder in it:


If you created a new subfolder , such as 'file', you will need to change destination configuraiton in ShareX.
You will need to add subfolder name 'file' into your remote directory and URL path configuration.


Check Usage detail:


For monthly billing related bandwidth consumption, check billing page:


Support service included:
The tecnical support is pretty fast to respond to the ticket opened, although we are using a free tier service. It usually will be answered in an hour so. 

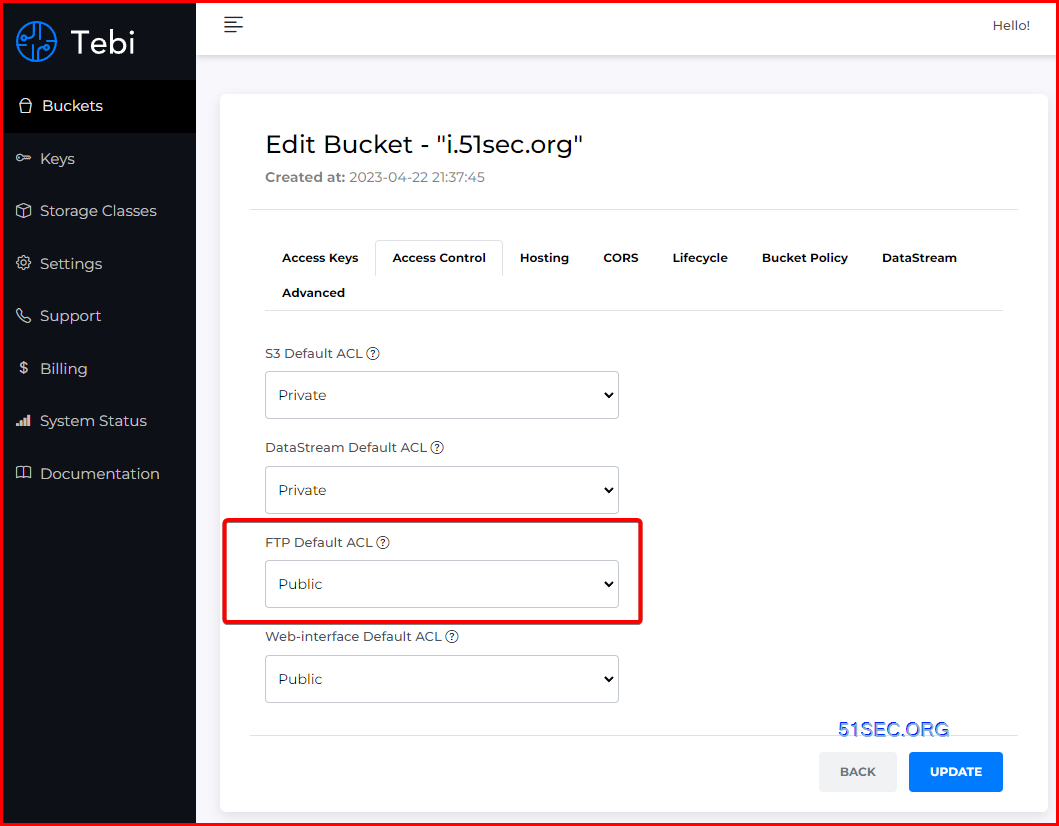
Enable Hosting and SSL Certificate Support

To enable SSL certificate support, you will need to enable hosting first and configuration custom subdomain. 

The high level steps from Tebi's documentation to associate a hostname with a Tebi bucket using CNAMEs:

  1. Select a hostname that belongs to a domain you control. This example uses the images subdomain of the your-domain.net domain.

  2. Create a bucket that matches the hostname. In this example, the host and bucket names are 
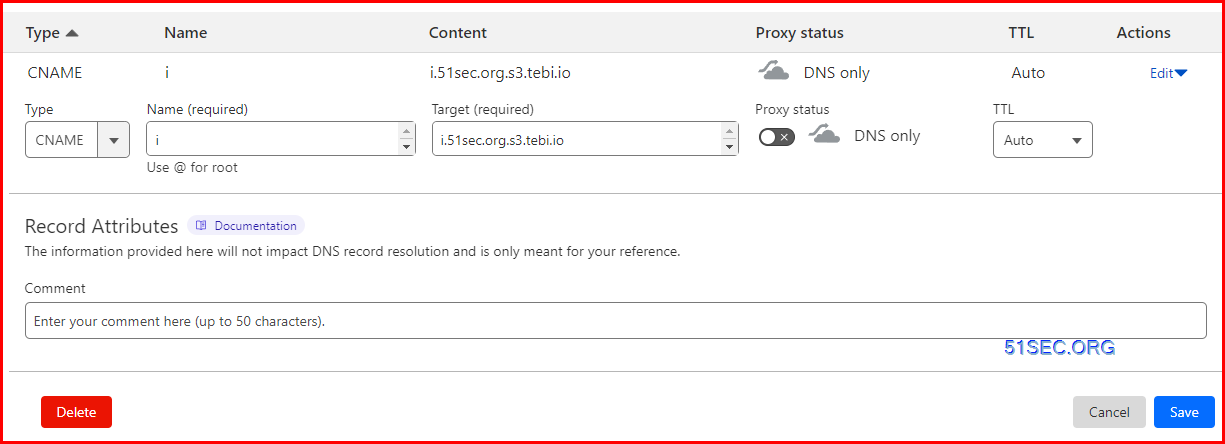
images.your-domain.net. The bucket name must exactly match the hostname.

  3. Create a CNAME record that defines the hostname as an alias for the Tebi bucket. For example: images.your-domain.net CNAME images.your-domain.net.s3.tebi.io.

1. Enable hosting:


2. Enable HTTPS Certificate

If you have not create DNS CNAME record, the https certificate option will be greyed out. 

There is a trick at Cloudflare configuration to enable https certificate. When configuration CNAME record in Cloudflare site, you will not enable Proxy for this cname record. 

For 

Here is wrong configuration:


Correct configuration:


3 Enable Force HTTPS

It will automatically rediect http traffic to https.

4. Change ShareX configuration to reflect domain change


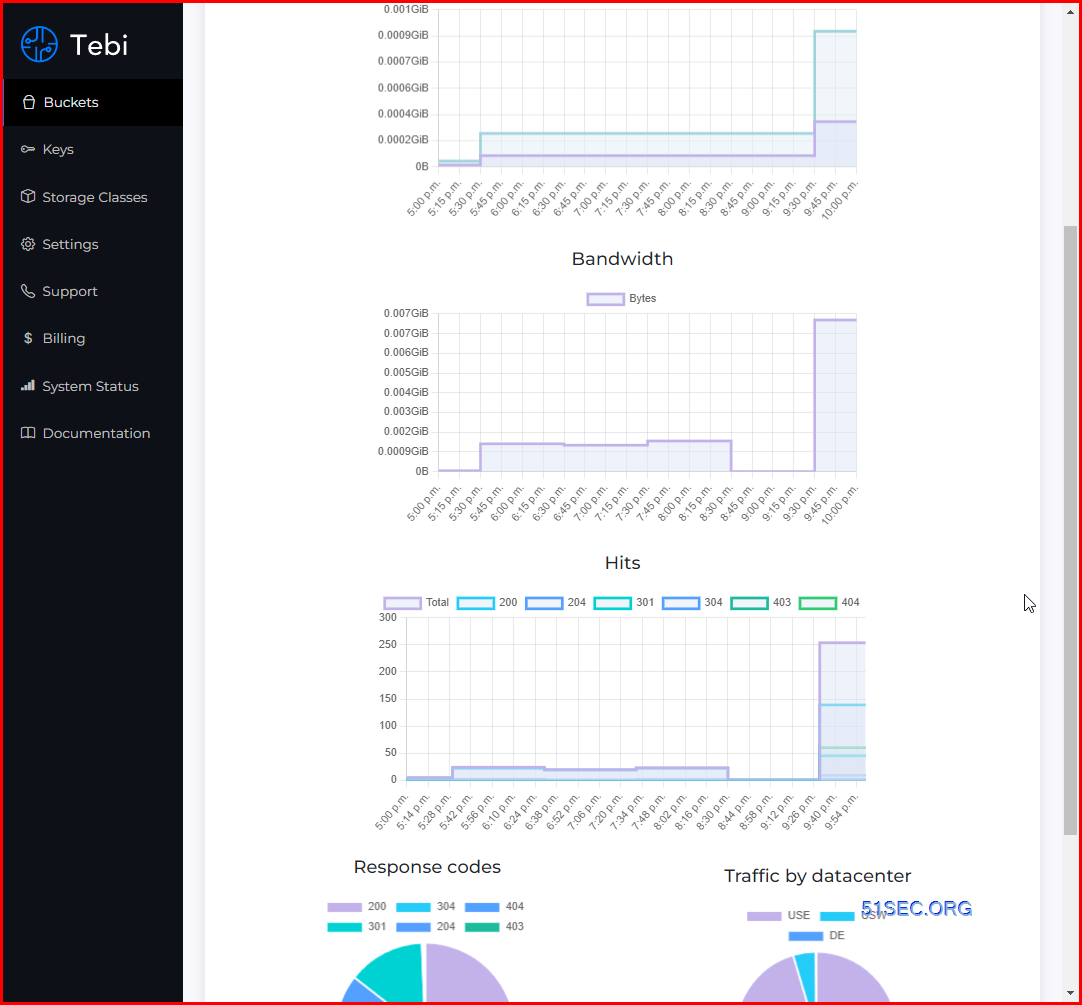
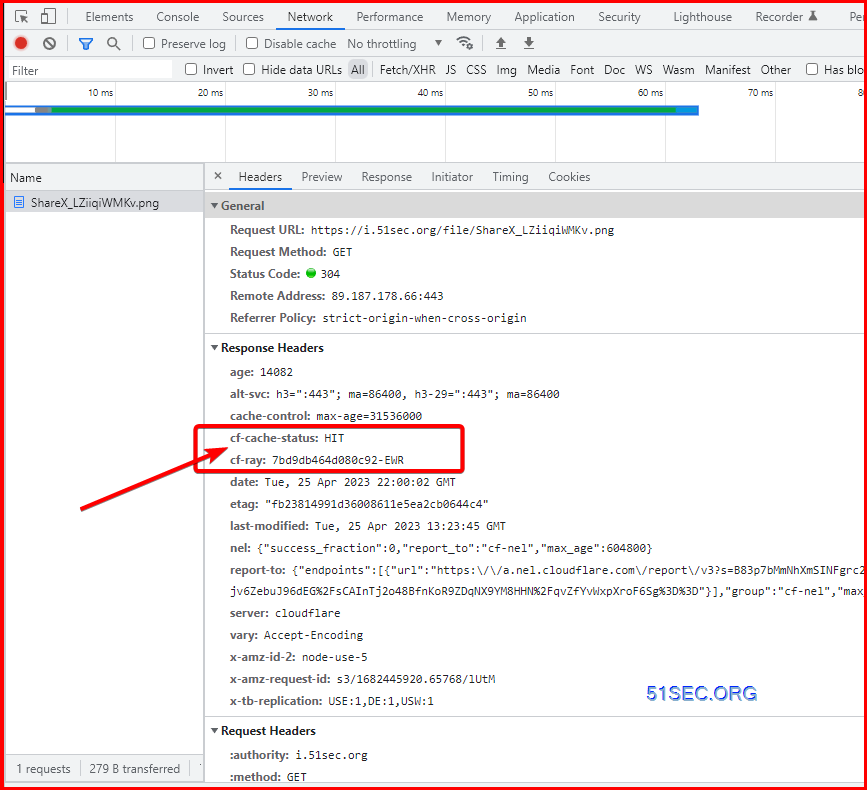
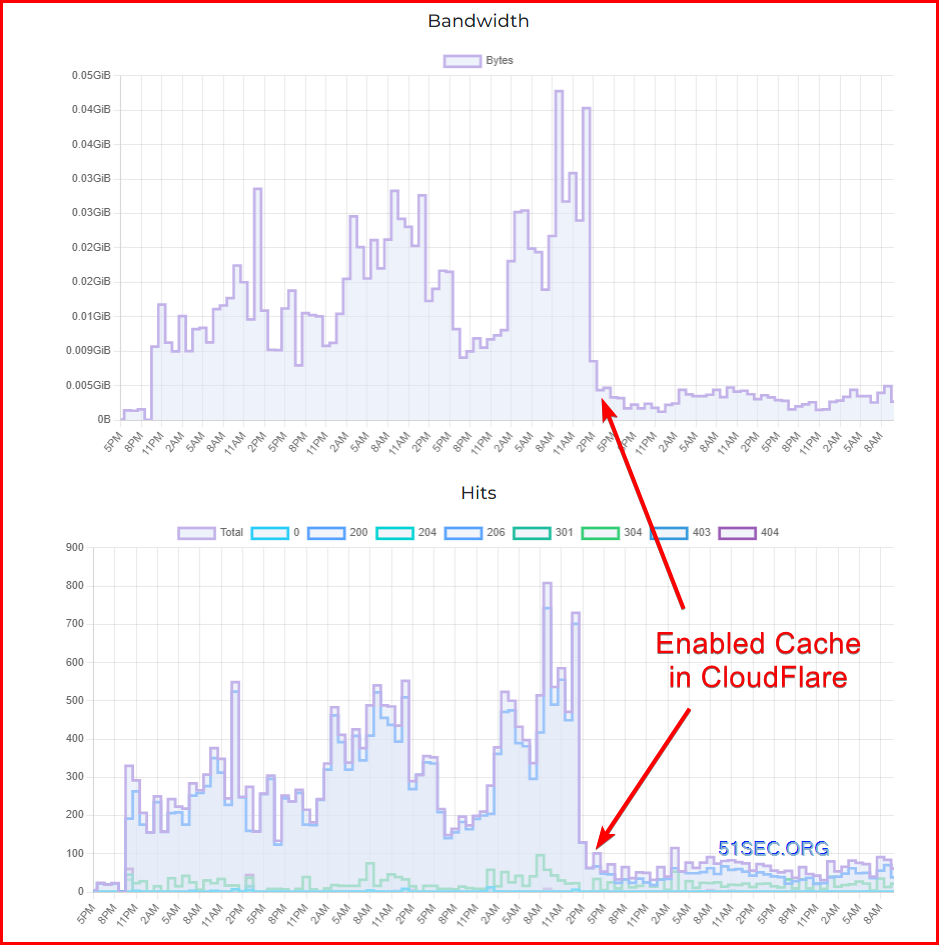
5. Enable Cache for cname configuration after you enabled https for your Tebi busket

now you can check the image if has been cached by Cloudflare for F12 Chrome's developer tool network tab:


The bandwidth and hits decreased dramatically after enabeld cache. 


Videos


References


No comments:

Post a Comment