Enable SmartWorkflow steps:
1. Create two Permission Profiles for normal administrators and managers. Only difference is Manager profile has manage administrators permission.
2. Create two users , Admin1 and manager. Admin1 is used to perform daily routing work and it is associated with permission profile Admin. manager is in Manager group and will be used to do approval and of course changes.
3. Check License from SmartWorkflow menu:
4. Enable SmartWorkflow from SmartWorkflow dropdown menu:
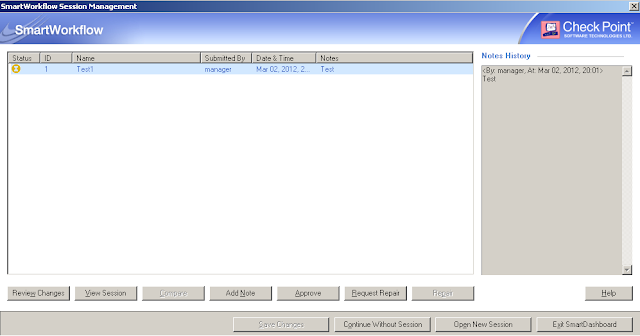
5. After saved configiration and SmartDashboard restarted, SmartWorkflow Session Management window pops up.
Create a new session, system will automatically build a new database baseline revision for your new session.Depending your revision database size and your management server's power, the revision creating time will take a couple of seconds to one minute.
6. Menu for SmartWorkflow:
7. First change and submit for approval:
Make some changes, and those changes will automatically be highlighted with a vivid green color.
At Submit Session for Approval window, click Submit button. You can add some notes to explain your changes which your approval group may like to see.
Comparing the databases window will show up after submitted your changes. It will run a couple of minutes on my case. Not sure if it is because my smart-1 appliance resource not enough or my revision database is more than 300m.
8. Surprised Session Management window coming up:
I was surprised when this window comes up with approval option. I though SmartWorkflow has segregated the role with task performer and approvals. It seems normal admin user can approval themselves.
9. Change SmartWorkflow settings on Global Properties:
This time looks better. Normal admin could not have option to approve themselves now.
10. Log in SmartDashboard again with manager account. You will see there is a session waiting approve, clieck approve button. Then it will show approved. Save Changes. Then you can either open a new session or go ahead without session to push policy, either exit SmartDashboard.
11. Remember, there is always only one in process session exist. If you quit your session without send an approval request. Once somebody else logged in, either he continue your session or he open a new session for himself.
Refer Documentation:
http://supportcontent.checkpoint.com/documentation_download?ID=12283


No comments:
Post a Comment