http://www.juniper.net/us/en/products-services/security/uac/ic4500/
Actually there is similar Juniper Secure Access / SSL vpn product introduced before here.
Just recently configured an IC4500 to implementation access control. Here is some steps to share out. Hopefully it can save some others time for their task.
- Juniper UAC Appliance IC4500 Step by Step Configuration (Part 1)
- Juniper UAC Appliance IC4500 Step by Step Configuration (Part 2) - Certificates based Authentication
- Pulse Secure (formerly Juniper Pulse) - UAC Configuration Summary
1. Log into system
2. Upgrade Package
Upgrade it to latest version 4.2.R1 build 19091. It can be done from Maintenance->System-> Upgrade/Downgrade:3. Set up Internal Port network info while others can keep default settings.
4. Licensing
5. Add a new Infranet Enforcer
6. Configure SRX to interact with IC4500
root@fw-srx1-1> show configuration servicesunified-access-control {
infranet-controller ic4500 {
address 10.9.0.6;
interface reth0.2;
password "$9$f5F/CA0hSeO1eWx7sn/9A1R"; ## SECRET-DATA
}
inactive: test-only-mode;
}
Note: Updated on Oct 25 2012, Interface reth5.200 can not be in any routing instance except the main one. By the way, you also can use fxp interface to do connection with UAC device (Updated Feb 24 2016)
{primary:node1}
admin@fw-2> show services unified-access-control status
node1:
--------------------------------------------------------------------------
Host Address Port Interface State
ic4500 10.9.0.6 11123 fxp0.0 connected
8 Create new User Role
9. Enable Agentless Access and Disable Agent Odyssey Access
In this case, only agentless method used.10. Create User Sign in Page
11. Create user in the Users tab under Auth. Servers menu
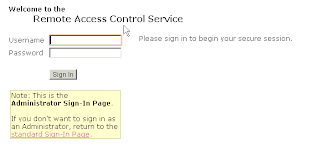
12. Access Authentication Page
At this moment, all basic setup has been finished. User created, and can be authenticated by accessing url https://10.9.2.14/users webpage.13. Grant User to Access Resources
Last step is to tell how UAC going to grant access to resource. Go to Infranet Enforcer ->Resource tab, click button New Policy to create one:14. Done, testing
Reference:


No comments:
Post a Comment