Raspberry Pi is mostly ready for use after the basic configuration completed in my previous posts:
- Raspberry Pi 2 Model B Basic Configuration Part 2
- Raspberry Pi 2 Model B Basic Configuration Part 1
- Remote Access Raspberry Pi from Anywhere
The next cool thing to do is to install wordpress on it. This post is just used to record all steps I have followed online instruction installed an instance of a WordPress site to run on Raspberry Pi using the Apache Web Server. There are a lots of more things you may like to know regarding Apache, PHP, Mysql. It is best to search other online resources or take a look those listing at the Reference section to find out more.
1. Check system update
sudo apt-get update && sudo apt-get upgrade
|
Choose Y if there is any update.
2. Install Apache2
sudo apt-get install apache2 -y
|
hostname -I
|
Open http://<IP> to confirm apache is working. It shows the /var/www/index.html in your browser.

3. Install php5
sudo apt-get install php5 libapache2-mod-php5 -y
|
create a test index.php file
cd /var/www
sudo echo "<?php phpinfo(); ?>" | sudo tee index.php |
verify php has been installed properly by using curl command.
pi@raspberrypi /var/www $ curl http://127.0.0.1/index.php
<!DOCTYPE html PUBLIC "-//W3C//DTD XHTML 1.0 Transitional//EN" "DTD/xhtml1-transitional.dtd"> <html xmlns="http://www.w3.org/1999/xhtml"><head> <style type="text/css"> body {background-color: #ffffff; color: #000000;} body, td, th, h1, h2 {font-family: sans-serif;} pre {margin: 0px; font-family: monospace;} a:link {color: #000099; text-decoration: none; background-color: #ffffff;} a:hover {text-decoration: underline;} table {border-collapse: collapse;} .center {text-align: center;} .center table { margin-left: auto; margin-right: auto; text-align: left;} .center th { text-align: center !important; } td, th { border: 1px solid #000000; font-size: 75%; vertical-align: baseline;} h1 {font-size: 150%;} h2 {font-size: 125%;} .p {text-align: left;} .e {background-color: #ccccff; font-weight: bold; color: #000000;} .h {background-color: #9999cc; font-weight: bold; color: #000000;} .v {background-color: #cccccc; color: #000000;} .vr {background-color: #cccccc; text-align: right; color: #000000;} img {float: right; border: 0px;} hr {width: 600px; background-color: #cccccc; border: 0px; height: 1px; color: #000000;} </style> <title>phpinfo()</title><meta name="ROBOTS" content="NOINDEX,NOFOLLOW,NOARCHIVE" /></head> <body><div class="center"> <table border="0" cellpadding="3" width="600"> <tr class="h"><td> <a href="http://www.php.net/"><img border="0" src="/index.php?=PHPE9568F34-D428-11d2-A769-00AA001ACF42" alt="PHP Logo" /></a><h1 class="p">PHP Version 5.4.45-0+deb7u2</h1> </td></tr> ...... |
4. Install mysql database server.
sudo apt-get install mysql-server
|
5. Download wordpress and install it under /var/www/wordpress folder
cd /var/www
sudo chown pi: . sudo rm * wget http://wordpress.org/latest.tar.gz tar xzf latest.tar.gz //mv wordpress/* . rm -rf wordpress latest.tar.gz |
6. Create wordpress database from mysql command line
mysql -uroot -ppassword
mysql> create database wordpress; Query OK, 1 row affected (0.00 sec) |
7. Open URL "http://<IP>/wordpress" in the browser to start configure Wordpress
During installation wizard, fill out the basic site information as follows:
Database Name:      wordpress
User Name:          root
Password:           <YOUR PASSWORD>
Database Host:      localhost
Table Prefix:       wp_
During configuration Wordpress site, there is a problem to write wp-config.php file. To resolve this issue, you will have to manually create it with the contents showing above in the browser.
cd /var/www/wordpress
nano wp-config.php |
Paste the copied text from browser into this file, and save and exit with Ctrl + X, then Y for yes and Enter.
Hit Run the install button to continue the installation. The last step is to enter your WordPress site information.

After installation done, the browser will jump to http://<ip>/wordpress/wp-admin. You will need to provide wordpress site username and password to log into Dashboard to manage your new created site.

There is one tip for a problem which is when you are trying to install new plug-in in your Wordpress site, it will prompt a page to ask you ftp username, password and site address. It is because of wordpress folder's permission problem.
The easiest and fastest fix is :
cd /var/www
sudo chown -hR http:http wordpress |
You can replace http user with pi user.
8. Test it from Internet
Once you have your dynamic DNS client installed and configured properly based on my previous post:
Remote Access Raspberry Pi from Anywhere and Dynamic DNS Update with Dynu.com
You will need to configure your WordPress to use your registered Dynamic DNS name as following screenshot:
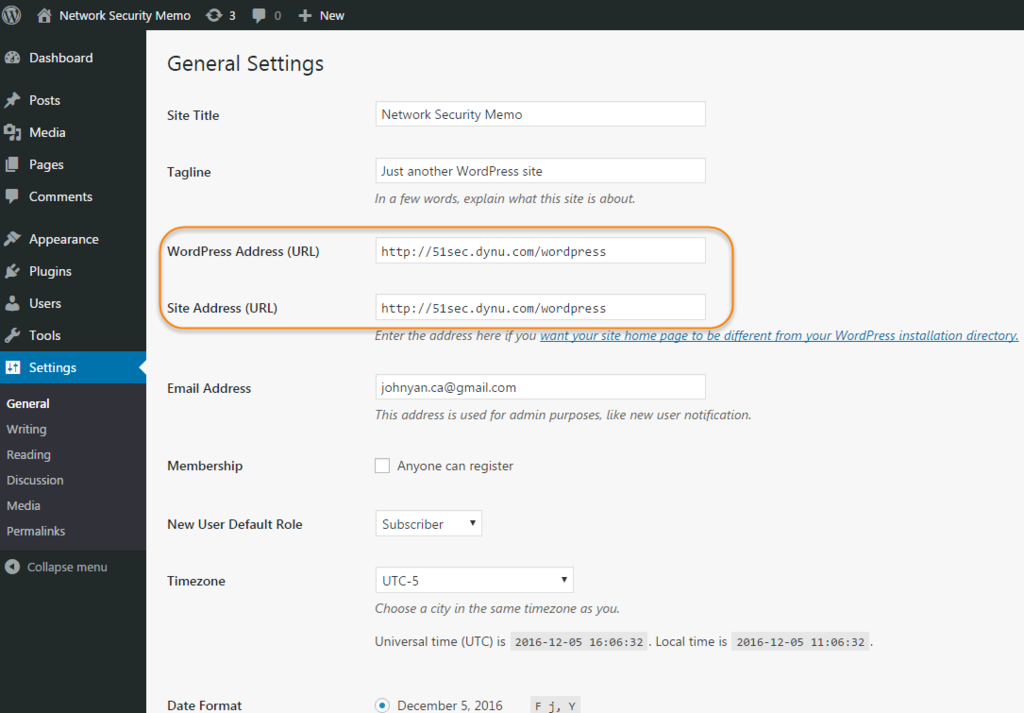
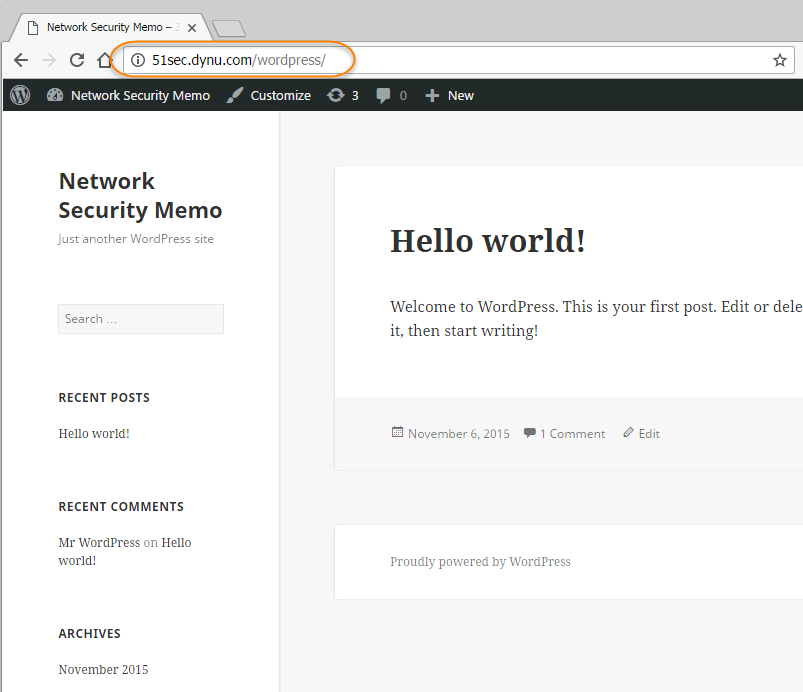
Now your Raspberry Pi WordPress site http://51sec.dynu.com/wordpress can be accessed from Internet:
9. Redirect Homepage to Specific URL
pi@raspberrypi /var/www $ sudo vi index.html

<html>
<head>
<META HTTP-EQUIV="Refresh" Content="3; URL=http://51sec.dynu.com/wordpress">
</head>
<body>
This page will forward to http://51sec.dynu.com/wordpress in three seconds.
<p>
Please update your links.
</body>
</html>
Notes: Install Others Services on Raspberry Pi
[教程] 将树莓派变成网络打印机服务器(更新PC和手机端设置)!
[心得] 【分享】用树莓派构建你自己的微型服务器,可以外网访问
配置树莓派(Raspberry Pi)成为一台完美的家用服务器
[教程] 将树莓派作为自己的软件代码托管服务器!!!
[教程] 树莓派(raspberry pi)学习之安装ftp服务器
[教程] 将树莓派变成一个Web服务器
[教程] 利用树莓派搭建Git私有服务器
太阳能供电的树莓派FTP服务器
[教程] 如何用树莓派搭建一个低能耗的Minecraft服务器
[教程] 树莓派变身Aria2下载服务器
[教程] 用树莓派打造多功能家庭服务器
[教程] 树莓派教程之小型web服务器
[教程] 用树莓派+移动硬盘+MINIDLNA打造家用媒体服务器
[教程] 树莓派搭建NAS服务器
[教程] Raspberry Pi加速上网体验之设置公共DNS查询服务器
[教程] Raspberry Pi——DIY自己的mail服务器,全球可访问
[教程] 树莓派基于asterisk的SIP电话软件交换服务器(免费电话系统)
[教程] 在树莓派上搭建LAMP(Linux Apache Mysql PHP)服务器
[教程] 树莓派上手实战之配置Samba服务器实现网络存储服务器
[教程] 树莓派搭建网站服务器托管WordPress
[教程] 树莓派廉价媒体服务器方案分享 Raspberry Pi DLNA server
Reference:
- BUILD A LAMP WEB SERVER WITH WORDPRESS
- How to Install WordPress on a Raspberry Pi
- Tutorial: Hosting a WordPress Blog with Amazon Linux
- Tutorial: Installing a LAMP Web Server on Amazon Linux


No comments:
Post a Comment