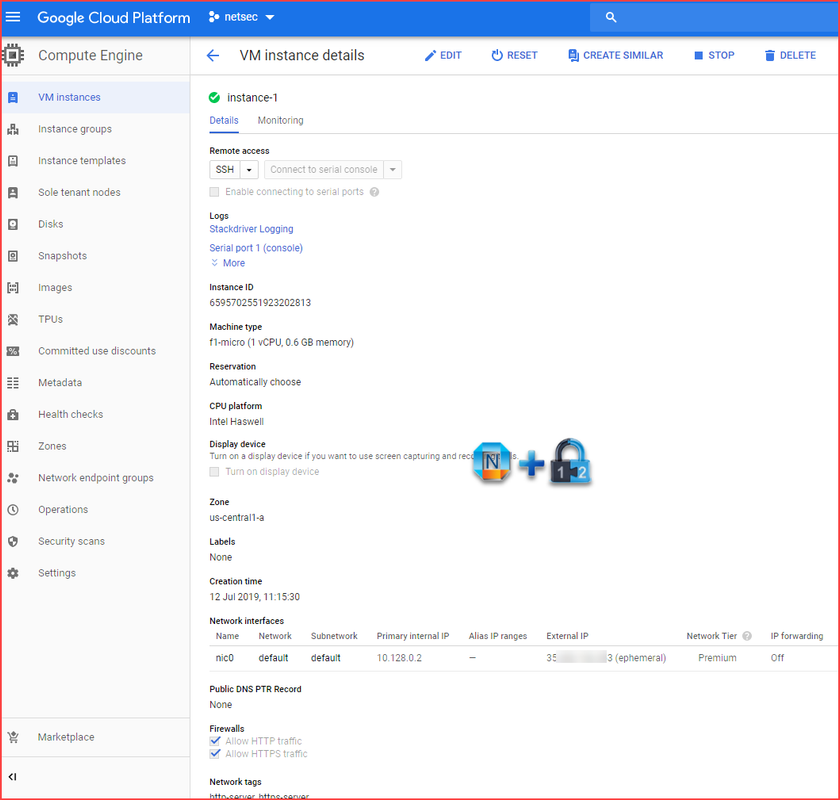
Spin up another VM in GCP Computer Enginer -> VM Instance, create a new VM instance with Ubuntu 18.04 template.
Install the PHP
sudo apt update & apt upgrade & dist-upgrade
sudo apt install php-curl php-gd php-mbstring php-xml php-xmlrpc
sudo apt-get install php libapache2-mod-php
If there is SQL Extension missing from Php page, you might want to run following command:sudo apt-get install php7.2-mysql
Get WordPress
wget https://wordpress.org/latest.tar.gz
sudo apt install apache2
cd /var/www
sudo tar xpf ~/latest.tar.gz
sudo chown -R www-data:www-data /var/www/wordpress
Apache Configuration
If your apache2 has been installed on your server, you just need to create a new virtual host for your site. Start by copying either the default configuration or a previous configuration to modify to host WordPress.sudo cp /etc/apache2/sites-available/000-default.conf /etc/apache2/sites-available/wordpress.conf
sudo vi /etc/apache2/sites-available/wordpress.conf
Open your configuration and modify the
DocumentRoot to point at where you unpacked the wordpress directory.DocumentRoot /var/www/wordpress
Set the
ServerName to your site's domain(or localhost or public ip address if you're just testing).ServerName 51sec.orgCreate an alias for the
www version too.ServerAlias www.51sec.orgWhen you're done, save your file and exit. Enable your site in Apache.
$ sudo a2ensite wordpress.confReload Apache.
$ sudo systemctl reload apache2
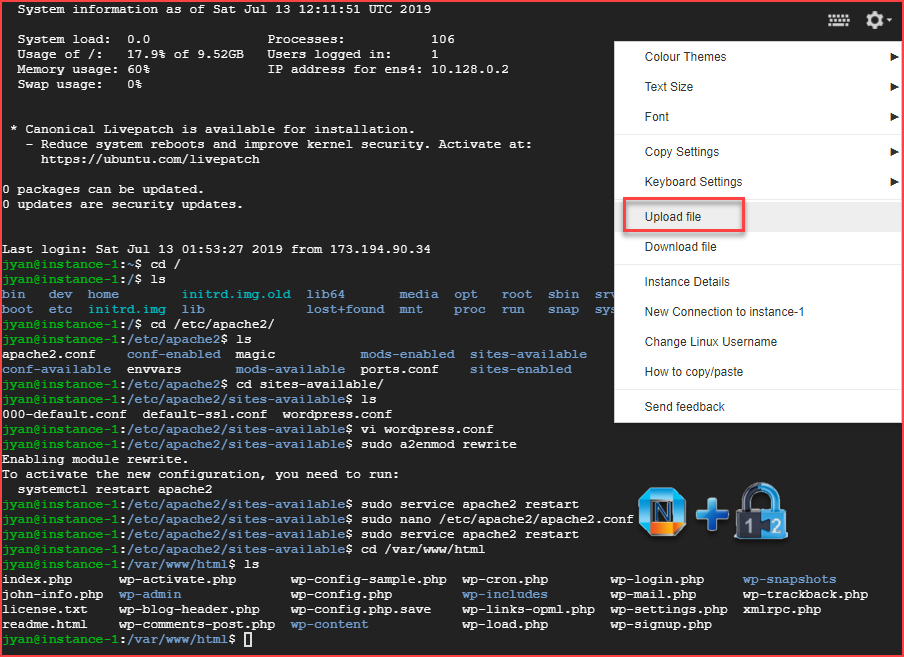
Welcome to Ubuntu 18.04.2 LTS (GNU/Linux 4.15.0-1036-gcp x86_64)

 * Documentation:  https://help.ubuntu.com
 * Management:     https://landscape.canonical.com
 * Support:        https://ubuntu.com/advantage

  System information as of Sat Jul 13 12:11:51 UTC 2019

  System load:  0.0               Processes:           106
  Usage of /:   17.9% of 9.52GB   Users logged in:     1
  Memory usage: 60%               IP address for ens4: 10.128.0.2
  Swap usage:   0%


 * Canonical Livepatch is available for installation.
   - Reduce system reboots and improve kernel security. Activate at:
     https://ubuntu.com/livepatch

0 packages can be updated.
0 updates are security updates.


Last login: Sat Jul 13 01:53:27 2019 from 173.194.90.34
jyan@instance-1:~$ cd /
jyan@instance-1:/$ ls
bin   dev  home        initrd.img.old  lib64       media  opt   root  sbin  srv  tmp  var      vmlinuz.old
boot  etc  initrd.img  lib             lost+found  mnt    proc  run   snap  sys  usr  vmlinuz
jyan@instance-1:/$ cd /etc/apache2/
jyan@instance-1:/etc/apache2$ ls
apache2.conf    conf-enabled  magic           mods-enabled  sites-available
conf-available  envvars       mods-available  ports.conf    sites-enabled
jyan@instance-1:/etc/apache2$ cd sites-available/
jyan@instance-1:/etc/apache2/sites-available$ ls
000-default.conf  default-ssl.conf  wordpress.conf
jyan@instance-1:/etc/apache2/sites-available$ vi wordpress.conf
jyan@instance-1:/etc/apache2/sites-available$ sudo a2enmod rewrite
Enabling module rewrite.
To activate the new configuration, you need to run:
  systemctl restart apache2
jyan@instance-1:/etc/apache2/sites-available$ sudo service apache2 restart
jyan@instance-1:/etc/apache2/sites-available$ sudo nano /etc/apache2/apache2.conf
jyan@instance-1:/etc/apache2/sites-available$ sudo service apache2 restart
jyan@instance-1:/etc/apache2/sites-available$
Migrating Wordpress from Ubuntu 16.04 platform to Ubuntu 18.04 platform
I used to use All-in-One WP Migration plug-in to do transit my WP site from one server to another. But this time, I got an issue while importing the backup file into new server. I am thinking it might relate to Php version since new Ubuntu 18.04 is using Php 7.
Quick googled online and it seems lots of people getting this issue when using All-in-One WP Migration. It also brought me to a new migration tool - Duplicator.
It is not that easy to use, like All-in-One WP Migration plug-in. But it did its work well.
Step 1. Create package
You might have some issues with create a couple of snapshot folder, or tmp folder, and write permission for your /var/www/html folder. But you basically can manually create folder and grant www-data:www-data to /var/www/html or your own wp folder such as /var/www/wordpress
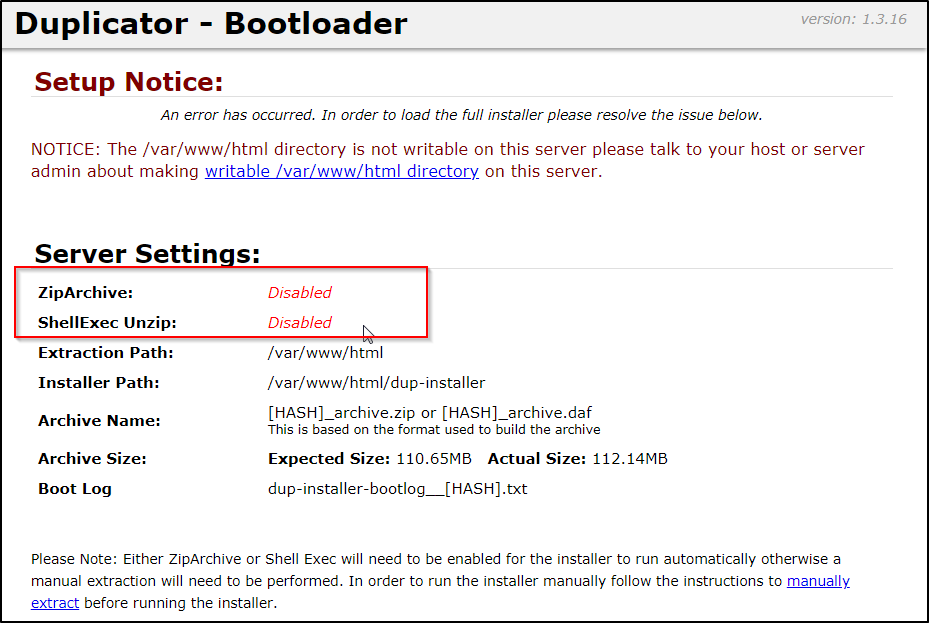
The package site is much smaller than All-in-One plug-in, 112MB vs 176MB.
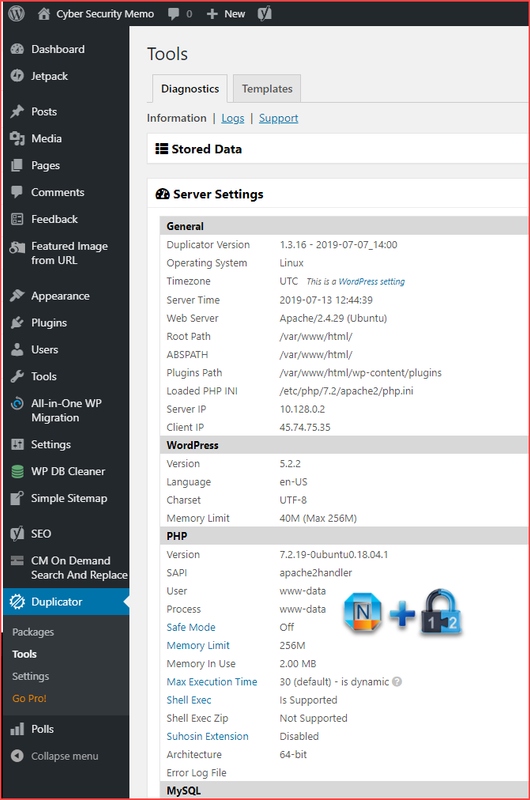
Step 2. Scan
It will check server settings, WordPress settings , files size and dabatase size. My database size is only 43MB. But files size is 174MB.
Step 3. Build
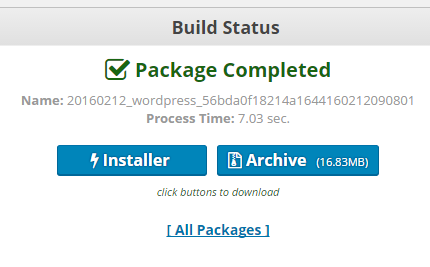 It will compressed all contents into one archive file. Once build completed, you will get download links for installer.php and your archived file. Do not change your archived file name since it is include hash value and file name pattern is important for restore procedure.
Each installer is unique to a package. If you happen to lose the installer file there is one inside the archive.zip named installer-backup.php which is identical to the original installer.
Step 4. Upload step 4 files to new server's folder, such as /var/www/html. Please make sure there is no other files under your new server's wordpress folder /var/www/html.
Step 5. Start the installer script
In your browser, type the address of your website with /installer.php added at the enf of your site URL (http://35.21.134.251/installer.php).
If there is an issue with ziparchive and unzip, run following two commands and try it again:
One thing , you will need to change is to set up writable permission to the wordpress folder.
sudo chown -R www-data:www-data /var/www/wordpress
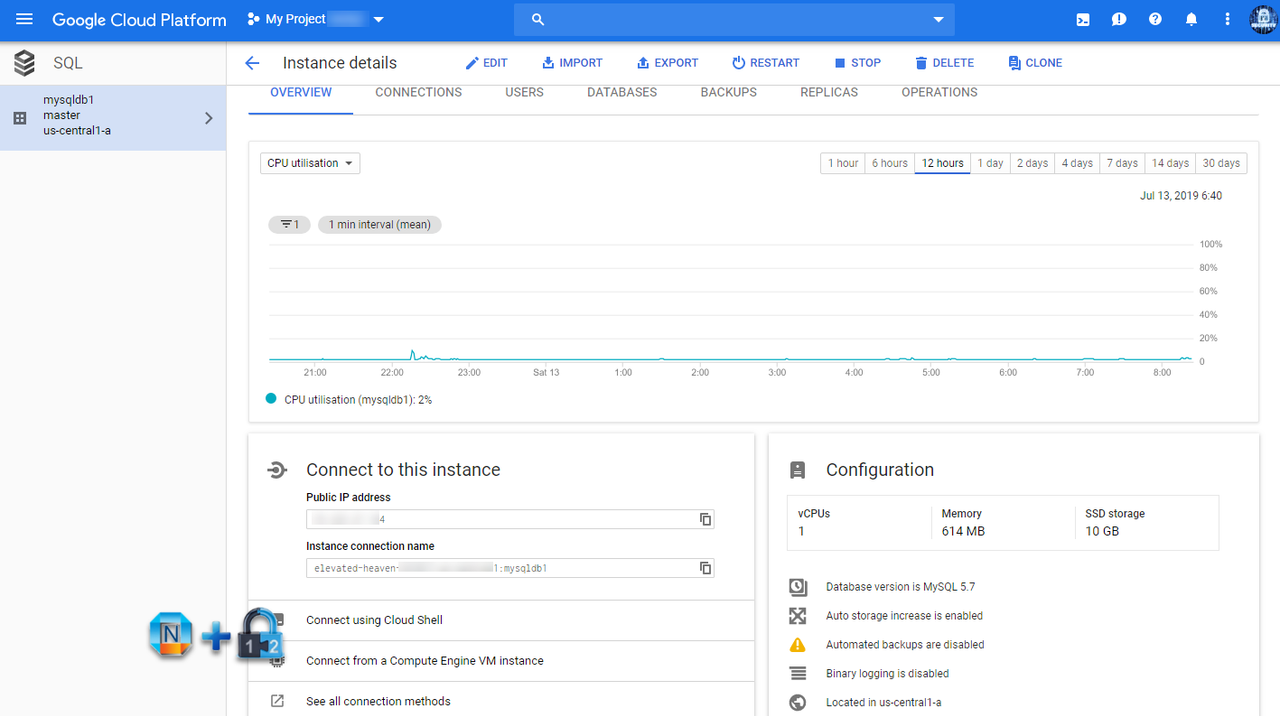
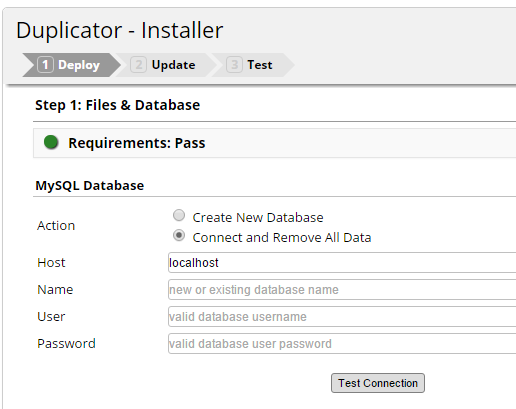
Connect to remote MySQL DB with GCP Cloud DB IP, existing database name, username and password, which you previously defined from GCP DB page.
We might need to change site settings as well. usually I will use IP settings for URL until all tested, I am going to change them from WP Site Admin page -> Settings -> General Settings:
- WordPress Address (URL) - http://35.21.134.251/
- Site Address (URL) - http://35.21.134.251/
later, I will change both of them to https://www.51sec.org

Step 6. Test site
Your new WP site should be up and running now. But there is an issue. You may be able to only access home page, but not able to get into any other links. That is because of permalinks not working.
In newer versions of apache2, you need to enable the module:
sudo a2enmod rewrite
sudo service apache2 restart
You may also need to modify the apache2.conf file.
sudo nano /etc/apache2/apache2.conf
Change your web directory override rule to AllowOverride All.
<Directory /var/www/>
    Options Indexes FollowSymLinks
    AllowOverride All
    Require all granted
</Directory>
After that, restart the service again.
sudo service apache2 restart
References:


No comments:
Post a Comment