This post summarize some basic accounts onboarding tasks in Thycotic Secret Server.
Secret Server Basic Concepts and Features
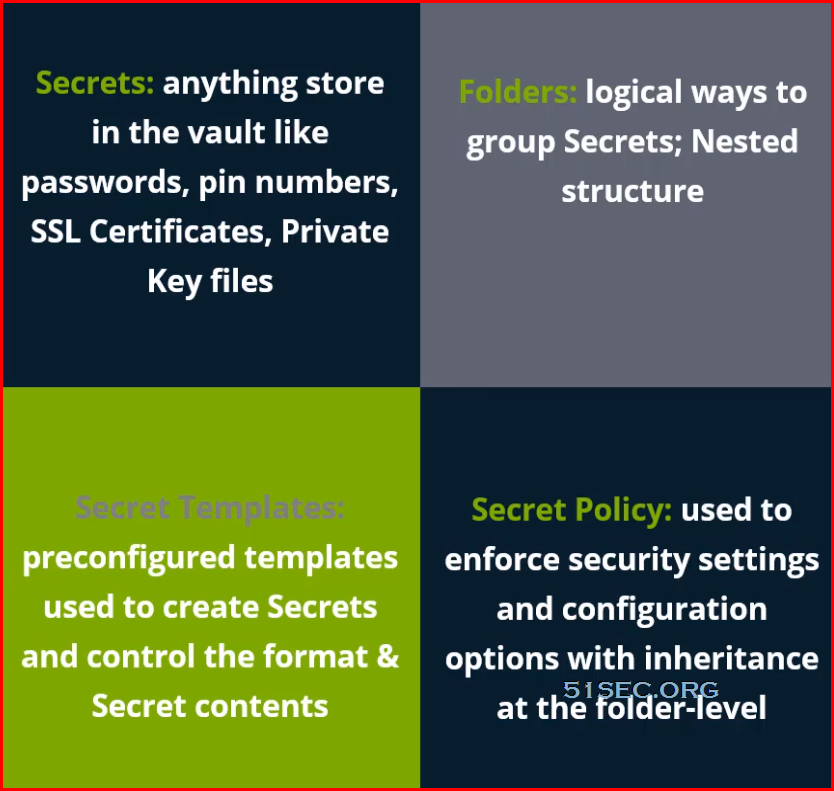
- Secrets
- Folders
- Secret Templates
- Secret Policy
Basic Features:
- Launchers
- RDP
- Putty
- Website
- Mac
- z/OS mainframes
- Custom
- script
- any executable
- Discovery
- Out of box
- AD
- LDAP
- Local
- Domain accounts running services/tasks/app pools/COM+
- Unix/Linux Local
- Hypervisor ESXi
- Google Cloud Platform
- IAM Service Accounts
- Instances
- AWS
- AWS Access key
- AWS Console Accounts
- Instances
- Custom
- SQL Accounts & DB links
- Network equipment
- Embedded passwords
- Leverages PowerShell Scripts
- Extensible Discovery
- Configuration Files
- Remote Password Changing
- Automated Password Rotation
- Mainframe Integration
- Service account management
- Distributed Engines
- Scripts
- PowerShell Launcher
- Custom Batch File Launcher
- Alerting and SIEM
- Heartbeat
- Event pipelines
- Auditing, Reporting and Dual Controls
- Workflows
- Request for access
- Require Comment
- Ticketing System Integration
- CheckOut (OTP)
- Doublelock
- Session Monitoring
- Unix Protection
- SSH Endpoint
- User Initiates Sessions -> Points to SS IP -> Authenticates into SS -> Provided menu of available secrets (RBAC)
- Web Service API
- Soap
- Rest
- SDK
- DR and HA
- Strategy
- Architecture Planning -> Virtualization -> Backups -> Uptime Monitoring -> Escalation
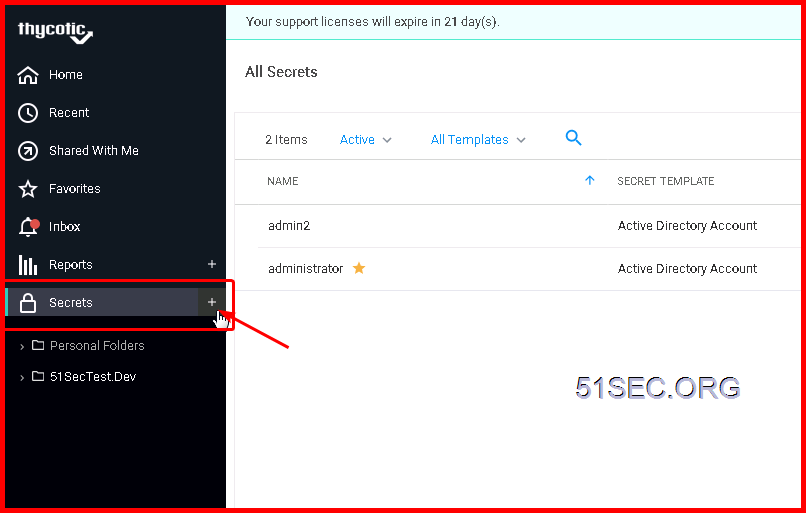
Manually Onboard Your Secrets
Click + sign to add a new secret account into Thycotic Secret Server:
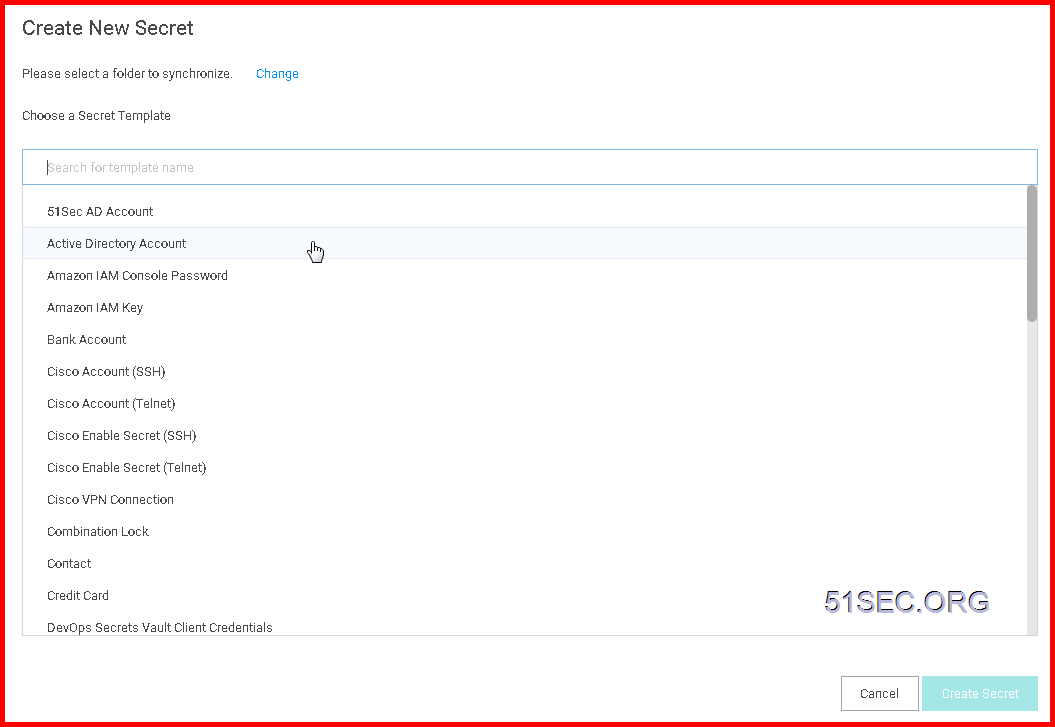
Choose a secret template for your New Secret:
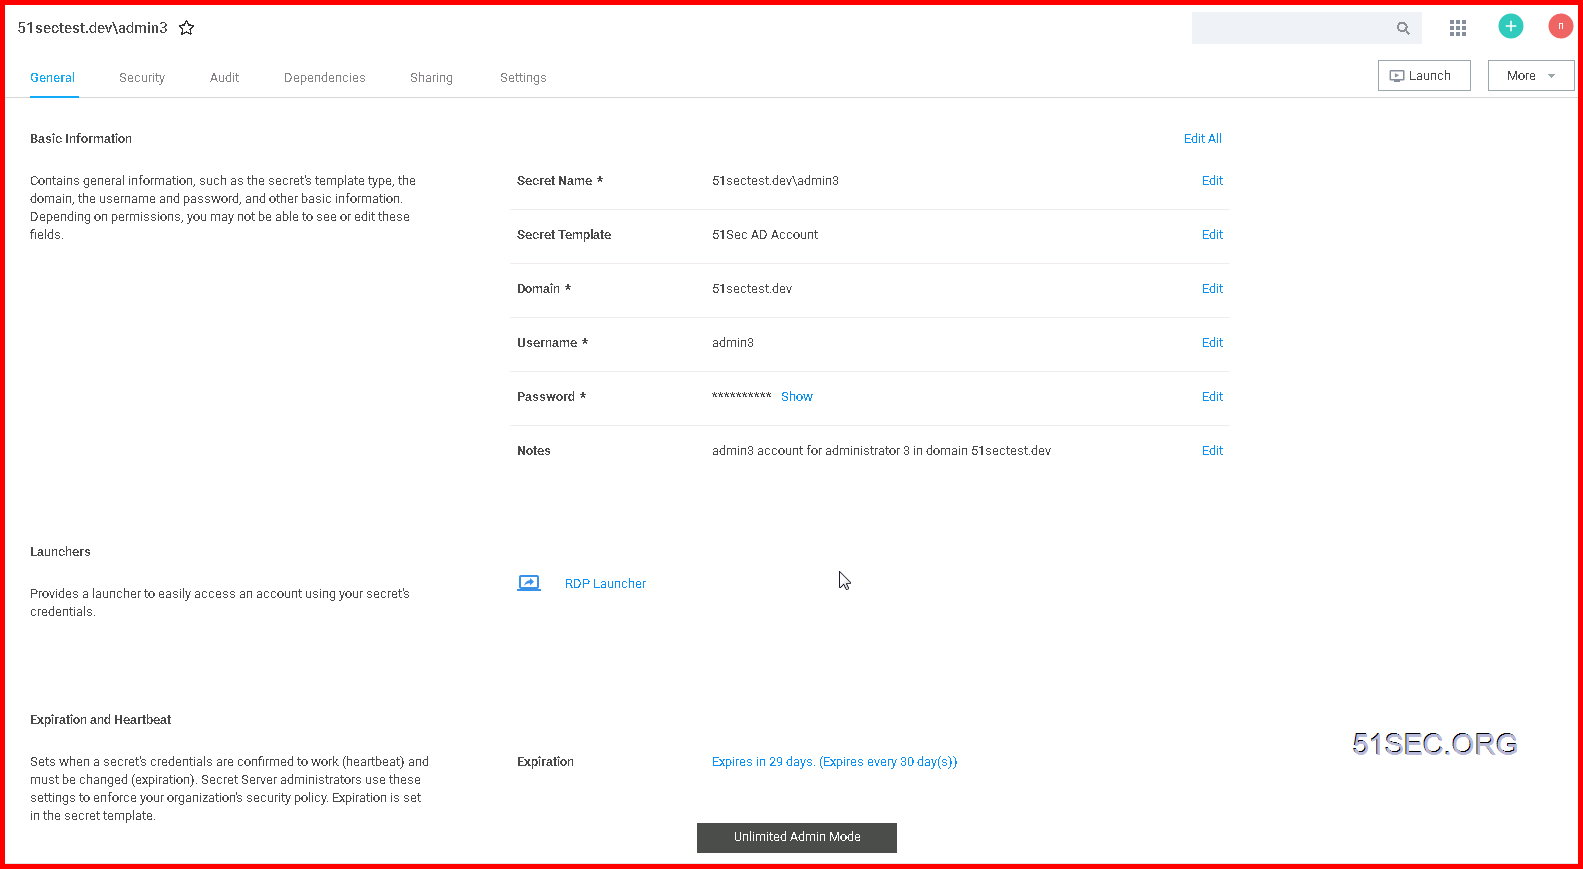
Enter your secret account information and choose a folder to save
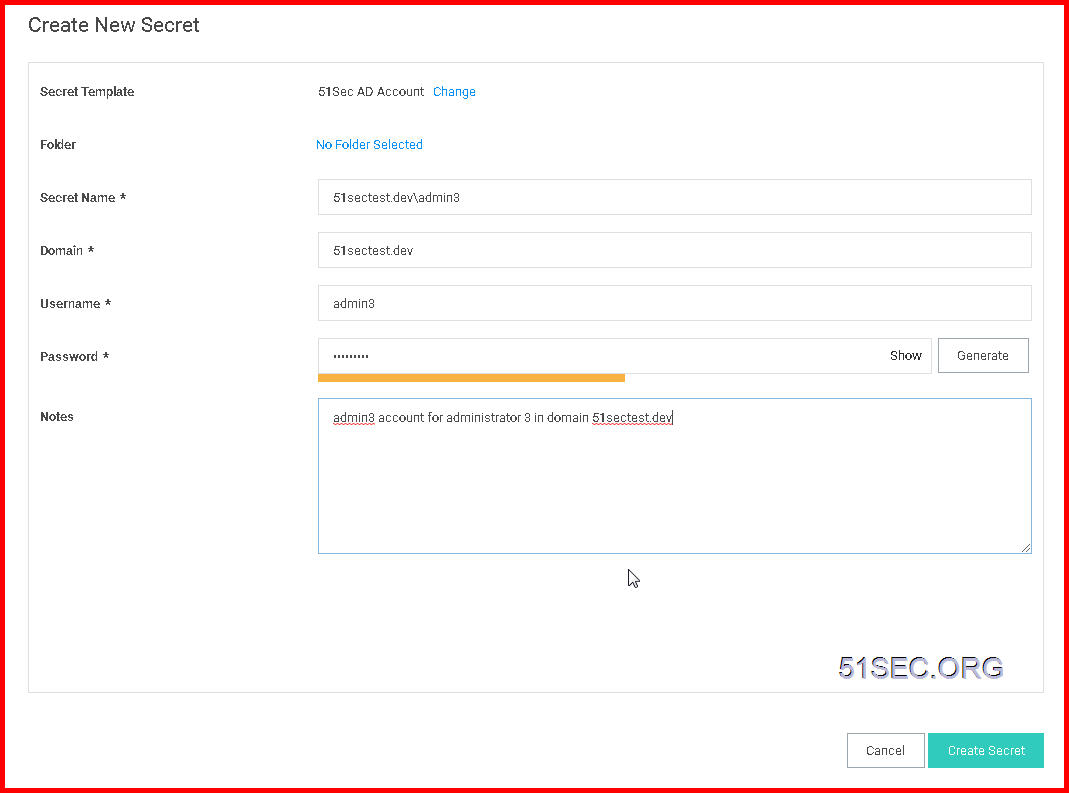
Secret Account Detailed Information:
Onboard Windows Accounts
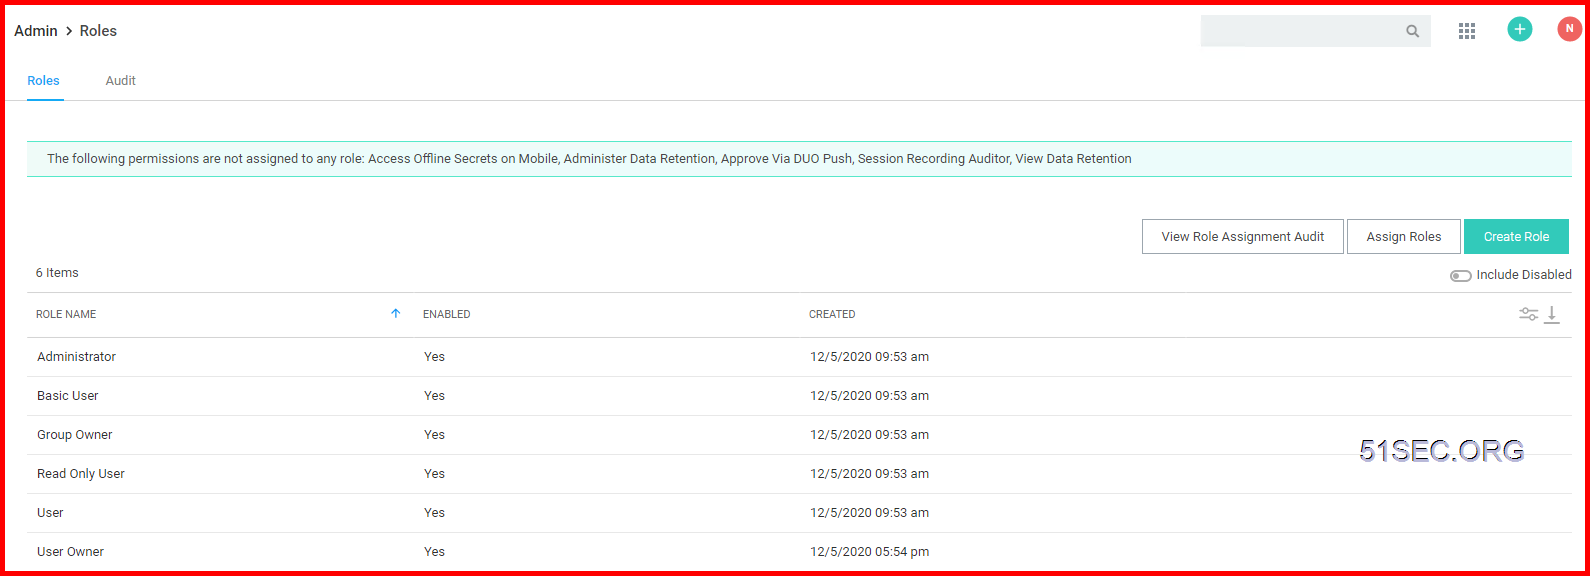
1 Define your own roles for your environment
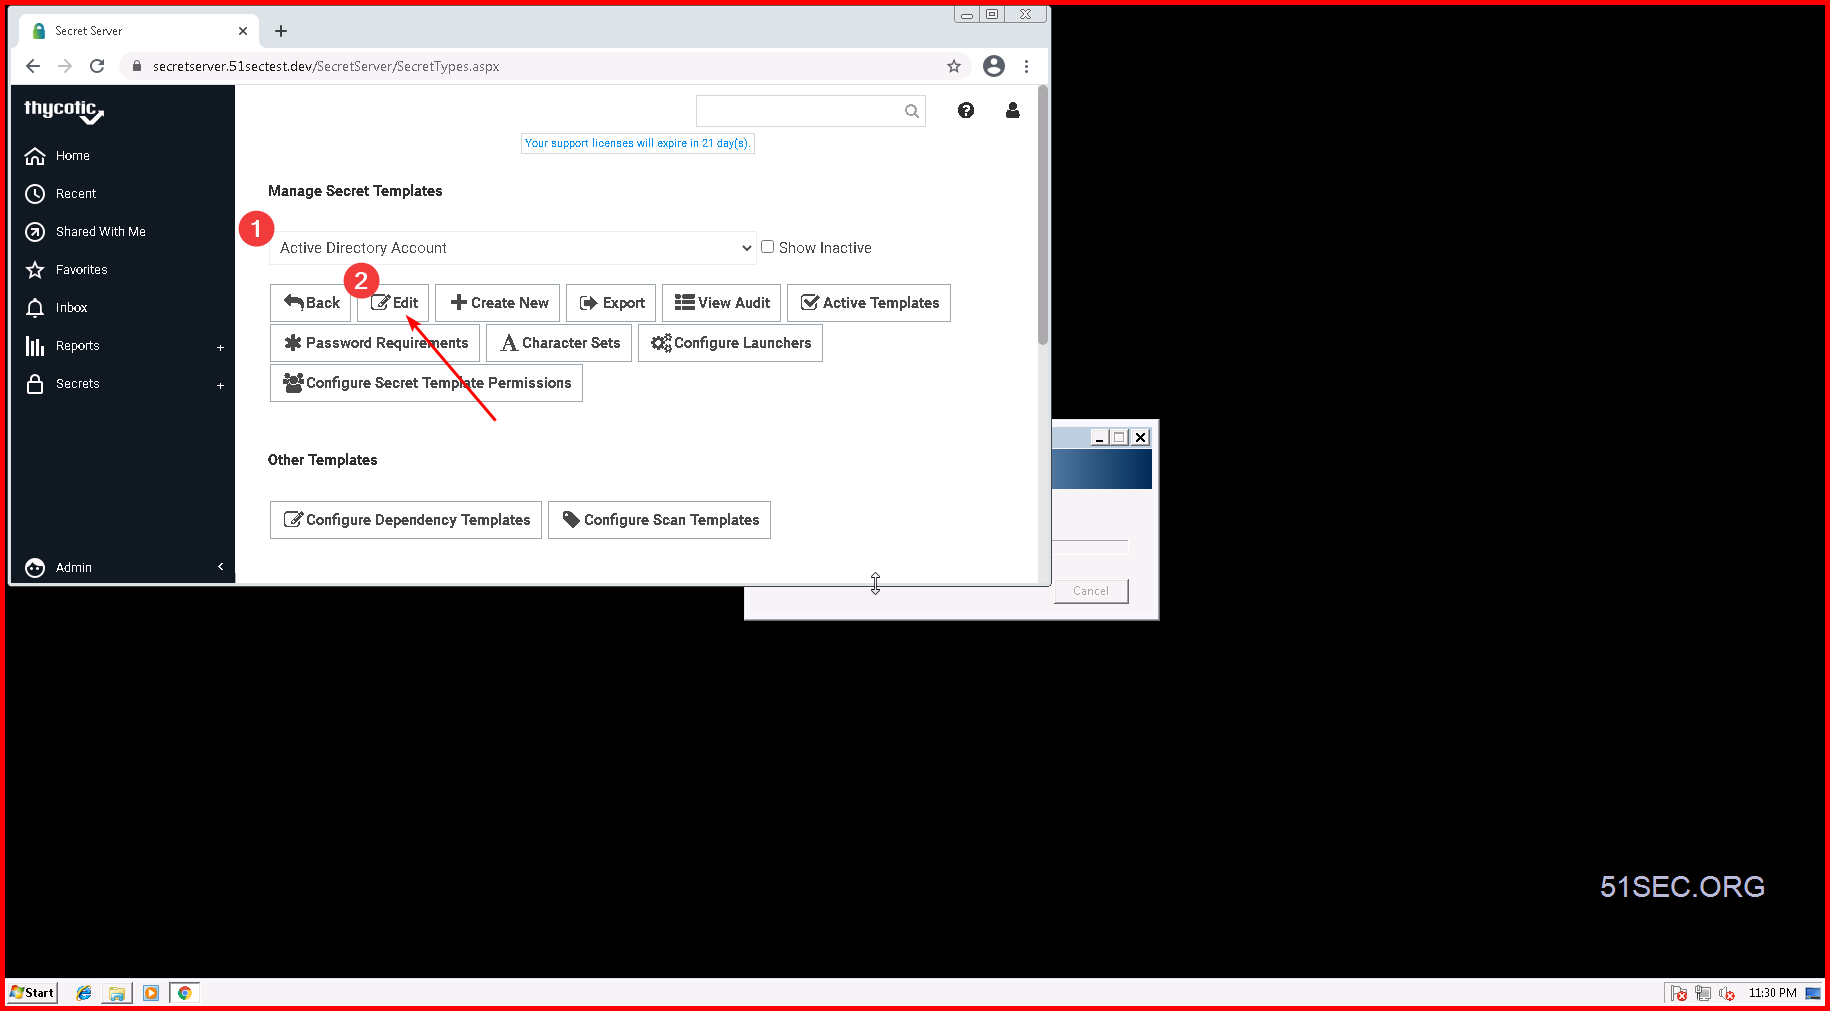
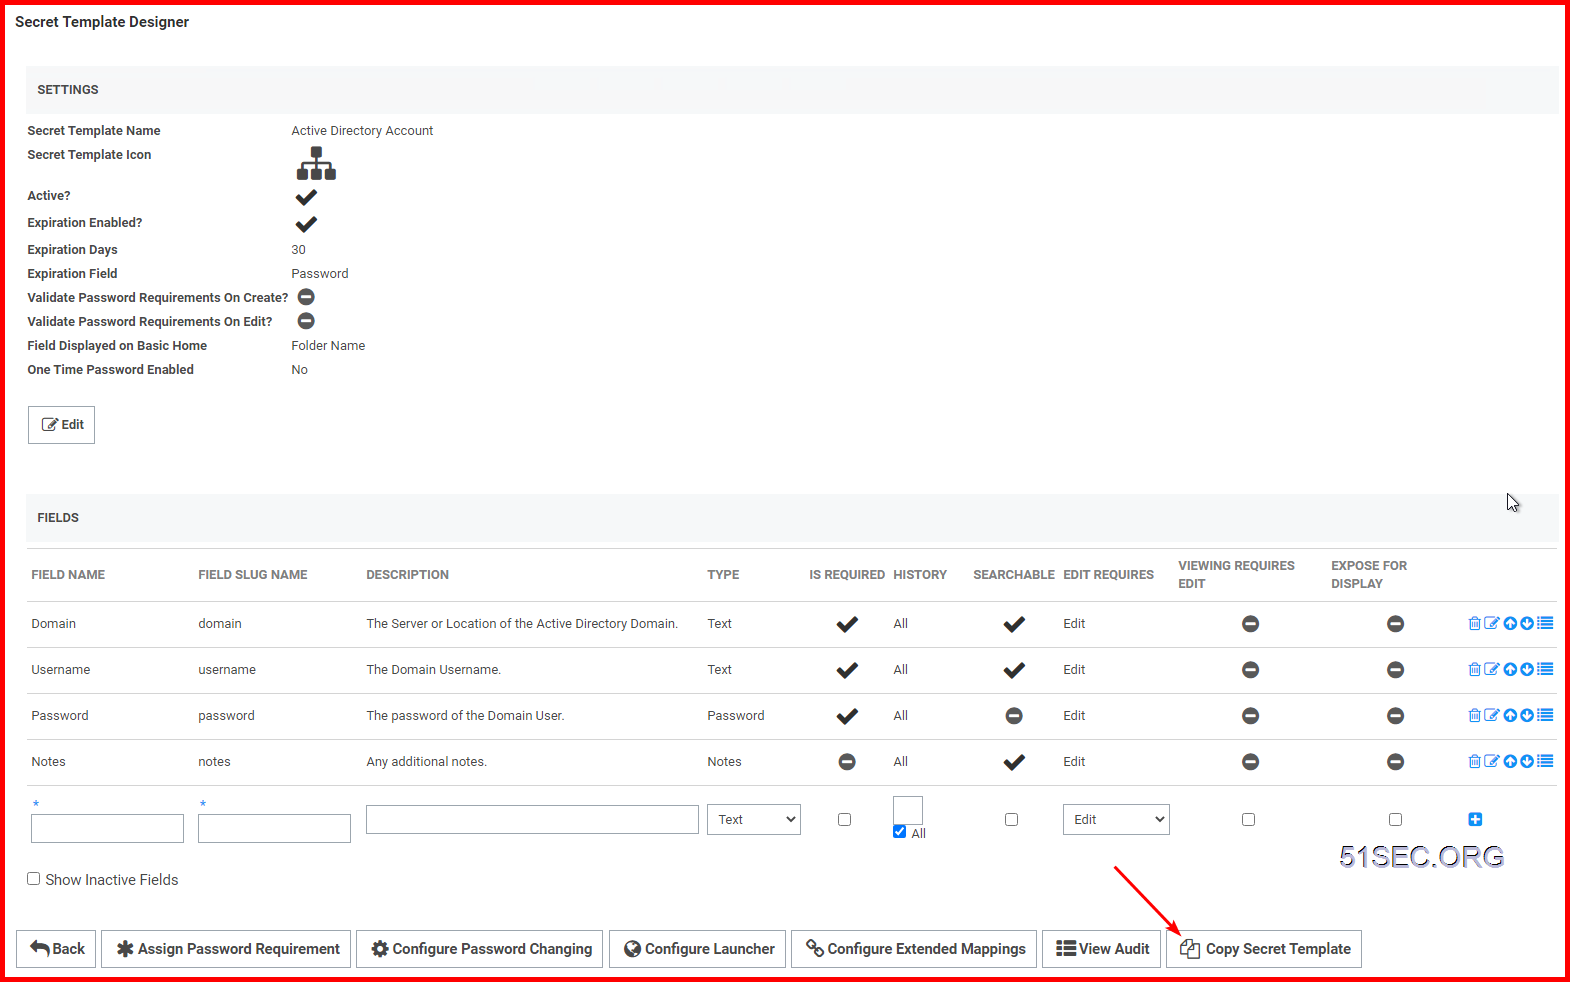
2 Create your own secrete templates
Click "Copy Secret Template" to save a copy of your current template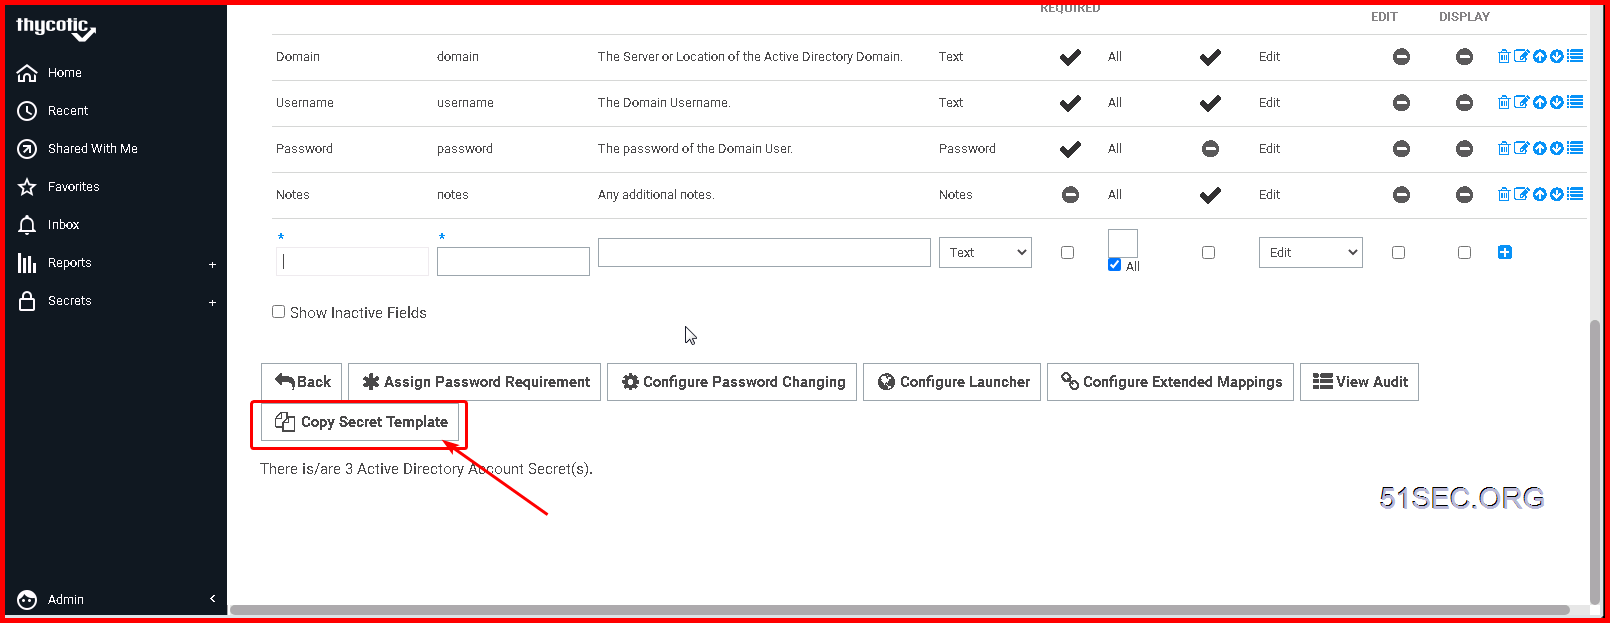
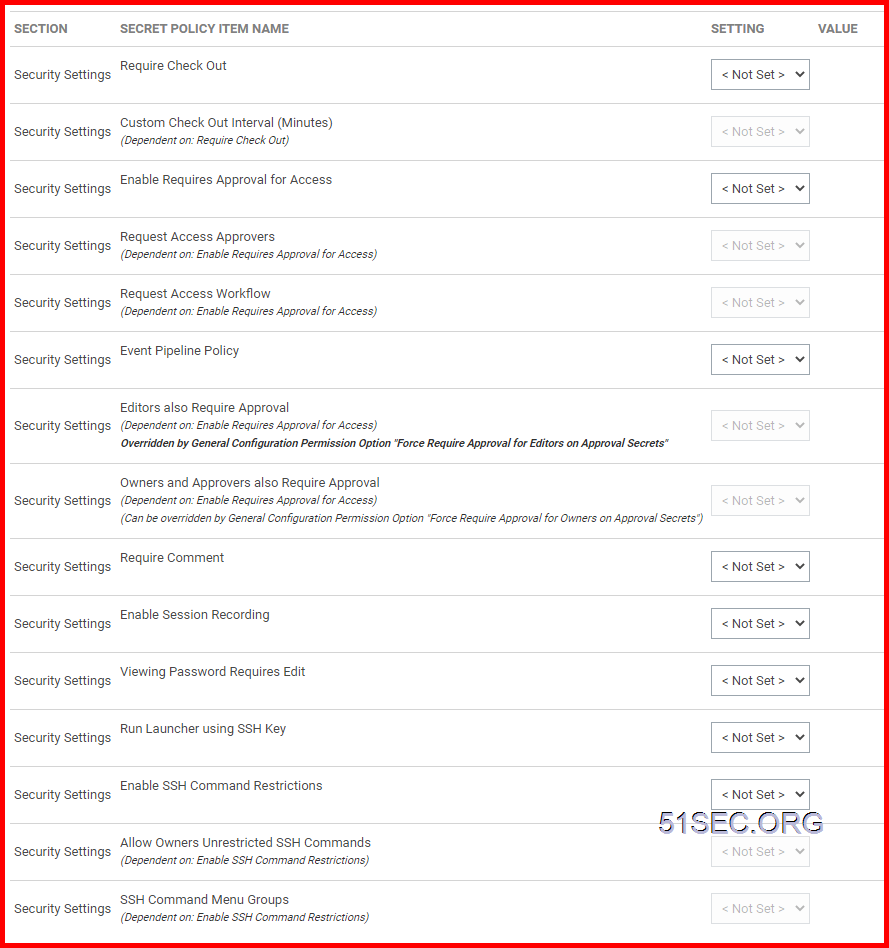
3 Create Security Policies
- <Not Set> will cause a setting to stay off (it will not change current vault)
- <Default> will cause the setting to be on, but editable in the future by users with edit permissions on secret (it will not change current settings value, no matter if you click checkbox of value or not.). It will set the value when there is a creation of secret using this policy.
- <Envorced> will cause the setting to be on and be uneditable, it will be locked onto any secret with this policy. The setting's value will be changed based on the value you set in the policy.
- Any items selected as 'Default' will be applied on the creation of any Secret that has this Secret Policy applied to it.
- Any items selected as 'Enforced' will be applied to all Secrets that have this Secret Policy applied to it.
- 'Enforced' settings cannot be changed on the Secret.
- Certain settings will only be applied to a Secret if they are valid settings for the Secret.
- <Not Set> - this is the default setting which mark the item as disabled/not in effect;
- Default – selecting this option will apply the Policy Item across all Secrets in the target folder, with the option of doing manual changes on the Secret settings further down the line. Any items selected as 'Default' will be applied on the creation of any Secret that has this Secret Policy applied to it.
- Enforced - selecting this option will apply the Policy Item across all Secrets in the target folder, without the option of changing these applied settings on the Secrets in that folder. Any items selected as 'Enforced' will be applied to all Secrets that have this Secret Policy applied to it.
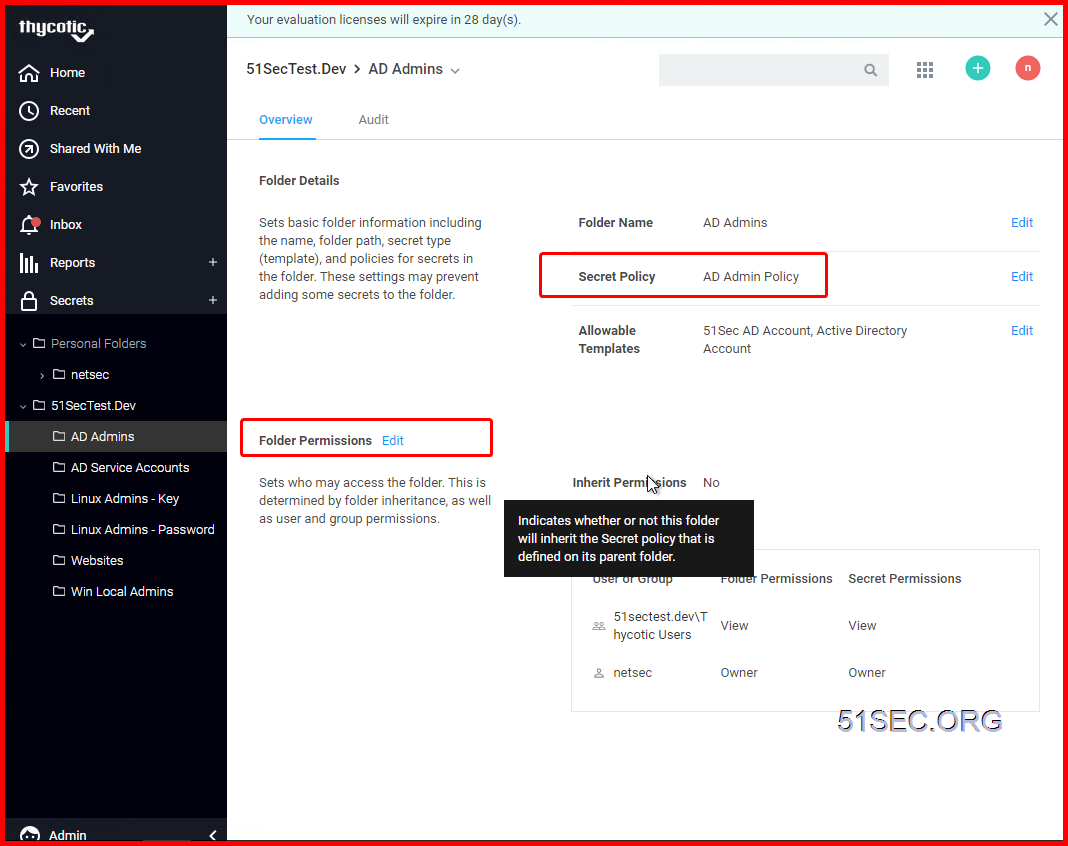
4 Create Secret folder structure and assign permission & Policy to corresponding folder
The most typical configuration is to break out the folders based on the teams that need to use those folders with the most restrictive permissions at the outer most “leaf” folders of the tree.
For Example:
- Information Technology
- Technical Services
- Systems
- Windows
- UNIX
- Network Infrastructure
- Database
- Oracle
- SQL Server
- Systems
- Development Services
- Programmers
- Technical Services
- Vendors
- Human Resources
- Customers
An Oracle DBA might have the following permissions on the below folders:
- Information Technology (VIEW)
- Technical Services (VIEW)
- Database (VIEW)
- Oracle (VIEW / EDIT / OWNER)
- SQL Server (VIEW / EDIT)
- Database (VIEW)
- Technical Services (VIEW)
Note: A user will not be able to see the full folder structure unless they have View permissions on all the parent folders of a particular folder. For example, a user with View on the “Oracle” folder, would also need View on “Database”, “Technical Services” and “Information Technology” to be able to see the full folder path.
There are settings under ADMIN > Configuration > Folders to control whether inheritance on folders and Secrets should be turned on and also whether users should always see all folders. There are many ways to configure this for your organization. The most common approach is:
- Use inheritance to get Parent Folder's permission list. Then break inheritance to customize special group's permission. This always has to be done at the last level.
- Don’t allow users to see folders unless they explicitly have View permissions
- Require all Secrets to have a Folder
This allows different teams or even different departments within your organization to use the same Secret Server instance independently.
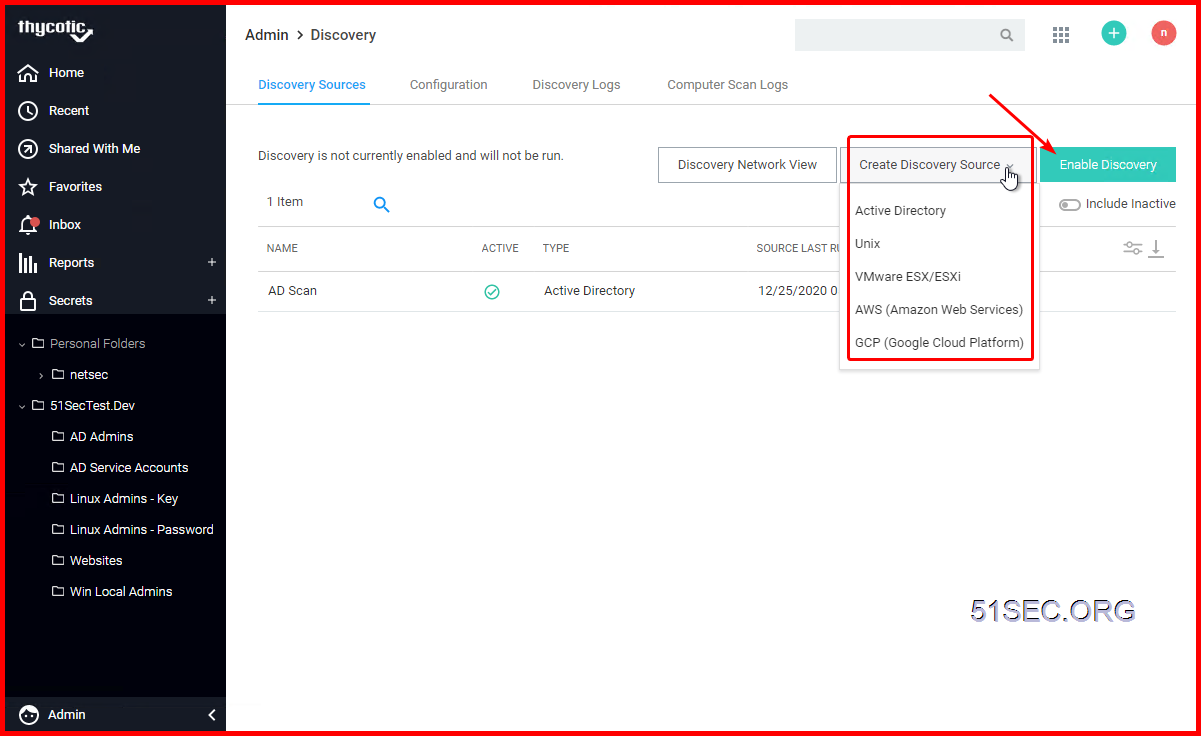
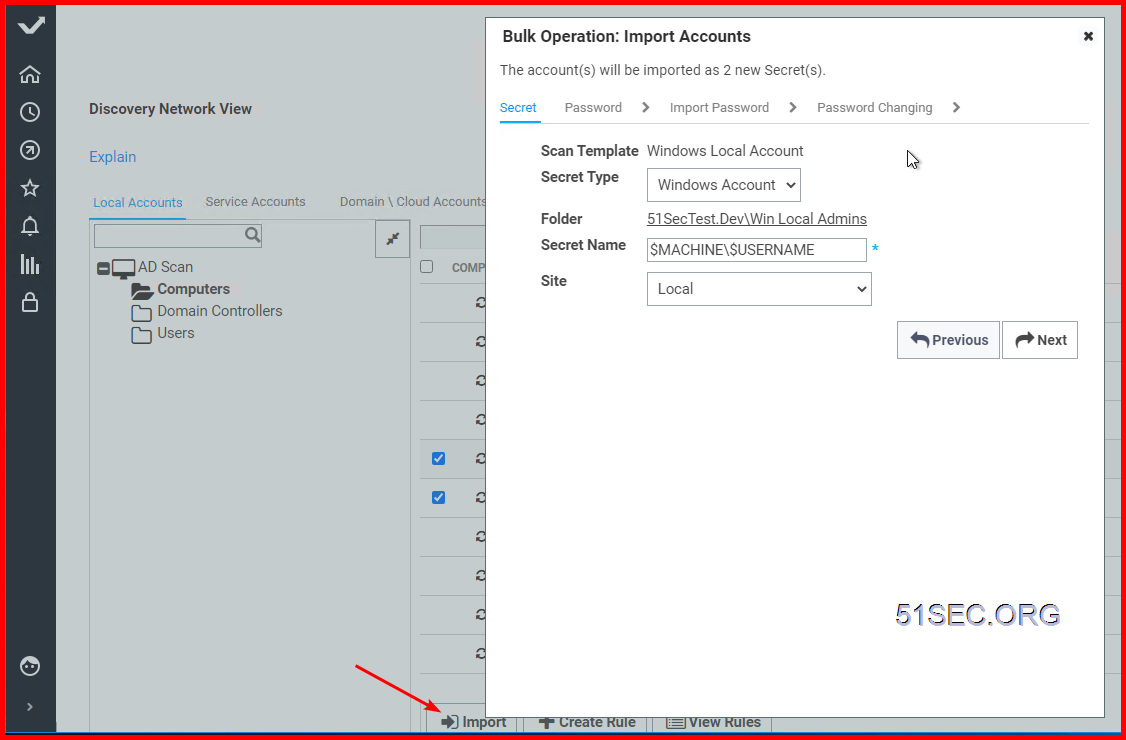
5 Discovery & Import
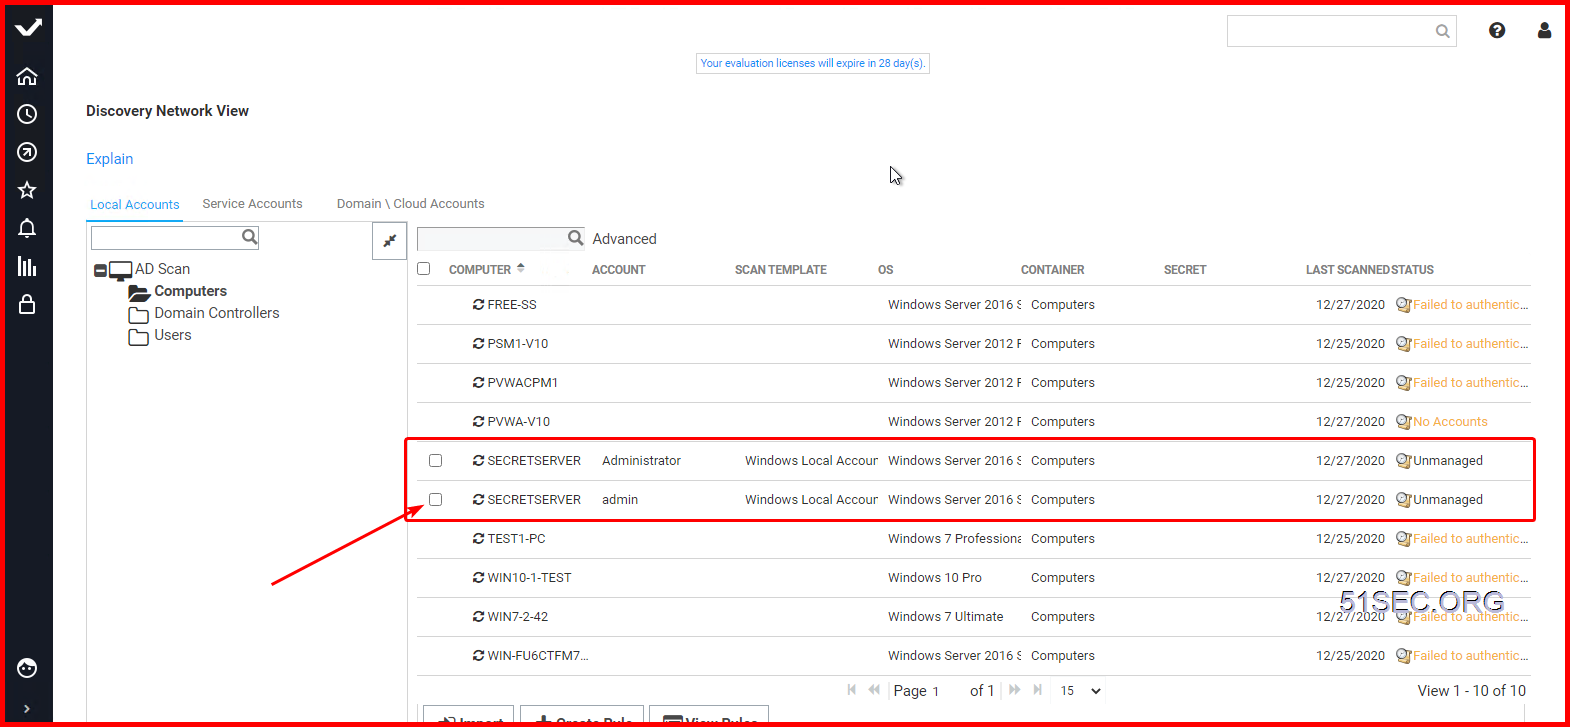
Onboard Linux Accounts
1 Create your own secrete templates
2 Create Own Security Policies
3 Create Own Secret folder and assign permission & Policy to corresponding folder
4 Onboard Account with SSH Key but no Password.
Notes:
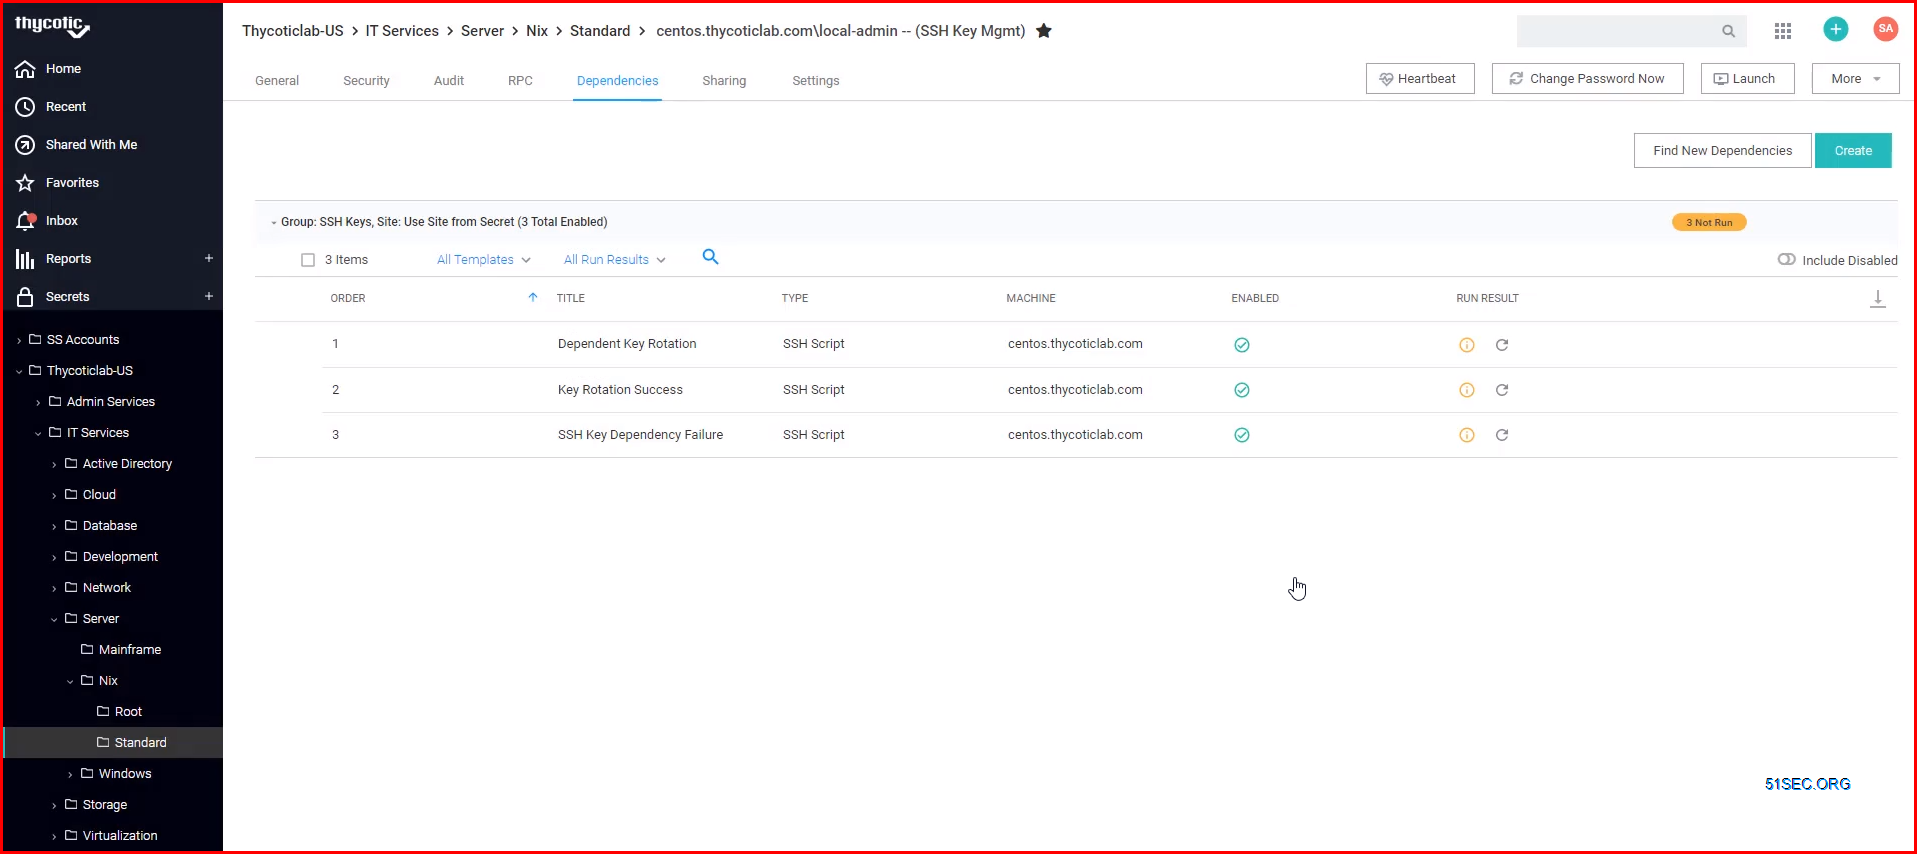
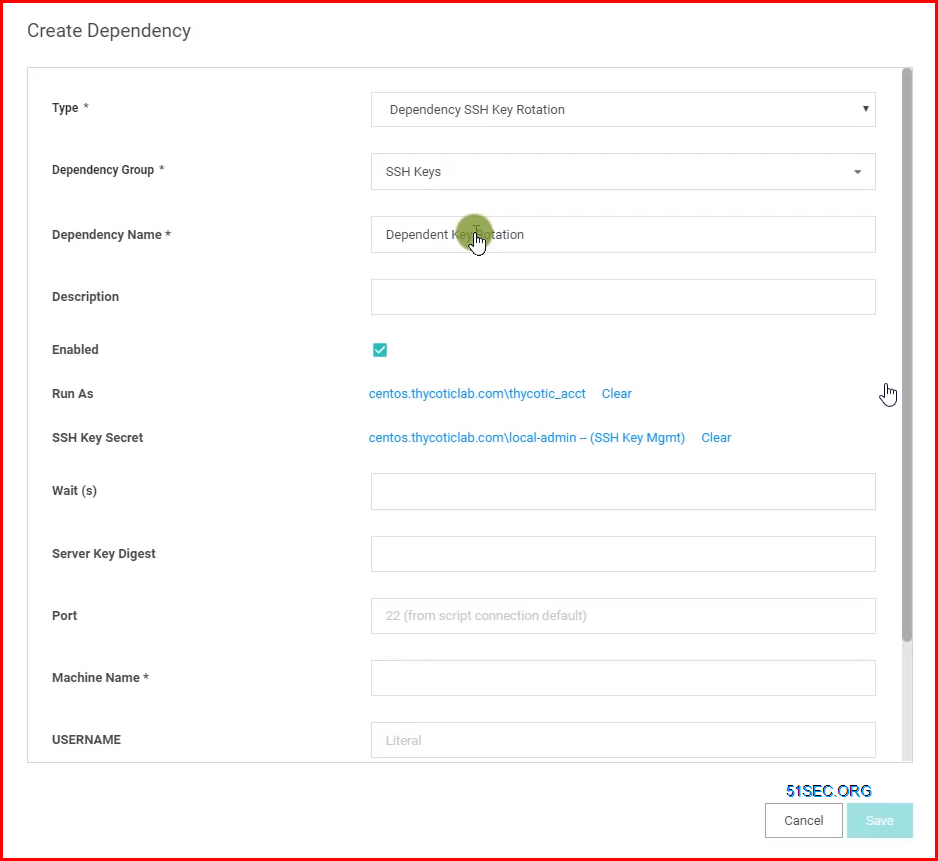
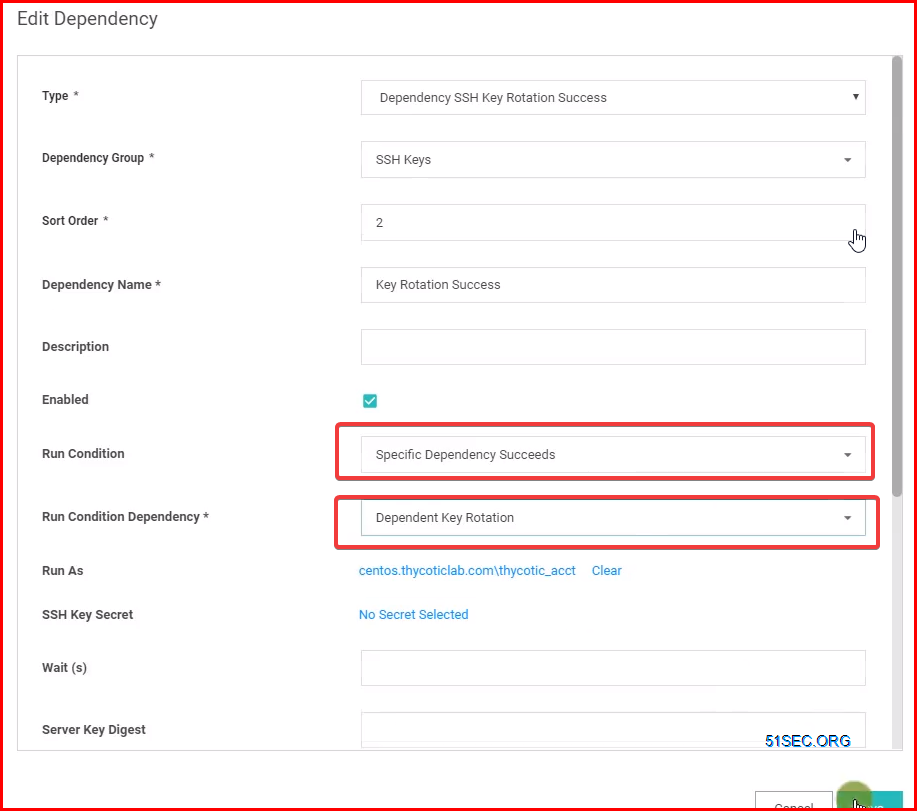
Dependencies are items that rely on the username, password, and/or SSH private key stored in the Secret. By adding them to the dependencies tab, they will automatically be updated when the Secret's password is changed, ensuring they are up to date with the account on which they depend.
Custom Dependencies
If there are different dependency types that you want to manage that aren’t supported out of the box, new ones can be created based on a script. A custom dependency consists of two components:
Dependency Template: The Dependency Template defines how a Dependency is matched to discovered accounts and how it updates the target after a password change occurs on the account. To create a new Dependency Template, go to ADMIN | Secret Templates and click the Dependency Templates button.
Dependency Changer: A Dependency Changer is a script and the associated parameters to be passed into the script. Dependency Changers can be created and modified by going to ADMIN > Remote Password Changing > Configure Dependency Changers.
Secret Server SSH Key Dependencies Configuration:

Onboard Cisco Network Device Accounts
1 Create your own secrete templates
There are for different existing built-in templates. Two for SSH connections. Two for telnet.
Each of them includes one template for normal accounts, and another one for enable password.
2 Create Own Security Policies for user accounts and enable password.
You will need to define auto password changing rule, heartbeat rule, check-in, check-out rule, etc.
3 Create Own Secret folder and assign permission & Policy to corresponding folder
It had better to create one folder for normal Cisco accounts, and another one for enable passwords.
You will need to assign proper permission, template, and secret policy for each folder.
4 Onboard user accounts and enable password separately.
Note: Onboarding Process example can be found from this post: PAM Solution Roadmap, Project Phases & Onboarding Process


No comments:
Post a Comment