A print screen button is available in all the systems to capture the image or screen but it has too much limitations in it. It is a tedious job to add text, arrows, edge frame, and highlighters on the captured image using the print-screen option. Also, uploading and store it to a cloud storage space is taking too much time from your busy life.
ShareX can do all this for you in an automatically way to save your effort and time. Here are some configuration I made to adapt my habits for screenshots.
Configuration Steps
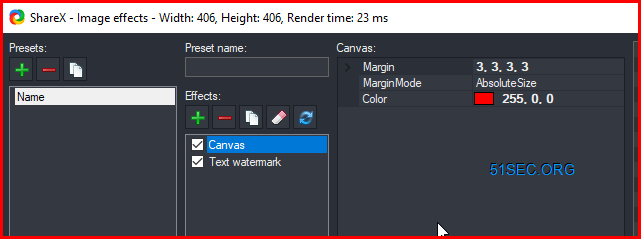
1 Add Image Effects
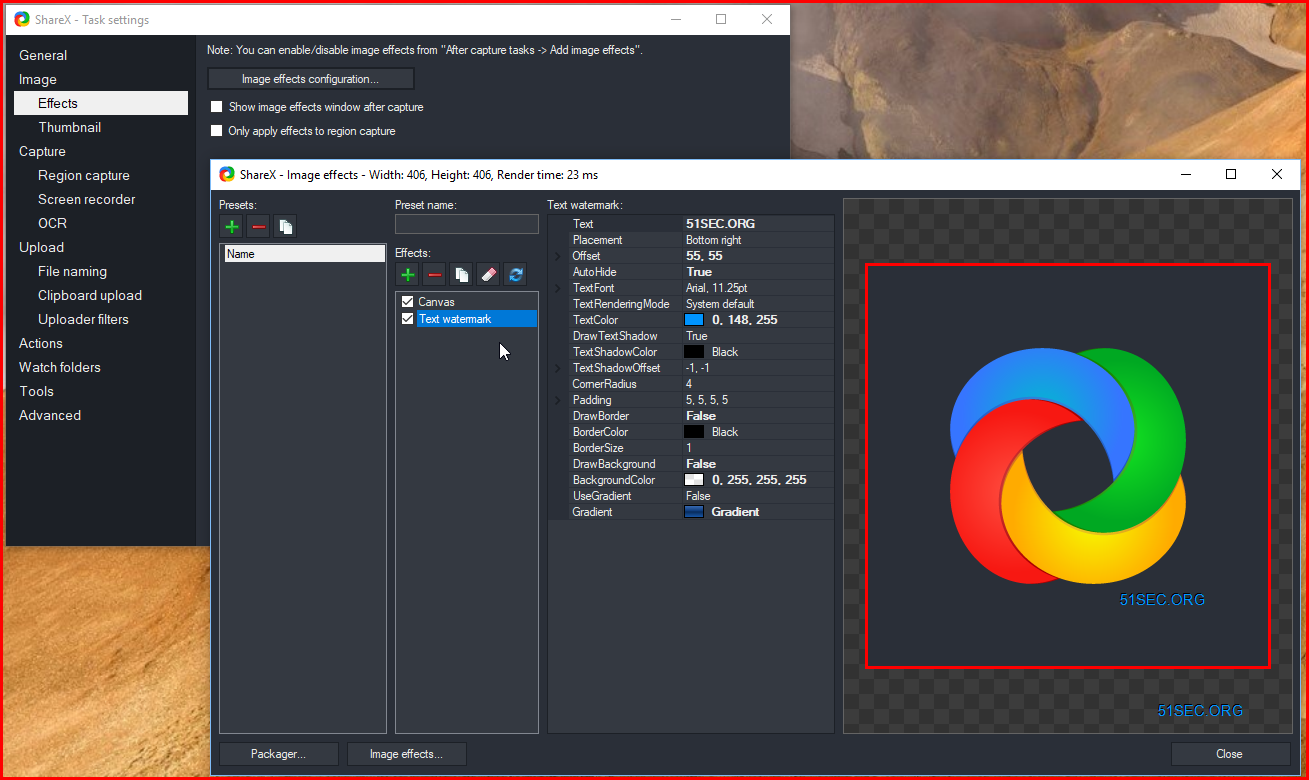
2 Add Tasks After Captured Screenshots
- Add image effects from step 1
- Open it in image editor to check screenshot before it uploaded to cloud
- Upload images to host

3 For upload image to host
Configure Backblaze B2 as destination with my own domain. More details about how to create Backblaze bucket for your own photos hosting (10G for free):

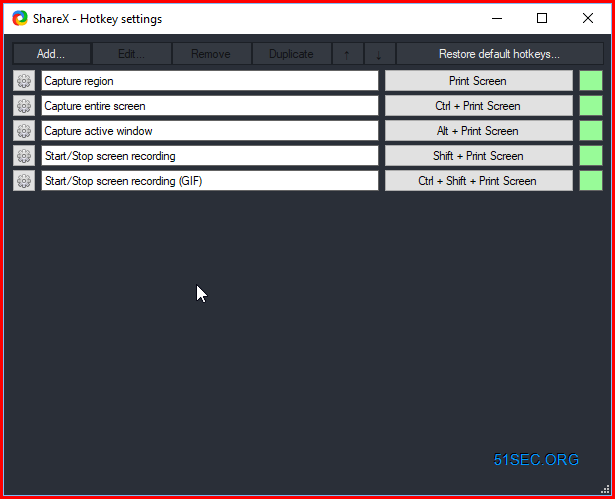
4 Change ShareX Hotkeys Based on Your Habits
Software Introduction & Download
https://itprosec.com/index.php/2021/10/12/sharex-the-best-free-and-open-source-screenshot-tool/
Configure Imgur for upload destination


ShareX Custom uploader guide : Picsur Integration
What is custom uploader?
Custom uploader system in ShareX let users to upload image/text/file to hosting services or shorten/share URL. This feature is mainly used by users who host their own hosting services.Export / Import
You can export your custom uploader with .sxcu extension which allows users to just double click that file to be able to use custom uploader.If destination type is configured then ShareX can also set this custom uploader as selected custom uploader and change current destination to this custom uploader, so users won't need any additional configuration to use it.
Github : https://github.com/CaramelFur/Picsur
Steps:
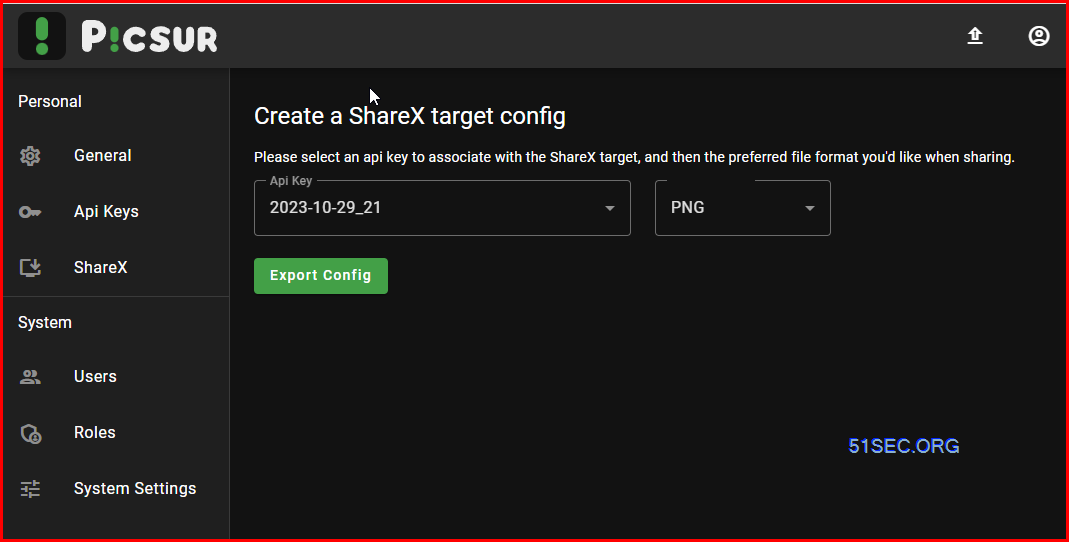
1. Create API Key in Picsur
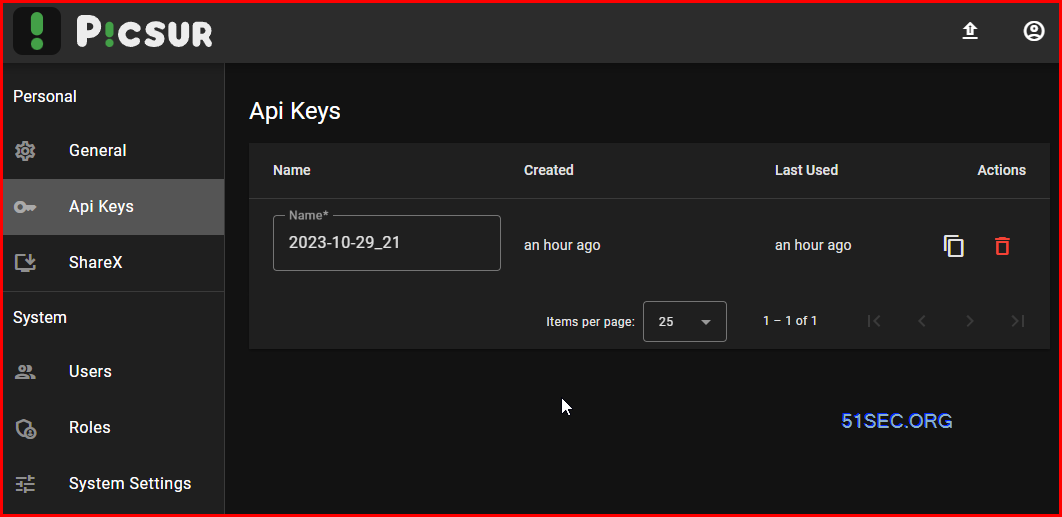
2. Set up API key for Sharex then export config
3. Import Configuration into Sharex
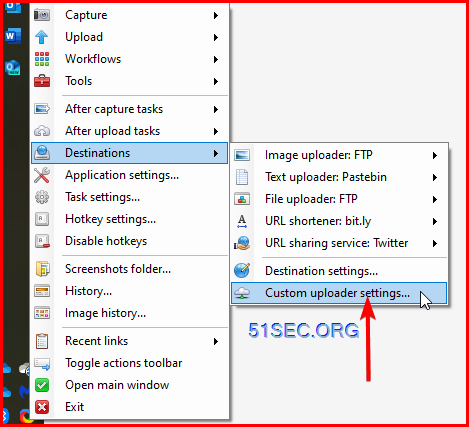
4. Configure Custom Uploader Settings...
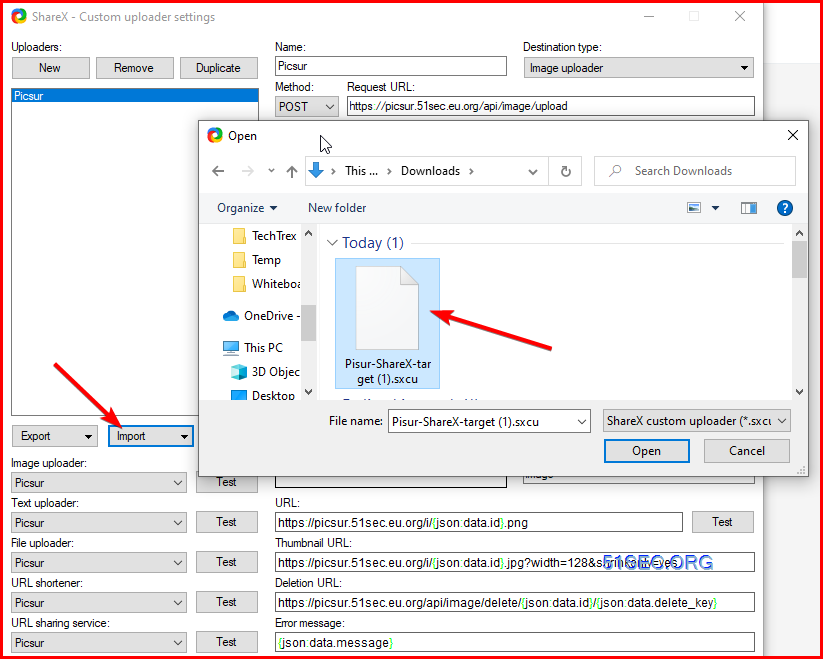
When you choose Test for Image uploader, you will find a ShareX icon uploaded to the Picsur site and you will have a url for the image.
References
- Create Your Own Cloud Photo Storage Site in BackBlaze B2 Using Cloudflare and ShareX
- ShareX Custom uploader guide


![[5 Mins Docker] Deploy FreshRSS Using Docker Run Command and Deploy To Fly.io](https://lh3.googleusercontent.com/blogger_img_proxy/AEn0k_uwWoK0D3lKhapR3TuAktUkm7OQAKQMixOGhdcFw-oGwev-KMophv5t7u0SXFxKfGc7Efm7NexIW0pKuAX6tVmmYy-qSQYjlGom0i5pPL2fSA)


No comments:
Post a Comment