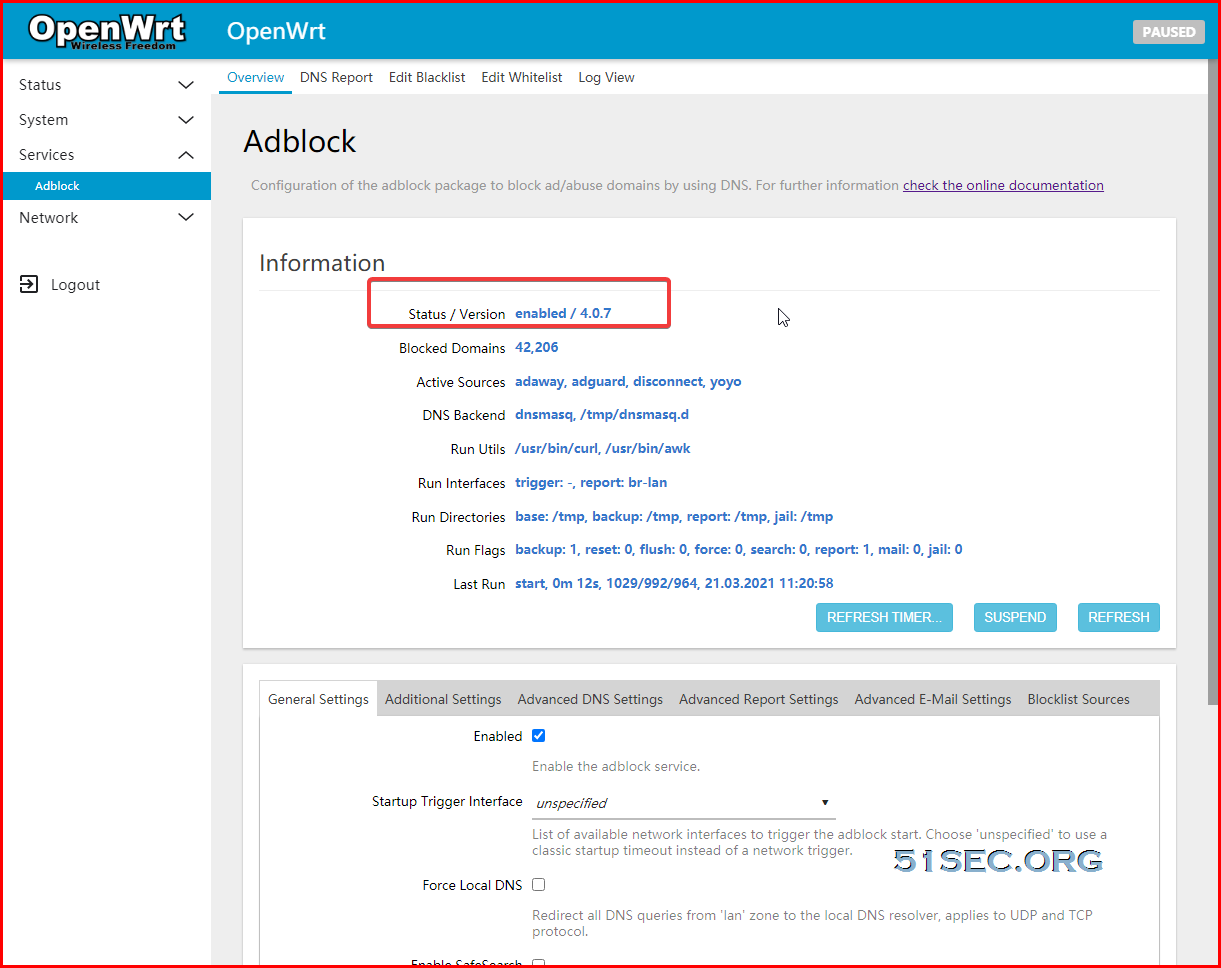
Adblock software in OpenWRT is a script running in your OpenWRT gateway to sort out those DNS queries that ask for the resources recrds of ad servers and return a simple 'NSDOMAIN'. This action will make your browser not able to show those ads on the page you are surfing.
Topology
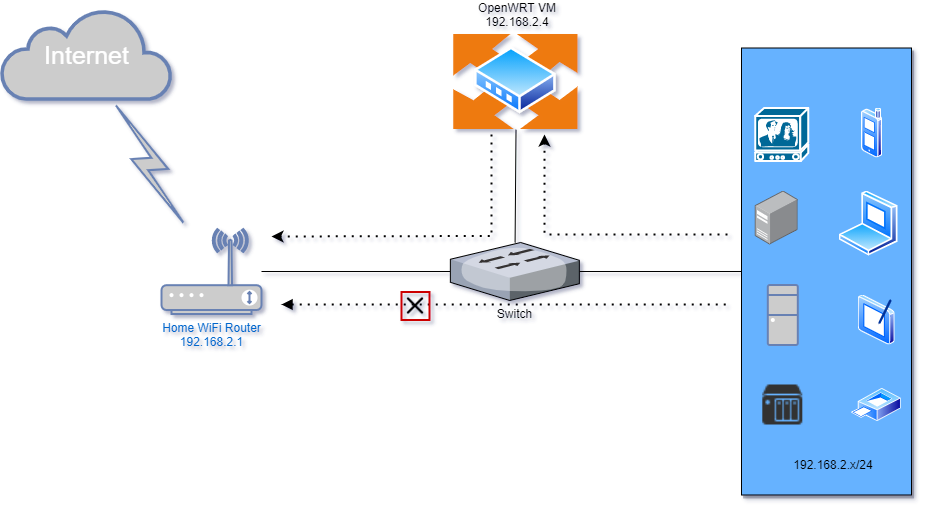
A simple topology to show you the position of OpenWRT Virtual machines I installed in VMWare Workstation. It is inside my Windows 2016 host connecting to a giga switch. Other devices in my home network, they are either connecting through WiFi or through wired connection to switch.
Prerequisites
- OpenWrt, tested with the stable release series (19.07.x) and with the latest rolling snapshot releases. On turris devices it has been successfully tested with TurrisOS 5.1.x
- A download utility with SSL support: 'wget', 'uclient-fetch' with one of the 'libustream-*' ssl libraries, 'aria2c' or 'curl' is required
- Option: DNS Reporting, TCPDUMP or TCPDUMP-Mini installed
- Client DNS pointing to OpenWRT
Installation Steps
From OpenWRT Luci Web GUI:
- Click Update Lists from OpenWRT Web GUI - System - Software
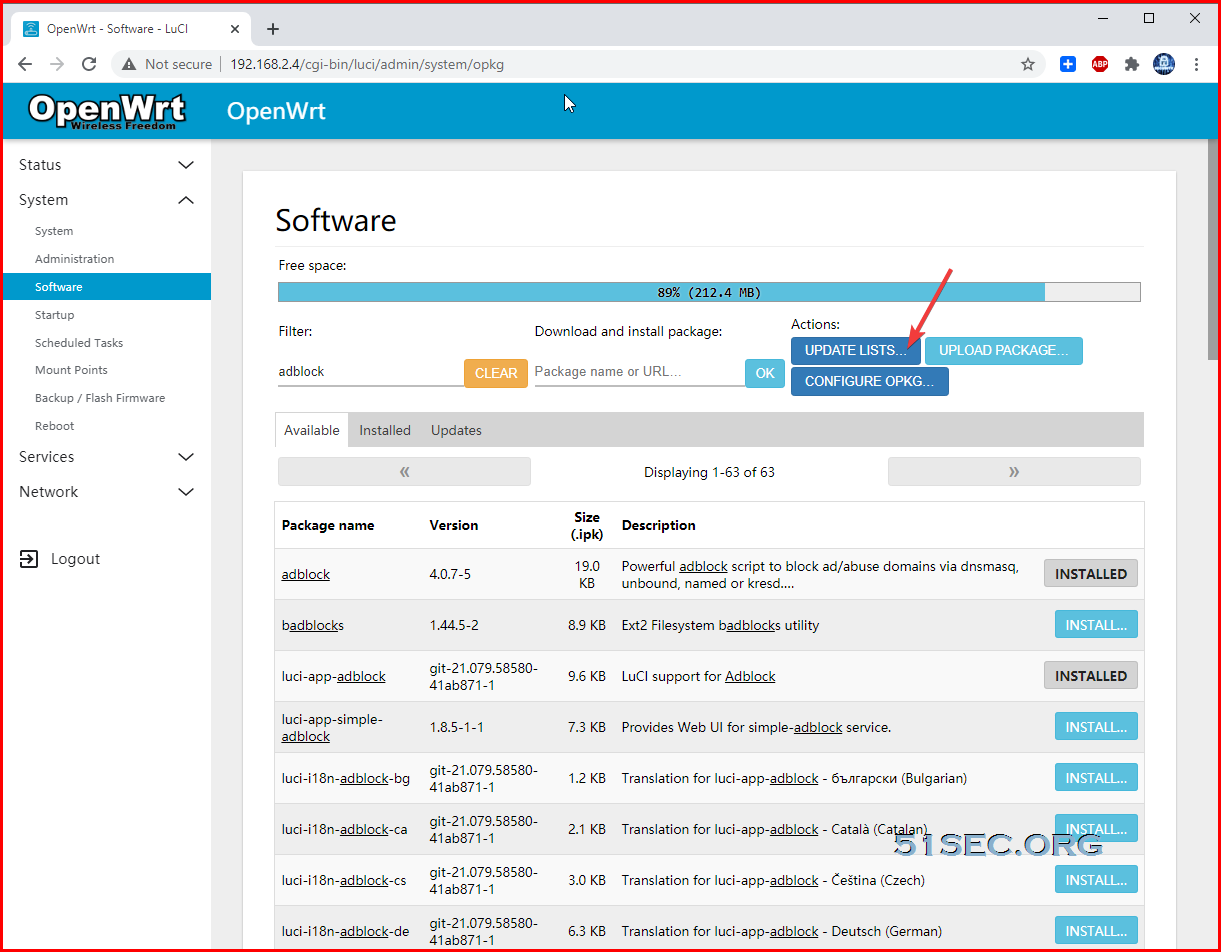
- Install adblock and luci-app-adblock
- Install wget / Curl
- Reboot OpenWRT
- Browse to OpenWRT Web GUI - Services - Adblock
From Console or SSH Session:
- Update your local opkg repository (opkg update)
- Install 'adblock' (opkg install adblock). The adblock service is enabled by default
- Install the LuCI companion package 'luci-app-adblock' (opkg install luci-app-adblock)
- It's strongly recommended to use the LuCI frontend to easily configure all aspects of adblock, the application is located in LuCI under the 'Services' menu
- Update from a former adblock version is easy. During the update a backup is made of the old configuration '/etc/config/adblock-backup' and replaced by the new config - that's all
References
- OpenWRT Wiki - Ad blocking
- DNS based ad/abuse domain blocking
- Layman's guide for Adblock (on WRT1900AC)


![[5 Mins Docker] Deploy FreshRSS Using Docker Run Command and Deploy To Fly.io](https://lh3.googleusercontent.com/blogger_img_proxy/AEn0k_vCCl8kaPFdfHtDwCsIwFHiWzlXOeuAbLB-BgH0Dg_-6ejdpcfJTebemPZmsZalhWqy5vIRSbnFSv5aSfokOXz75xt0REfgefo4pVVQkTjQbg)


No comments:
Post a Comment