This post is to collect some of packages using on my OpenWRT router. The list is still adding. Once more packages tested and used, they will be added in this post for future reference.
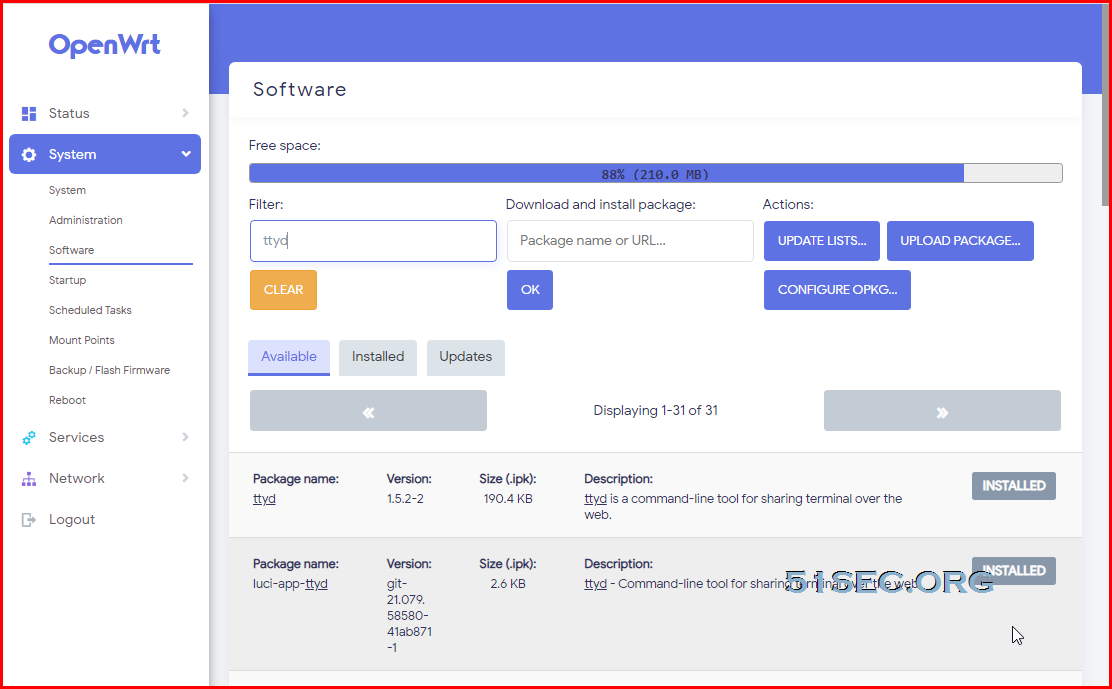
Terminal integration in LUCI: luci-app-ttyd
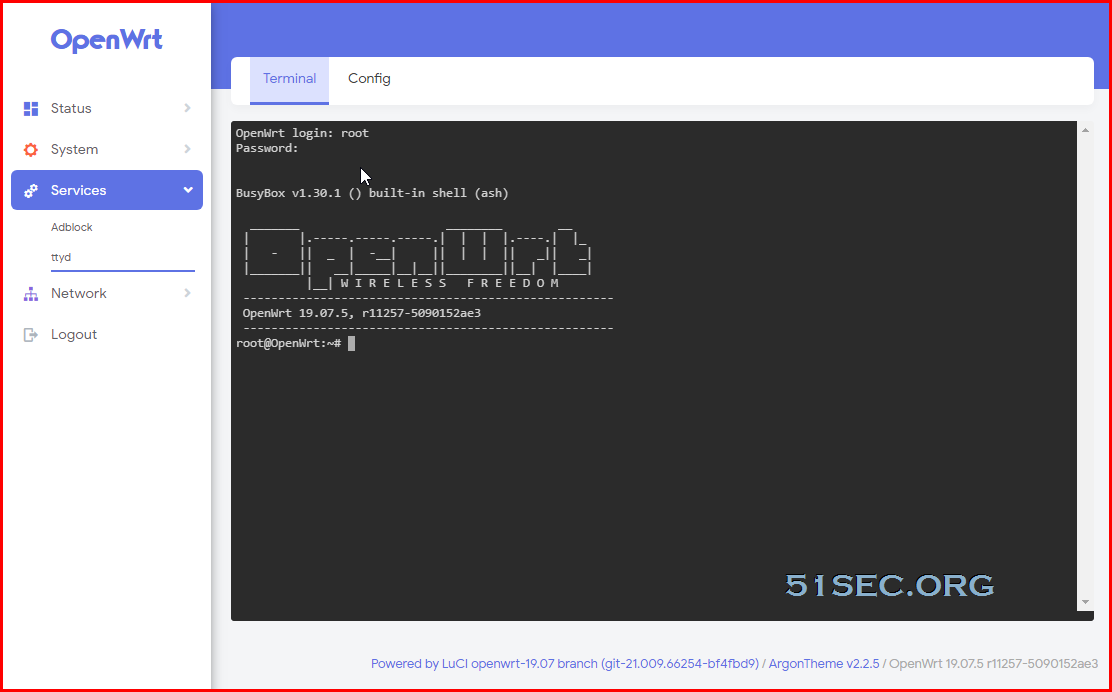
This package intigrates ttyd in LUCI. Two packages to install, ttyd and luci-app-ttyd.
luci-theme-argon
You will have to use TTYD to do installation.
For openwrt official 19.07 Snapshots LuCI master
opkg install luci-compat
wget --no-check-certificate https://github.com/jerrykuku/luci-theme-argon/releases/download/v2.2.5/luci-theme-argon_2.2.5-20200914_all.ipk
opkg install luci-theme-argon*.ipk
DNS based ad/abuse domain blocking - Adblock
Getting rid of annoying ads, trackers and other abuse sites (like facebook) is simple: block them with your OpenWRT router. Adblock on OpenWrt uses DNS to block Ads by becoming your first-hop DNS server, and returning IP address not found when the queried for the address of the an Ads server.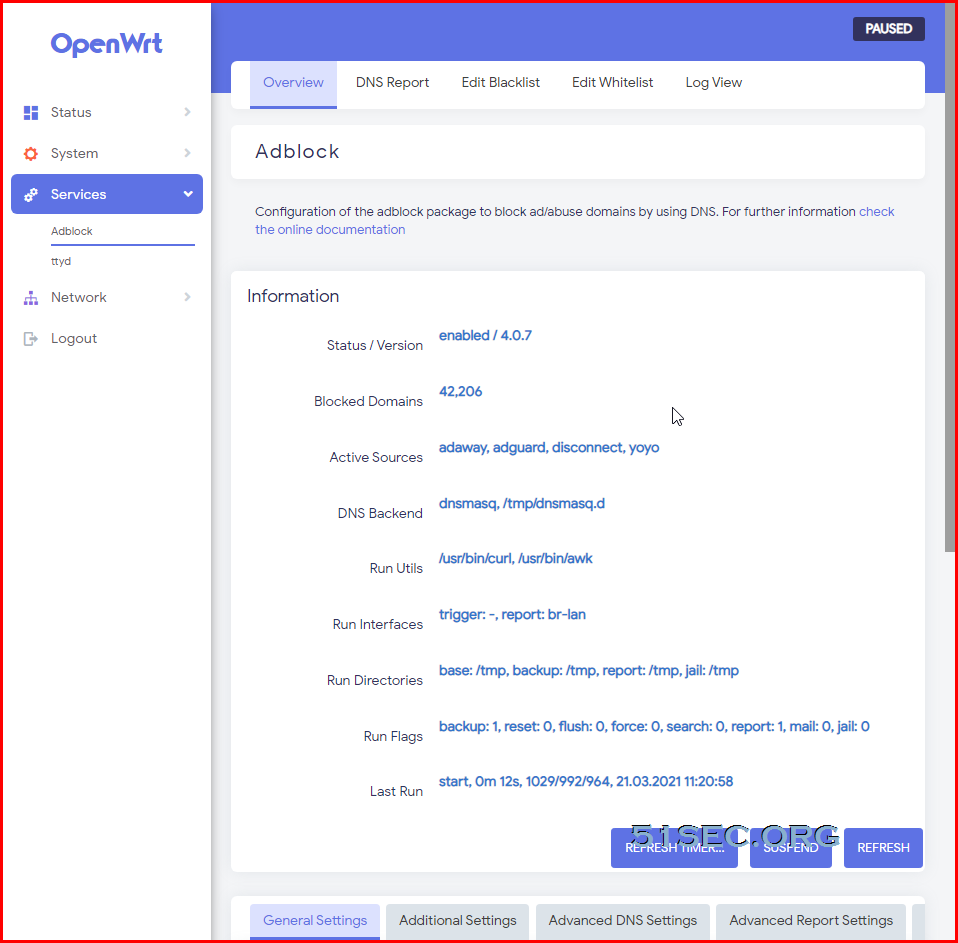
Some installed packages and enabled feature to get ADBlock working:
Github : https://github.com/openwrt/packages/blob/master/net/adblock/files/README.md
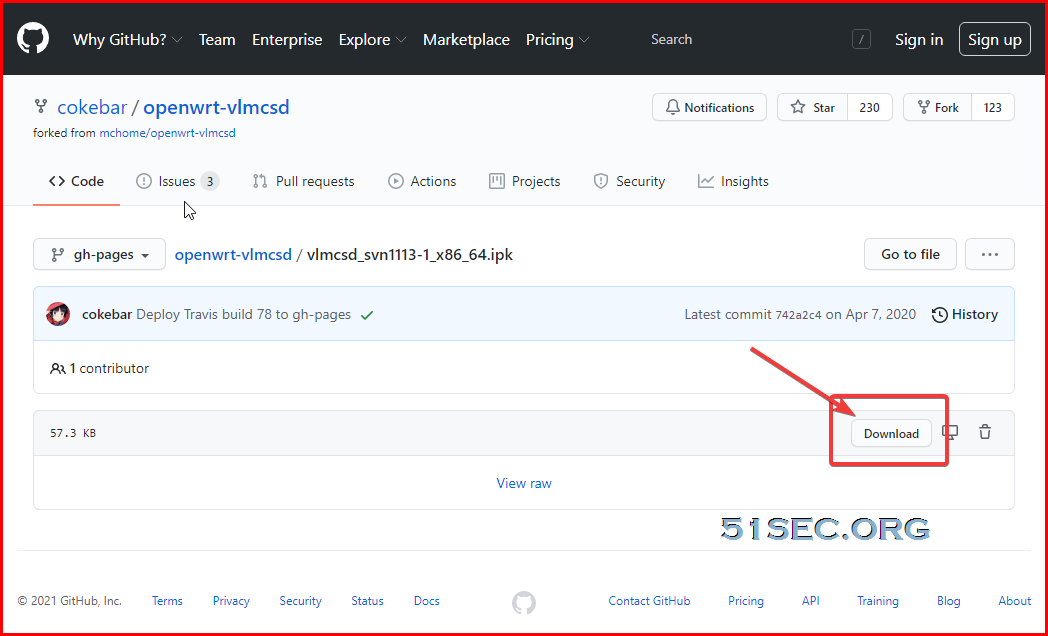
vlmcsd - KMS server

C:\Windows\system32>slmgr /ipk NPPR9-FWDCX-D2C8J-H872K-2YT43

C:\Windows\system32>slmgr /skms 192.168.2.4

C:\Windows\system32>slmgr /ato

C:\Windows\system32>
DDNS for CloudFlare
Install packages
- Login to you router
- Go to [System] -> [Software]
- In {Actions} tab, click the <Update lists> button
- Install the following package
- luci-app-ddns
- ddns-scripts_cloudflare.com-v4
- luci-app-ddns
- ddns-scripts_cloudflare.com-v4
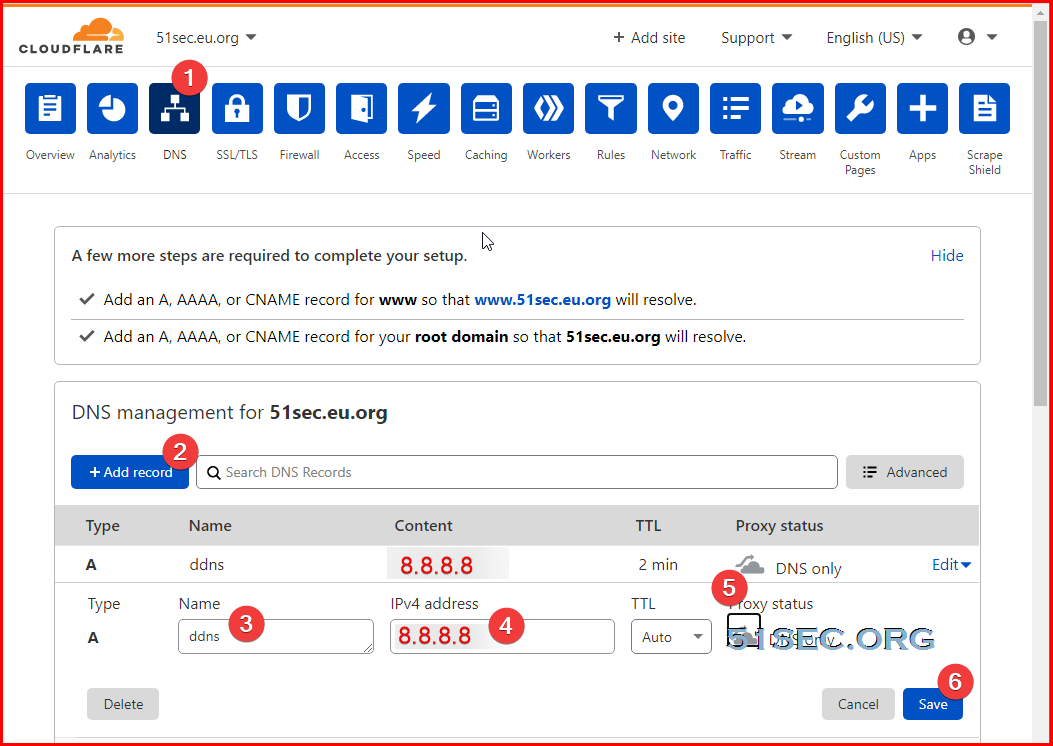
Creating a DNS A record for ddns.51sec.eu.org
- Login to your CloudFlare account
- Go to your domain, in my example it will be ‘myabc.com’
- Go to [DNS]
- Click <+Add record>
- In {Type} field select:
A
- In {Name} field input:
ddns
- In {IPv4 address} field input a random IP first, for example, 8.8.8.8
- Change Proxy Status from Proxied to DNS Only
- Click <Save> button
A
ddns
- Go to [My Profile]
- Go to {API Tokens} tab
- Go to {API Keys} section
- Click the <View> button at {Global API Key}
- Copy that API key and it will in used in the next section
Add DDNS entry in OpenWRT
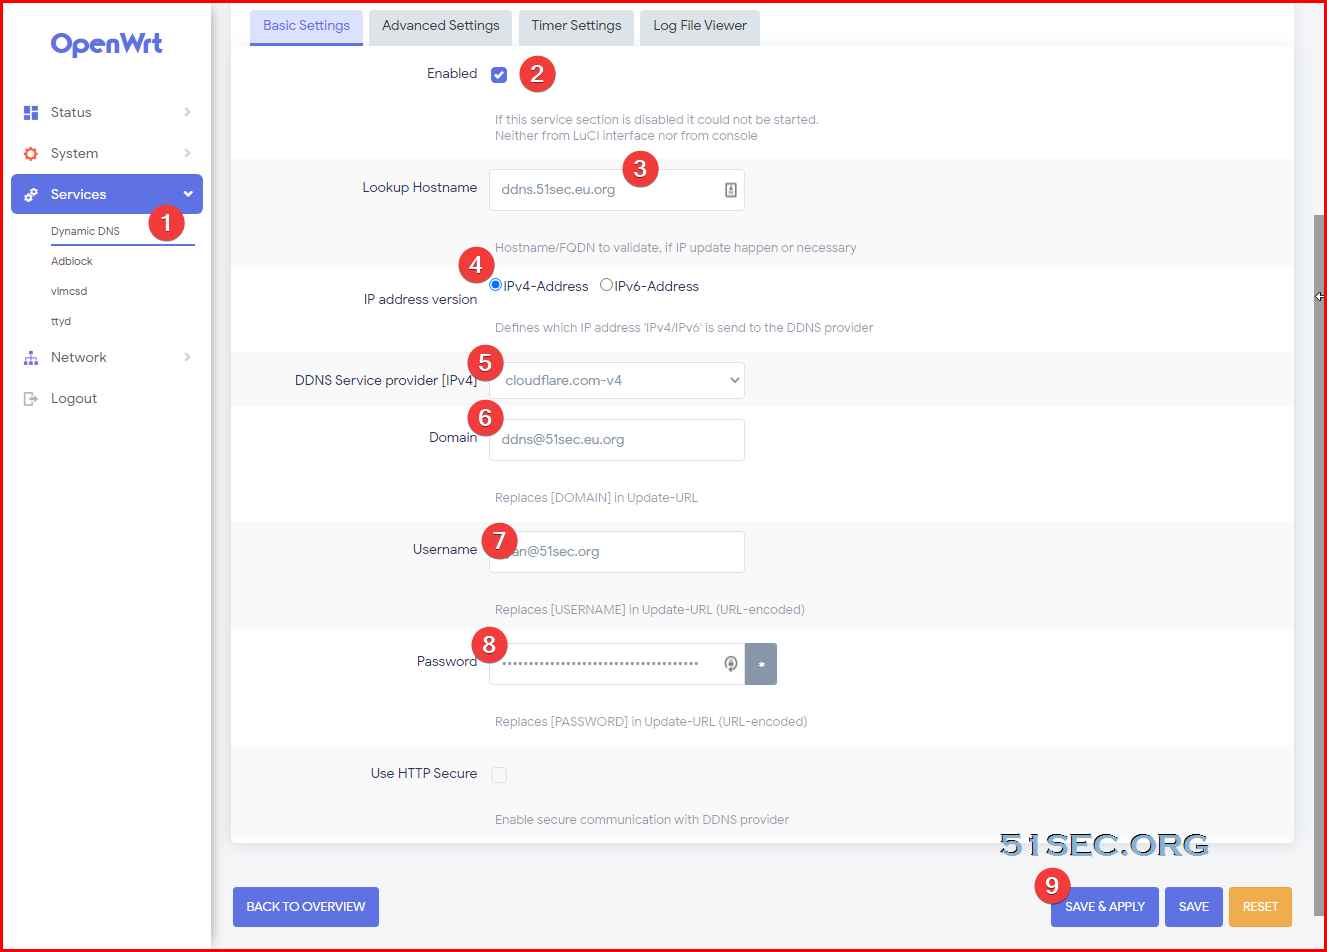
- Go to [Services] -> [Dynamic DNS]
- In section {Overview} -> {Basic} tab
- In drop down menu {DDNS Service provider [IPv4]}:
- cloudflare.com-v4
- Go to input field and input
- ddns.51sec.eu.org
- Click <Add> button and it will go into the details page
- Ensure {Enabled} field:
- Marked with tick
- In {Lookup Hostname} input field:
- ddns.51sec.eu.org
- In {IP address version} select:
- IPv4-Address
- In {Domain} field in put your domain with a @ character:
- In {Username} field:
- your username for login CloudFlare, ie: [email protected]
- In {Password} field:
- The Global API Key from CloudFlare
- In section {Overview} -> {Advanced Settings} tab
- In {URL to detect [IPv4]} field
- http://checkip.dyndns.com
- In {Event Network [IPv4]} field
- wan or lan , depending on which port is used for externa traffic
- Click <Save & Apply> button

YouTube Videos
OpemWRT Image Download
- OpenWRT固件下载合集,长期更新中。包含软件:Bypass、Hello World、PassWall、SSR-Plus、AdGuard Home、OpenClah、SmartDNS等 (default ip: 192.168.100.1, root/password)
- uci sec network.lan.ipaddr=192.168.2.20 to change ip addres
- uci set network.lan.gateway=192.168.2.1 to set gateway
- uci commit network ,
- Power down machine then power up.
- https://od.51sec.org/T51SecEU/Sharing/VM/OpenWRT/
iStoreOS系统镜像。
点击直达---iStoreOS官网下载
OpenWRT Plugins
| 插件名 | 功能 | 下载 | 编译日期 |
|---|---|---|---|
| AdGuardHome | DNS/拦截 | 下载 | 2024-06-30 |
| MosDNS | DNS 转发/分流器 | mosdns_5.3.1-1 | 2024-02-26 |
| UnblockNeteaseMusic | 解锁网易云灰色歌曲 | 下载 | 2024-01-05 |
| VSSR | HelloWorld 科学工具 | 下载 | N/A |
| ByPass | ByPass 科学工具 | 下载 | N/A |
| ikoolproxy | koolproxy去广告(不适合高于5.4内核的固件) | 下载 | N/A |
| adblock | adblock去广告 | 下载 | N/A |
| adbyby | adbyby去广告 | 下载 | N/A |
| KMS | KMS服务器 | 下载 | N/A |
| OpenVPN | OpenVPN客户端 | 下载 | N/A |
| OpenVPN-Server | OpenVPN服务端 | 下载 | N/A |
| NPS | Nps内网穿透 | 下载 | N/A |
OpenWRT Command Line
The syntax is broken into three parts. The first two are mandatory with the [arguments] field being optional depending on the [option]
uci options commands arguments
[commands] is also broken down into three parts: file.section.option. Section can be called by their name, such as lan, wan as in /etc/config/network or wifi0 in /etc/config/wireless. Sections that do not have names can be called their position in the array of sections. An example of this is wireless.@wifi-iface[0].ssid
To view a configuration file such as /etc/config/network:
uci export network
Making or adding a new value to a section, in this case the default gatway, is easy as typing:
uci set network.lan.gateway=10.168.1.1
OR
uci set network.@interface[1].gateway=10.168.1.1
To add and delete options use uci add or uci delete:
uci delete wireless.@wifi-iface[0].encryption
It is also possible to set DHCP options, such as the gateway or DNS servers to push to clients. Refer to this website to find the DHCP option codes.
uci add_list network.lan.dhcp_option="3,10.168.1.1"
When done making changes you must run:
uci commit [configuration]
example: uci commit network
It is possible to change the behavior of startup services.
root@OpenWRT:~#/etc/init.d/network
Syntax /etc/init.d/network [command]
Available commands:
start Start the service
stop Stop the service
restart Restart the service
reload Reload configuration files (or restart if that fails)
enable Enable service autostart
disable Disable service autostart
Resetting Root Password
If you have forgotten the root password or if the root password no longer works, you have to use the Failsafe Mode and Factory Reset.
From there, you don't have to reset the whole configuration. Note that fail safe mode does not require a password for authentication of root (!)
You only have to mount the root file system and set a new password with passwd and then trigger a restart. In fail safe mode, passwd will not ask for the old password (that you may have forgotten):
root@(none):~# mount_root
switching to jffs2 overlay
root@(none):/rom/root# passwd
Changing password for root
New password:
Retype password:
passwd: password for root changed by root
root@(none):/rom/root# reboot -f
note: https://openwrt.org/docs/guide-user/troubleshooting/root_password_reset


No comments:
Post a Comment