This post is to summarize the steps to install additional Domain controller in an Azure Virtual machine for your existing on-prem Active directory.
Diagram
Prerequisites
- An Azure AD tenant with an active subscription.
- A Virtual Network in Azure that doesn’t overlap with your on-premises network.
- A continuous line of sight between your on-premises domain controller and Microsoft Azure (Azure VPN Gateway, ExpressRoute or an NVA). For Site-2-Site VPN between On-Prem VPN Gateway and Azure VPN Gateway, here are some documents using ZyWALL devices
Multiple On-premises ZyWALL connect IPSec VPN to Azure
How to Configure Route-based IPsec VPN to Azure
(VTI over IKEv2/IPSec)How to Configure Route-based IPsec VPN to Azure
(BGP over IKEv2/IPSec)
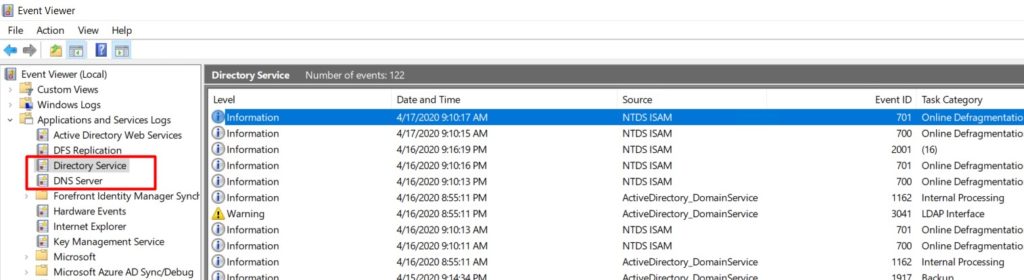
Test Your On-Premises Domain Controller
- Analyse your Active Directory and DNS Logs.
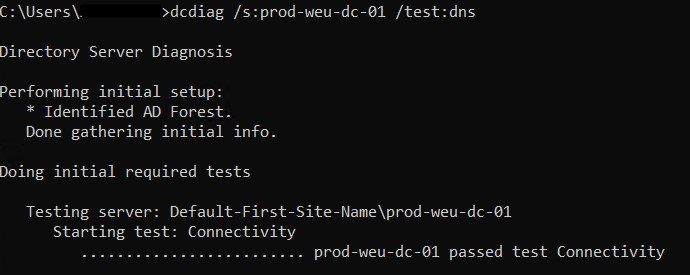
- Test your domain controller health with dcdiag /s:dcName

- Test DNS with dcdiag /s:dcName /test:dns
Deploy A Virtual Machine
- Navigate to https://portal.azure.com and sign-in with a user that has sufficient permissions.
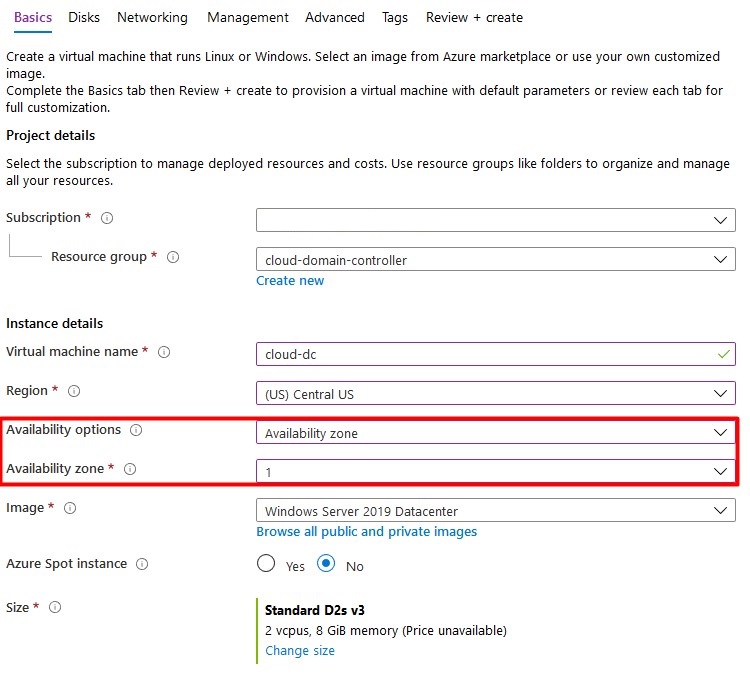
- Create a new Windows Server resource. I Recommend using Windows Server 2022 if possible.
- Enter al basic information and don’t forget about the availability options. Don’t use a spot VM to save costs – a domain controller should be always online.
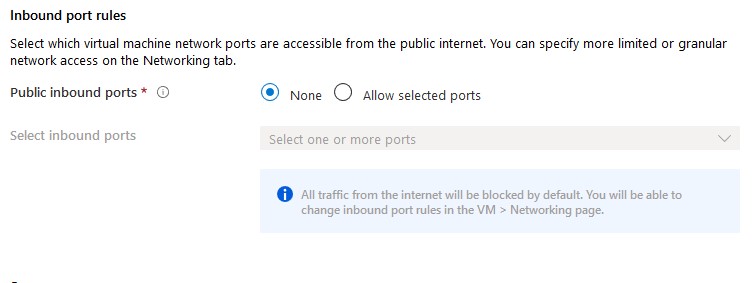
By default, allow selected ports is enabled to alow RDP (3389). For safety reasons, you should set this option to none. If required, a network security group can be attached to the subnet or vm afterwards to block certain ports. I Recommend attaching NSG’s to subnets.
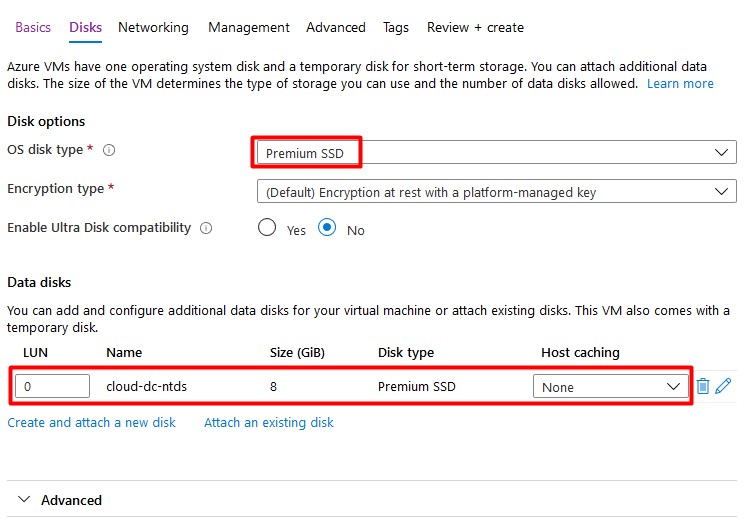
- Click Next to configure vm disks.
A Single VM without premium SSD’s has an SLA of 99.95%. A Single VM with premium SSD’s (all disks) has an SLA of 99.99%. I Recommend using premium disks for your domain controller.
Add a second (premium ssd) disk with host caching set to none. This disk will contain the database, logs and sysvol folders. A Disk with a size of 8GB is sufficient.
- Click Next to configure networking. Attach the VM to your existing vNet that’s connected with your on-premises domain. Don’t assign a public IP address to your virtual machine as recommended by Microsoft – use a VPN or Azure Bastion to connect to the machine. Again, I’ll apply NSG’s to my subnet if required.
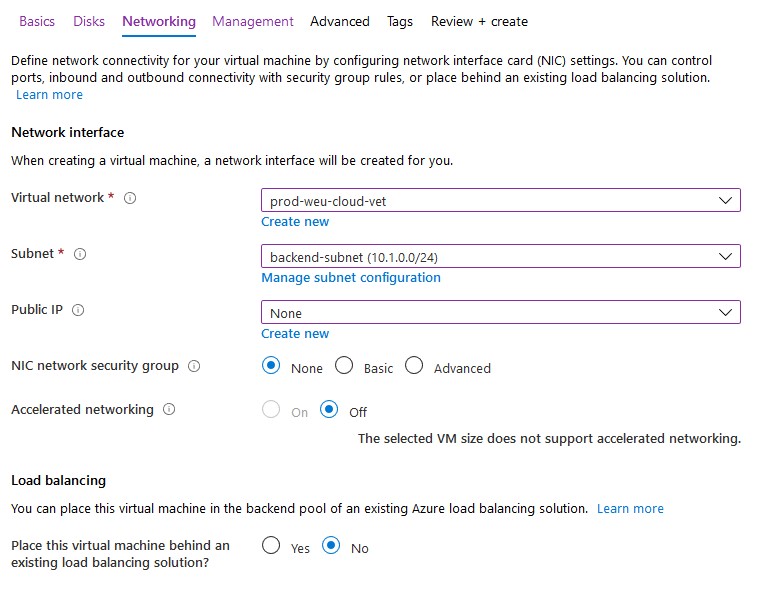
- Finish all steps to create the virtual machine. Don’t enable ‘Login with AAD credentials‘ or ‘Auto-shutdown’.
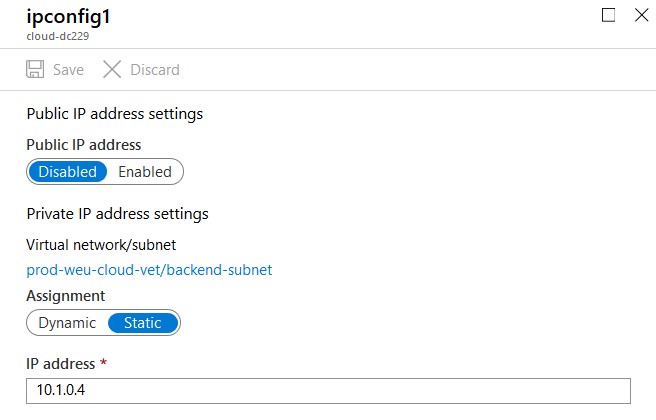
Configure IP Settings
Static IP Address
- Click on the network interface of your new virtual machine.
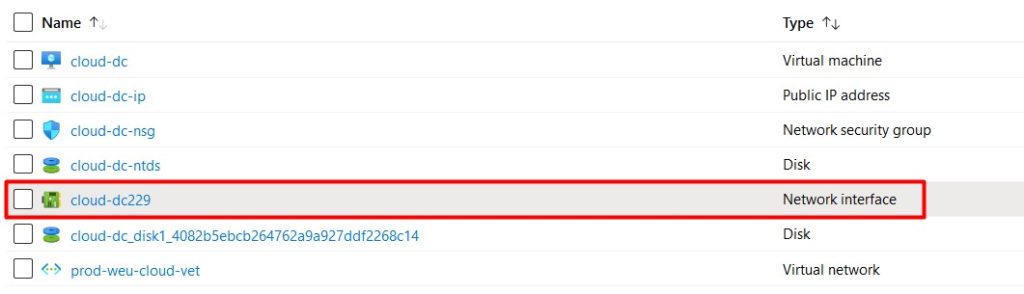
- Select IP configurations and click on the IP config to change the IP settings.
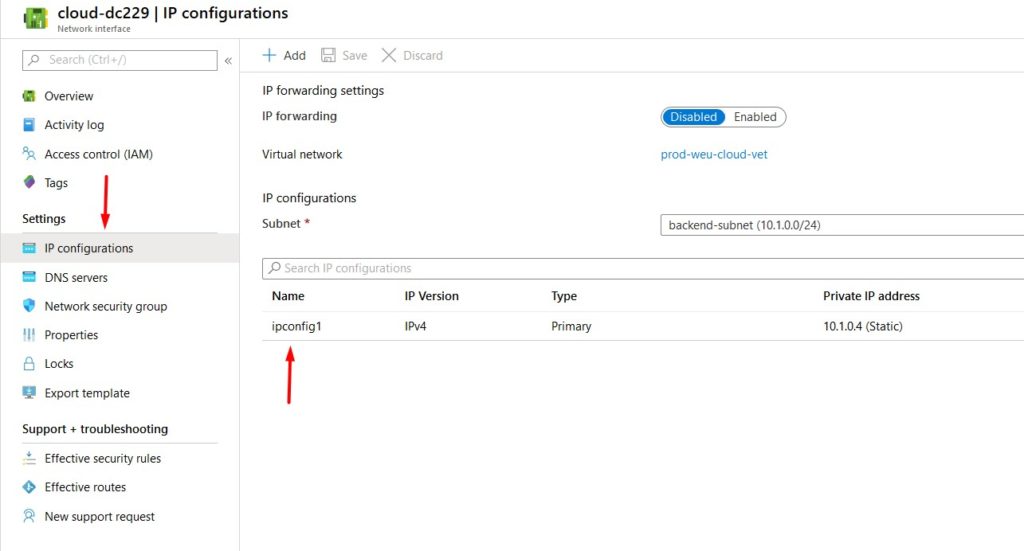
- Select Static and configure the IP address. Don’t forget to click save – a reboot may be required. You should never configure the static IP address on the VM itself as you do on-premises.
- Test if you can ping the VM from your on-premises domain controller and the other way around. If this isn’t working you can try the Network Watcher for troubleshooting.
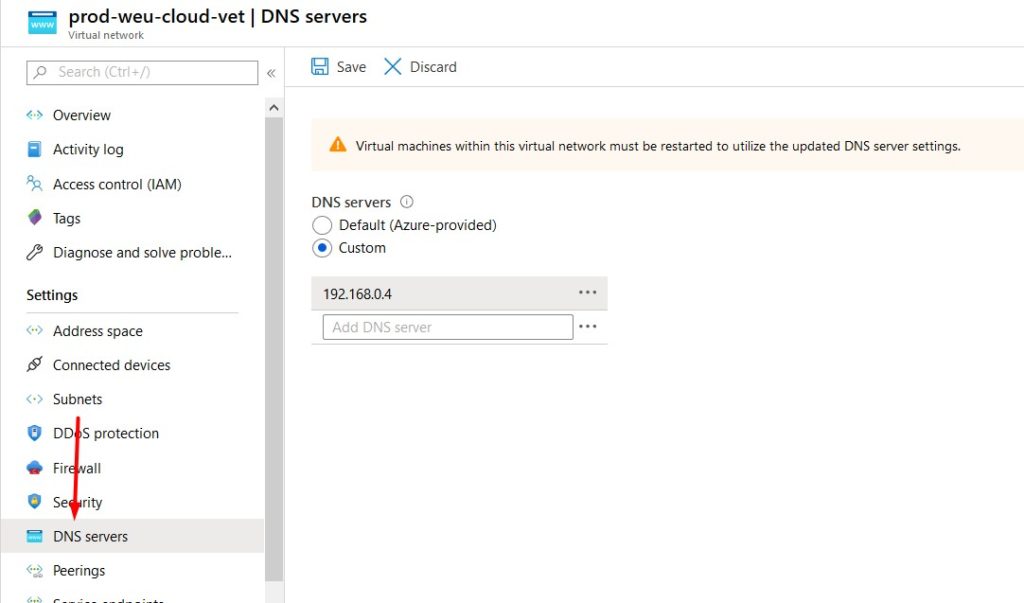
DNS Servers
DNS servers can be configured on the virtual network or on the virtual machine itself. If configured on the vNet, everything that’s connected to this network will inherit these settings (you probably want this).
- Click on your virtual network to edit it’s settings.
- Select DNS and confire a custom DNS server (your on-premises domain controller).
- Don’t forget to click save and reboot the virtual machine.
After adding AD DC roles to the new VM we’ll come back to this page to change the DNS settings once more.
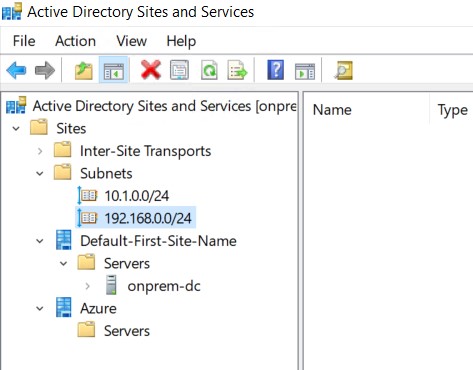
Active Directory Sites & Services
- Open Active Directory Sites & Services on your on-premises domain controller.
- Right click Sites and select New Site.
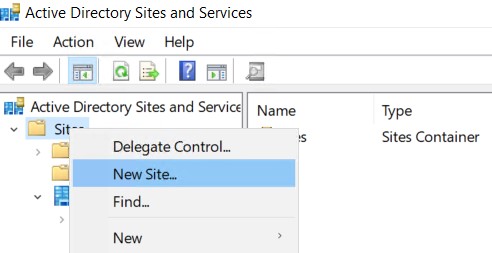
- Name your new site and link it to the DEFAULTIPSITELINK. Click OK to complete.

- Right click Subnets and select New Subnet.
- Enter to correct prefix (your azure subnet that contains your virtual machine) and link it to the new site.
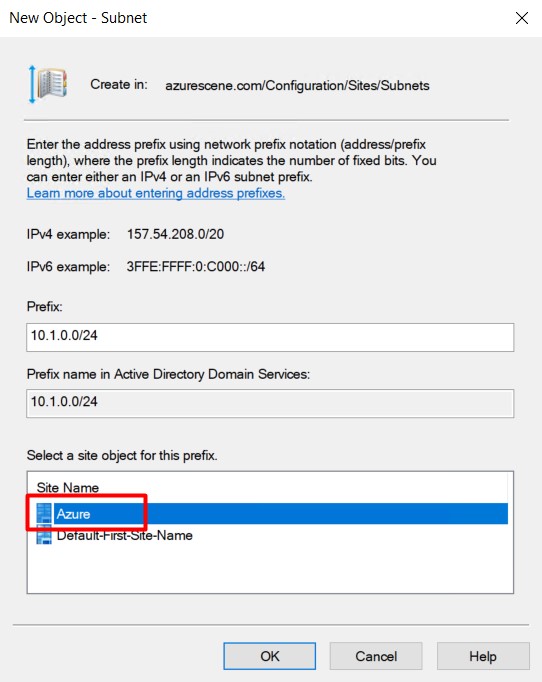
- Click OK to complete. You should end up with two (or more) subnets and two (or more) sites.
Install Active Directory Domain Services
- Start Add Roles and Features on the Azure VM.
- Add the Active Directory Domain Services role and all necessary features.
- Promote this server to a domain controller.

- Select Add a domain controller to an existing domain.
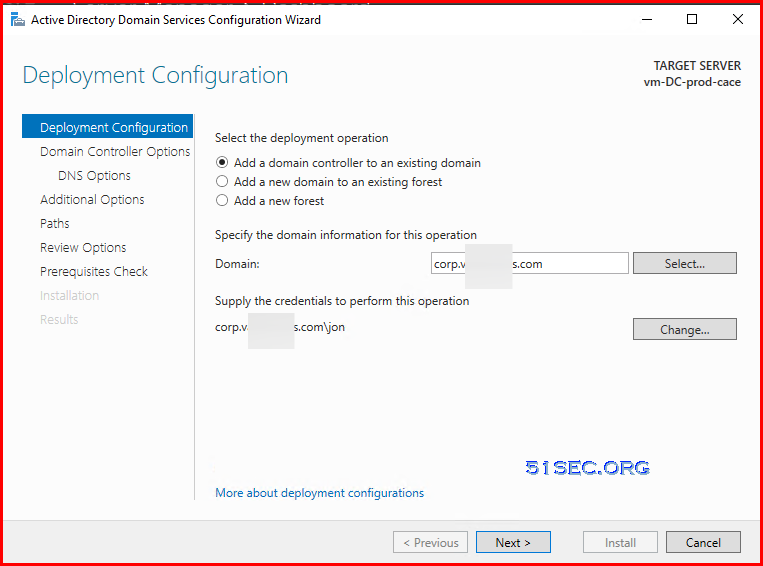
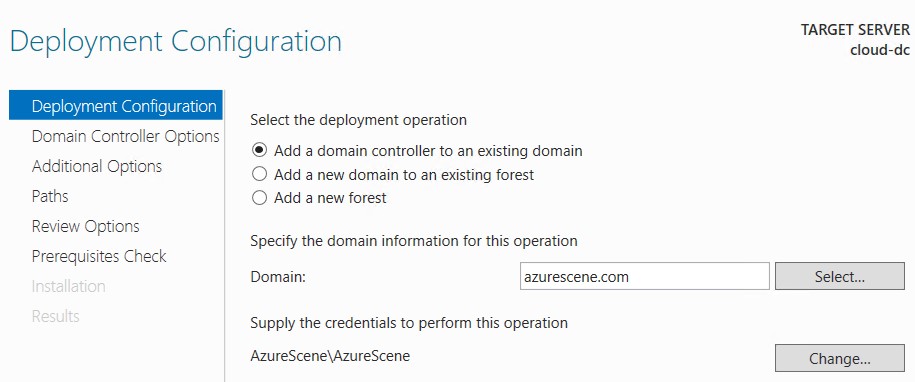
- Enter your domain name and click Select. Provide credentials with sufficient permissions. If you get an error that the wizard can’t find your domain, your DNS settings are probably incorrect.
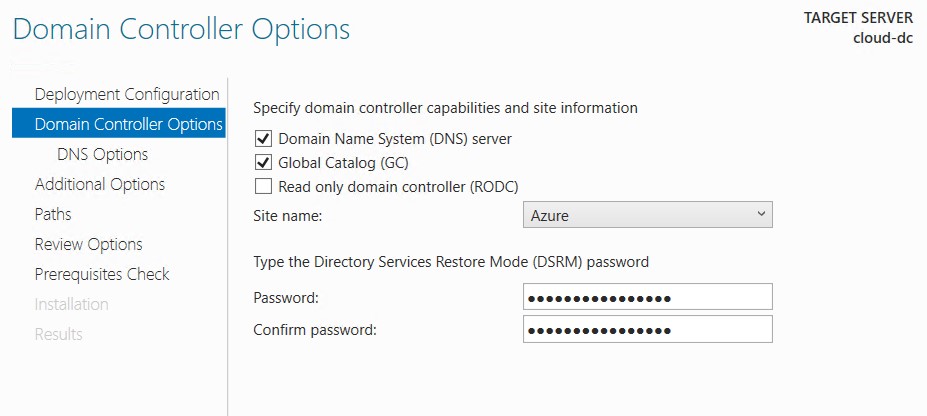
- Select the correct site name and enter a DSRM password.
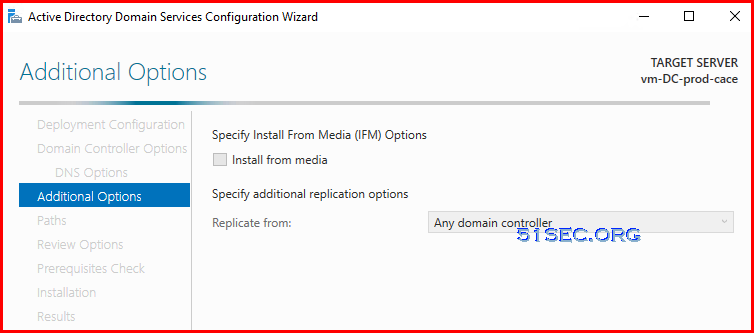
- Replicate from any domain controller.
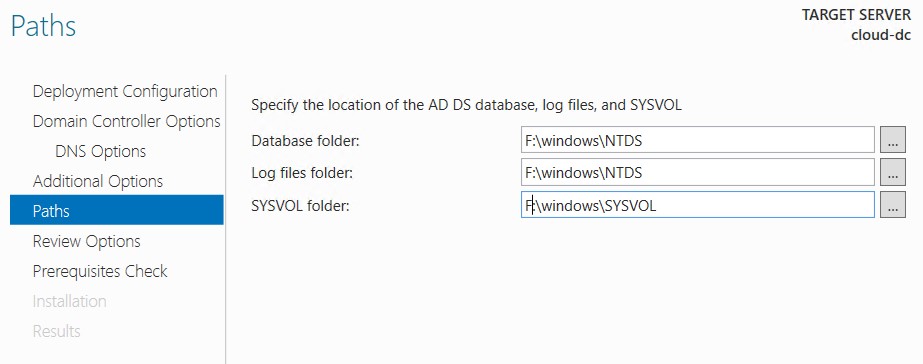
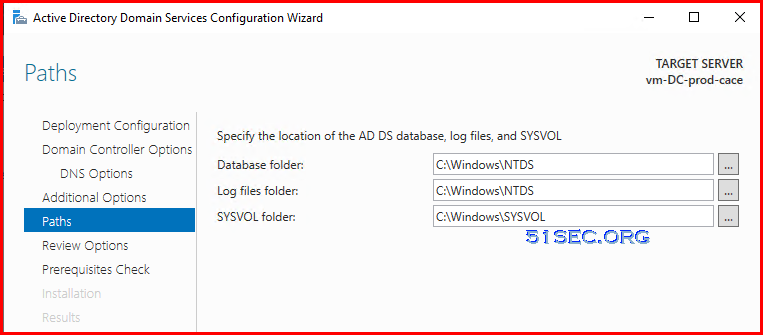
Change all paths to the 8GB partition (without caching).
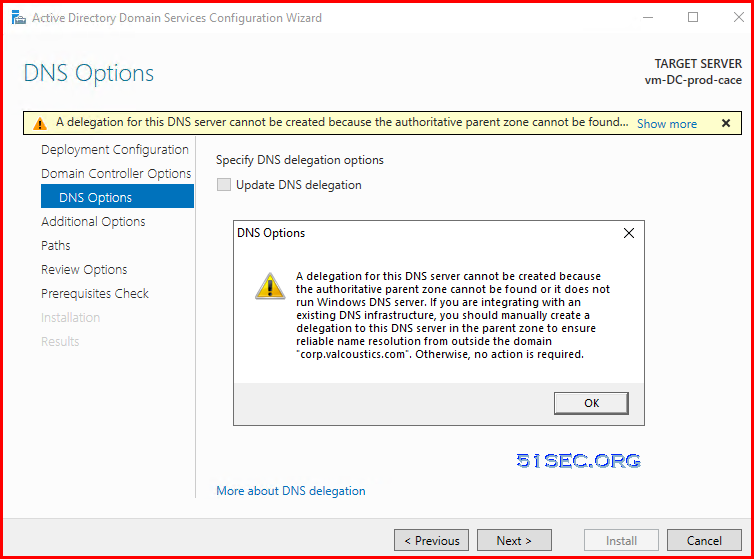
- Leave all other options default or configure as required.
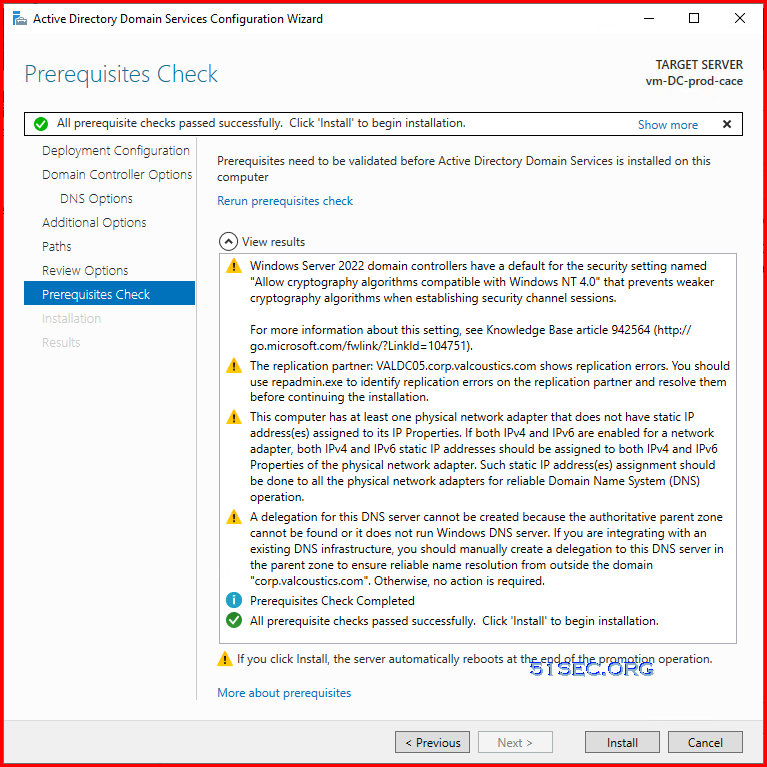
- There are some warning messages, but you can feel free to do installation.
- Reboot the virtual machine.
Validate DNS Settings
DC on Azure
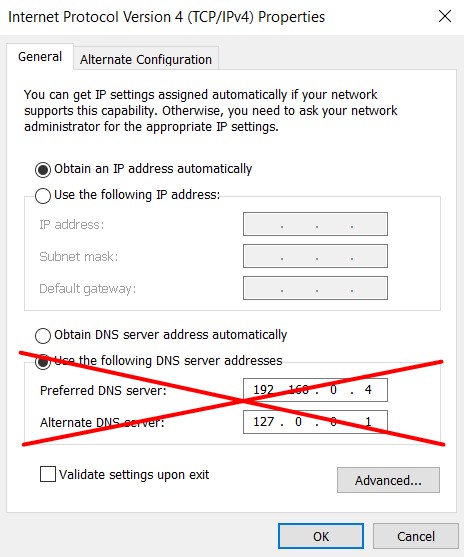
When the virtual machine is back online, it probably has static DNS servers configured – this happened because of the AD DC roles. Change this back to Obtain DNS server address automatically. Do this for both IPv4 and IPv6. you probably loose connection to the virtual machine.
DC on-premises
The preferred DNS server of your on-premises domain controller should be the domain controller on Azure. The alternate DNS server should point to itself. All other on-premises servers or clients should have the on-premises dc as preferred DNS server.

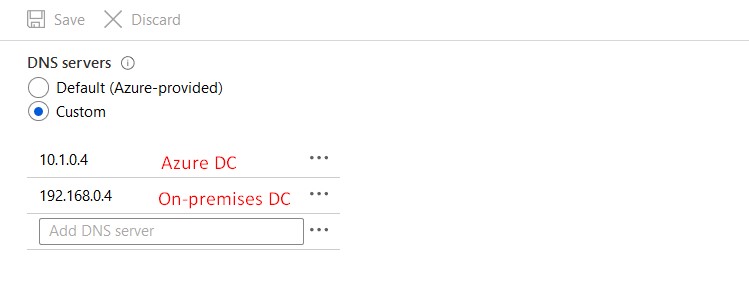
Virtual Network DNS Settings
The first DNS server should be the DC on Azure and the second DNS server should be the DC on-premises.
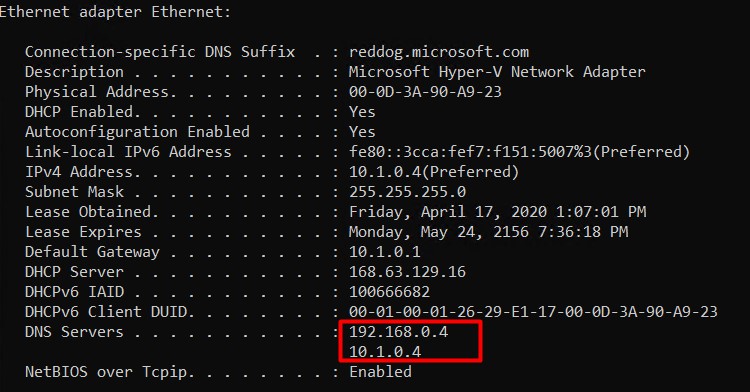
DNS Settings DC on Azure
The first DNS server should be the on-premises DC and the second DNS server should be the DC on Azure. Reboot your VM after changing this.

Validate this change on the VM itself by using ipconfig /all.


![[5 Mins Docker] Deploy FreshRSS Using Docker Run Command and Deploy To Fly.io](https://lh3.googleusercontent.com/blogger_img_proxy/AEn0k_tYprHwEnRQTZeE4NiB1crEOwUjo7G84qP_fpMdCNeB6IEpEO_rkegi8a5_M983NAugZrh2ZQ4FYXac4goIpOrC_92sCRx8z1Uie5UEMXngpg)


No comments:
Post a Comment