OpenWRT can be installed on physical machine, virtual machines, also docker environment. This post summarizes some steps how to get OpenWRT running into your docker environment.
Docker Image : sulinggg/openwrt:latest
https://hub.docker.com/r/sulinggg/openwrt
Topology
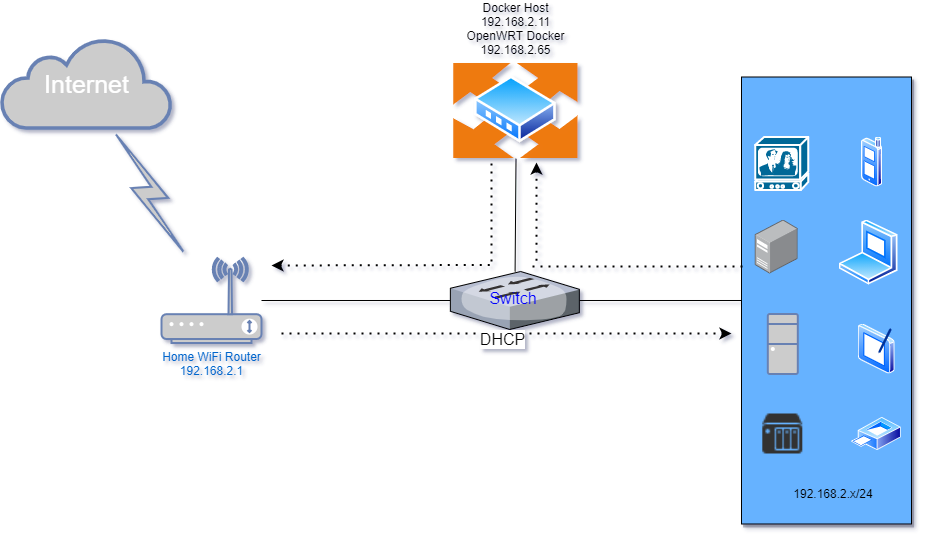
Create macvlan Network
Create macvlan configuration :
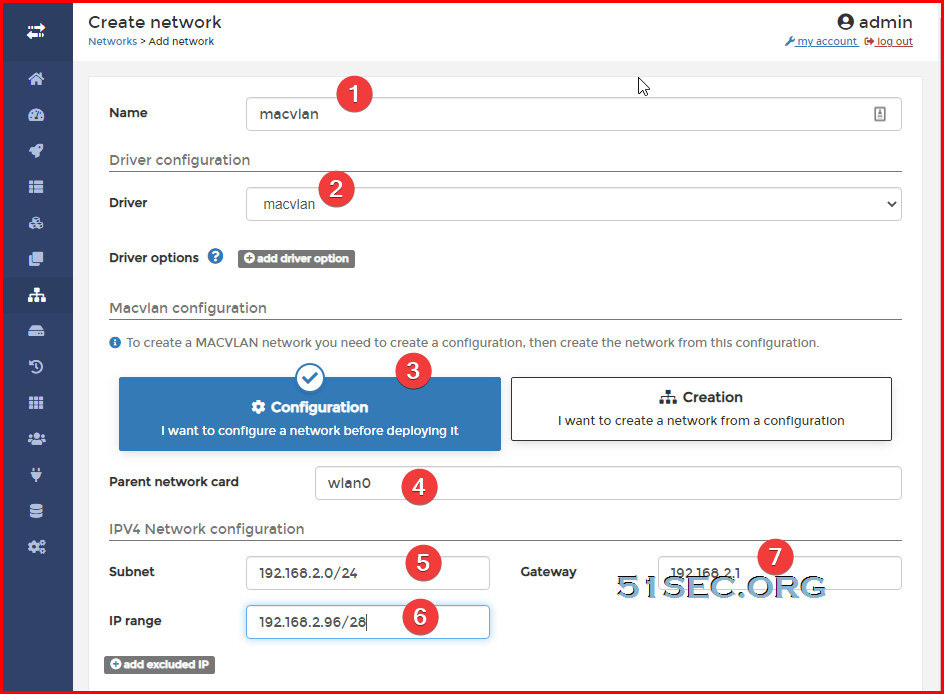
Create macvlan network:
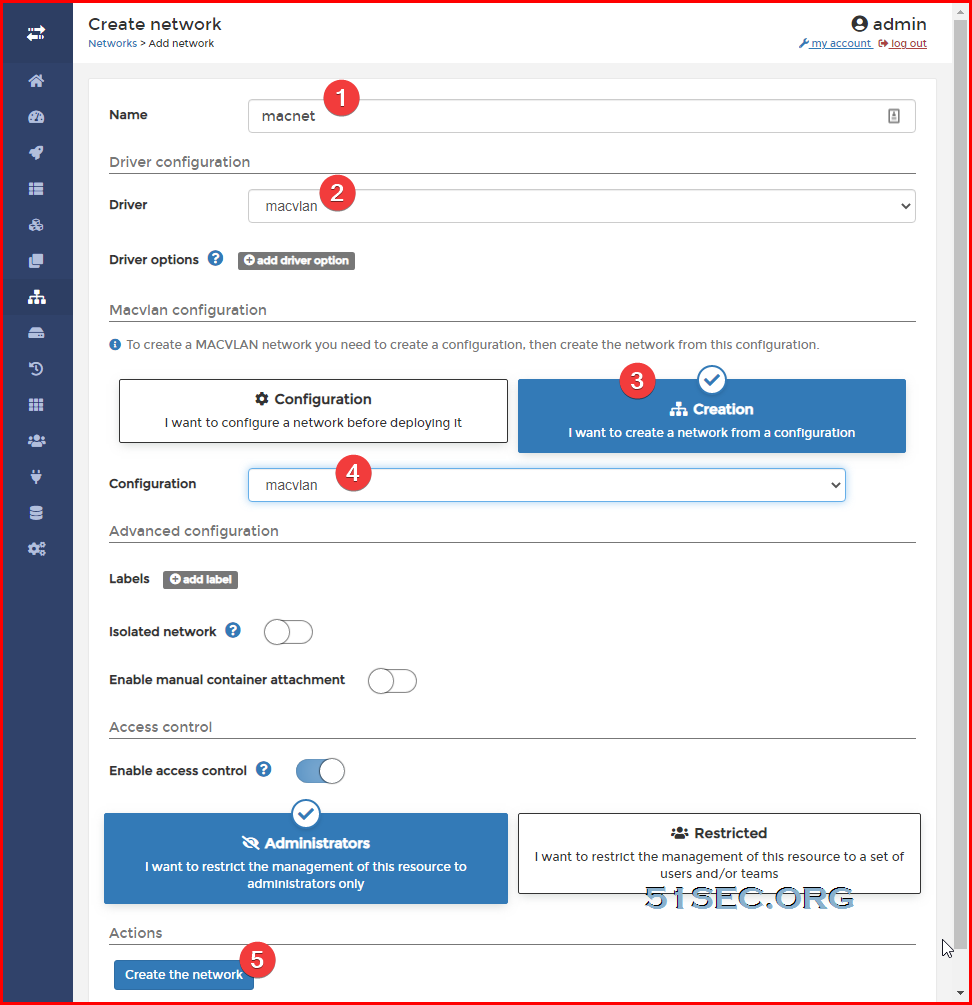
Command line:
docker network create -d macvlan --subnet=192.168.2.0/24 --gateway=192.168.2.1 -o parent=wlan0 macnet
Check the network created for Docker environment:
root@ubuntu:/etc# docker network ls
NETWORK ID          NAME                DRIVER              SCOPE
0f5799ba3db3        bridge              bridge              local
ad41a2fa3a8a        host                host                local
af9991f302ea        macnet              macvlan             local
7a6c6991d92b        macvlan             null                local
74f1375fb8c1        none                null                local
Pull Image and Create Container
From Portainer: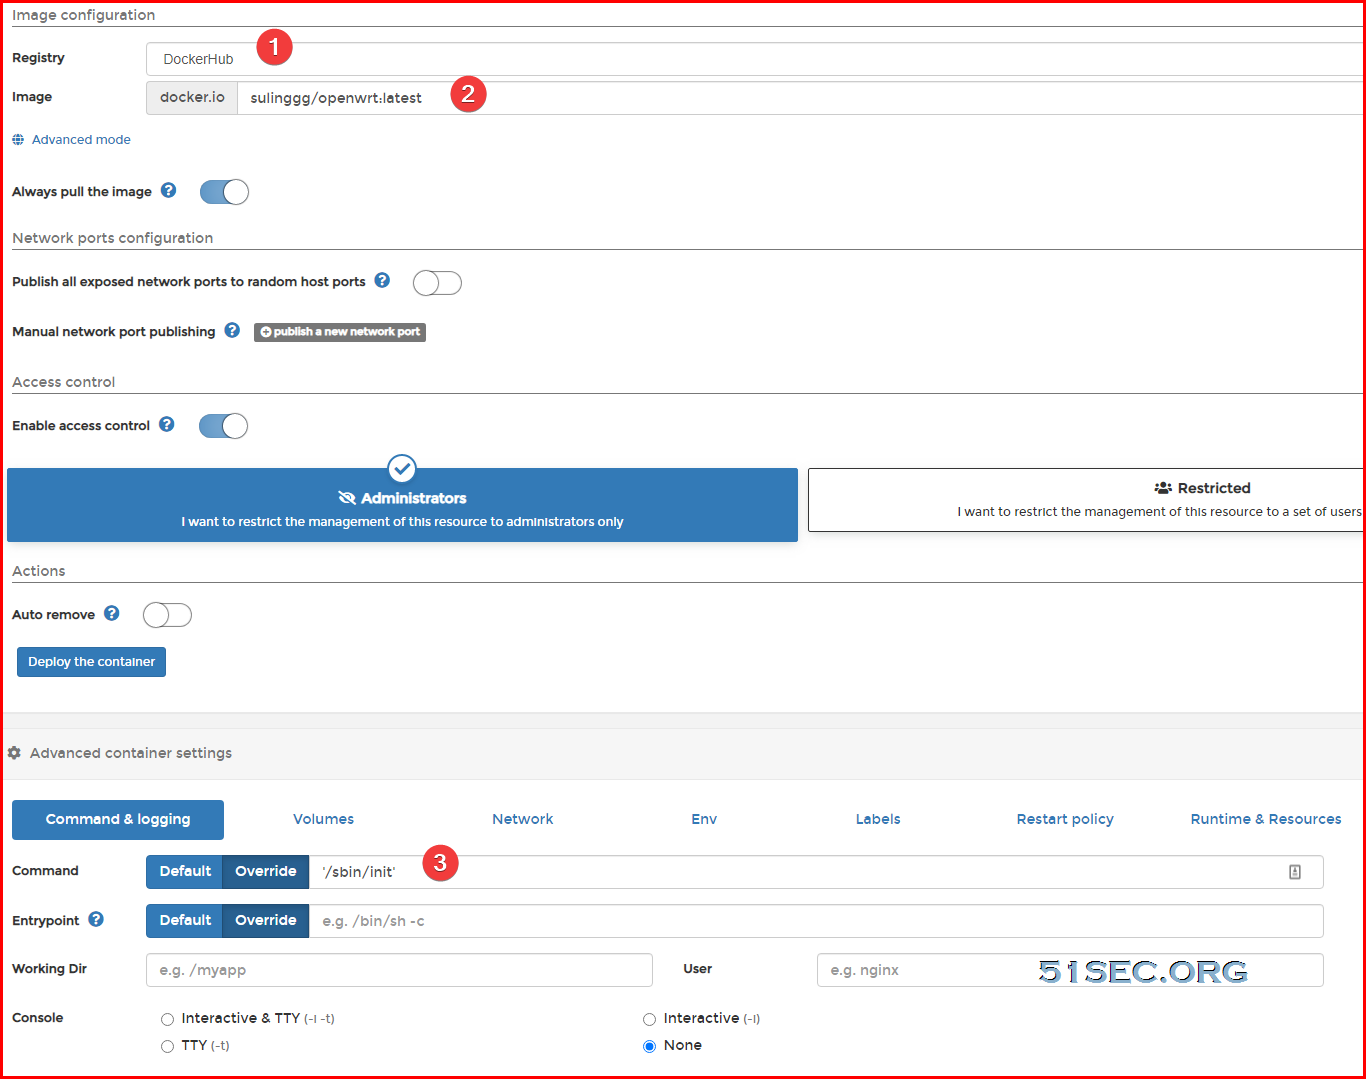
Other configuration :
network - choose macnet
Restart policy - Never (for testing)
Runtime & Resources - Privileged mode enable
If you had an already running container that you wanted to change the restart policy for, you could use the docker update command to change that:
docker update --restart unless-stopped container_id
After deployed the dock, check the ip address allocated from network macnet. You will need to manually set this ip into docker's /etc/config/network file.
docker pull sulinggg/openwrt:latest
docker run --restart always --name openwrt -d --network macnet --privileged sulinggg/openwrt:latest /sbin/init
After deployed the dock, check the ip address allocated from network macnet. You will need to manually set this ip into docker's /etc/config/network file.
bash-5.0# cd /etc/config
bash-5.0# nano network
bash-5.0# cat network

config interface 'loopback'
        option ifname 'lo'
        option proto 'static'
        option ipaddr '127.0.0.1'
        option netmask '255.0.0.0'

config globals 'globals'
        option ula_prefix 'fd7d:334c:6108::/48'

config interface 'lan'
        option type 'bridge'
        option ifname 'eth0'
        option proto 'static'
        option netmask '255.255.255.0'
        option ip6assign '60'
        option ipaddr '192.168.2.96'
        option gateway '192.168.2.1'
        option dns '8.8.8.8'

config interface 'vpn0'
        option ifname 'tun0'
        option proto 'none'

bash-5.0#
Now you should be able to access your OpenWRT web gui from http://192.168.2.96
Note:
Ubuntu has systemd-resolved listening on port 53 by default. In case you want to run your own DNS server, you can't because port 53 is already in use, so you'll get an error similar to this: "listen tcp 0.0.0.0:53: bind: address already in use".
You have systemd-resolved enabled as the local DNS server. You can disable it by setting
DNSStubListener=no in /etc/systemd/resolved.conf and then restart the systemd-resolved service. It will then start without binding to port 53, allowing dnsmasq to bind instead.[Resolve] DNS=1.1.1.1 #FallbackDNS= #Domains= #LLMNR=no #MulticastDNS=no #DNSSEC=no #DNSOverTLS=no #Cache=no DNSStubListener=no #ReadEtcHosts=yes
and reboot service:
$ sudo systemctl restart systemd-resolved


![[5 Mins Docker] Deploy FreshRSS Using Docker Run Command and Deploy To Fly.io](https://lh3.googleusercontent.com/blogger_img_proxy/AEn0k_ucwAOkDpO8N905LQ-nsqp9qwmepsiFVKEiIymJEp0HCgXpym4Yu038oa8f608hN4j33--2jLCCvo4xjSqApSy5gtzWvu-60vLXLAsPuiXWTw)


No comments:
Post a Comment