JunOS Space is in my environment and starting to replace NSM. I have played with in testing lab which recorded in my previous posts:
- Install JUNOS Space Virtual Appliance at ESXi 5.5
- Installation of Junos Space Security Director and Managing Juniper Firewall
- Juniper vSRX Firewall (Firefly Perimeter) installation in ESXi and Managed by JunOS Space
- Import Existing Juniper SRX Cluster into JunOS Space Security Director
Notes: Recently Space has been upgraded from 14.1 to 16.1 with my post: Juniper JunOS Space Upgrade Procedures from 14.1 to 16.1. The installation and configuration steps for 16.1 is similar as 14.1. This post is updated during configuring JunOS Space 16.1.
1. Review Space Settings
Space release 16.1R2.7 (381623)

Last login: Wed Mar 22 00:18:53 2017 from 10.9.20.14

Welcome to the Junos Space network settings utility.

Initializing, please wait


Junos Space Settings Menu

1> Change Password
2> Change Network Settings
3> Change Time Options
4> Retrieve Logs
5> Security
6> Expand VM Drive Size
7> (Debug) run shell

A> Apply changes
Q> Quit
R> Redraw Menu

Choice [1-7,AQR]: 2

Change Network Settings:
1> Set DNS Servers
2> Change IP Address of Space node
3> Change Static Routes

A> Apply changes
M> Return to Main Menu
R> Redraw Menu

Choice [1-3,AMR]: 2

Change IP Address of Space node:
1> Change VIP
2> Change Node Management Interface
3> Change Device Management Interface
4> Configure NAT

A> Apply changes
M> Return to Main Menu
R> Redraw Menu

Choice [1-4,AMR]:
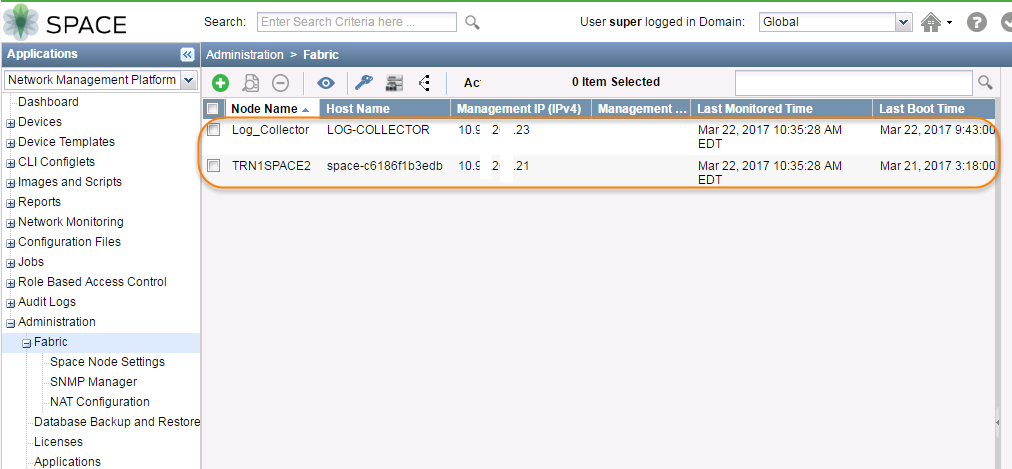
Your JunOS Space is ready and first thing probably is to review the settings, which you will find from Administration -> Fabric -> Space Node Settings
Fabric Virtual IP: 10.4.20.19
Management IP: 10.4.20.18
 |
| Fabric Node Settings |
Also review the applications you installed from Administration ->Applications. You will find out the application version from this page.
 |
| Applications |
2. Licenses
By default, after installed your JunOS Space, it will be on trial license for 60 days. You will need authorization code and serial number purchased from your partner to generate a new license code. Next a couple of screenshots show the license importing procedures.
 |
| Juniper Support Site to Generate License for JunOS Space |
 |
| Authorization Code and Serial Number you got from Partner |
 |
| Import License into Space |
| License Type Changed from Trial to Commercial |
3. Authentication Servers
It will be your Radius / Tacacs+ Server which you will use it to authenticate your user to log into JunOS Space. After entered the server info, you can test the connection.
 |
| Radius / Tacacs+ Authentication Server |
 |
| TekRADIUS |
4. SMTP Server
Put your Internal SMTP server in and do test connection.
 |
| SMTP Server |
5. Proxy Server
Add your proxy server in your environment. If authentication information needed, add them in as well.
 |
| Proxy Server |
6. DMI Schemas
You may find out all kinds of support device families and OS version. But the specific one in your environment may be not in this list.
 |
| DMI Schemas |
 |
| SVN Access configuration |
7. Create Domain
If you are managing multiple sites devices, you can create domain for each site and assign corresponding administrator to manage those sites. Next screenshot shows a new domain test1 created under the global domain.
 |
| Domain |
8. Logging (Log Collector)
By default, the loggine, event, alarm and reporting function will not be enabled until you added your Log Collector node into JunOS Space.8.1 Download Log Collector Image
Download Log Collector OVA Image for VM on ESX Deployment from Junos Space Security Director -Download Software site. Current version is 14.1R2. Size is about 1.3G.8.2 Importing into ESX server.
 |
| Log Collector VM Settings |
8.3. Configure Log Collector.
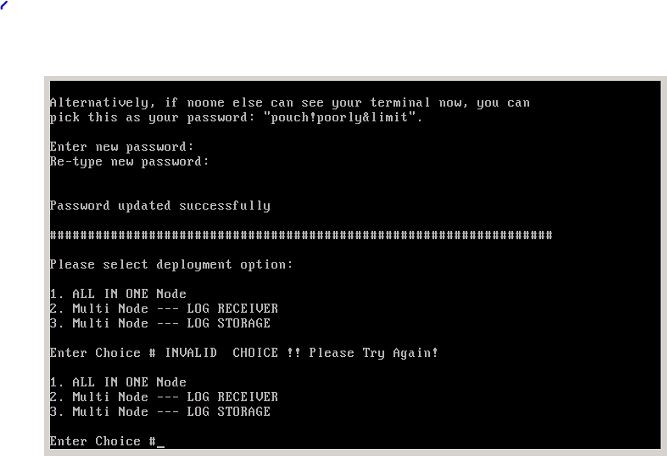 |
| Change Root Password and Select Deployment option |
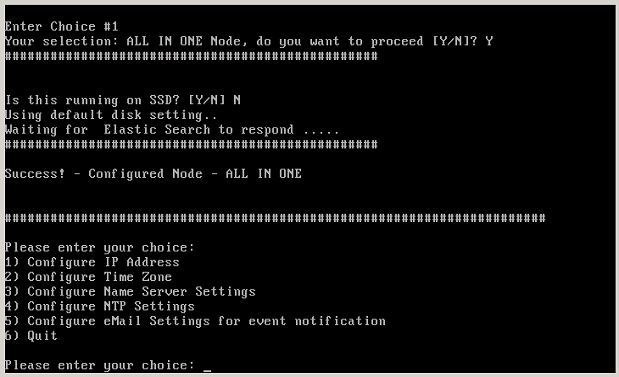 |
| All in One mode |
1) Configure IP Address
2) Configure Time Zone
3) Configure Name Server Settings
4) Configure NTP Settings
5) Quit
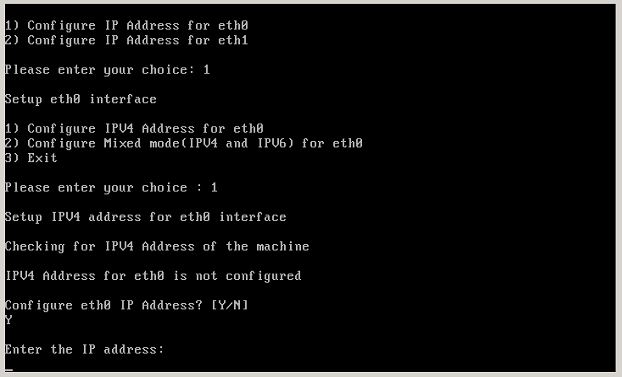 |
| IP Address Configuration |
8.4 Add Log Collector Node into Junos Space Fabric
Add a specialized node into JunOS Space Fabric:
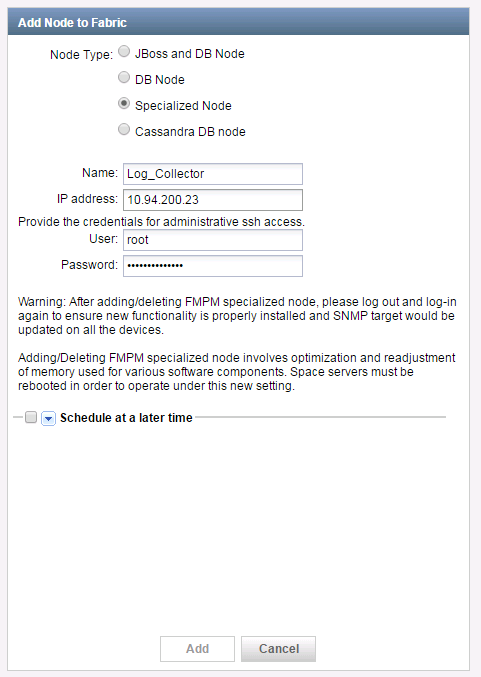 |
| add log collerctor node |
After a couple of minutes, new log collector should show in the node list.
8.5 Enable Logging on SRX Devices
Go to Security Director -> Devices -> Device Management , right click your device, choose Device Configuration -> Modify Configuration -> Security Logging |
| Security Logging for SRX Device |
After finished configuration, select Deploy button at the bottom of window to push following configuration to Juniper SRX firewall.
security {
log {
mode stream;
format sd-syslog;
source-address 10.9.20.26;
stream LogCollector {
host {
10.9.20.17;
}
}
}
After deployed this secure logging configuration to devices, your log collector should be able to get logs from your Juniper Devices.
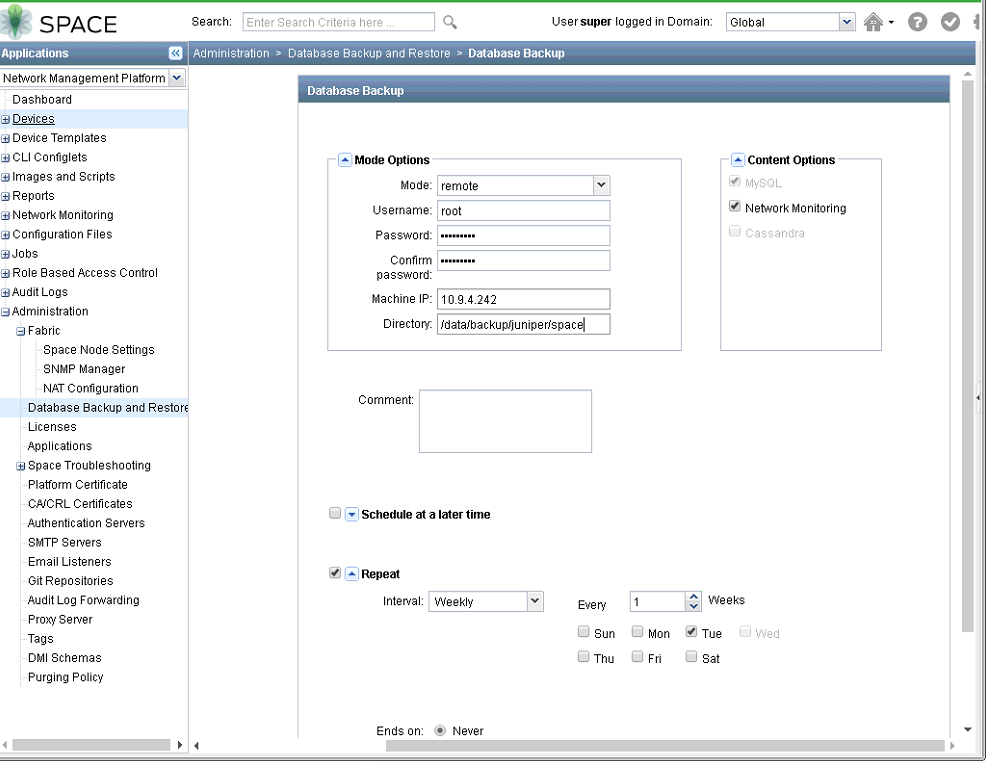
9. Space Database Backup and Restore
Reference:
- [Junos Space] Example - How to update the DMI schema
- [Junos Space] Example - How to perform offline DMI schema update using SVN client on Windows
- JunOS Space Security Director Logging Reporting Getting Started Guide


No comments:
Post a Comment