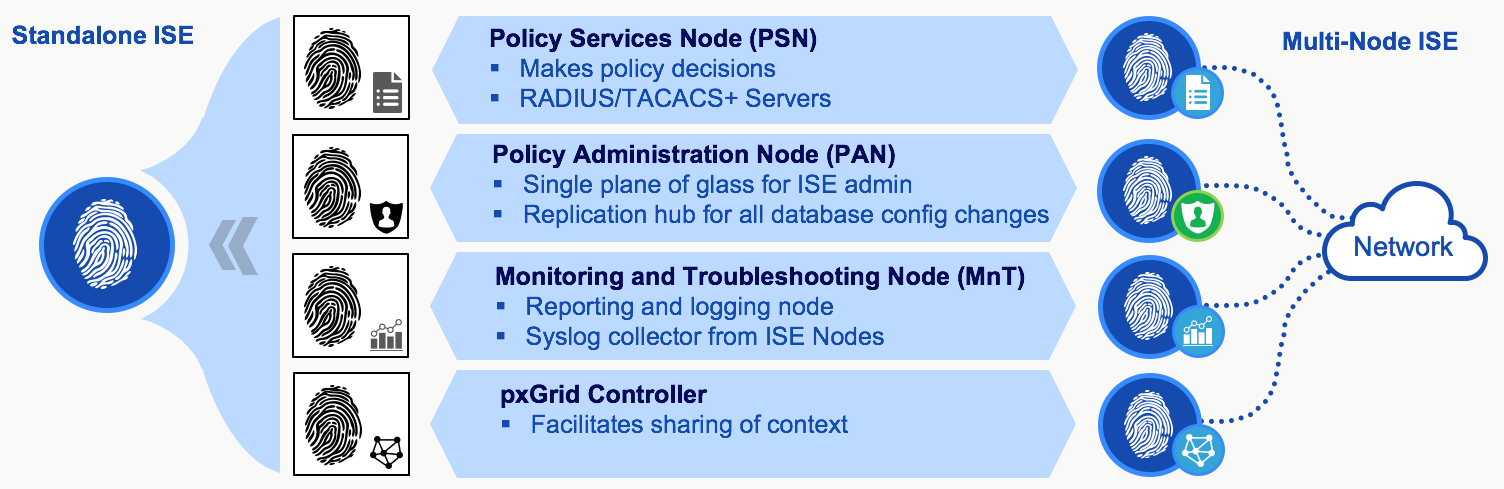
 ISE stands for Identity Services Engine and is Cisco’s flagship security product for network access control
Cisco Identity Services Engine (ISE) is a server based product, either a Cisco ISE appliance or Virtual Machine that enables the creation and enforcement of access polices for endpoint devices connected to a companies network.
How does Cisco ISE work?
Every time a user or device wants to connect to the network either wired or wireless, the device or user is validated to check if it’s permitted on the network. ISE can also posture devices and based on a profile allow or deny them access to the network
The ISE solution is made up of a deployment of nodes with three different ISE personas:
- Policy Administration Node (PAN)
- Monitoring Node (MnT)
- Policy Services Node (PSN)
- pxGrid
Depending on the size of your deployment all three personas can be run on the same device or spread across multiple devices for redundancy and scalability. Lets go through each persona and explain their function.
Deployment options
ISE has two different deployment options – Standalone and DistributedThe smallest distributed ISE deployment consists of two Cisco ISE nodes with one node functioning as the primary.

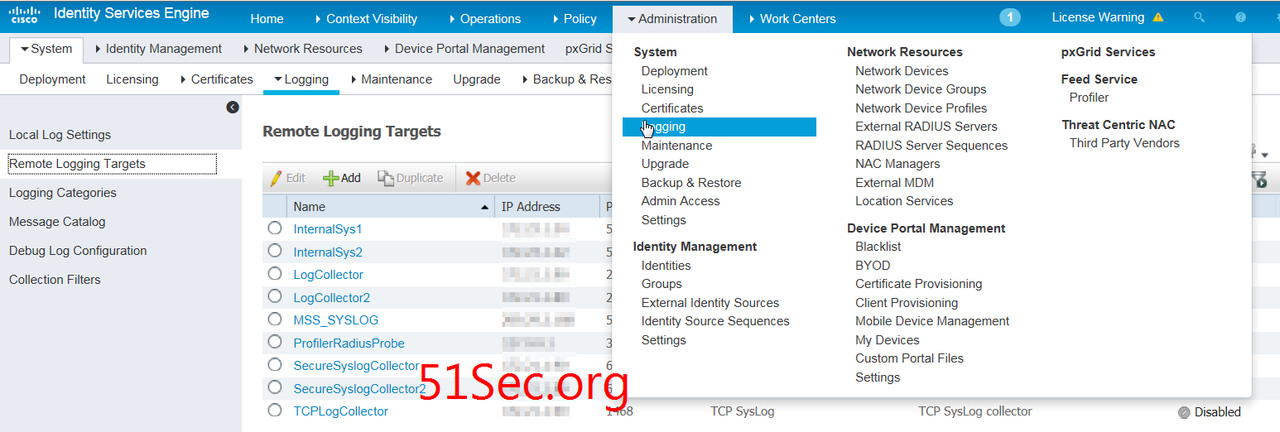
Logging Configuration for Remote Logging Target
Create remote logging target
1. In Cisco ISE,
choose Administration > System > Logging > Remote Logging
Targets.
2. Click Add.
3. Configure the
following fields:
Field
|
Value
|
Description
|
Name
|
LR
|
Target name, also used
below in the category
|
IP Address
|
1.1.1.2 (for example)
|
IP address of LR
Collector
|
Port
|
514 (for example)
|
|
Target Type
|
UDP
|
Best practice. NOT the
default.
|
Maximum Length
|
8192
|
Events will be broken
if you use a smaller value.
|
 4. You can tune all
other fields at your discretion.
4. You can tune all
other fields at your discretion.
5. Click Save.
6. Go to the Remote
Logging Targets page and verify the creation of the new target.
Add the new target to your desired logging categories
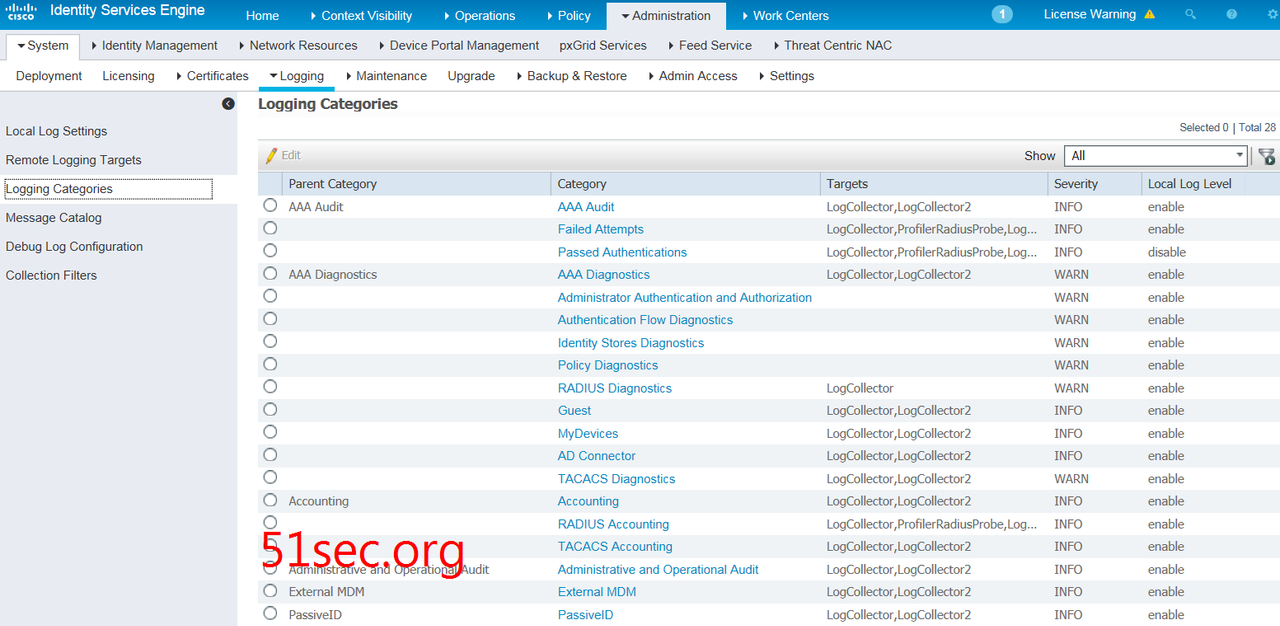 1. Choose Administration
> System > Logging > Logging Categories.
1. Choose Administration
> System > Logging > Logging Categories.
2. Click the radio
button next to the category that you want to edit, then click Edit.
3. Add the target that
you created in the previous section, LR, to the following categories. These are
default log collection settings and can be tuned at your discretion: AAA Audit
Failed Attempts Passed Authentications AAA Diagnostics Accounting RADIUS
Accounting Administrative and Operational Audit Posture and Client Provisioning
Audit Posture and Client Provisioning Diagnostics MDM Profiler System
Diagnostics System Statistics
4. Click Save.
5. Go to
the Logging Categories page and verify the configuration changes that
were made to the specific categories.
SNMP Configuration
conf
t
snmp-server
host 20.9.2.242 version 2c password1234
end
wr mem
Check Report for Authentication Failure
To check if there is any authentication failure, you can use Operation - Reports - Endpoint and Users to filter top N authentication by Failure Reason to find out those events.


No comments:
Post a Comment