Pre-requirements:
- UptimeRobot account
- Github Account
- Heroku Account
- Own Domain, Cloudflare account (Option)
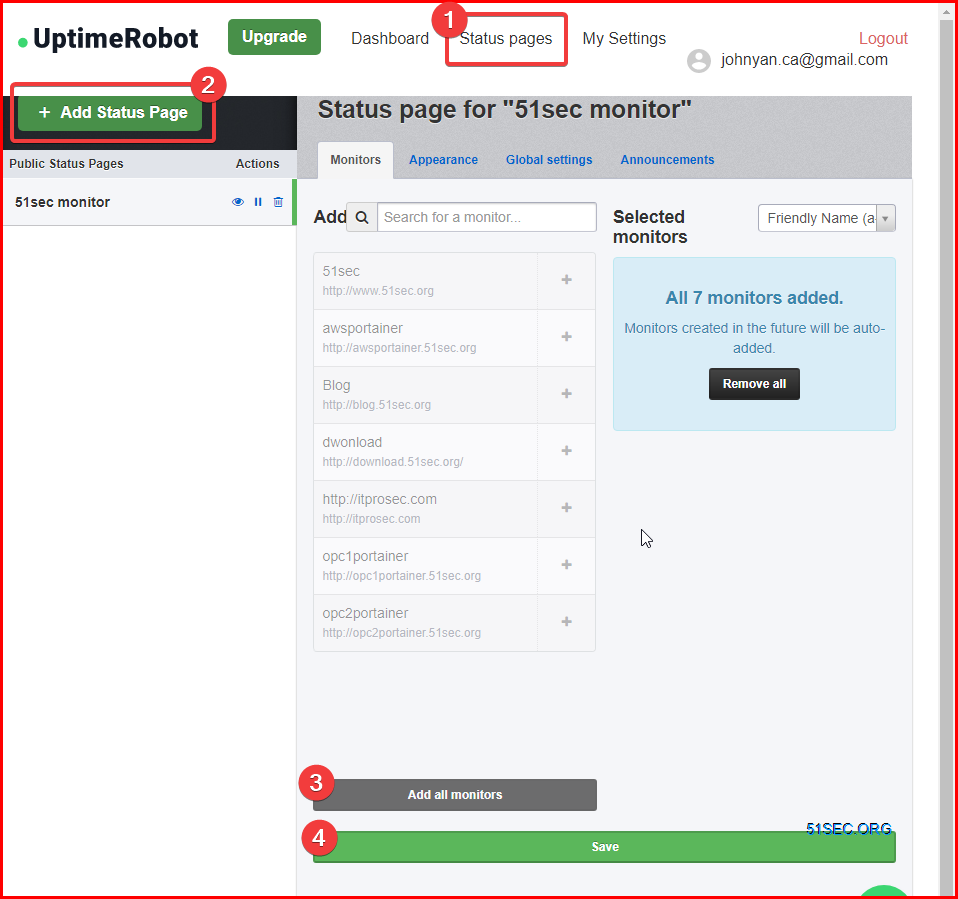
From UptimeRobot Website Status Page
This will be easiest way to do but you wont be able to get much customization other than using your own logo and domain. There are some themes for you to choose and also you can control which monitor can show on the page. For security, you can put an password on your page to make it not public.
GitHub Project - Uptime-status
I forked yb/uptim-status into my own repository (https://github.com/51sec/uptime-status) and made a Deploy to Heroku button to make this project can be quickly and easily deployed.
1 Deploy to Heroku button
Modify README.md file and add following code in:
[](https://dashboard.heroku.com/new?template=https://github.com/51sec/uptime-status/master)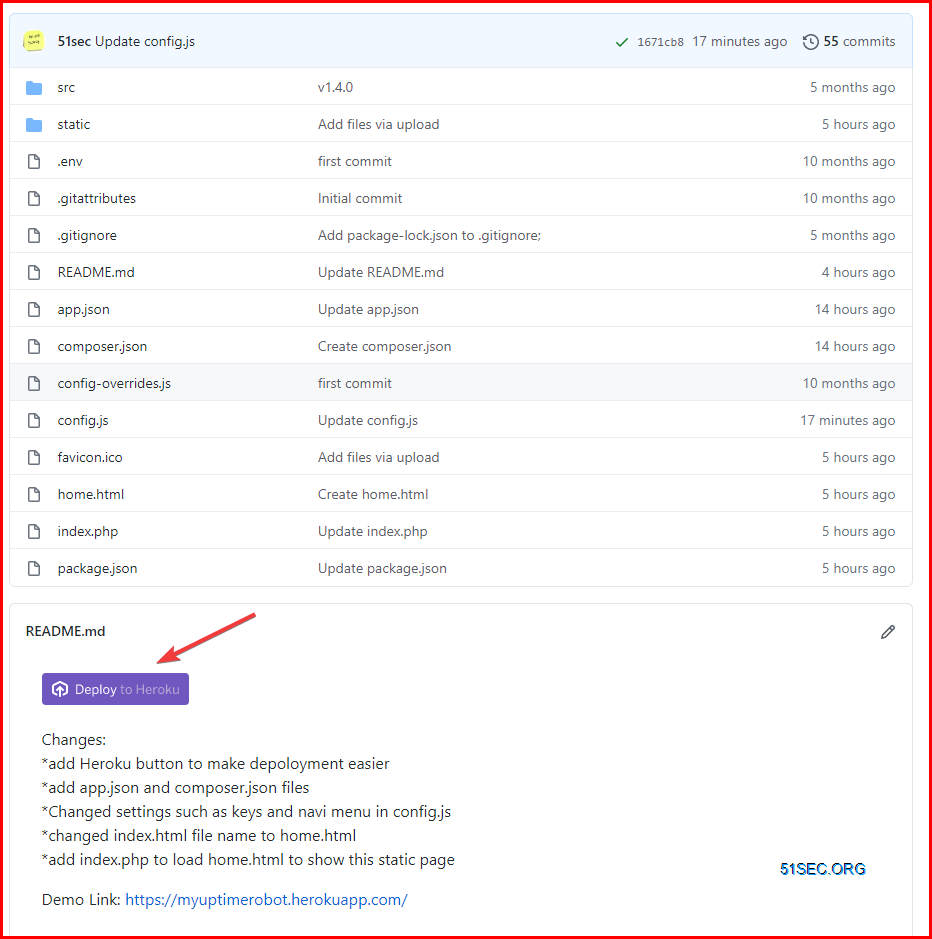
2 Create a index.php file to load home.html static web page
also rename index.html file to home.html. You can not use index.php to load index.html.
<?php include_once("home.html"); ?>3 Create a composer.json file including {}{}4 Create a app.json file:Change it accordingly based on your configuration.
{
    "name": "uptime-status",
    "description": "UptimeRobot StatusPage",
    "keywords": [
        "UptimeRobot",
        "StatusPage",
        "Uptime",
        "Robot"
    ],
    "website": "https://github.com/51sec/uptime-status",
    "repository": "https://github.com/51sec/uptime-status",
    "env": {
        "BUILDPACK_URL": "https://github.com/heroku/heroku-buildpack-php"
    }
}
5 Click button to deploy
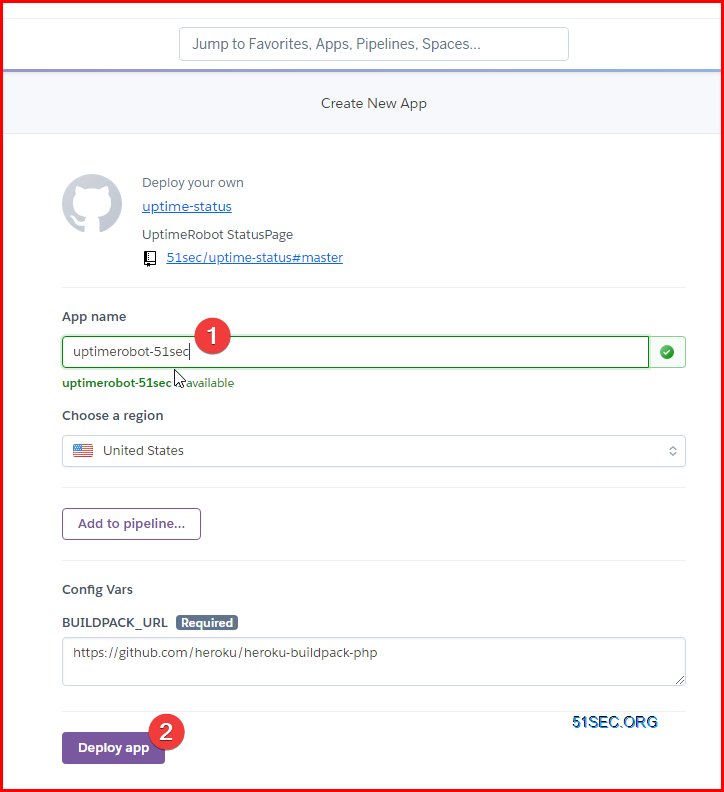
6 Get your Heroku App Link
Demo site:
Notes:Latest release from yb/uptime-status : https://github.com/yb/uptime-status/releases/latest
Source code files are under src folder. It will need to be compiled to be used to serve as static page. Cloudflare - Custome domain
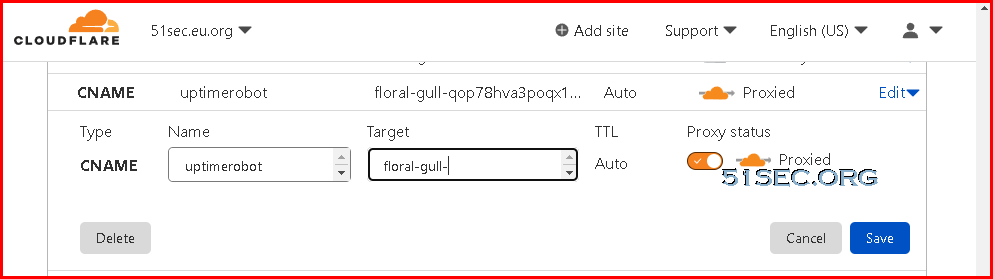
From Heroku project's settings page, add a custom domain for your project.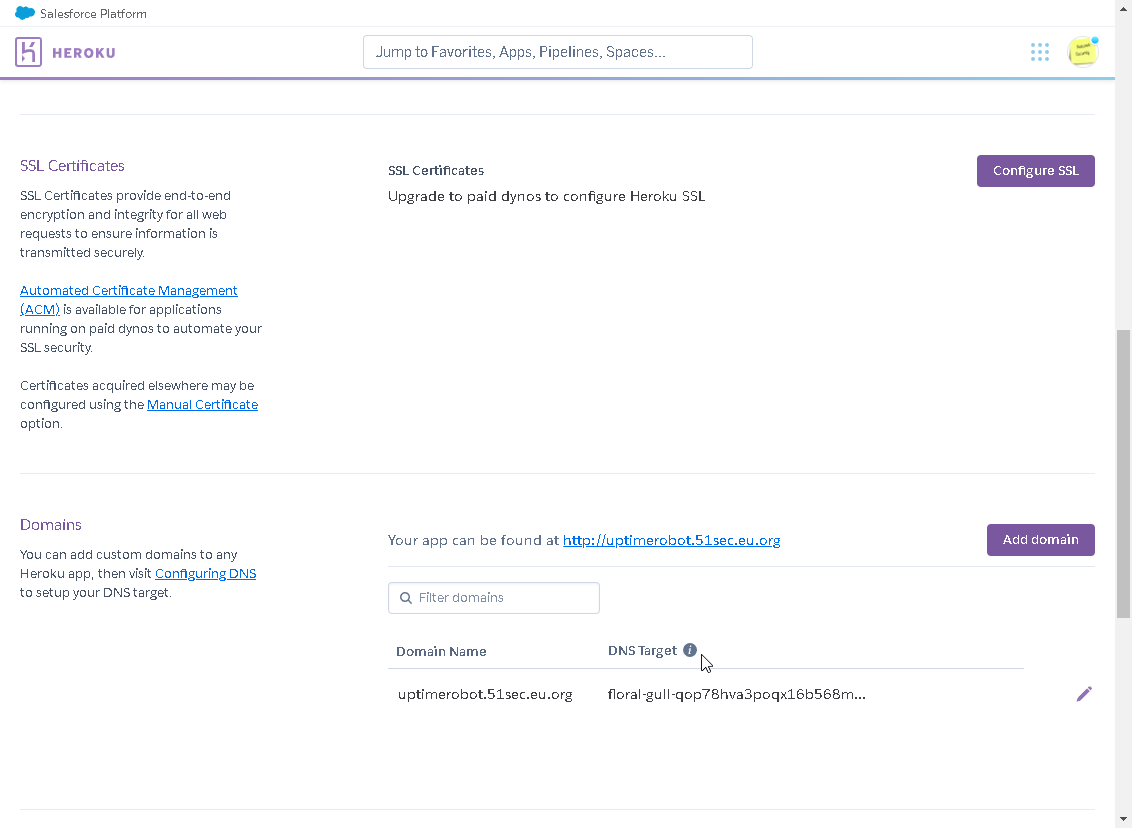
The target for this cname, you will get it from Heroku's settings page when you add custom domain in.


No comments:
Post a Comment