Related post:
Protocols for P2S VPN
Point-to-site VPN can use one of the following protocols:
OpenVPN® Protocol, an SSL/TLS based VPN protocol. A TLS VPN solution can penetrate firewalls, since most firewalls open TCP port 443 outbound, which TLS uses. OpenVPN can be used to connect from Android, iOS (versions 11.0 and above), Windows, Linux, and Mac devices (macOS versions 10.13 and above).
Secure Socket Tunneling Protocol (SSTP), a proprietary TLS-based VPN protocol. A TLS VPN solution can penetrate firewalls, since most firewalls open TCP port 443 outbound, which TLS uses. SSTP is only supported on Windows devices. Azure supports all versions of Windows that have SSTP and support TLS 1.2 (Windows 8.1 and later).
IKEv2 VPN, a standards-based IPsec VPN solution. IKEv2 VPN can be used to connect from Mac devices (macOS versions 10.11 and above). IKEv2 VPN is a standards-based IPsec VPN solution that uses outbound UDP ports 500 and 4500 and IP protocol no. 50. Firewalls don't always open these ports, so there's a possibility of IKEv2 VPN not being able to traverse proxies and firewalls.
Note
IKEv2 and OpenVPN for P2S are available for the Resource Manager deployment model only. They are not available for the classic deployment model.
Authentication Methods
- Certificate :
- Self-signed or from an enterprise certificate authority.
- Radius
- Integration with Windows Active Directory.
- Azure AD authentication
- Supports MFA
SKU
| VPN Gateway Generation | SKU | S2S/VNet-to-VNet Tunnels | P2S SSTP Connections | P2S IKEv2/OpenVPN Connections | Aggregate Throughput Benchmark | BGP | Zone-redundant |
|---|---|---|---|---|---|---|---|
| Generation1 | Basic | Max. 10 | Max. 128 | Not Supported | 100 Mbps | Not Supported | No |
| Generation1 | VpnGw1 | Max. 30 | Max. 128 | Max. 250 | 650 Mbps | Supported | No |
| Generation1 | VpnGw2 | Max. 30 | Max. 128 | Max. 500 | 1 Gbps | Supported | No |
| Generation1 | VpnGw3 | Max. 30 | Max. 128 | Max. 1000 | 1.25 Gbps | Supported | No |
| Generation1 | VpnGw1AZ | Max. 30 | Max. 128 | Max. 250 | 650 Mbps | Supported | Yes |
| Generation1 | VpnGw2AZ | Max. 30 | Max. 128 | Max. 500 | 1 Gbps | Supported | Yes |
| Generation1 | VpnGw3AZ | Max. 30 | Max. 128 | Max. 1000 | 1.25 Gbps | Supported | Yes |
| Generation2 | VpnGw2 | Max. 30 | Max. 128 | Max. 500 | 1.25 Gbps | Supported | No |
| Generation2 | VpnGw3 | Max. 30 | Max. 128 | Max. 1000 | 2.5 Gbps | Supported | No |
| Generation2 | VpnGw4 | Max. 100* | Max. 128 | Max. 5000 | 5 Gbps | Supported | No |
| Generation2 | VpnGw5 | Max. 100* | Max. 128 | Max. 10000 | 10 Gbps | Supported | No |
| Generation2 | VpnGw2AZ | Max. 30 | Max. 128 | Max. 500 | 1.25 Gbps | Supported | Yes |
| Generation2 | VpnGw3AZ | Max. 30 | Max. 128 | Max. 1000 | 2.5 Gbps | Supported | Yes |
| Generation2 | VpnGw4AZ | Max. 100* | Max. 128 | Max. 5000 | 5 Gbps | Supported | Yes |
| Generation2 | VpnGw5AZ | Max. 100* | Max. 128 | Max. 10000 | 10 Gbps | Supported | Yes |
High Level Steps to Create P2S VPN
- Create a Virtual Network
- Create Subnet(s) for Virtual Machines
- Create Virtual Machine(s) within the subnet in step 2 above
- Create a Gateway Subnet within the Virtual Network
- Create a Virtual Network Gateway after Step 3 above is complete
- Create the Root VPN certificate and client certificate using PowerShell commands in the next section
- Or create the Root VPN Certificate using makecert utility (Optional method)
- Download and install Windows 10 SDK (if you do not have the makecert utility).
- Go to Directory – C:\Program Files (x86)\Windows Kits\10\bin\x86 (This path might slightly differ)
- Run Command – makecert -sky exchange -r -n “CN=<NameofVpnRootCert>” -pe -a sha1 -len 2048 -ss My “<NameofVpnRootCert>”
- Open Certificate Manager (certmgr.msc), locate the certificate created above inside “Personal/Certificates” and export the certificate to BASE64 without the password
- Open the Base64 certificate in step above in Notepad++ or Notepad, and put everything in a single line by deleting the carriage return. This is done because the VPN Gateway created in Step 5 above needs the certificate in a single line.
- Create the Client Certificate
- Run Command – makecert.exe -n “CN=<NameofVpnClientCert>” -pe -sky exchange -m 96 -ss My -in “<NameofVpnRootCert>” -is my -a sha1
- Open Certificate Manager (certmgr.msc), locate the client certificate created above inside “Personal/Certificates” and export the certificate as PFX with the password. This certificate is to be distributed to all the clients, who will be connecting to Azure VNets
- Configure Root Certificate on Gateway created in Step 5 above
- Download VPN Software after the certificate has been validated by Azure and highlights the download button
The VPN software downloaded after Step 8 above can be distributed along with the client certificate (PFX) to all clients who wish to connect to Azure VMs.
Create Point-to-Site VPN
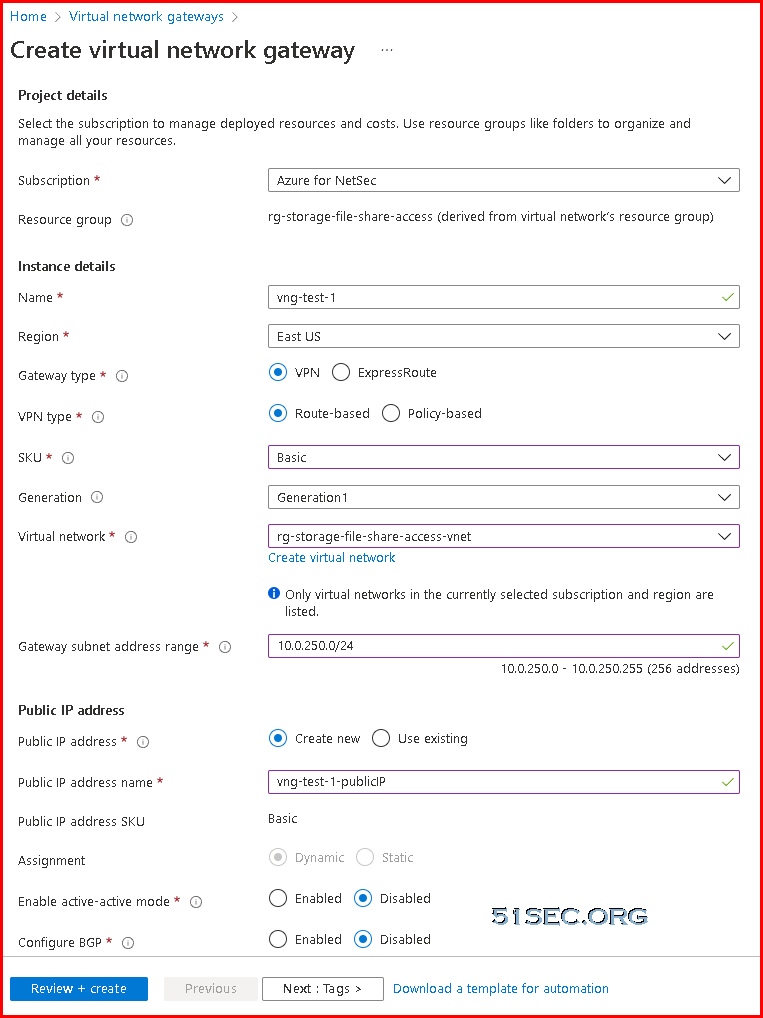
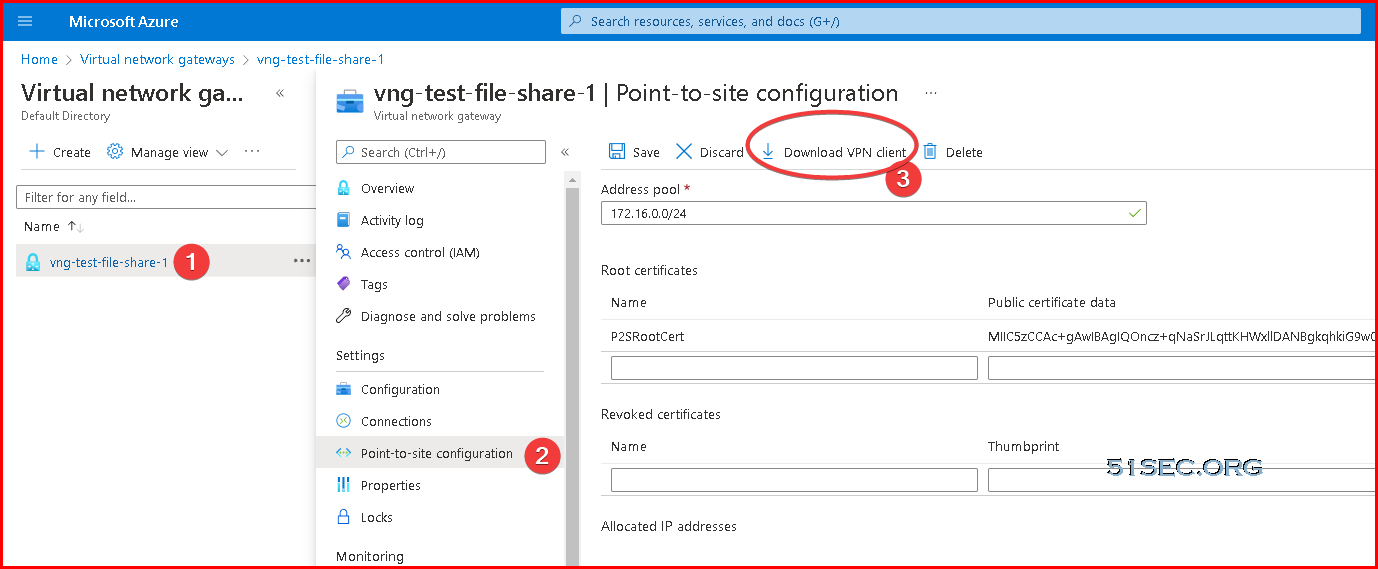
1. Create Virtual network gateway


2. Create a Point-to-Site Configuration

Generate Root Cert and Client Cert
PowerShell Commands:
- Generate root Cert and Client cert in a same PowerShell Session:
#Create the root cert
$cert = New-SelfSignedCertificate -Type Custom -KeySpec Signature `
-Subject "CN=P2SRootCert" -KeyExportPolicy Exportable `
-HashAlgorithm sha256 -KeyLength 2048 `
-CertStoreLocation "Cert:\CurrentUser\My"  `
-KeyUsageProperty Sign -KeyUsage CertSign

# Create Client Cert
New-SelfSignedCertificate -Type Custom -DnsName P2SChildCert -KeySpec Signature `
-Subject "CN=P2SClientCert1" -KeyExportPolicy Exportable `
-HashAlgorithm sha256 -KeyLength 2048 `
-CertStoreLocation "Cert:\CurrentUser\My" `
-Signer $cert -TextExtension @("2.5.29.37={text}1.3.6.1.5.5.7.3.2") - Generate client certificate in a separate PowerShell Session.
If you are creating additional client certificates, or are not using the same PowerShell session that you used to create your self-signed root certificate, use the following steps:
Identify the self-signed root certificate that is installed on the computer. This cmdlet returns a list of certificates that are installed on your computer.
PowerShellGet-ChildItem -Path "Cert:\CurrentUser\My"Locate the subject name from the returned list, then copy the thumbprint that is located next to it to a text file. In the following example, there are two certificates. The CN name is the name of the self-signed root certificate from which you want to generate a child certificate. In this case, 'P2SRootCert'.
Thumbprint                                Subject
----------                                -------
AED812AD883826FF76B4D1D5A77B3C08EFA79F3F  CN=P2SChildCert4
7181AA8C1B4D34EEDB2F3D3BEC5839F3FE52D655  CN=P2SRootCert
Declare a variable for the root certificate using the thumbprint from the previous step. Replace THUMBPRINT with the thumbprint of the root certificate from which you want to generate a child certificate.
PowerShell$cert = Get-ChildItem -Path "Cert:\CurrentUser\My\<THUMBPRINT>"For example, using the thumbprint for P2SRootCert in the previous step, the variable looks like this:
PowerShell$cert = Get-ChildItem -Path "Cert:\CurrentUser\My\7181AA8C1B4D34EEDB2F3D3BEC5839F3FE52D655"Modify and run the example to generate a client certificate. If you run the following example without modifying it, the result is a client certificate named 'P2SChildCert'. If you want to name the child certificate something else, modify the CN value. Do not change the TextExtension when running this example. The client certificate that you generate is automatically installed in 'Certificates - Current User\Personal\Certificates' on your computer.
PowerShellNew-SelfSignedCertificate -Type Custom -DnsName P2SChildCert -KeySpec Signature ` -Subject "CN=P2SChildCert" -KeyExportPolicy Exportable ` -HashAlgorithm sha256 -KeyLength 2048 ` -CertStoreLocation "Cert:\CurrentUser\My" ` -Signer $cert -TextExtension @("2.5.29.37={text}1.3.6.1.5.5.7.3.2")
Create Self-Signed Certificate for More Than One Year
PowerShell Commands:
- Generate root Cert and Client cert in a same PowerShell Session:
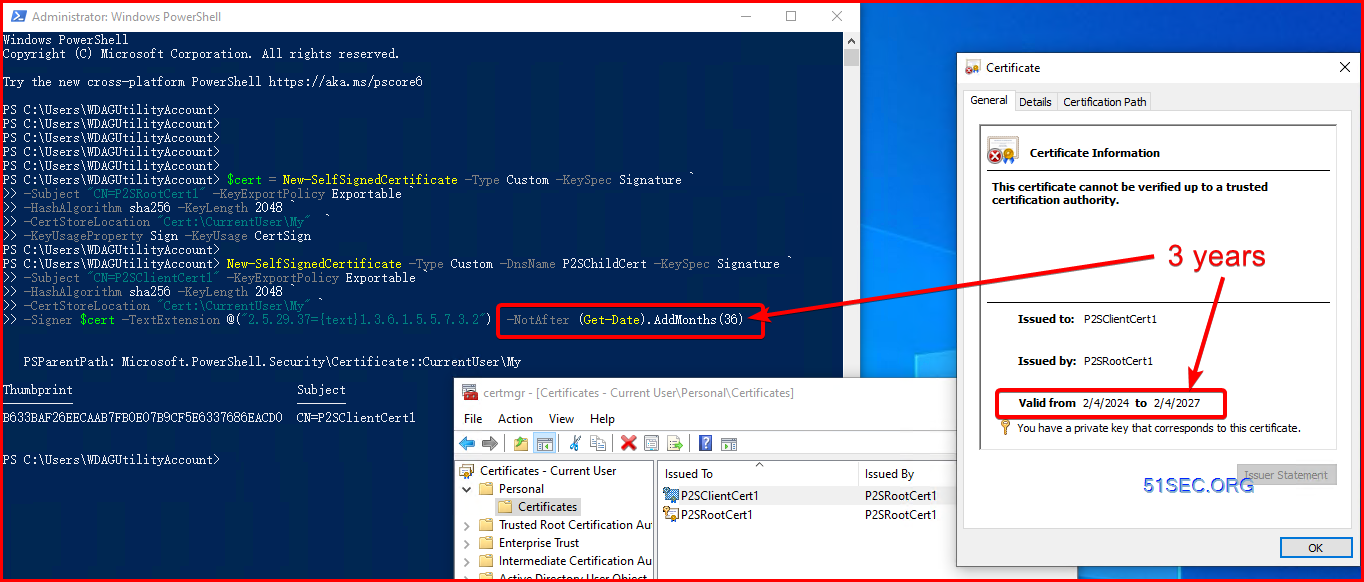
#Create the root cert (by default it is one year)
$cert = New-SelfSignedCertificate -Type Custom -KeySpec Signature `
-Subject "CN=P2SRootCert1" -KeyExportPolicy Exportable `
-HashAlgorithm sha256 -KeyLength 2048 `
-CertStoreLocation "Cert:\CurrentUser\My"  `
-KeyUsageProperty Sign -KeyUsage CertSign

# Create Client Cert (for three years)
New-SelfSignedCertificate -Type Custom -DnsName P2SChildCert -KeySpec Signature `
-Subject "CN=P2SClientCert1" -KeyExportPolicy Exportable `
-HashAlgorithm sha256 -KeyLength 2048 `
-CertStoreLocation "Cert:\CurrentUser\My" `
-Signer $cert -TextExtension @("2.5.29.37={text}1.3.6.1.5.5.7.3.2") -NotAfter (Get-Date).AddMonths(36)
For 10 years root cert:
$cert = New-SelfSignedCertificate -Type Custom -KeySpec Signature `
-Subject "CN=P2SRootCert-NETSEC-10Y" -KeyExportPolicy Exportable `
-HashAlgorithm sha256 -KeyLength 2048 `
-CertStoreLocation "Cert:\CurrentUser\My"  `
-KeyUsageProperty Sign -KeyUsage CertSign  `
-NotAfter (Get-Date).AddMonths(120)
Add following parameter into the original PowerShell Command (e.g. 3 years, 36 months):
- -NotAfter (Get-Date).AddMonths(36)
Check generated certs:
- certmgr.msc (current user)
Export Root Cert Using certmgr.msc
Following steps are export Root Cert:
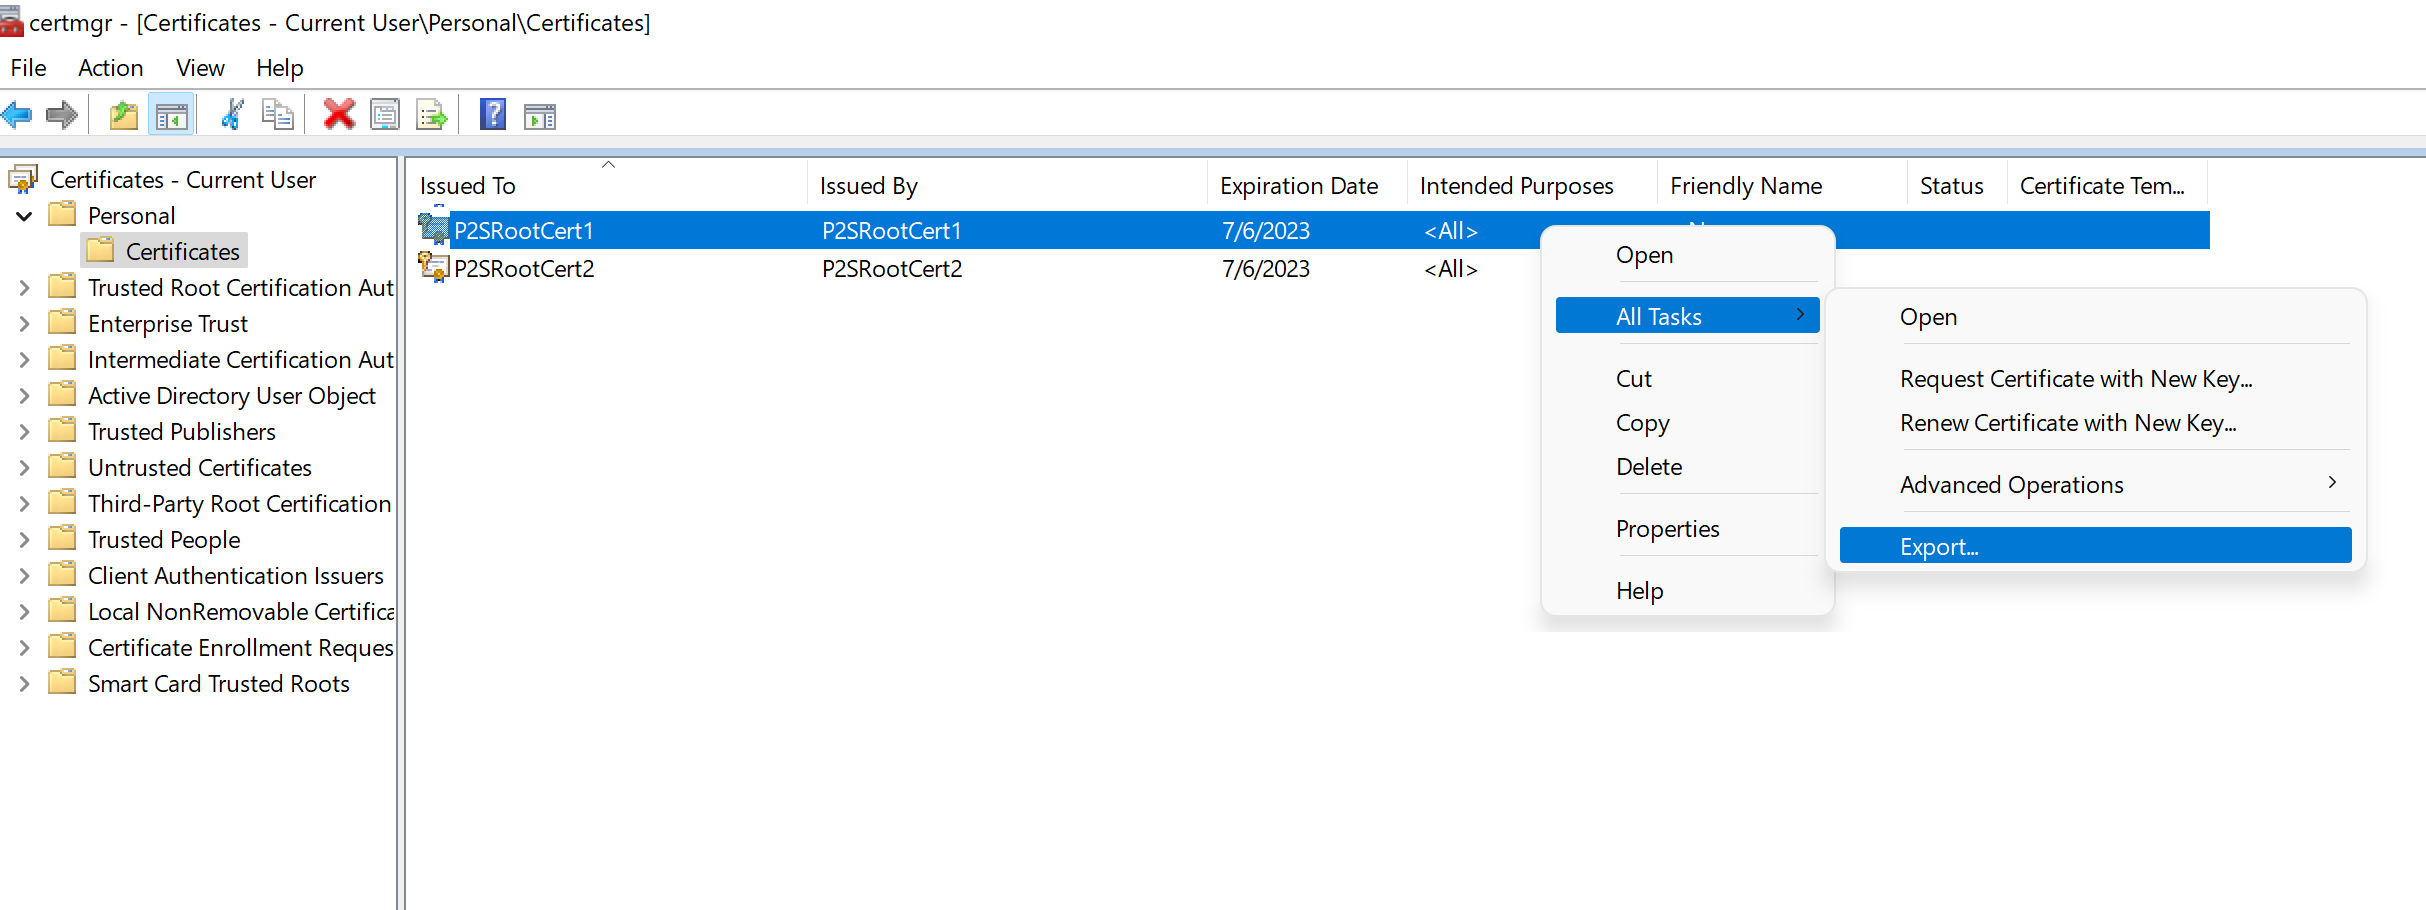
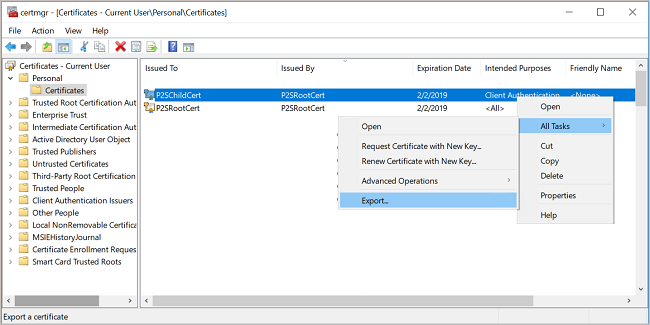
To obtain a .cer file from the certificate, open Manage user certificates (run certmgr.msc from command line or run window). Locate the self-signed root certificate, typically in 'Certificates - Current User\Personal\Certificates', and right-click. Click All Tasks, and then click Export. This opens the Certificate Export Wizard. If you can't find the certificate under Current User\Personal\Certificates, you may have accidentally opened "Certificates - Local Computer", rather than "Certificates - Current User"). If you want to open Certificate Manager in current user scope using PowerShell, you type certmgr in the console window.
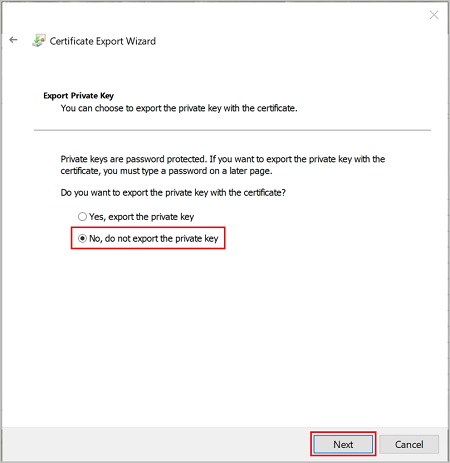
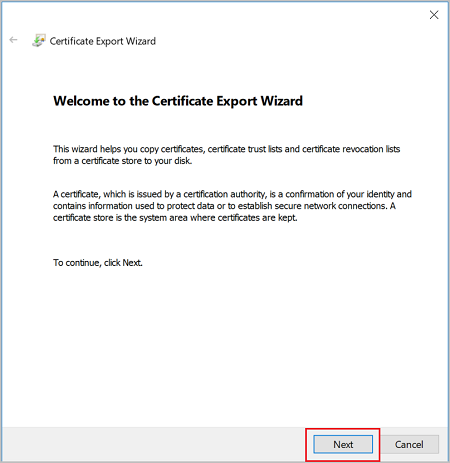
In the Wizard, click Next.

Select No, do not export the private key, and then click Next.
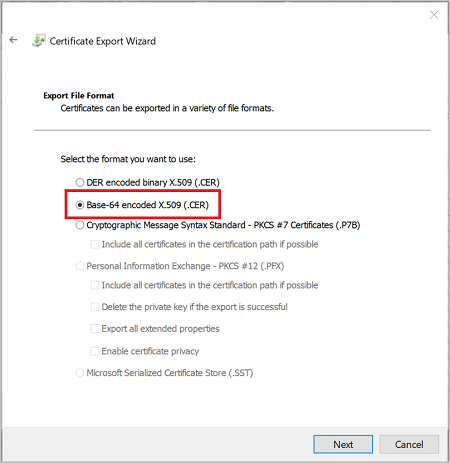
On the Export File Format page, select Base-64 encoded X.509 (.CER)., and then click Next.
For File to Export, Browse to the location to which you want to export the certificate. For File name, name the certificate file. Then, click Next.

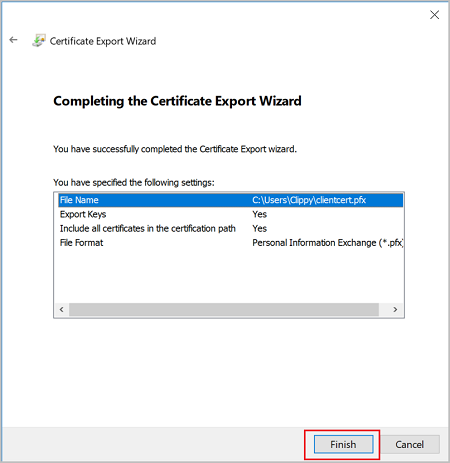
Click Finish to export the certificate.
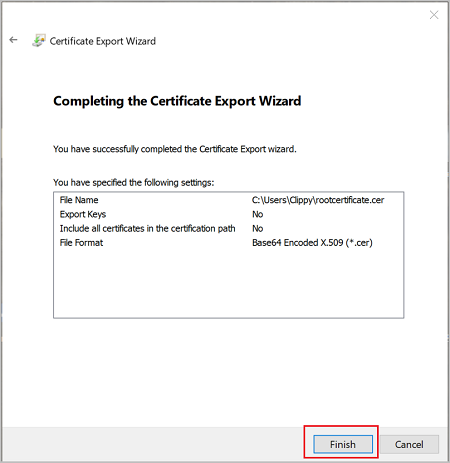
Your certificate is successfully exported.
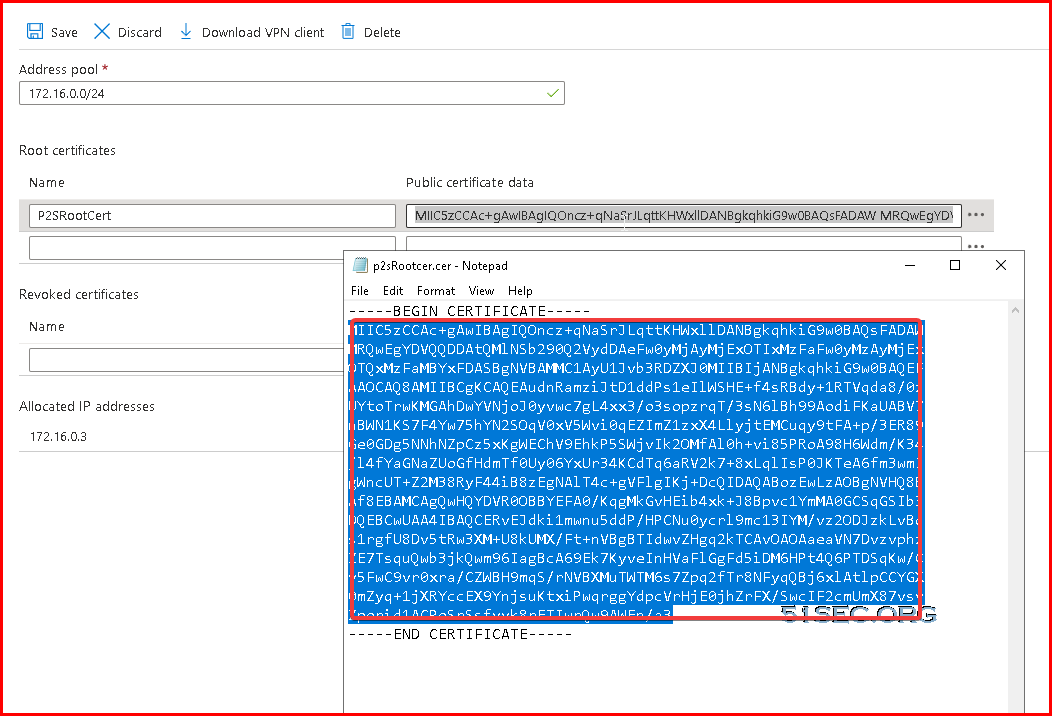
The exported certificate looks similar to this:
Exported certificate content will be copied into your VPN Gateway Point-to-Site configuration page's Root certificate section.
Following steps are exporting client certificate:
To export a client certificate, open Manage user certificates. The client certificates that you generated are, by default, located in 'Certificates - Current User\Personal\Certificates'. Right-click the client certificate that you want to export, click all tasks, and then click Export to open the Certificate Export Wizard.
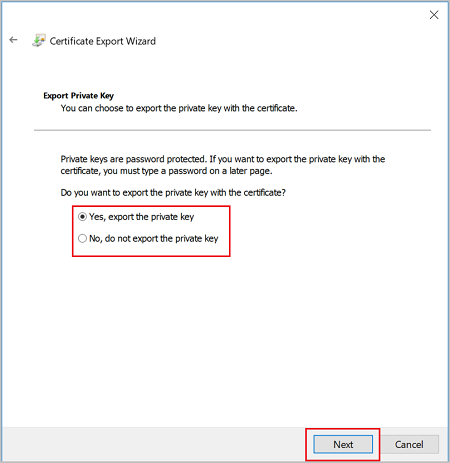
In the Certificate Export Wizard, click Next to continue.
Select Yes, export the private key, and then click Next.
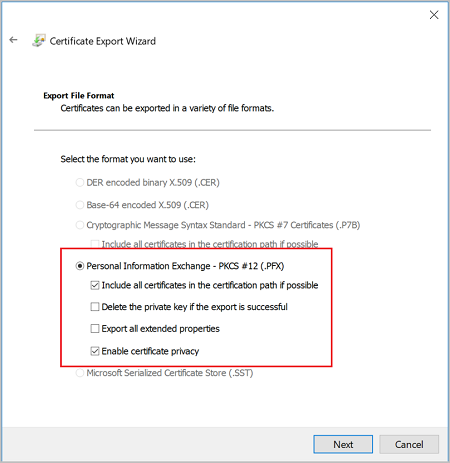
On the Export File Format page, leave the defaults selected. Make sure that Include all certificates in the certification path if possible is selected. This setting additionally exports the root certificate information that is required for successful client authentication. Without it, client authentication fails because the client doesn't have the trusted root certificate. Then, click Next.
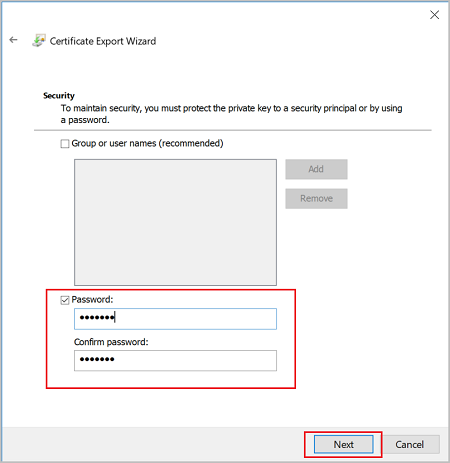
On the Security page, you must protect the private key. If you select to use a password, make sure to record or remember the password that you set for this certificate. Then, click Next.
On the File to Export, Browse to the location to which you want to export the certificate. For File name, name the certificate file. Then, click Next.
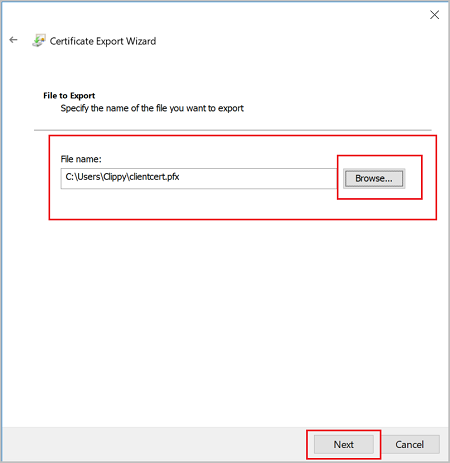
Click Finish to export the certificate.
Workflow
- Download and install the Azure VPN Client.
- Generate the VPN client profile configuration package.
- Import the client profile settings to the VPN client.
- Create a connection.
- Optional - export the profile settings from the client and import to other client computers.
Install Client Certificate and VPN Client
Double click certificate to import the client certificate.
You will be able to download your Azure VPN Client from Virtual Network Gateway Point-to-Site configuration page:
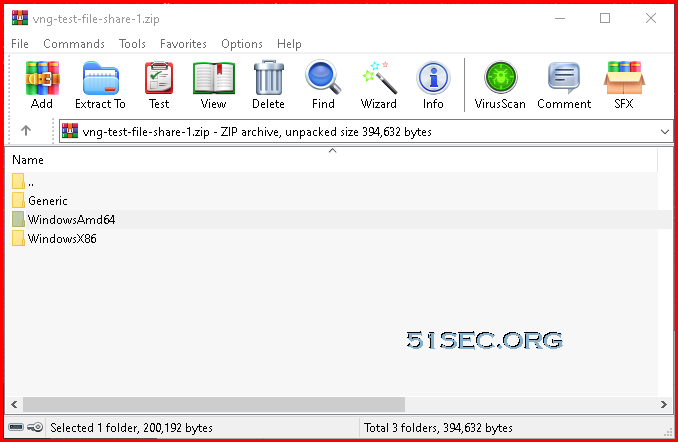
It is a zipped file, inside, you will find WindowsAMD64 folder which includes the installation exe file, VpnClientSetupAmd64.exe.
Double click VpnClientSetupAmd64.exe to install VPN client.
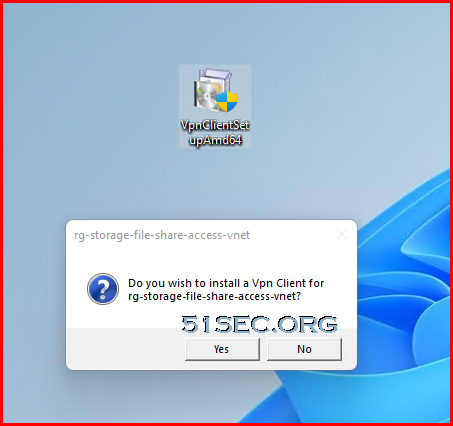
The installation window will disappear after completed.
Recent VPNClientSetup packet is not included into the download file. You will need to search Azure VPN from Microsoft Store and then install the client.
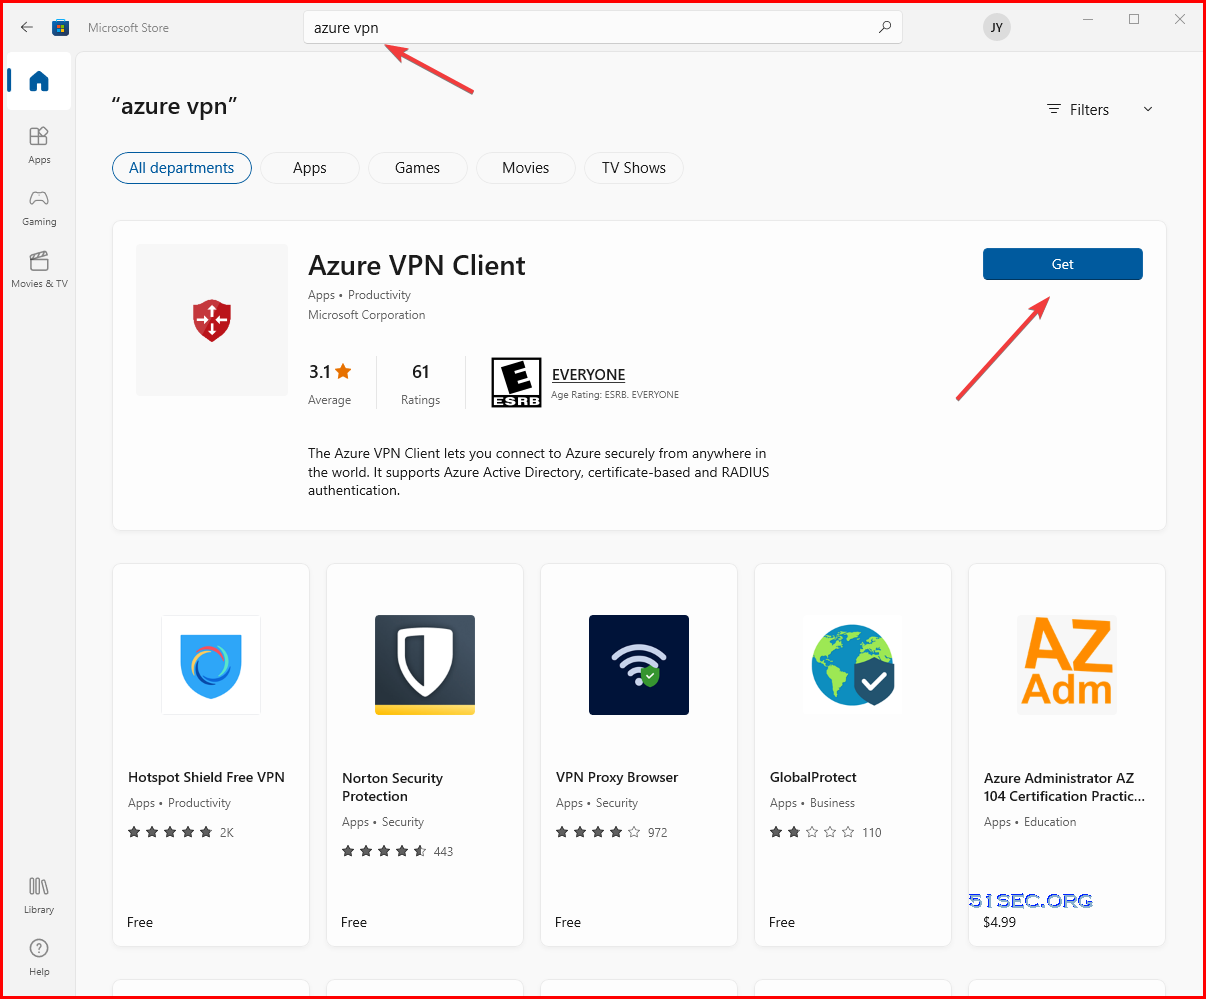
[May, 2022] Updated Steps to Install Azure VPN Client:
Download the latest version of the Azure VPN Client install files using one of the following links:
- Install using Client Install files: https://aka.ms/azvpnclientdownload.
- Install directly, when signed in on a client computer: Microsoft Store.
Install the Azure VPN Client to each computer.
Verify that the Azure VPN Client has permission to run in the background. For steps, see Windows background apps.
To verify the installed client version, open the Azure VPN Client. Go to the bottom of the client and click ... -> ? Help. In the right pane, you can see the client version number.
Generate the VPN client profile configuration package:
To generate the VPN client profile configuration package, see Working with P2S VPN client profile files. After you generate the package, follow the steps to extract the profile configuration files.
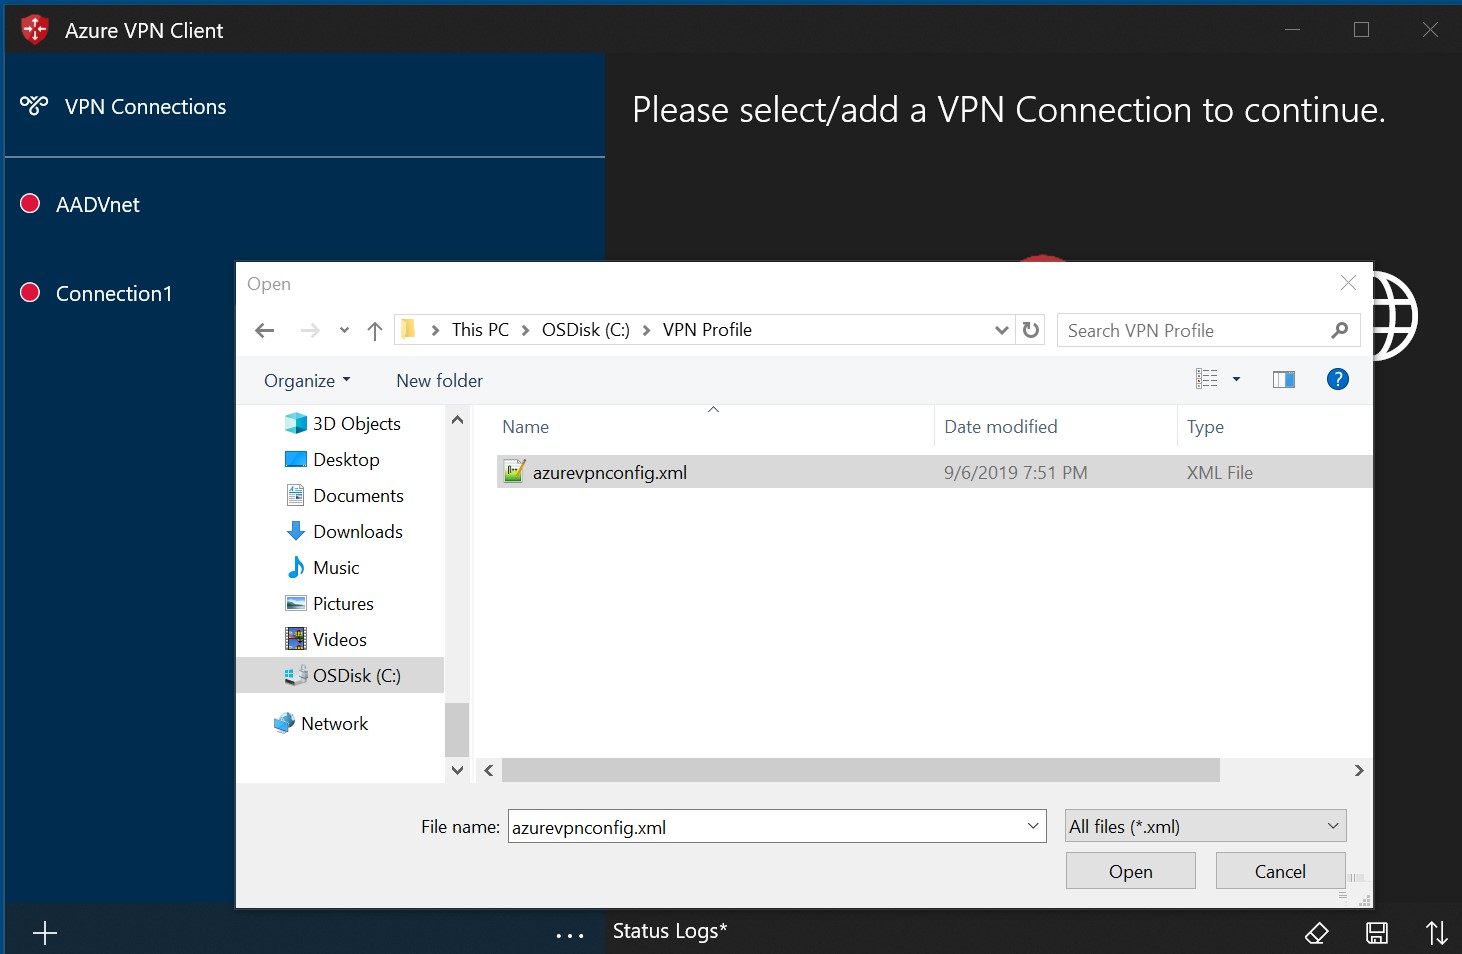
Import the profile file
For Azure AD authentication configurations, the azurevpnconfig.xml is used. The file is located in the AzureVPN folder of the VPN client profile configuration package.
On the page, select Import.

Browse to the profile xml file and select it. With the file selected, select Open.
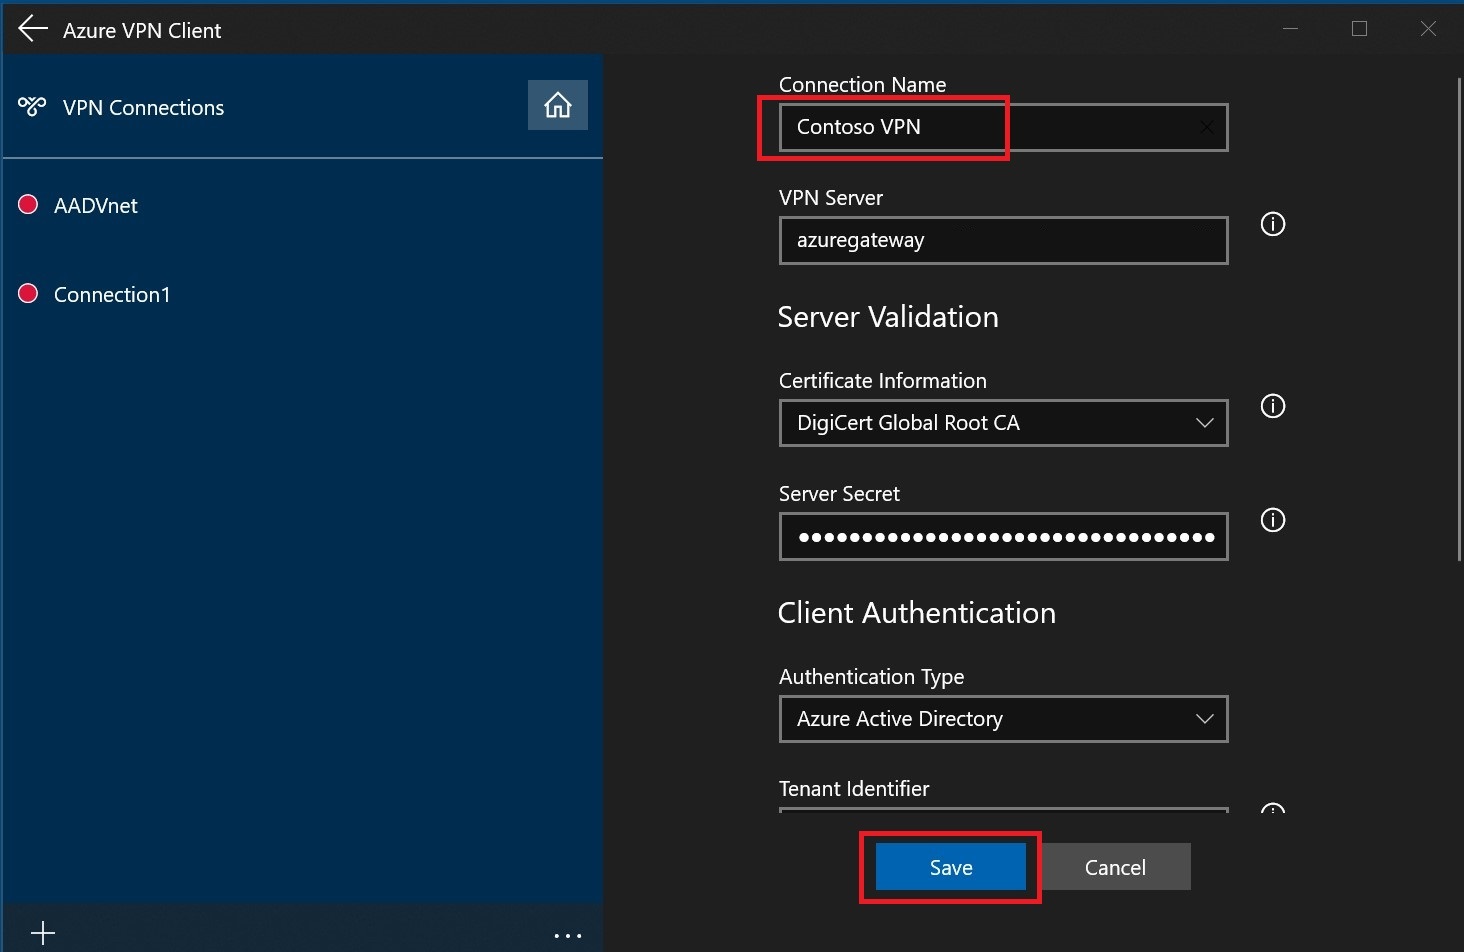
Specify the name of the profile and select Save.
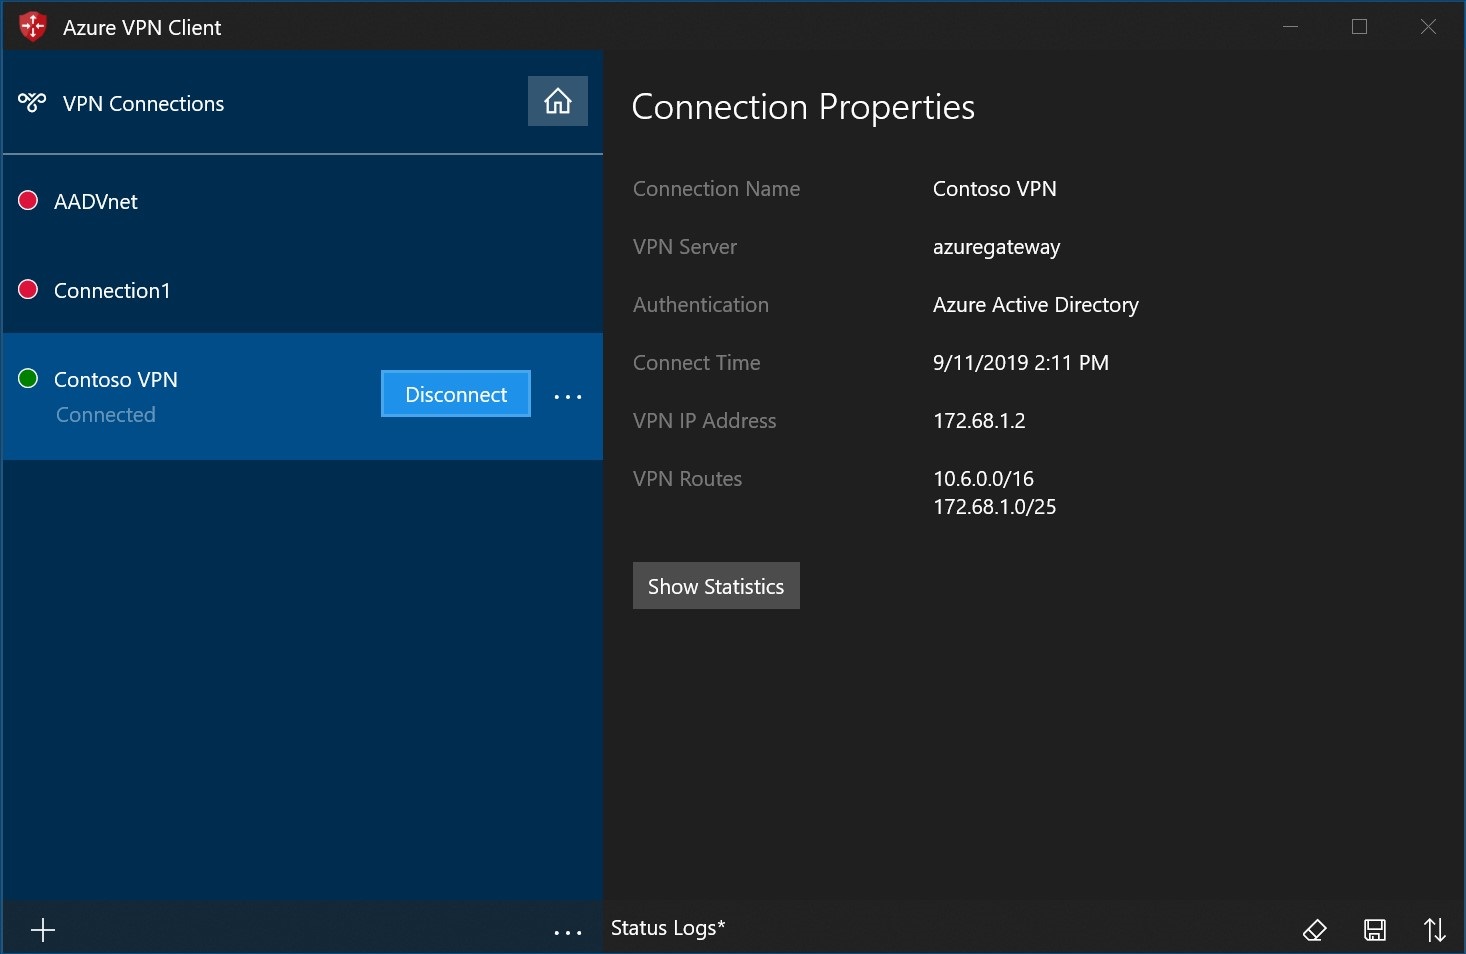
Select Connect to connect to the VPN.
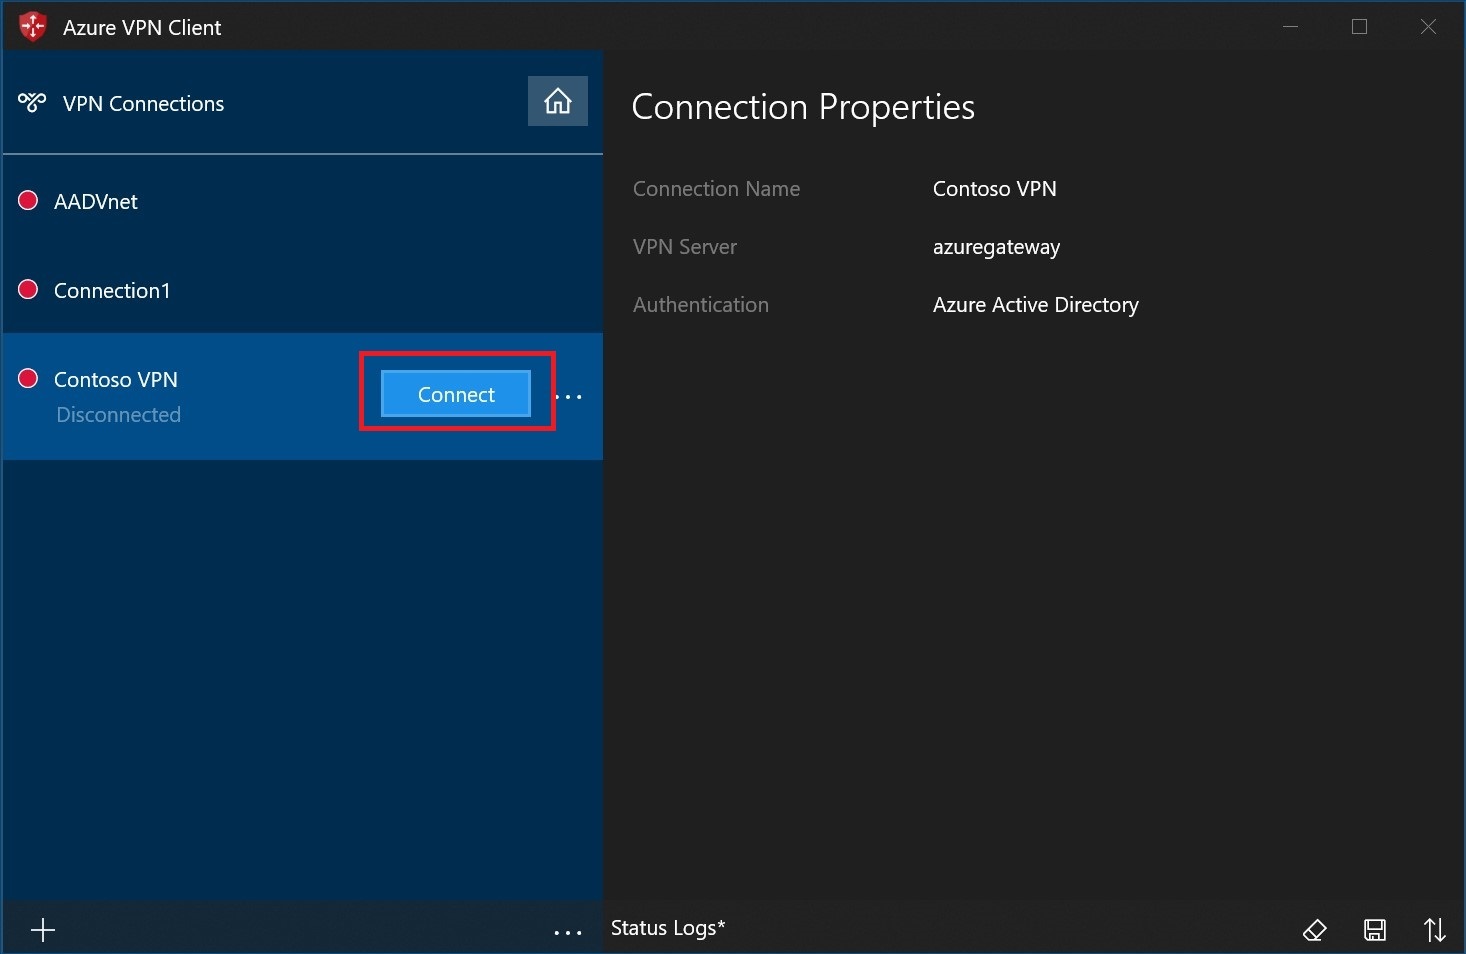
Once connected, the icon will turn green and say Connected.
Using AD Authentication
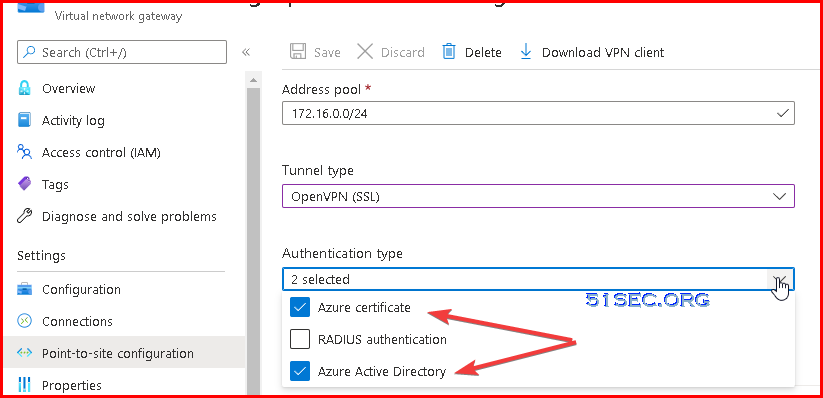
There are some requirements for enabling Azure AD authentication, such as, VPN tunnel type.
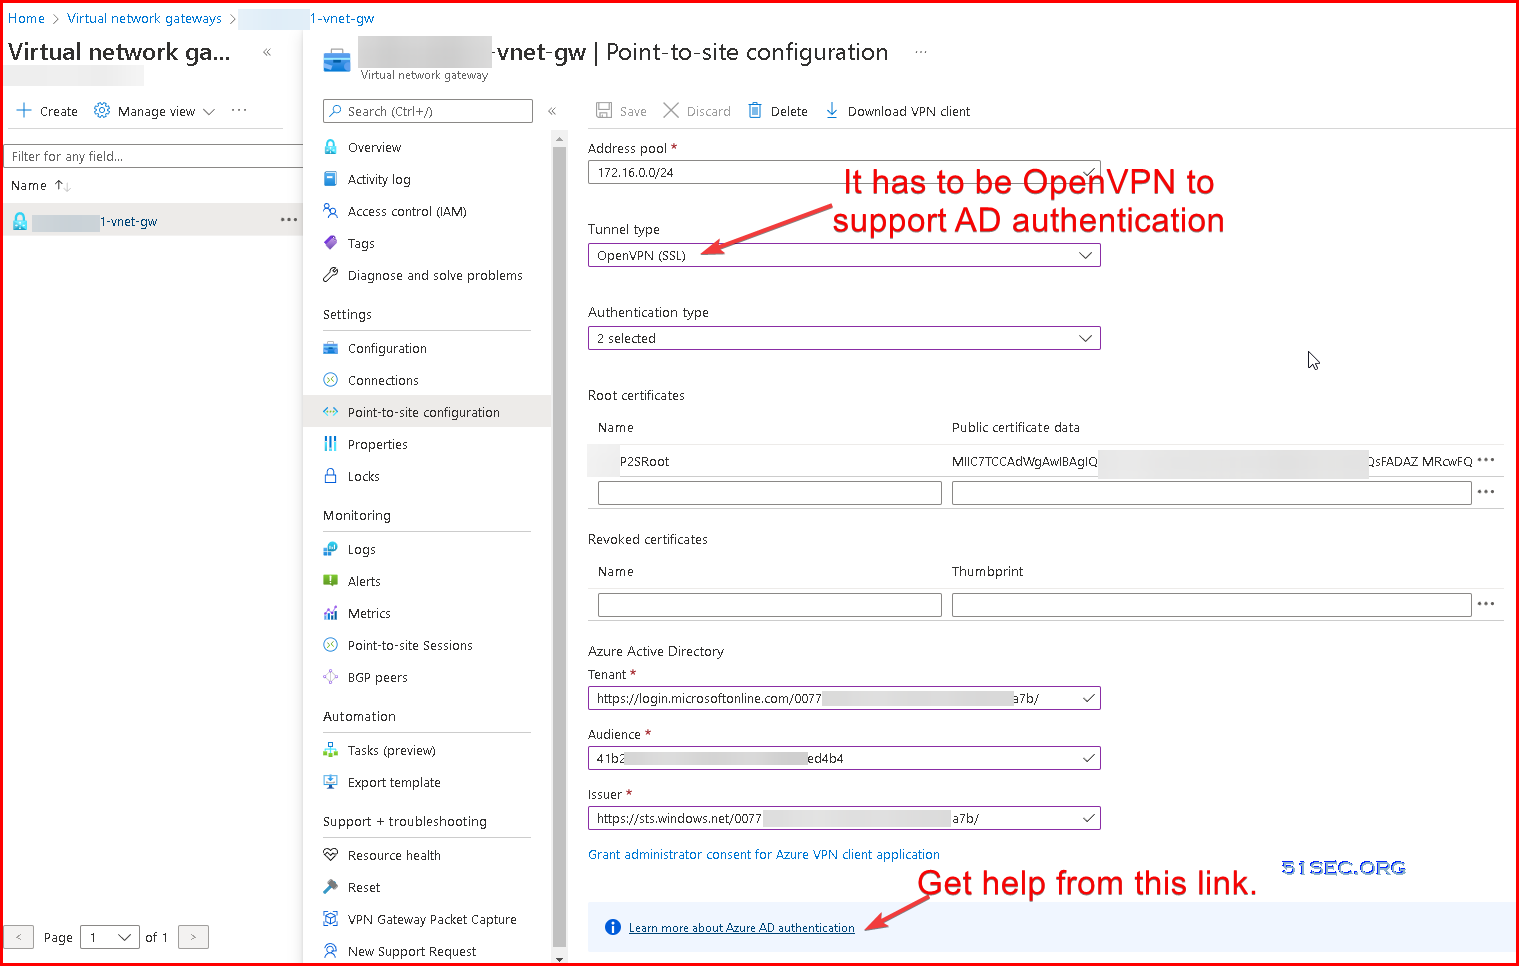
More explanation about Tenant ID, audience and Issuer, that can be found from following url:
https://docs.microsoft.com/en-ca/azure/vpn-gateway/openvpn-azure-ad-tenant
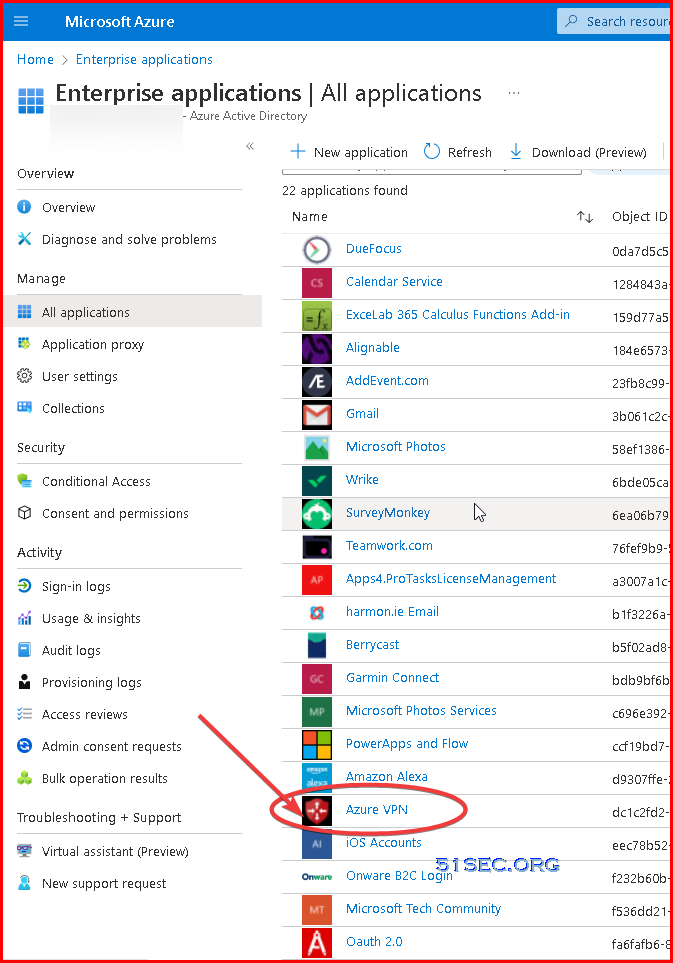
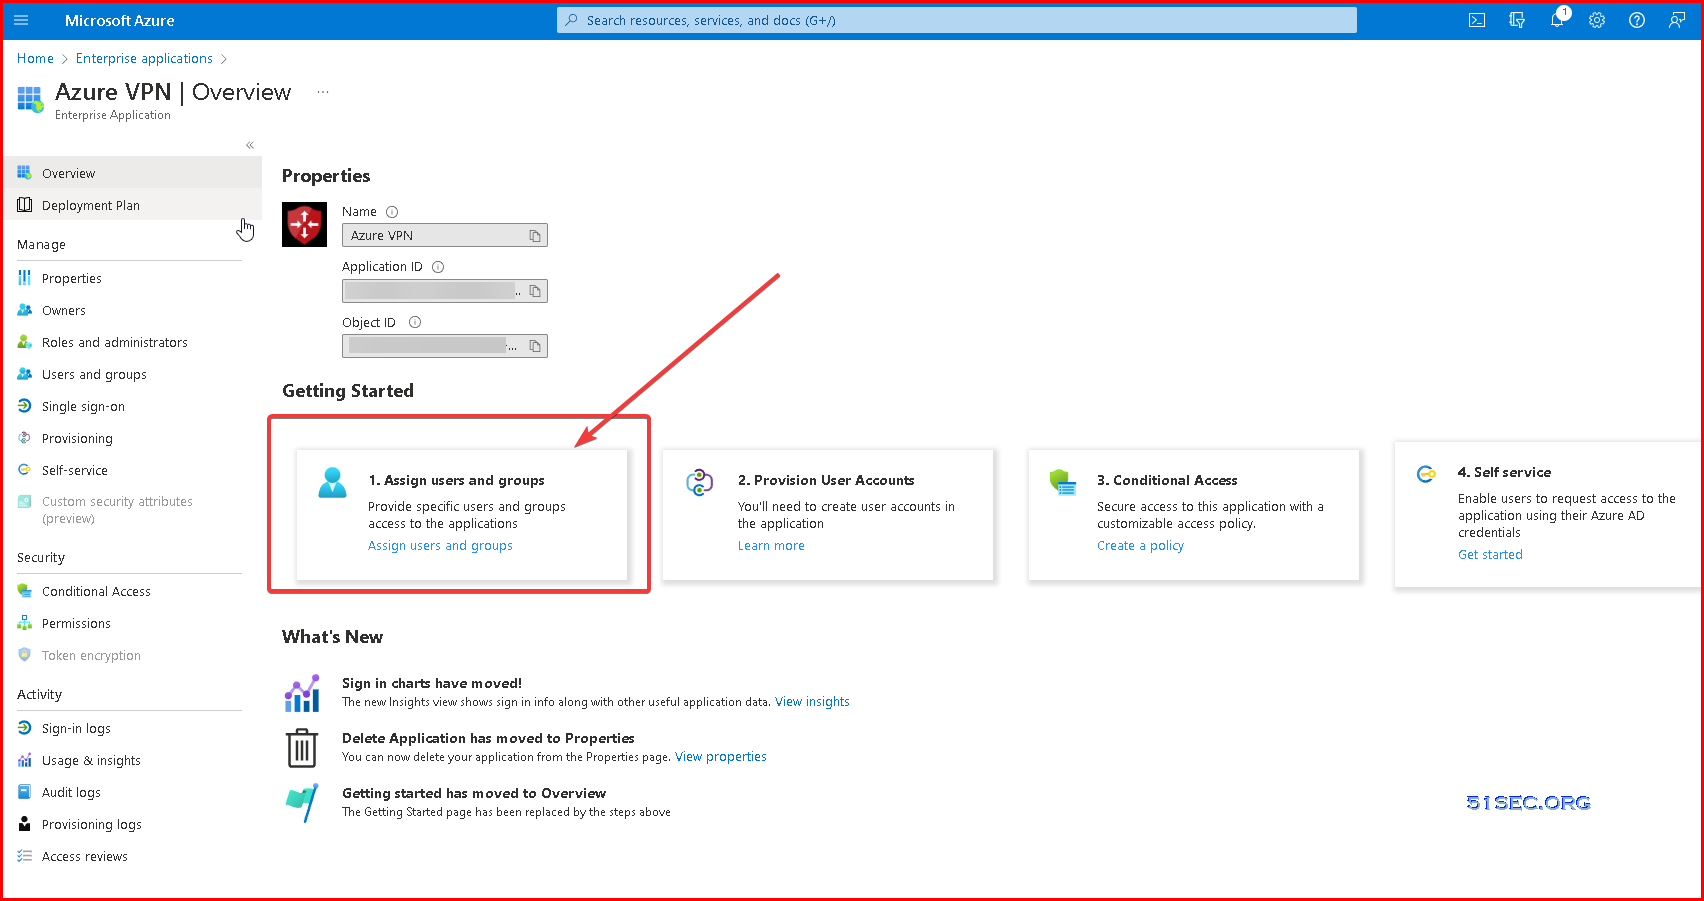
Assign Users to Azure VPN Application
Assign the users to your applications.
Under Azure AD -> Enterprise applications, select the newly registered application Azure VPN and click Properties. Ensure that User assignment required? is set to yes. Click Save.
- Assignment Required Set to Yes
If this option is set to yes, then users and other apps or services must first be assigned this application before being able to access it.
If this option is set to no, then all users will be able to sign in, and other apps and services will be able to obtain an access token to this service.
This option does not affect whether or not an application appears on My Apps. To show the application there, assign an appropriate user or group to the application.
This option only applies to the following types of applications and services: applications using SAML, OpenID Connect, OAuth 2.0, or WS-Federation for user sign-in, Application Proxy applications with Azure AD pre-authentication enabled, and applications or services for which other applications or service are requesting access tokens.
This option has no effect on users' access to the app when the application is configured for any of the other single sign-on modes.

4. Set Users / Groups Assignment
To select group, you might need to upgrade your AAD plan to P1 or P2. Else you will have to use selected users to grant assignment.
Connect to Azure VPN Gateway
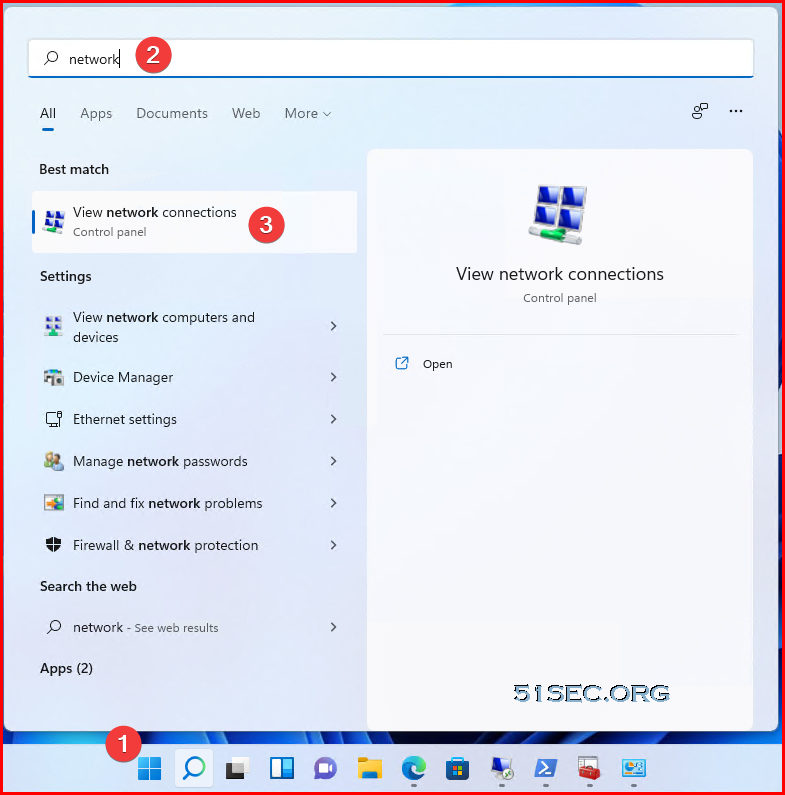
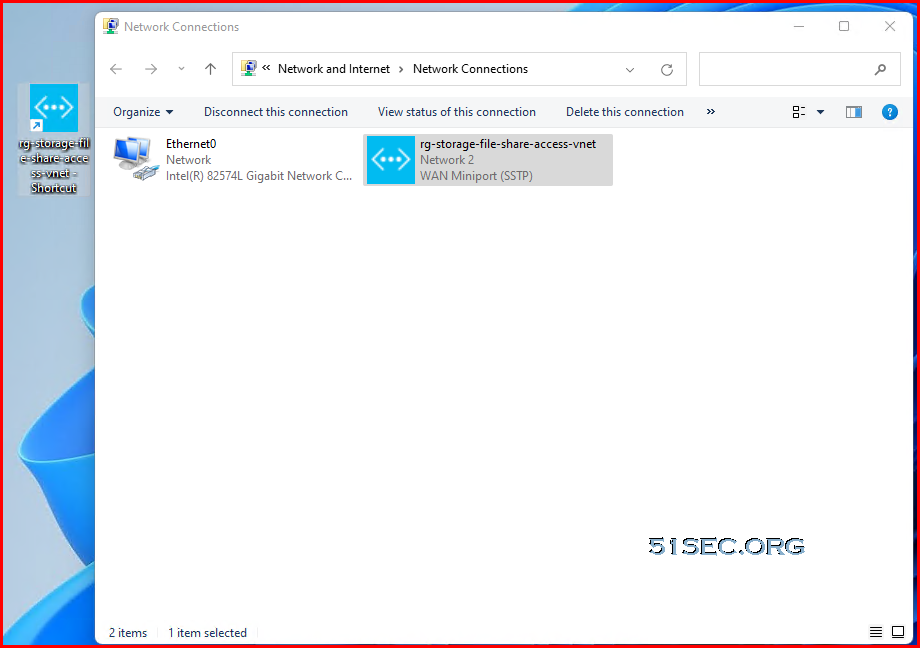
You will find a new network created. Drag the new network to your desktop to create a shortcut for future connection.
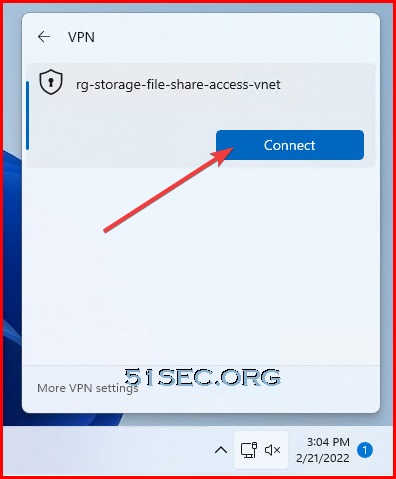
Click network icon then click VPN from pop up window
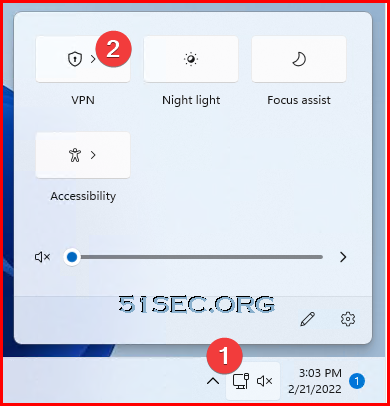
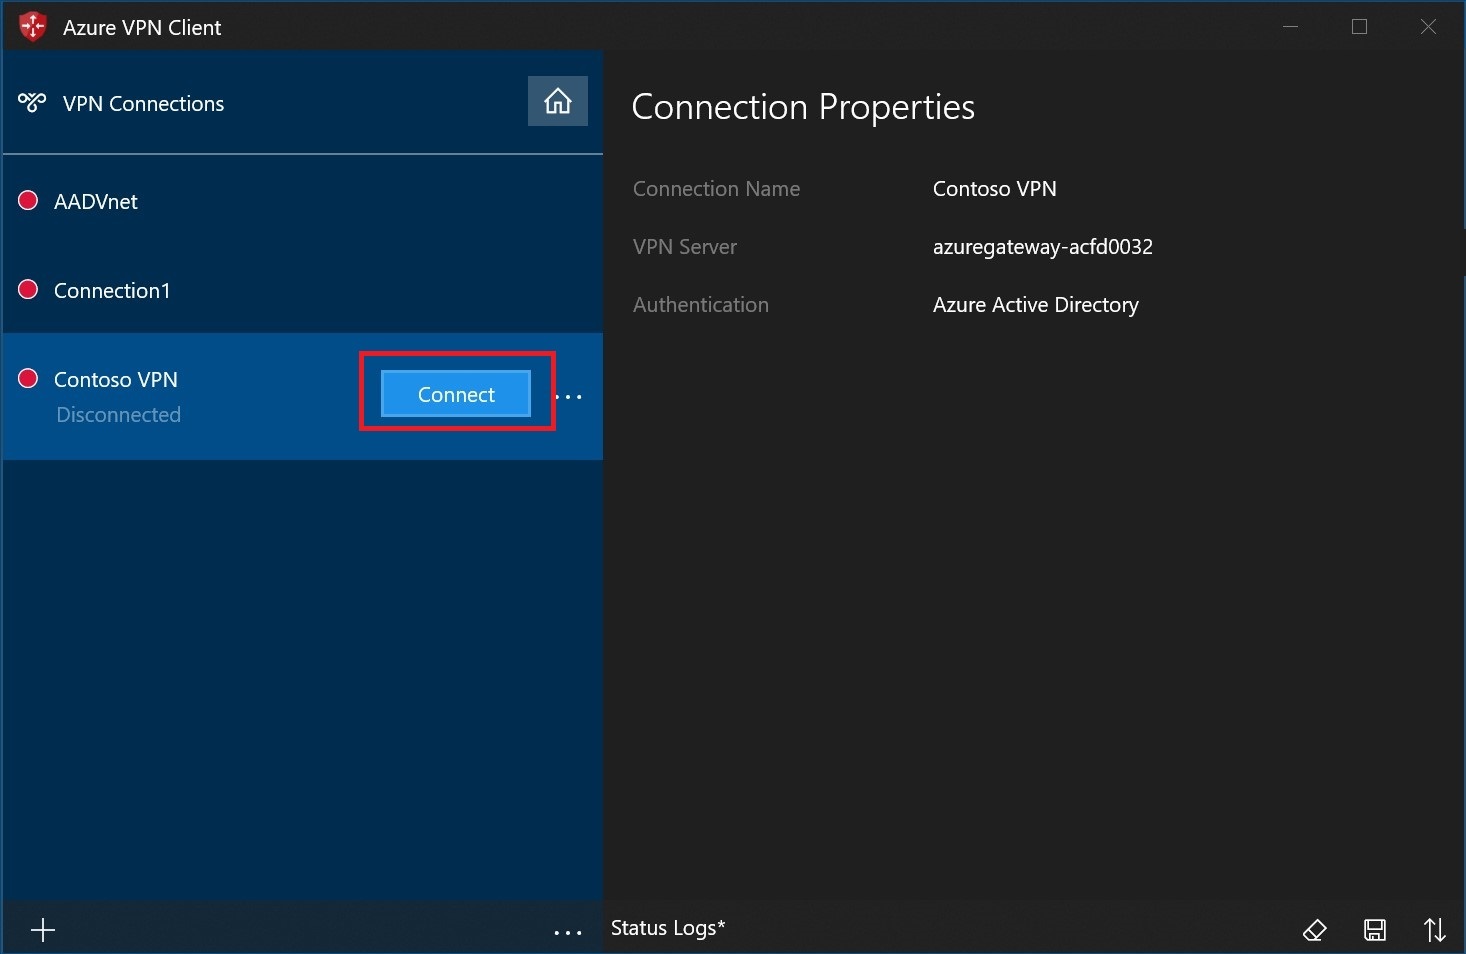
You should be able to see connect button , which is used to connect to your VPN gateway.
Verify connections:
After vpn connected, you might be able to check the ip address to see if your computer got a new ip from VPN pool:PS C:\WIDOWS\system32> ipconfig
Windows IP Configuration
Ethernet adapter Ethernet0:
Connection-specific DNS Suffix . : lan
Link-local IPv6 Address . . . . . : fe80::fd79:1858:9a7c:5a4f%4
IPv4 Address. . . . . . . . . . . : 192.168.2.71
Subnet Mask . . . . . . . . . . . : 255.255.255.0
Default Gateway . . . . . . . . . : 192.168.2.1
PPP adapter rg-storage-file-share-access-vnet:
Connection-specific DNS Suffix . :
IPv4 Address. . . . . . . . . . . : 172.16.0.3
Subnet Mask . . . . . . . . . . . : 255.255.255.255
Default Gateway . . . . . . . . . :
PS C:\WINDOWS\system32>
172.16.0.0/24 is the VPN pool we configured for our VPN gateway. We got an ip 172.16.0.3 which is allocated from that pool.
To connect automatically
These steps help you configure your connection to connect automatically with Always-on.
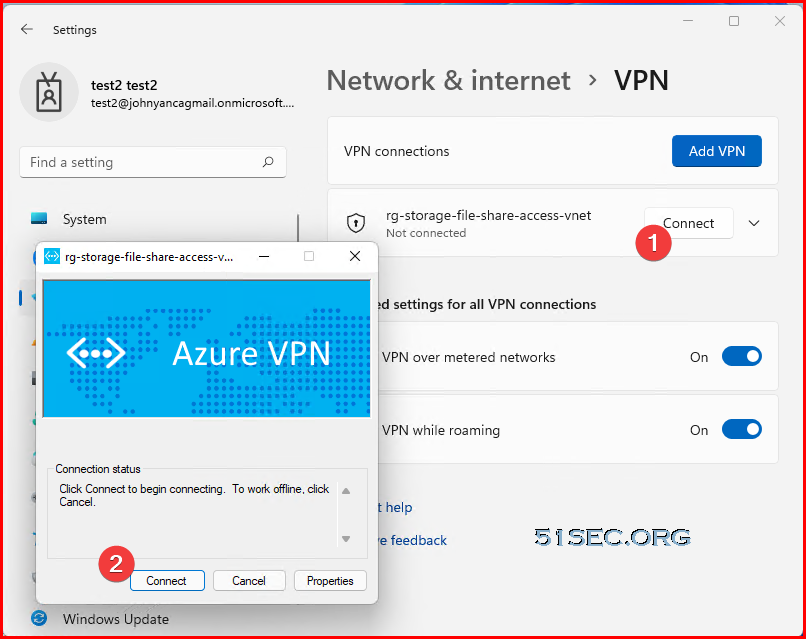
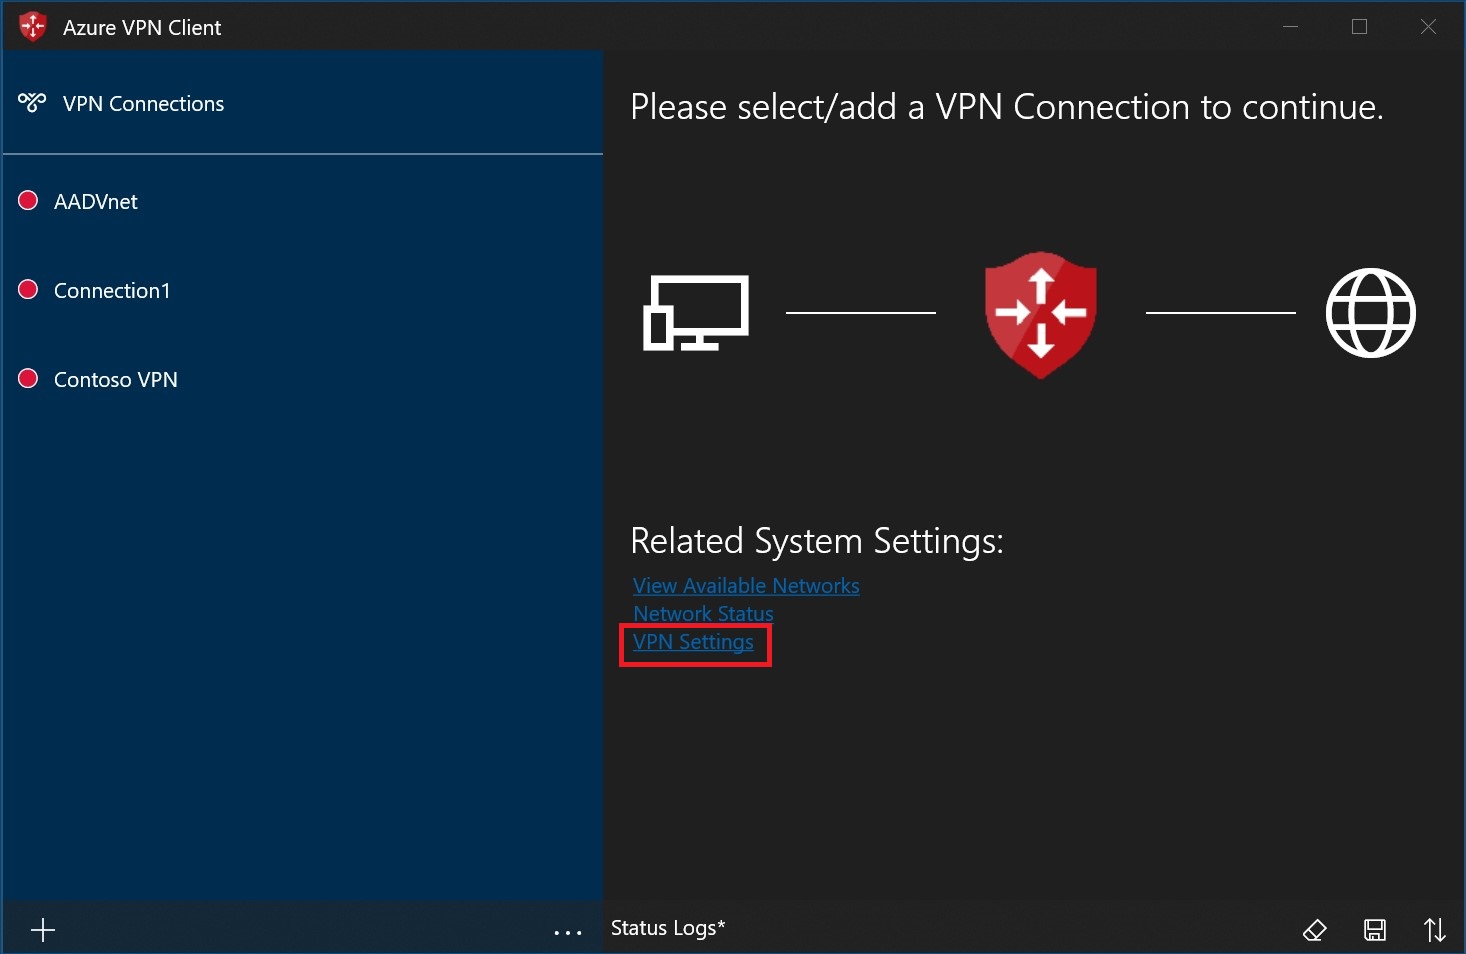
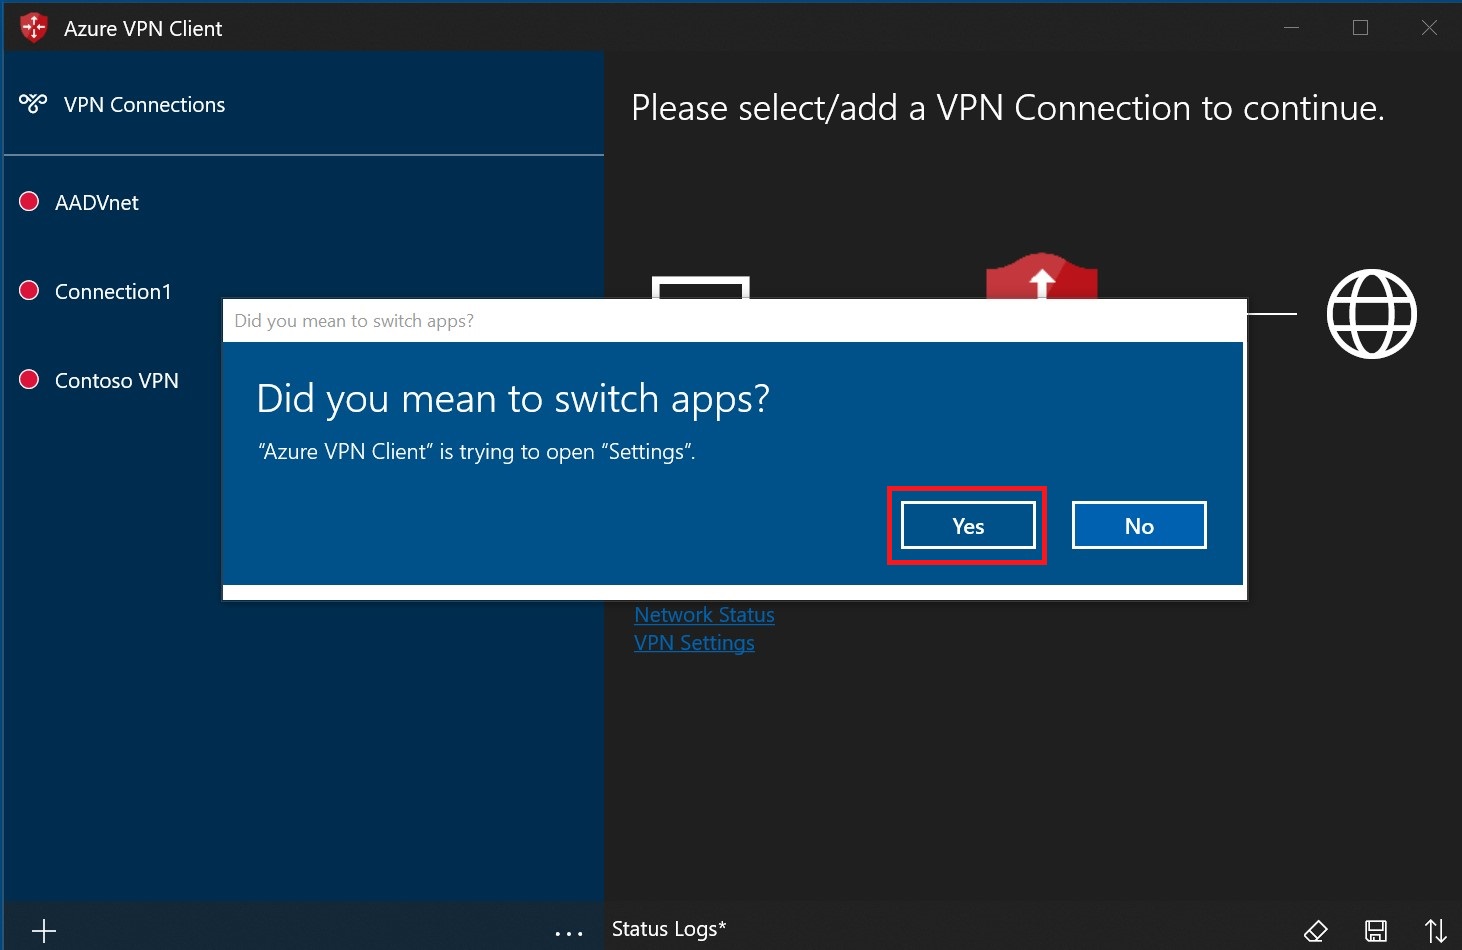
On the home page for your VPN client, select VPN Settings.
Select Yes on the switch apps dialogue box.
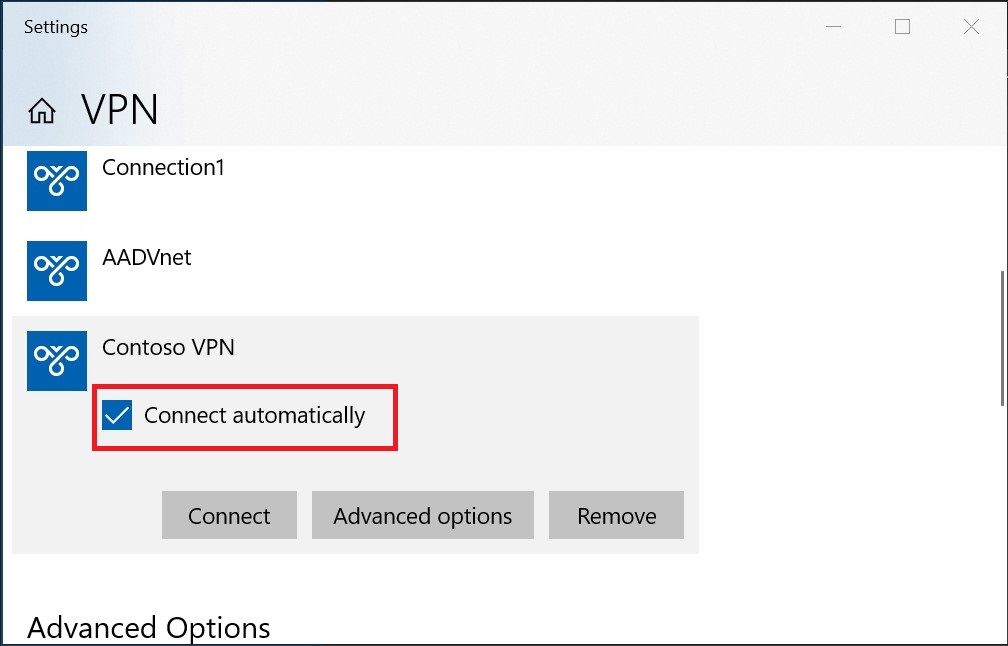
Make sure the connection that you want to set isn't already connected, then highlight the profile and check the Connect automatically check box.
Select Connect to initiate the VPN connection.
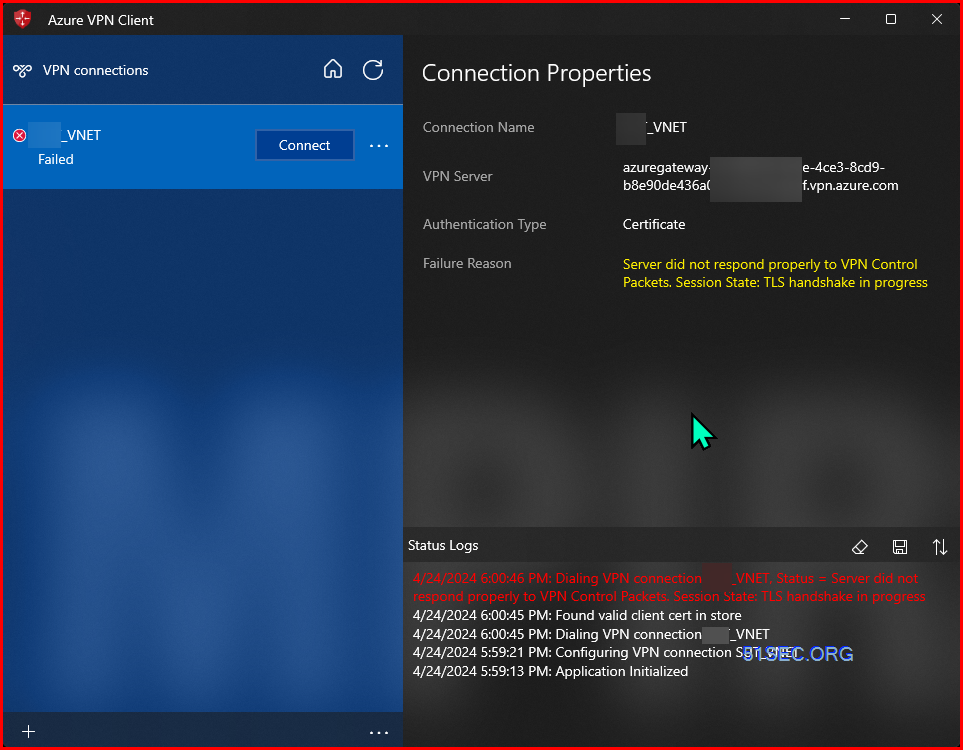
Client Issue to Resolve Azure Internal IP For Microsoft Internal DNS Suffixes
Home user might face an issue which home dns always resolve private endpoint dns to public, not private ip. Some suggestion as show below might still not work since it is not DNS resolution issue. It is DNS configuration priority issue.Some solution's setup steps (Might not fully resolve issue):
1. The virtual network in Azure is assigned a local VM DNS server (internal IP)
2. Azure VPN client showed the DNS server when connected and IpConfig did NOT show the dns server
3. Powershell Get -DnsClientNrptPolicy showed the correct local dns server was assigned
4. Could not resolve any internal IP addresses in the azure network as nslookup always used the lan/wlan dns server for resolution
5. Followed every step for setting up DNS forwarders for file shares and privatelink
6. Still could not resolve any internal IP addresses in the azure network as nslookup always used the lan/wlan dns server for resolution
The answer turns out to be ridiculously simple but took me 3 days to finally resolve. Modify the xml file that you download from the azure portal for the vpn client to add the in the dnssuffixes you want resolved via the vpn (make sure to put the (.) before typing out the domain name
<dnssuffixes>
<dnssuffix>.XXXXX.org</dnssuffix>
<dnssuffix>.core.windows.net</dnssuffix>
</dnssuffixes>
Nslookup immediately returned the correct internal IP's of every query. Since I had also setup an azure file share and had setup the forwarders for it in the DNS server I added the dns suffix ".core.windows.net" and now mapping drives resolves to the internal IP. Anyway, I hope this helps because this was a ridiculous problem I spent HOURS and HOURS trying to find an answer.
Reference
https://docs.microsoft.com/en-us/azure/vpn-gateway/openvpn-azure-ad-client
How do I add DNS suffixes to the VPN client?
You can modify the downloaded profile XML file and add the <dnssuffixes><dnssufix> </dnssufix></dnssuffixes> tags.
<azvpnprofile>
<clientconfig>
<dnssuffixes>
<dnssuffix>.mycorp.com</dnssuffix>
<dnssuffix>.xyz.com</dnssuffix>
<dnssuffix>.etc.net</dnssuffix>
</dnssuffixes>
</clientconfig>
</azvpnprofile>
Block (exclude) routes
Modify the downloaded profile xml file and add the <excluderoutes><route><destination><mask> </destination></mask></route></excluderoutes> tags.
<azvpnprofile>
<clientconfig>

  <excluderoutes>
    <route>
      <destination>x.x.x.0</destination><mask>24</mask>
    </route>    <route>
      <destination>y.y.0.0</destination><mask>16</mask>
    </route>
  </excluderoutes>

</clientconfig>
</azvpnprofile>
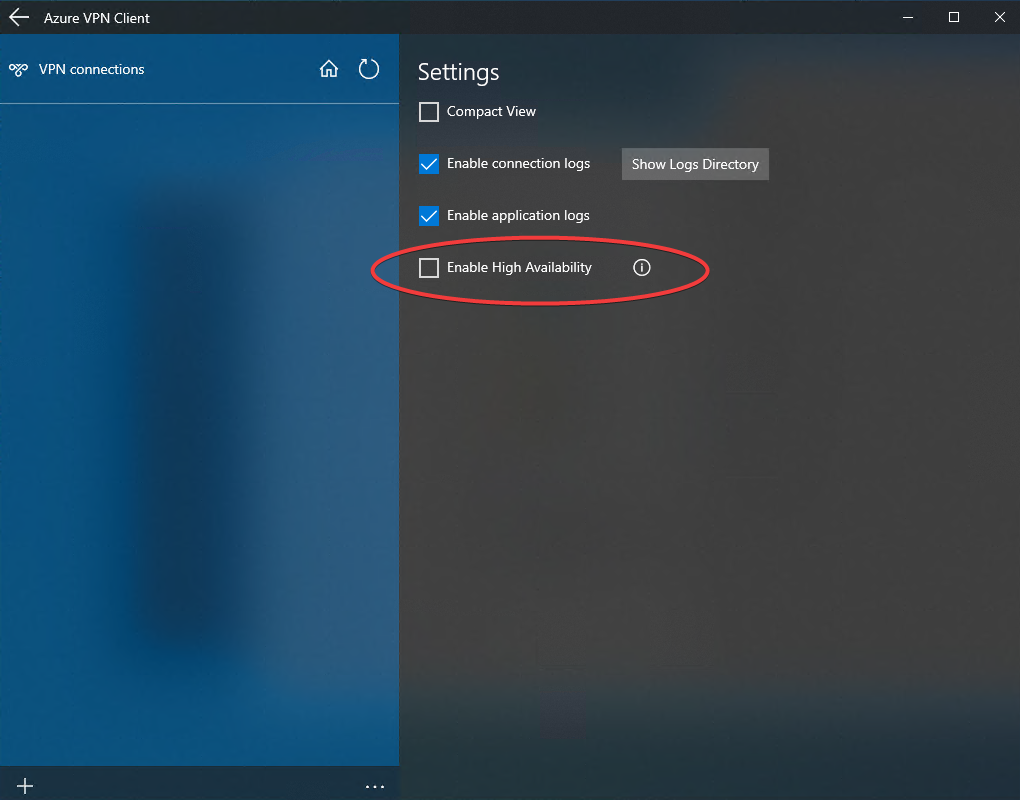
Secondary Profile - High Availability feature disabled message
If you already has corportate vpn, and it is connecting, you might get following warning message about High Availability feature disabled message.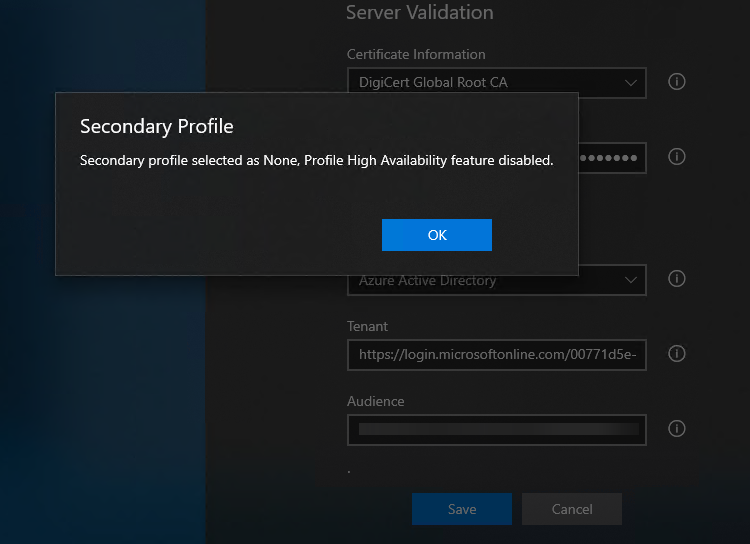
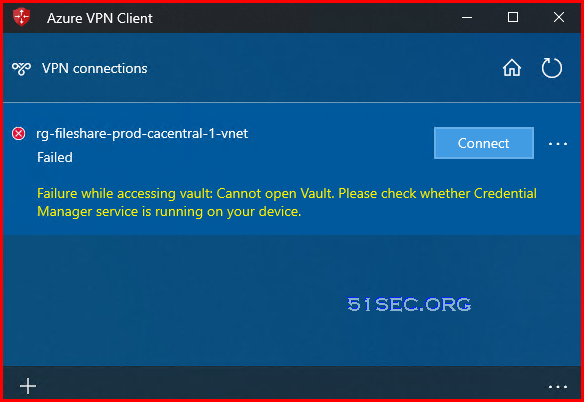
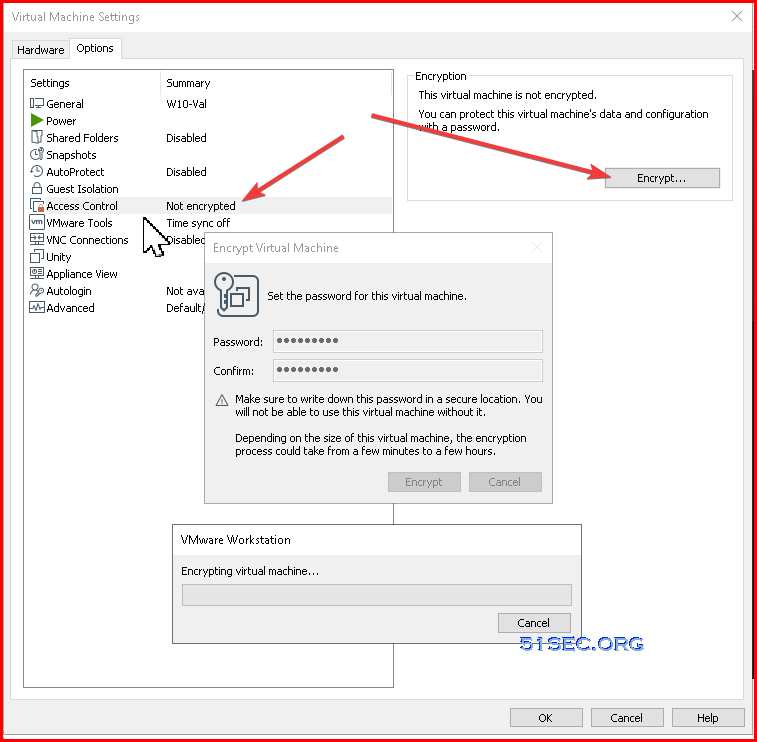
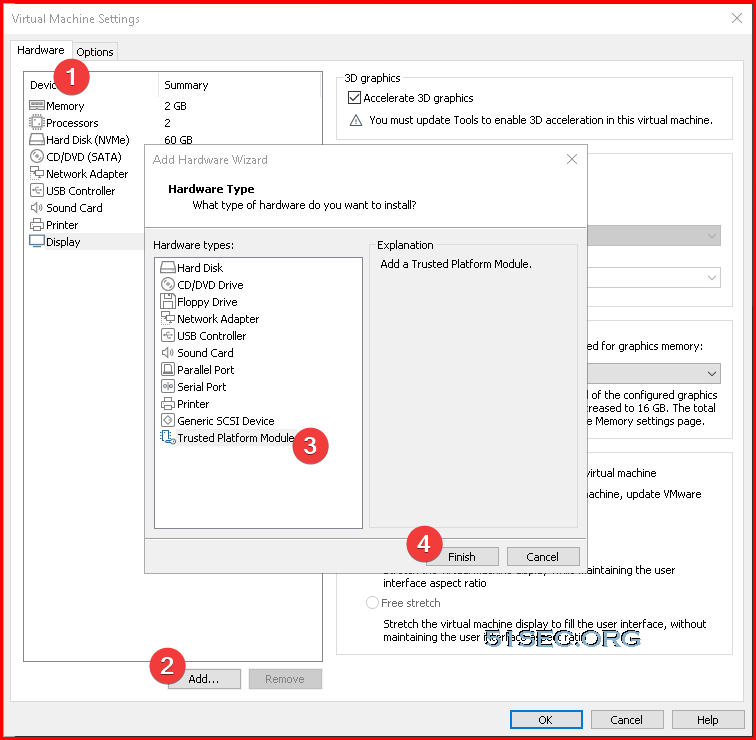
Failure while accessing vault: Cannot open Vault
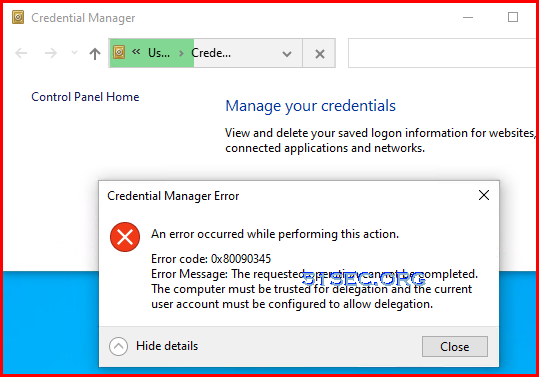
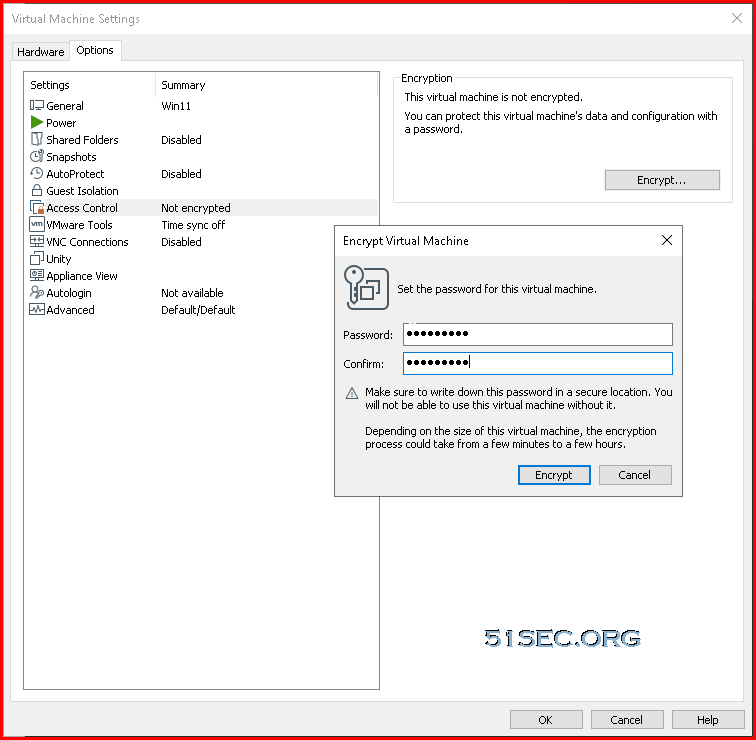
1. Enable Access Control Encryption
2 Add Trusted Platform Module
Other Errors
References
- Microsoft Azure VPN Gateway Overview
- About Microsoft Azure Point-to-Site VPN
- Windows 10 Always On VPN IKEv2 Security Configuration
- Configure a Point-to-Site connection by using certificate authentication (classic)
- Azure Point-to-Site VPN with Certificate Based Authentication
- Generate and export certificates for Point-to-Site using PowerShell
- Install client certificates for P2S certificate authentication connections
- Configure an Azure VPN Client - Azure AD authentication - Windows
- Zyxel : How to Configure Site-to-site IPSec VPN with Microsoft (MS) Azure
- USG/Zywall Series - How to Configure Route-based IPsec VPN to Azure (BGP over IKEv2/IPSec)


![[5 Mins Docker] Deploy FreshRSS Using Docker Run Command and Deploy To Fly.io](https://lh3.googleusercontent.com/blogger_img_proxy/AEn0k_v2wtb16rAE9F9kJ9pqtoGQHkTLGhNQHjoxtlQxjHTOcUMpFpIgwOnhES4iTbC84KexBvbgHNpeZi3colzrGk801CmRBBn1gjCgQCwkk7ZS_Q)


No comments:
Post a Comment