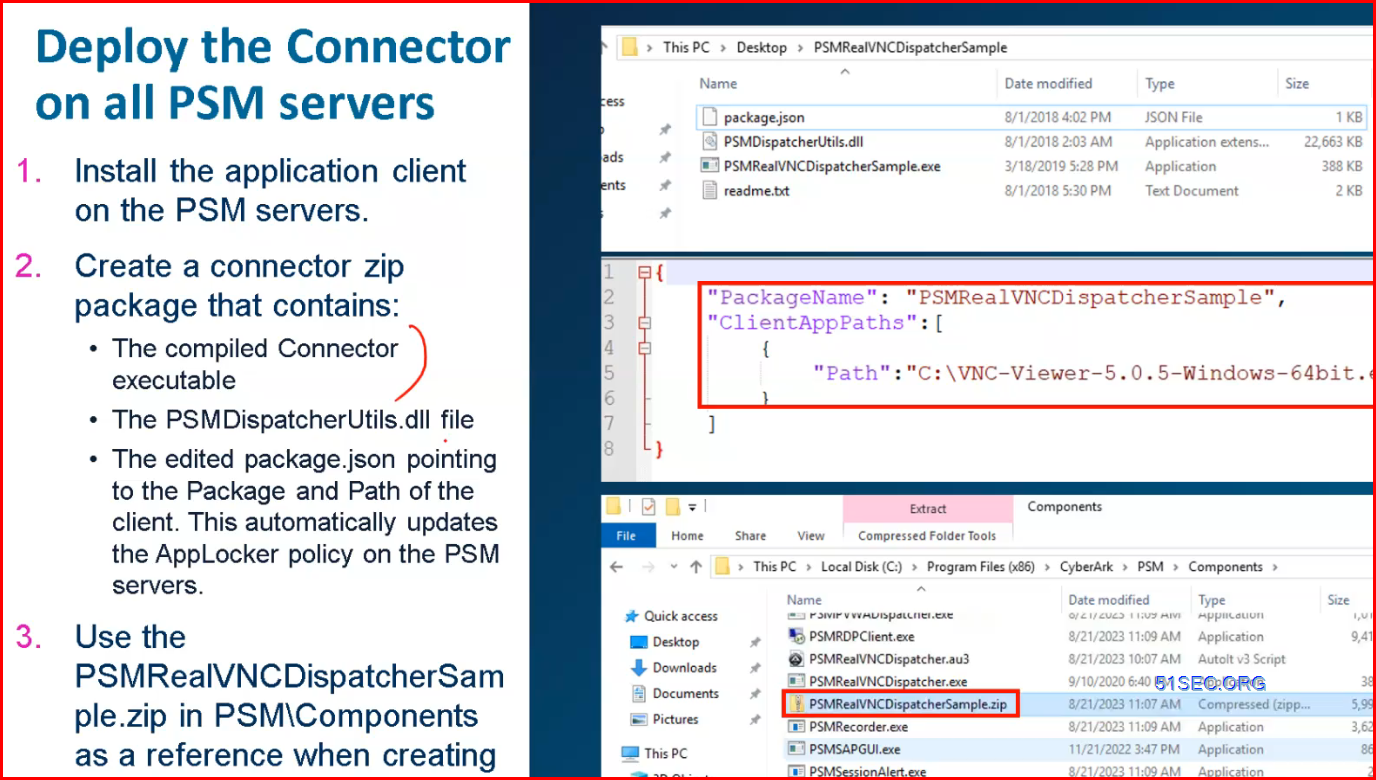
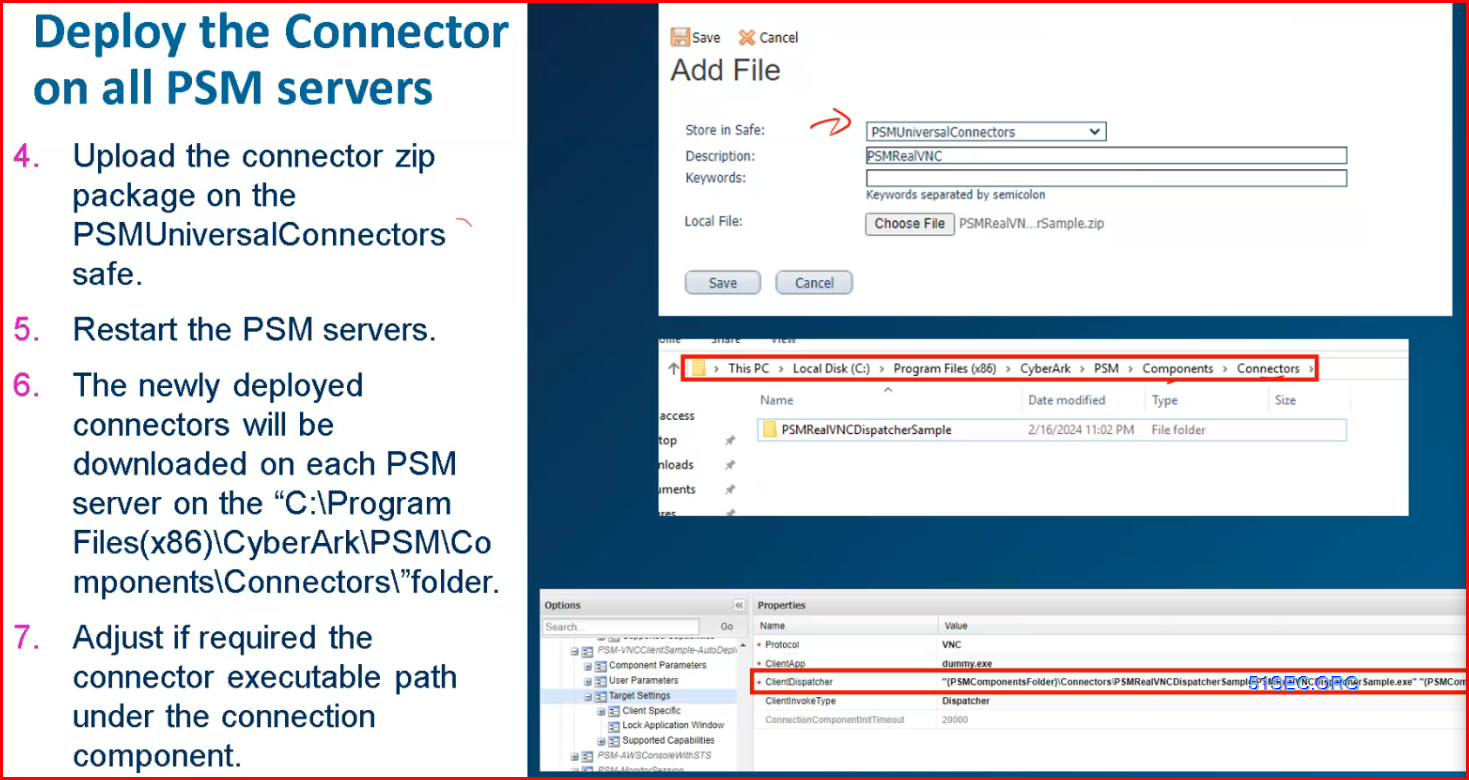
Diagram
Example:
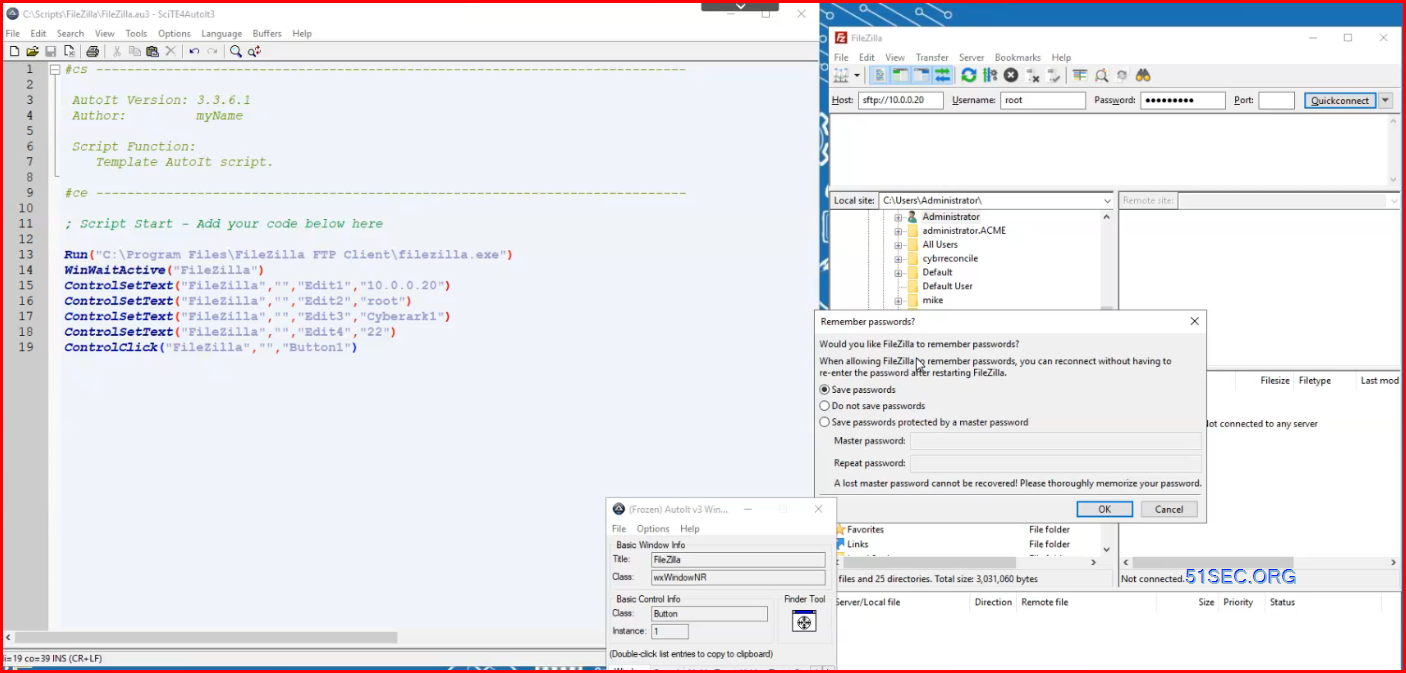
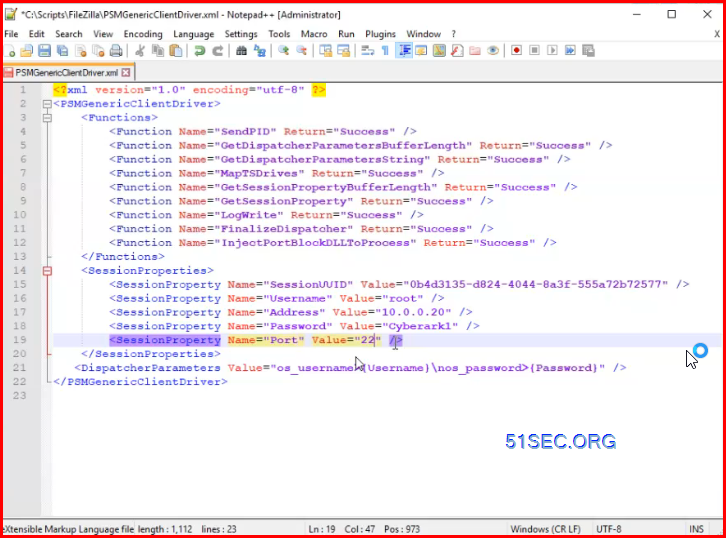
FileZilla - sFTP -> Linux Server 10.0.0.20 (root/CyberArk1)
Steps
1 Install AutoIT and Client Application
Download and install AutoIt3 on the development machine to develop PSM universal connector components. By default, AutoIt3 is installed in the following location on your computer: %ProgramFiles%\AutoIt3.
When using Autoit based connection components, we recommend that you compile the Autoit script to an executable form and use that binary. Running AutoIt scripts directly using AutoIt3.exe might introduce security risks.
version 3.3.14.2
SciTE Editor is the main script editor.
- autocomplete the command
- point to the required parameter
- F1 for help
- F5 to run or Tools - go
- Finder tool icon to identify the elements
2 Develop the AutoIT script
Common functions
- launch the client application, manage any message pop-ups that may appear and log in to the target.
- Common functions
- Run - runs an external application
- WinWaitActive
- ControlSetText
- ControlClick
- Manage message pop
- sleep
- if , endif
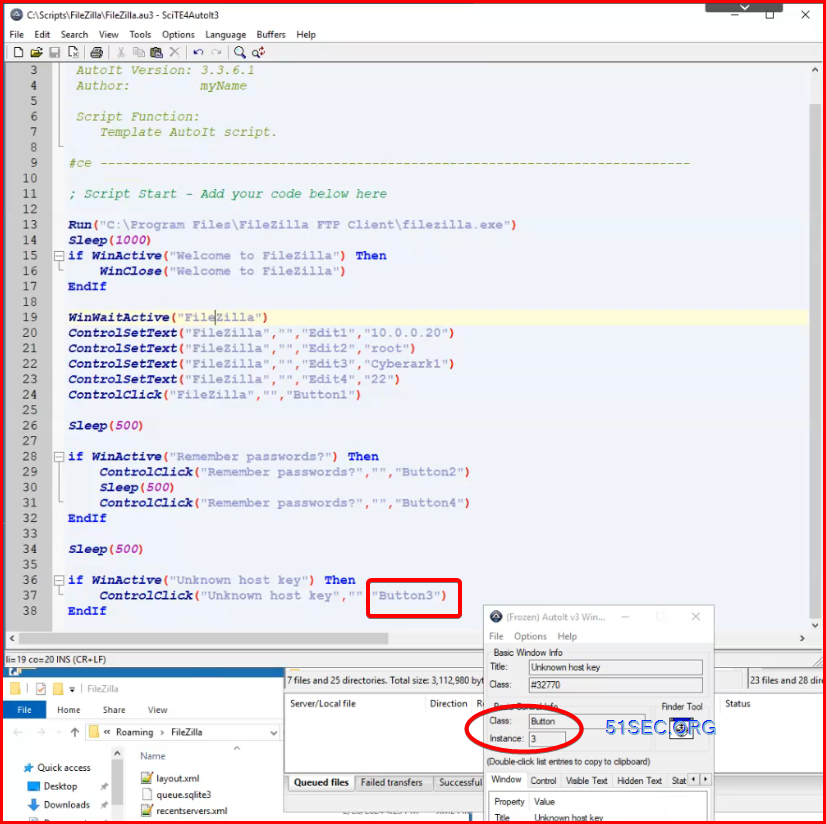
Debug and best practice
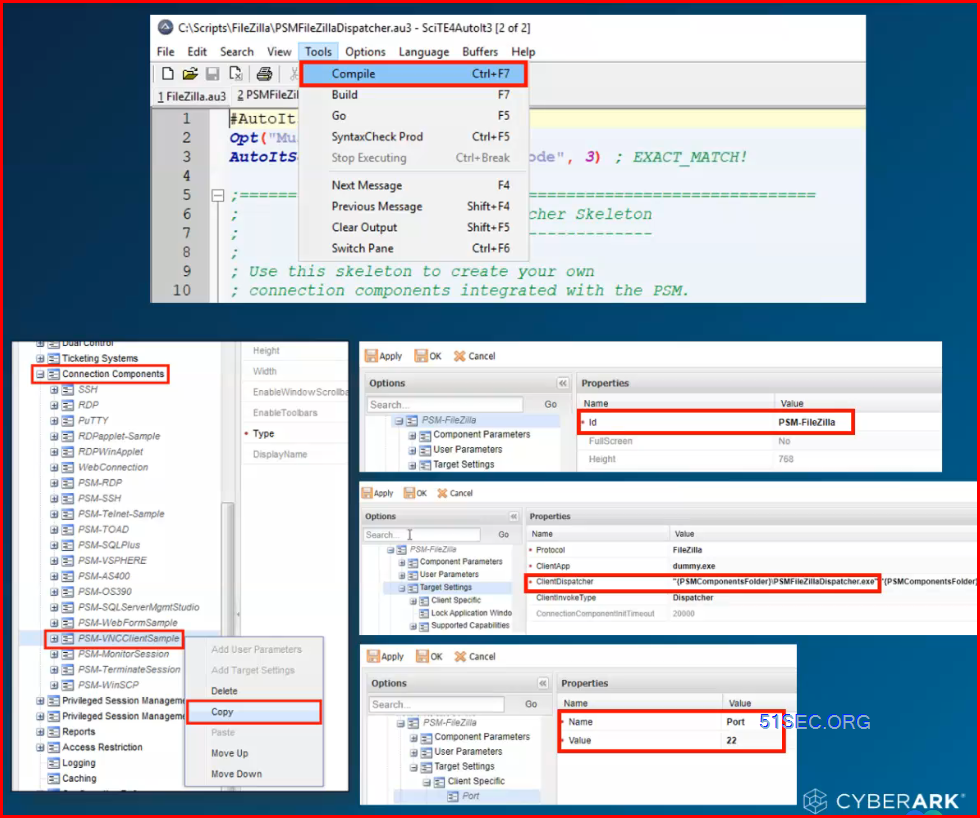
3 Create the Connector
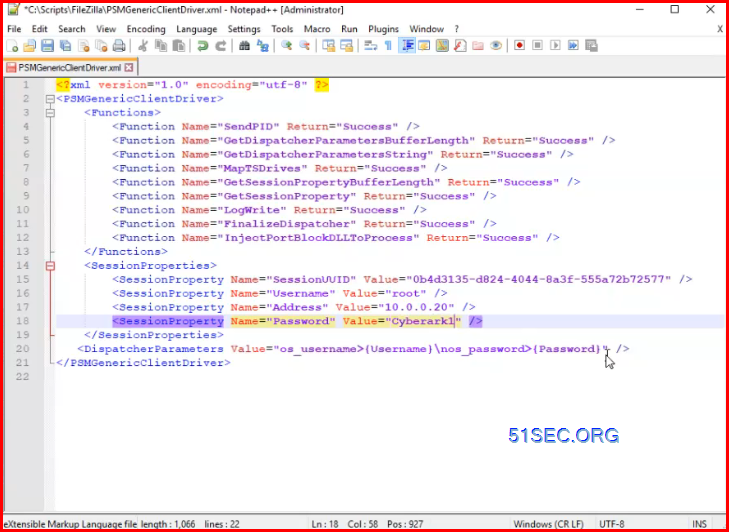
- copy the PSMAutoItDispatcherSkeleton.au3 file from PSM's Components folder
- Areas you may want to modify in the skeleton file will be marked with the string "CHANGE_ME"
- Set the dispatcher name and path for the application executable accordingly
- Copy your script under the "Handle login here!" section and replace hard coded values with variables.
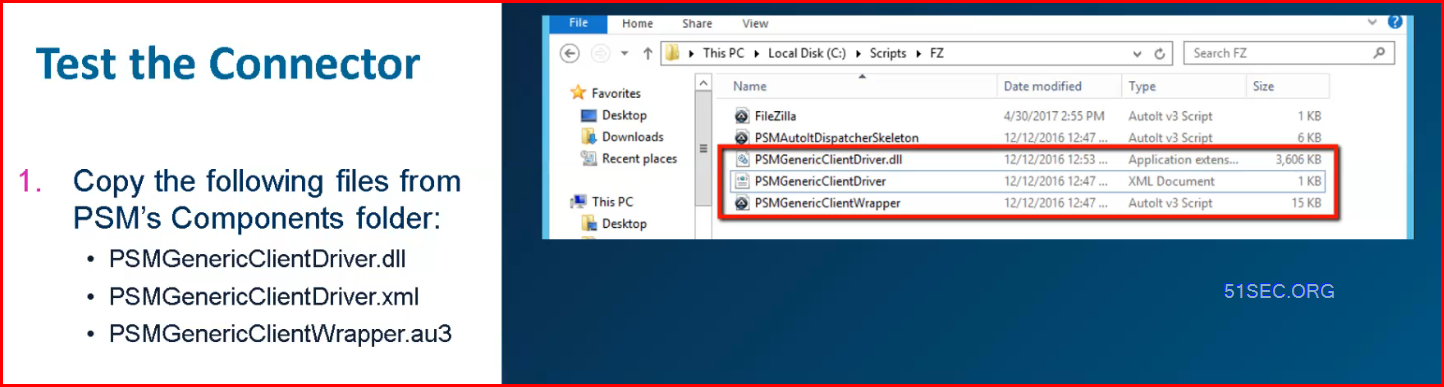
4 Test the Connector
Command line for testing:
- Compile au3 file into an executable file and copy it to PSM's compnent folder
- Create a new Connection Component using th PSM-VNCClientSample as a template and adjust accordingly
- set a unque id
- point to the compiled executable
- add any additional parameters if required
HTML5
If there is HTML5 gateway deployed in your CyberArk environment, you will be able to use it to access your target.
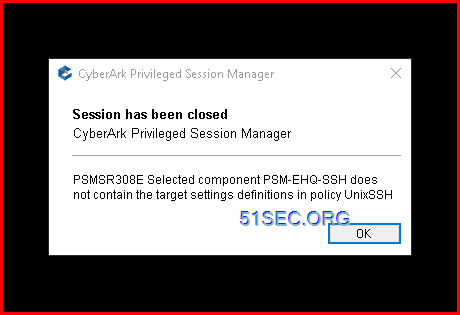
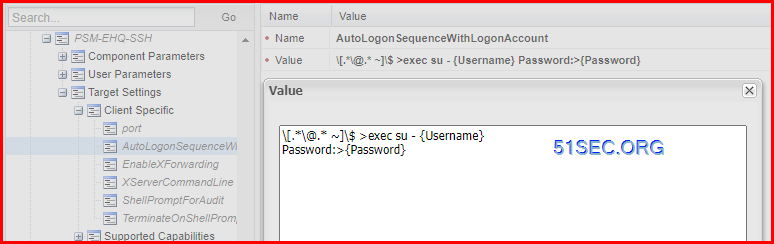
The configuration of AutoLogonSequenceWithLogonAccount is
\[.*\@.* ~]\$ >exec su - {Username}
Password:>{Password}
Videos
References
- Custom Universal Connectors
PSM web applications documentation: Web Applications for PSM | CyberArk Docs
AutoIT Universal Connectors documentation: Custom Universal Connectors | CyberArk Docs
CyberArk training course featuring some AutoIT topics: CPM Plugin & PSM Connector Development - CyberArk
AutoIT forum: https://www.autoitscript.com/forum/


No comments:
Post a Comment