Shell GPT (SGPT) is a command-line tool that integrates with OpenAI’s GPT-4 models to enable natural language processing (NLP) from your Linux shell. It’s designed to simplify repetitive tasks, generate scripts, and assist with coding, all from within the terminal environment. SGPT is a powerful tool that brings the capabilities of OpenAI’s GPT models directly into the Linux command line.
SGPT itself is free to install and use, but you will need an OpenAI API key, which may come with costs depending on your usage tier. SGPT requires an active internet connection as it relies on OpenAI’s cloud-based API to function.
Requirements
- Python Version: Python 3.6 or later
- OpenAI API Key: You will need an API key from OpenAI to access GPT models.
Install SGPT
Step 1: Install Python
SGPT requires Python to run. Most Linux distributions come with Python pre-installed, but if not, you can install it using:sudo apt install python3
Step 2: Install pip (Python Package Installer)
You’ll need a pip to install SGPT. Install it using the following command:sudo apt install python3-pip
Step 3: Install SGPT
Now that Python and pip are installed, you can install SGPT using pip:pip install shell-gpt --break-system-packages
note: you will need to add --break-system-packages at the end of command. Else, you will get some warning messages and installation will be stopped.
Step 4: Verify Installation
Once the installation is complete, verify that SGPT has been instsualled correctly by running:┌──(root㉿kali)-[~/.config/shell_gpt]
└─# sgpt --version
ShellGPT 1.4.4This should ask you to enter openai api key, then return the installed version of SGPT, confirming that it’s ready for use.
Setting up OpenAI API Key
Step 1: Get the OpenAI API Key
- Go to the OpenAI API website.
- Sign up or log in to your account.
- Navigate to the API section and generate a new API key.
Usage:
Step 2: Set API Key in Environment Variables
zsh and bash are different shells that can be used on macOS and other Unix style OSes (Linux, BSD, macOS …). zsh is similar to bash but has some additional features.zsh is the default shell in more recent macOS versions while bash is the default for older ones. You can change what shell gets used when you open an new tab or window in Terminal by going to the Terminal preferences. Both zsh and bash have a number of different shell files that get run at different times. The one you want to edit is either .zshrc or .bashrc (depending on your choice of shell) - these specific files contain shell commands that are run every time you open a new Terminal window or tab.
- export OPENAI_API_KEY="your-api-key-here"
Alternatively, you can add this line to your ~/.zshrc to persist the key across sessions:
- echo 'export OPENAI_API_KEY="your-api-key-here"' >> ~/.zshrc
- source ~/.zshrc
Integrate ShellGPT in Parrot Security Machine
Visit the OpenAI platform (https://platform.openai.com) and sign up or log in to your existing account.
Once logged in, click the profile icon at the top-right, click Your profile option and navigate to the Billing section.
Under Billing section, go to Payment methods and click Add payment method to add a payment method.
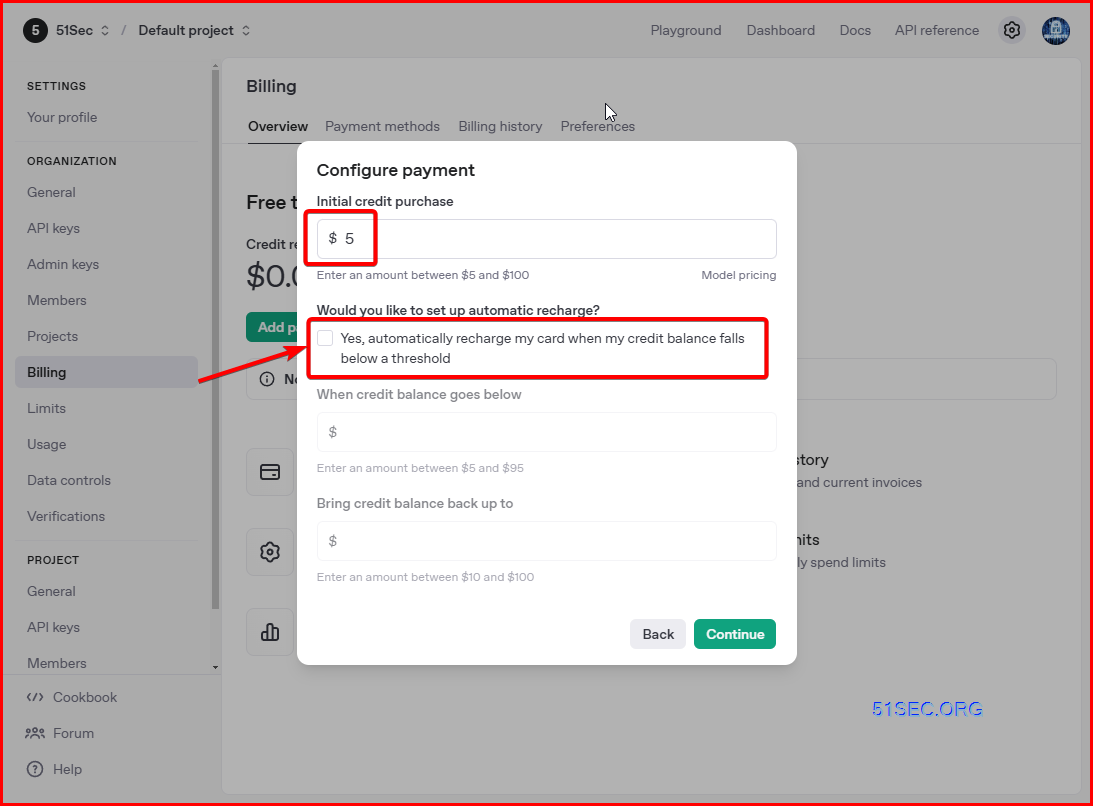
Go to Overview and click Add to credit balance.
Enter minimum amount, i.e. $5 for Amount to add, and click continue. Please refer https://openai.com/api/pricing/ for API pricing details.
Click Confirm payment and complete the transaction to add the credit balance.
Now, click Parrot Security to switch to Parrot Security machine and login with attacker/toor.
Open a Terminal window and type chromium and press Enter to launch Chromium web browser.
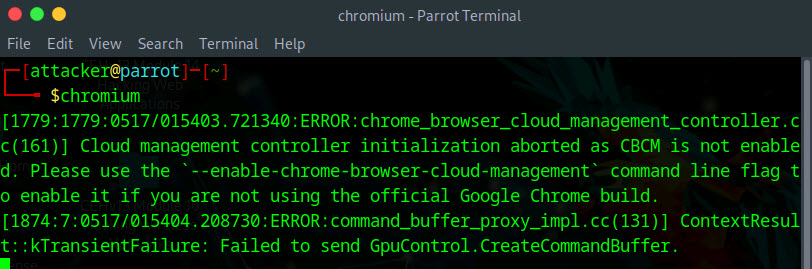
The Chromium window appears, go to https://platform.openai.com/api-keys.
An OpenAI Platform webpage appears, click on Login and login to the OpenAI account which you have created at the starting of this lab.
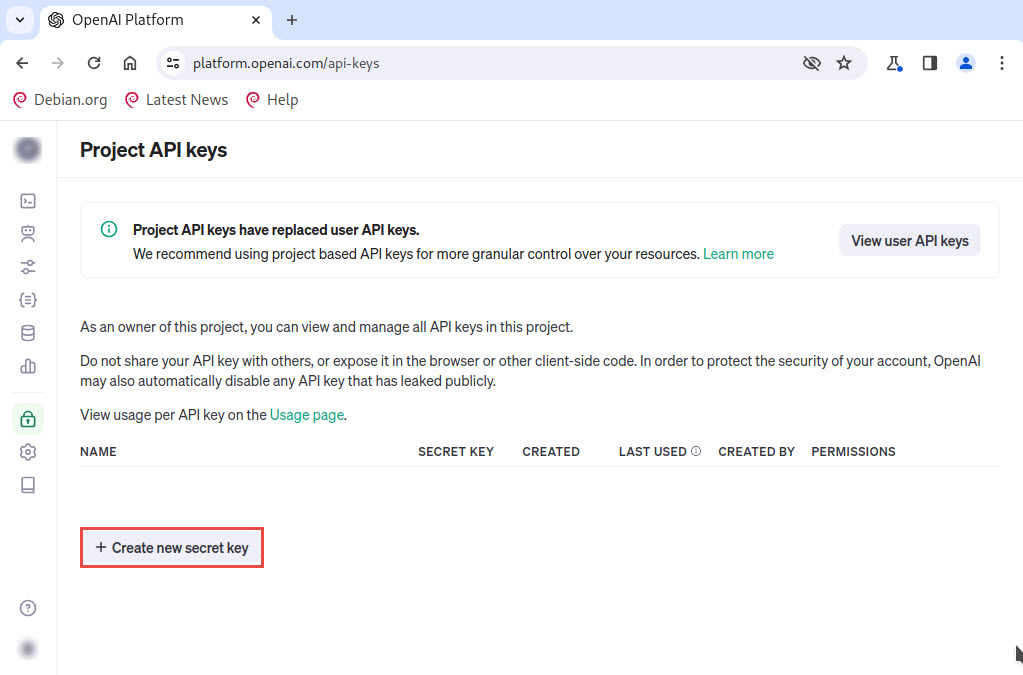
You will be redirected to Project API Keys window, click on + Create new secret key button to create a new key.
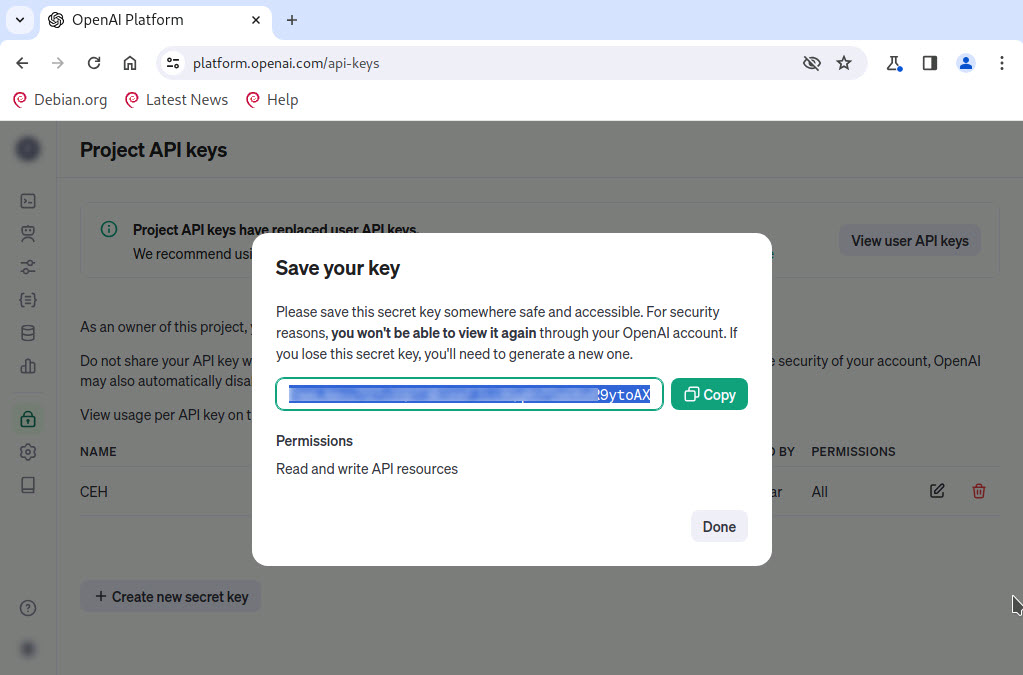
A Create new secret key window appears, provide a name for the secret key (here, CEH) and leave all the settings as default, as shown in the screenshot and click on Create secret key button.

Save your key pop-up appears, click Copy button to copy the key.
Now, open a new terminal with superuser privileges, by executing sudo su command (When prompted, enter the password toor).
Run sgpt command to launch ShellGPT tool.
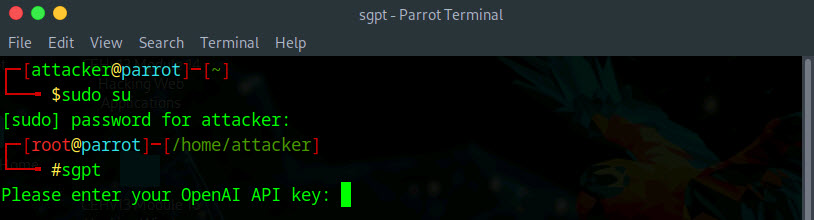
You will be prompted to enter your OpenAI API key, paste the copied API key in the terminal window and press Enter.
The secret key you have entered will not be visible.
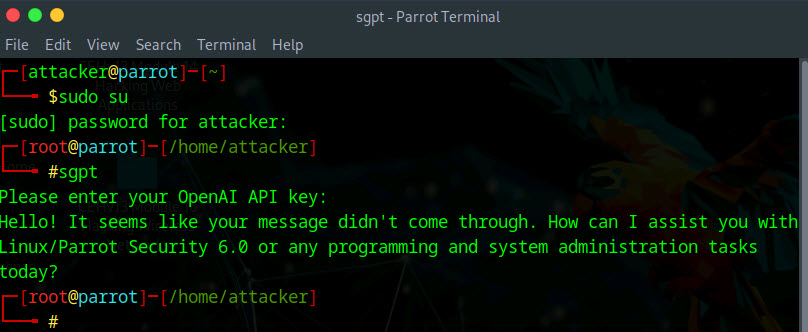
If the API key integration is successful you should receive a message, as shown in the screenshot.
Configuring SGPT for Usage
- ~/.config/shell_gpt/.sgptrc
- Default model: Choose between GPT models.
- Temperature: Control randomness in responses.
- nano ~/.config/shell_gpt/config.yaml
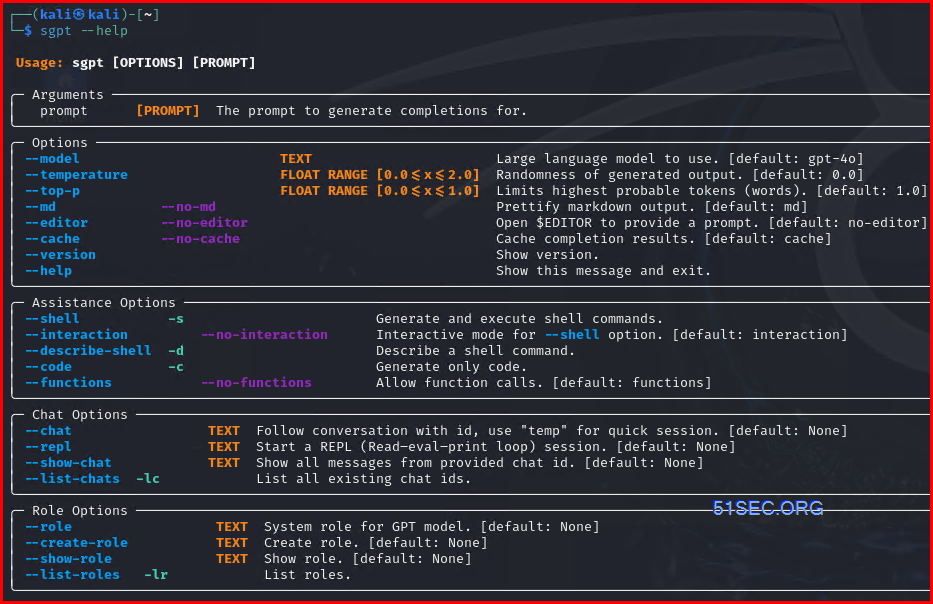
sgpt usage Examples: Query
Full list of arguments
--model                           TEXT     OpenAI model name. [default: text-davinci-003]
--max-tokens                      INTEGER  Strict length of output (words). [default: 2048]
--shell         --no-shell                 Get shell command as output. [default: no-shell]
--execute       --no-execute               Used with --shell, will execute command. [default: no-execute]
--code          --no-code                  Provide only code as output. [default: no-code]
--spinner       --no-spinner               Show loading spinner during API request. [default: spinner]
--animation     --no-animation             Typewriter animation. [default: animation]
--help                                     Show this message and exit.
Query Examples:
- sgpt --shell "make all files in current directory read only"
- # -> chmod 444 *
- sgpt "Explain how HTTP works."
- sgpt "Write a bash script to back up /home/user/documents to /backup."
- sgpt "Explain this Python code: def factorial(n): return 1 if n == 0 else n * factorial(n-1)"
- sgpt "Create a bash script to back up /var/log to /backup/log every night."
- sgpt "create a cron job script to run a database backup at midnight every day."
sgpt usage Examples:
Execute the shell code:-> chmod 444 *
-> Execute shell command? [y/N]: y
...
- sgpt --chat fp --shell "use fping to find active hosts in local network 192.168.2.0/24"
- fping -a -g 192.168.2.0/24 2>/dev/null
sgpt --chat footprint --shell "Use filetype search operator to obtain pdf files on the target website eccouncil.org and store the result in the ec-recon.txt file."curl -s "https://www.google.com/search?q=site:eccouncil.org+filetype:pdf" -A "Mozilla/5.0" | grep -oP 'https?://[^"]+\.pdf' > ec-recon.txtsgpt --chat footprint --shell "Use inurl search operator to obtail the Fortinet VPN login pages"curl -s "https://www.google.com/search?q=inurl:%22/remote/login%22+Fortinet+VPN" -A "Mozilla/5.0" | grep -oP 'https?://\S+'sgpt --chat domain --shell "Discover all the subdomains of ‘google.com’ using dig command."- sgpt --chat footprint --shell "Use Sublist3r to gather a list of subdomains of the target organization eccouncil"
- sgpt --chat fp --shell "Use theHarvester to gather hosts associated with 'microsoft.com', limiting results to 200, and leveraging 'duckduckgo' as a data source"
- baidu can be source as well
- sgpt --shell "what is my computer's dns configuration"
- nmcli dev show | grep 'IP4.DNS'
──(root㉿kali)-[~]
└─# sgpt --chat fp --shell "Use theHarvester to gather subdomains associated with 'microsoft.com', limiting results to 200, and leveraging 'duckduckgo' as a data source"
theHarvester -d microsoft.com -l 200 -b duckduckgo
[E]xecute, [D]escribe, [A]bort: E
Read proxies.yaml from /root/.theHarvester/proxies.yaml
*******************************************************************
* _ _ _ *
* | |_| |__ ___ /\ /\__ _ _ ____ _____ ___| |_ ___ _ __ *
* | __| _ \ / _ \ / /_/ / _` | '__\ \ / / _ \/ __| __/ _ \ '__| *
* | |_| | | | __/ / __ / (_| | | \ V / __/\__ \ || __/ | *
* \__|_| |_|\___| \/ /_/ \__,_|_| \_/ \___||___/\__\___|_| *
* *
* theHarvester 4.6.0 *
* Coded by Christian Martorella *
* Edge-Security Research *
* [email protected] *
* *
*******************************************************************
[*] Target: microsoft.com
[*] Searching Duckduckgo.
[*] No IPs found.
[*] No emails found.
[*] Hosts found: 27
---------------------
2Fblogs.microsoft.com
2Fdocs.microsoft.com
2Fdownload.microsoft.com
2Fmsdn.microsoft.com
2Fnews.microsoft.com
Docs.microsoft.com
account.microsoft.com
appsource.microsoft.com
azure.microsoft.com
azuremarketplace.microsoft.com
blogs.microsoft.com
browserdefaults.microsoft.com
careers.microsoft.com
choice.microsoft.com
copilot.microsoft.com
developer.microsoft.com
docs.microsoft.com
download.microsoft.com
go.microsoft.com
learn.microsoft.com
msdn.microsoft.com
news.microsoft.com
privacy.microsoft.com
schemas.microsoft.com
support.microsoft.com
techcommunity.microsoft.com
visualstudio.microsoft.com
Usage Examples for Vulnerability Scanning
example 1: Scan for open ports
sgpt --shell "Scan 192.168.2.22 for open ports"
- nmap -p- 192.168.2.22
example 2: Scan for vulnerabilities
sgpt --shell "Scan 192.168.2.21 for vulnerabilities"
- nmap -sV --script=vuln 192.168.2.21
example 3: Use Nikto to scan for web vulnerabilities
- nikto -h 192.168.2.20
Upgrade SGPT
wget https://github.com/tbckr/sgpt/releases/download/v2.15.0/sgpt-2.15.0-1.armv7hl.rpm
sudo apt-get install alien
sudo alien sgpt-2.15.0-1.armv7hl.rpm
sudo dpkg -i sgpt-2.15.0-1.armv7hl.rpm
Videos
References
- https://github.com/TheR1D/shell_gpt
- https://notepad.51sec.org/51sec


No comments:
Post a Comment