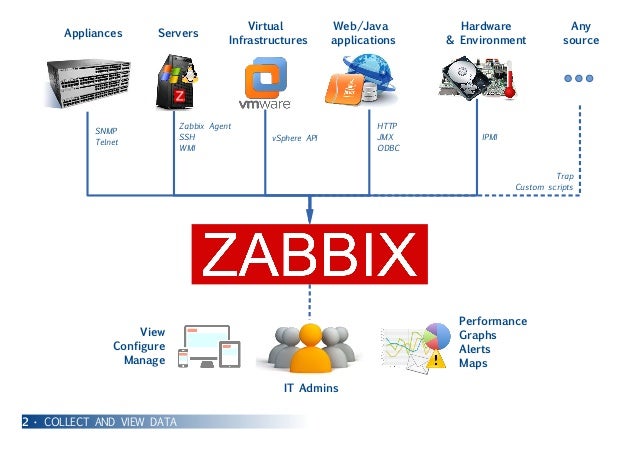
 Zabbix is a mature and effortless enterprise-class open source monitoring solution for network monitoring and application monitoring of millions of metrics. This post is going to install zabbix4.0 into a brand new Centos7.x system environment, including default installation of mariab5.5, php5.4, apache2.4 as well.
All configurations are almost default, the ultimate goal is to install the zabbix system in a fastest way.
Notes: Before you can install Zabbix, you might want to exclude Zabbix from SELinux disable SELinux and Firewall.
Note: I have used Google Cloud Platform free tier vm (1vCPU, 614MB Memory and 10G Hard Drive) to complete this installation without problem. If you have bigger space and large memory, that would be better.
1. Install the EPEL (Extra Packages for Enterprise Linux) source
yum updateyum -y install epel-release
rpm -qa | grep zabbix
rpm -ql zabbix-release
cat /etc/yum.repos.d/zabbix.repo
2. Install php-fpm and mariadb
yum -y install php-fpm mariadb mariadb-server wget
3. Configure zabbix4.0 source
Official image:
4. Install zabbix4.0 software (Server and Agent)
5. Start and Enable mariadb
systemctl enable mariadb
systemctl start mariadb
systemctl start mariadb
6. Configure mariadb for Zabbix to use
Create a zabbix database (default password is empty):
mysql -uroot -p
MariaDB [(none)]> create database zabbix character set utf8 collate utf8_bin;
MariaDB [(none)]> grant all privileges on zabbix.* to zabbix@localhost identified by 'zabbixdbpassword';
MariaDB [(none)]> quit
Import zabbix data:
zcat /usr/share/doc/zabbix-server-mysql*/create.sql.gz | mysql -uzabbix -pzabbixdbpassword zabbix
DBHost=localhost
DBName=zabbix
DBUser=zabbix
DBPassword=zabbixdbpassword
If the account password here is inconsistent with the actual account password you set, when you start zabbix-server, you can't see the port, but you can see the process!
mysql -uroot -p
MariaDB [(none)]> create database zabbix character set utf8 collate utf8_bin;
MariaDB [(none)]> grant all privileges on zabbix.* to zabbix@localhost identified by 'zabbixdbpassword';
MariaDB [(none)]> quit
Import zabbix data:
zcat /usr/share/doc/zabbix-server-mysql*/create.sql.gz | mysql -uzabbix -pzabbixdbpassword zabbix
7. Modify the zabbix-server configuration file
vi /etc/zabbix/zabbix_server.confDBHost=localhost
DBName=zabbix
DBUser=zabbix
DBPassword=zabbixdbpassword
If the account password here is inconsistent with the actual account password you set, when you start zabbix-server, you can't see the port, but you can see the process!
8. Modify the php timezone configuration
vi /etc/php.ini
date.timezone = "America/New_York"
|
9. Start related services
systemctl start php-fpm
systemctl enable httpd
systemctl start httpd
systemctl enable zabbix-server
systemctl start zabbix-server
systemctl enable zabbix-agent
systemctl start zabbix-agent
10. Enter the web installation
Visit http://<Zabbix VM's Public IP>/zabbix
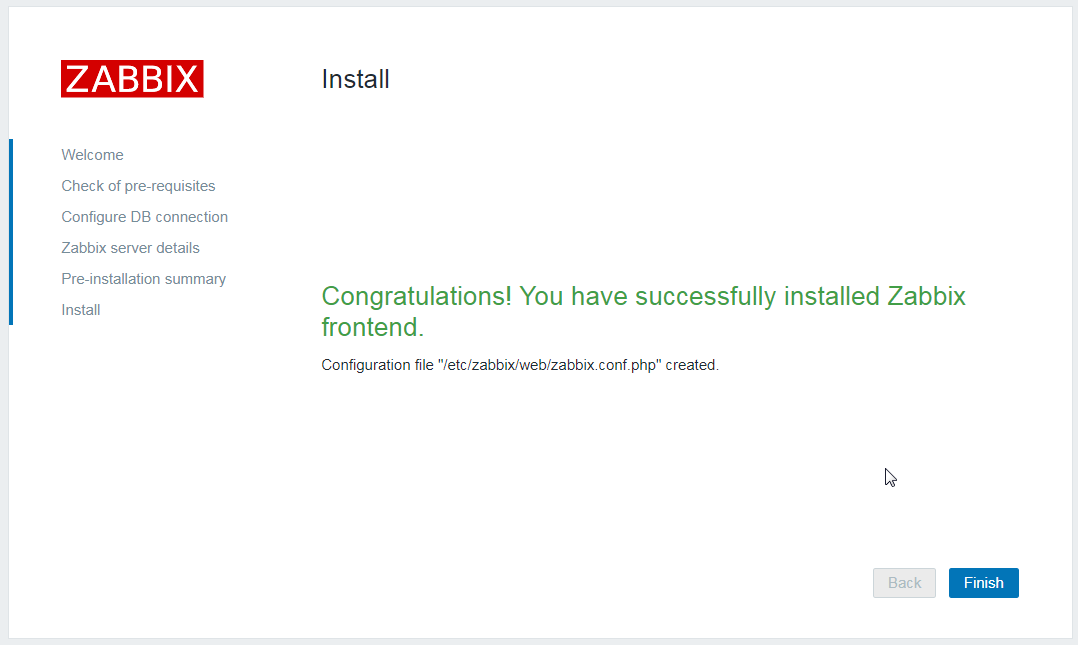
After setting the password, it will be the next step, just like the normal compilation and installation of zabbix. The default account Admin password is zabbix.
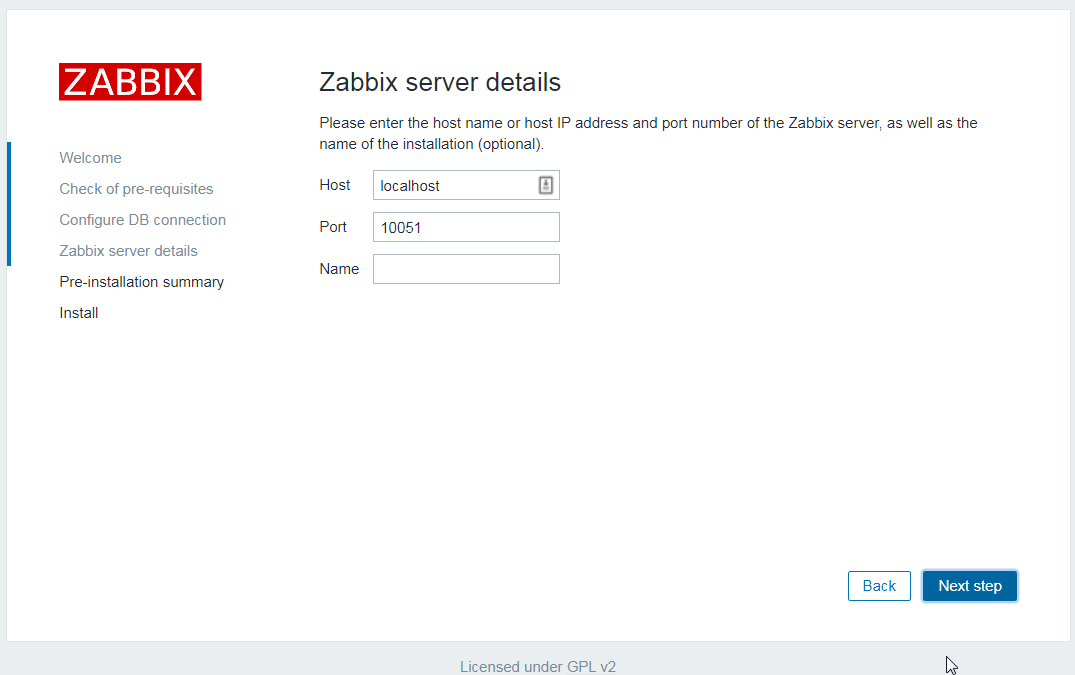
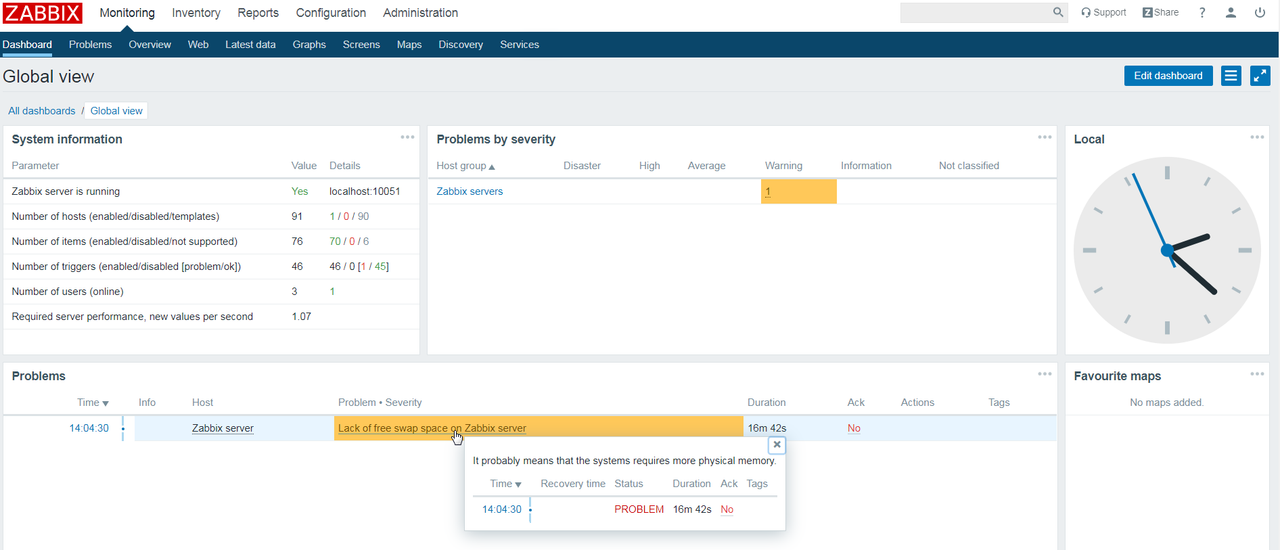
Here are screenshots to configure your frontend Zabbix server:

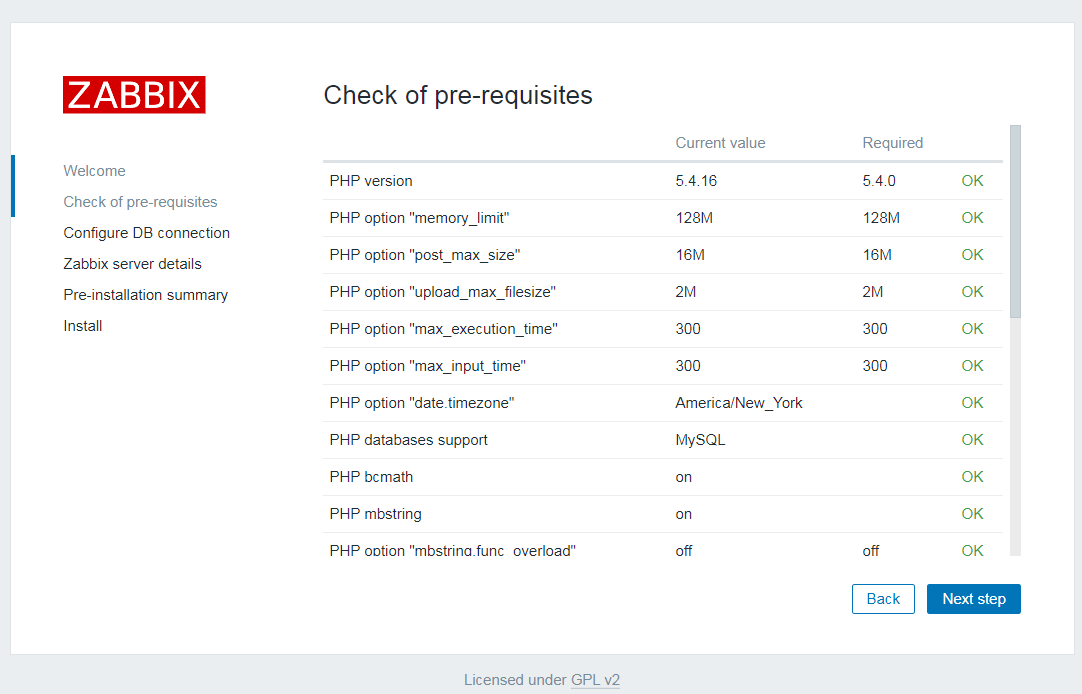

Here are screenshots to configure your frontend Zabbix server:

Another YouTube Video to install Zabbix Virtual Appliance:
Troubleshooting
Issue 1 : You might get one error to say "Zabbix server is running" but value is no. Basically, zabbix server is not started properly.From the /var/log/zabbix/zabbix_server.log, you will find following information:
[root@linux1centos1 zabbix]# tail zabbix_server.logUsually it is relating to selinux status. By default it has been enabled and it will give Zabbix service a problem to start.
5828:20191019:195018.548 server #20 started [trapper #1]
5830:20191019:195018.551 server #22 started [trapper #3]
5831:20191019:195018.554 server #23 started [trapper #4]
5838:20191019:195018.556 server #30 started [preprocessing manager #1]
5838:20191019:195018.556 cannot start preprocessing service: Cannot bind socket to "/var/run/zabbix/zabbix_server_preprocessing.sock": [13] Permission denied.
5804:20191019:195018.558 One child process died (PID:5838,exitcode/signal:1). Exiting ...
zabbix_server [5804]: Error waiting for process with PID 5838: [10] No child processes
5804:20191019:195018.632 syncing trend data...
5804:20191019:195018.632 syncing trend data done
5804:20191019:195018.632 Zabbix Server stopped. Zabbix 4.0.13 (revision 4e383bb6c5).
Disable SELinux
You can temporarily change the SELinux mode from
targeted to permissive with the following command:sudo setenforce 0
However, this change will be valid for the current runtime session only.
To permanently disable SELinux on your CentOS 7 system, follow the steps below:
- Open the
/etc/selinux/configfile and set theSELINUXmod todisabled:/etc/selinux/config# This file controls the state of SELinux on the system. # SELINUX= can take one of these three values: # enforcing - SELinux security policy is enforced. # permissive - SELinux prints warnings instead of enforcing. # disabled - No SELinux policy is loaded. SELINUX=disabled # SELINUXTYPE= can take one of these two values: # targeted - Targeted processes are protected, # mls - Multi Level Security protection. SELINUXTYPE=targeted - Save the file and reboot your CentOS system with:
sudo shutdown -r now - Once the system boots up, verify the change with the
sestatuscommand:sestatusThe output should look like this:SELinux status: disabled
Stop/Disable CentOS Firewall
sudo firewall-cmd --statesudo systemctl stop firewalld
sudo systemctl disable firewalld
Mask the FirewallD service which will prevent the firewall from being started by other services:
sudo systemctl mask --now firewalld


No comments:
Post a Comment