- Basic Commands
- Upgrade System
- Iptable firewalls
- User and Group
- Change Interface IP Address
- Fold and Disk Commands
- Cron Job
- Find Out My Linux Distribution Name and Version
- PS command
- VI Command
- Check Hardware Info
- Install a software on Linux
- Use ssh key to encrypt / decrypt files
- Change Time Zone
- Add/Remove Route
- Remove Specific SSH Host Key
Basic Commands
ls :List Directory Contents
pwd :print working directory
cd :change directory
mkdir
mkdir
mkdir :Make directory
cp
cp
cp :Copy
mv
mv
mv :Move
find,
find,
find, locate, which and whereis : four commands to search file / folder in Linux
kill:
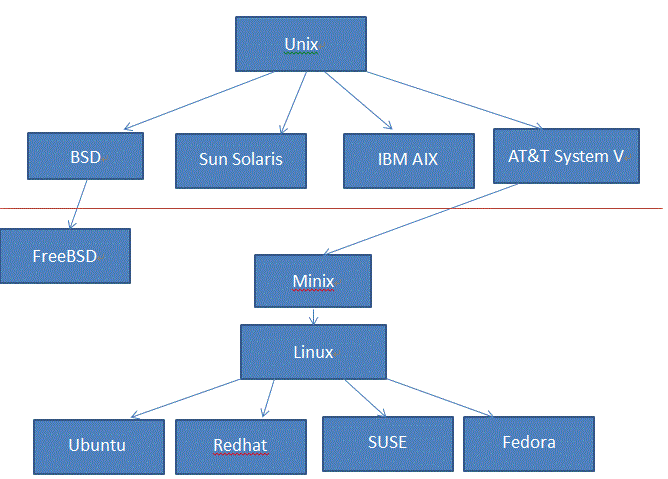 |
| Linux Developing History |
md5sum :Compute and Check MD5 Message Digest
history :History (Event) Record。
sudo :(super user do)
touch :Update the access and modification times of each FILE to the current time
chmod :change file mode bits
chown :change file owner and group
apt :Advanced Package Tool
dd: Convert and Copy a file
root@linux:~# dd if=/home/user/Downloads/debian.iso of=/dev/sdb1 bs=512M; sync
tar : Tape Archive
cal : Calendar
cat : Concatenation. Concatenate (join) two or more plain file and/or print contents of a file on standard output.
grep : searches the given file for lines containing a match to the given strings or words
ps : (Process)
service : command controls the Starting, Stopping or Restarting of a ‘service‘
df : disk usages of file system
du : disk usages
cmp : compare
wget : a free utility for non-interactive (i.e., can work in background) download of files from the Web
mount
gcc : is the in-built compiler for ‘c‘ language in Linux Environment.
g++ is the in-built compiler for ‘C++‘ , the first object oriented programming language.
Java is one of the world’s highly used programming language and is considered fast, secure, and reliable. Most of the the web based service of today runs on java.
kill:
|
| Linux Developing History |
md5sum :Compute and Check MD5 Message Digest
history :History (Event) Record。
sudo :(super user do)
touch :Update the access and modification times of each FILE to the current time
chmod :change file mode bits
chown :change file owner and group
apt :Advanced Package Tool
dd: Convert and Copy a file
root@linux:~# dd if=/home/user/Downloads/debian.iso of=/dev/sdb1 bs=512M; sync
tar : Tape Archive
cal : Calendar
cat : Concatenation. Concatenate (join) two or more plain file and/or print contents of a file on standard output.
grep : searches the given file for lines containing a match to the given strings or words
ps : (Process)
service : command controls the Starting, Stopping or Restarting of a ‘service‘
df : disk usages of file system
du : disk usages
cmp : compare
wget : a free utility for non-interactive (i.e., can work in background) download of files from the Web
mount
gcc : is the in-built compiler for ‘c‘ language in Linux Environment.
g++ is the in-built compiler for ‘C++‘ , the first object oriented programming language.
Java is one of the world’s highly used programming language and is considered fast, secure, and reliable. Most of the the web based service of today runs on java.
Upgrade System
For Ubuntu:Iptable firewalls
2.1 Delete IPtable firewall rules
[root@Linux01p ~]# /sbin/iptables -L -v -n
Chain INPUT (policy ACCEPT 0 packets, 0 bytes) pkts bytes target prot opt in out source destination 74M 53G RH-Firewall-1-INPUT all -- * * 0.0.0.0/0 0.0.0.0/0 Chain FORWARD (policy ACCEPT 0 packets, 0 bytes) pkts bytes target prot opt in out source destination 0 0 RH-Firewall-1-INPUT all -- * * 0.0.0.0/0 0.0.0.0/0 Chain OUTPUT (policy ACCEPT 18M packets, 1069M bytes) pkts bytes target prot opt in out source destination Chain RH-Firewall-1-INPUT (2 references) pkts bytes target prot opt in out source destination 5462 734K ACCEPT all -- lo * 0.0.0.0/0 0.0.0.0/0 46700 2228K ACCEPT icmp -- * * 0.0.0.0/0 0.0.0.0/0 icmp type 255 0 0 ACCEPT esp -- * * 0.0.0.0/0 0.0.0.0/0 0 0 ACCEPT ah -- * * 0.0.0.0/0 0.0.0.0/0 0 0 ACCEPT udp -- * * 0.0.0.0/0 224.0.0.251 udp dpt:5353 0 0 ACCEPT udp -- * * 0.0.0.0/0 0.0.0.0/0 udp dpt:631 719 34592 ACCEPT tcp -- * * 0.0.0.0/0 0.0.0.0/0 tcp dpt:631 63M 52G ACCEPT all -- * * 0.0.0.0/0 0.0.0.0/0 state RELATED,ESTABLISHED 3094 150K ACCEPT tcp -- * * 0.0.0.0/0 0.0.0.0/0 state NEW tcp dpt:22 10M 1029M REJECT all -- * * 0.0.0.0/0 0.0.0.0/0 reject-with icmp-host-prohibited [root@Linux01p ~]# /sbin/service iptables save Saving firewall rules to /etc/sysconfig/iptables: [ OK ] [root@Linux01p ~]# /sbin/service iptables stop Flushing firewall rules: [ OK ] Setting chains to policy ACCEPT: filter [ OK ] Unloading iptables modules: [ OK ] [root@Linux01p ~]# /sbin/iptables -L -v -n Chain INPUT (policy ACCEPT 0 packets, 0 bytes) pkts bytes target prot opt in out source destination Chain FORWARD (policy ACCEPT 0 packets, 0 bytes) pkts bytes target prot opt in out source destination Chain OUTPUT (policy ACCEPT 0 packets, 0 bytes) pkts bytes target prot opt in out source destination [root@Linux01p ~]# /sbin/service iptables start Flushing firewall rules: [ OK ] Setting chains to policy ACCEPT: filter [ OK ] Unloading iptables modules: [ OK ] Applying iptables firewall rules: [ OK ] Loading additional iptables modules: ip_conntrack_netbios_ns [ OK ] |
Or we can use the following command or script to stop the rules:
#!/bin/sh
echo "Saving current firewall rules at /root/current.firewall file..." iptables-save > /root/current.firewall echo "Stopping firewall and allowing everyone..." iptables -F iptables -X iptables -t nat -F iptables -t nat -X iptables -t mangle -F iptables -t mangle -X iptables -P INPUT ACCEPT iptables -P FORWARD ACCEPT iptables -P OUTPUT ACCEPT |
2.2. Changing Debian IPTABLES Rules To Survive Reboot
Linux1~# cat /etc/init.d/iptables
#!/bin/sh # IPTABLES_CONFIG=/usr/local/scripts/rc.iptables PATH=/usr/bin:/bin:/sbin:/usr/sbin:/usr/local/bin:/usr/local/sbin if [ ! -x /sbin/iptables ]; then exit 0 fi start() { if [ -f $IPTABLES_CONFIG ]; then iptables -F iptables -X echo $"Applying iptables firewall rules: " $IPTABLES_CONFIG echo touch /var/lock/subsys/iptables fi } stop() { iptables -P INPUT ACCEPT iptables -P OUTPUT ACCEPT iptables -P FORWARD ACCEPT iptables -F iptables -X echo rm -f /var/lock/subsys/iptables } case "$1" in start) start ;; stop) stop ;; restart) start ;; *) echo $"Usage: $0 {start|stop|restart}" exit 1 esac exit 0 Linux1~# vi /usr/local/scripts/rc.iptables Linux1~# /etc/init.d/iptables restart Linux1~#iptables -L -v -n | more |
2.2.2. using iptables-restore and iptables-save to edit iptables rules
Add these lines to iptables file:
#!/bin/sh
/sbin/iptables-restore < /etc/iptables.up.rule
The iptables file under /etc/network/if-pre-up.d/ needs to be executable so change the permissions:
User and Group
[root@Linux01p ~]# useradd test1
[root@Linux01p ~]# passwd test1 Changing password for user test1. New UNIX password: Retype new UNIX password: passwd: all authentication tokens updated successfully. [root@Linux01p ~]# usermod -a -G root test [root@Linux01p ~]# id test uid=501(test) gid=501(test) groups=501(test),0(root) context=root:system_r:unconfined_t:s0-s0:c0.c1023 [root@Linux01p ~]# groups root bin daemon sys adm disk wheel [root@Linux01p ~]# users root root [root@Linux01p ~]# groupadd network [root@Linux01p ~]# groups root bin daemon sys adm disk wheel [root@Linux01p ~]# cat /etc/group root:x:0:root,test,test1 test:x:501: test1:x:502: network:x:503: [root@Linux01p ~]# cat /etc/passwd root:x:0:0:root:/root:/bin/bash xfs:x:43:43:X Font Server:/etc/X11/fs:/sbin/nologin test1:x:502:502::/home/test1:/bin/bash |
When a new user is created, a new group with the same name is created and the user is added to it. This group is called the primary group of the user. For example, we create a user named “demo_user” in the following screenshot from the terminal:
$sudo groupadd demo_group
$sudo useradd demo_user
$sudo groupmod -a -U demo_user demo_group
$groups demo_user
demo_user : demo_user demo_group
Groups command to list all groups the user has been added in.
getent command is used to get the entries of man important files in a linux system like password files,.
Change Interface IP Address
- Temporary:
- ifconfig eth1 192.168.2.50 netmask 255.255.255.0 up
- Permanently
- RHEL / Red hat / Fedora / CentOS Linux eth1 config file - /etc/sysconfig/network-scripts/ifcfg-eth1
- Debian / Ubuntu Linux - /etc/network/interfaces
# /etc/init.d/network restartFold and Disk Commands
[root@Linux01p var]# rm -r dbbackup/ -f
[root@Linux01p var]# df -h Filesystem Size Used Avail Use% Mounted on /dev/hda3 7.6G 7.3G 0 100% / /dev/hda1 244M 12M 219M 6% /boot tmpfs 504M 0 504M 0% /dev/shm /dev/hdb1 197G 197G 0 100% /data [root@Linux01p var]# du -s 4779468 . |
Cron Job
[admin@ss ~]$ sudo su -
Password: [root@ss ~]# crontab -l @daily scp -r find /var/netscreen/dbbackup/ -mtime -1 -type d -print [email protected]:/data @daily mv /root/CP_MGMT_*.tgz /data/backup/cp/ |
root@ip-172-31-23-170:~# crontab -e
no crontab for root - using an empty one

Select an editor.  To change later, run 'select-editor'.
  1. /bin/nano        <---- easiest
  2. /usr/bin/vim.basic
  3. /usr/bin/vim.tiny
  4. /bin/ed

Choose 1-4 [1]: 1
crontab: installing new crontab


# Edit this file to introduce tasks to be run by cron.
#
# Each task to run has to be defined through a single line
# indicating with different fields when the task will be run
# and what command to run for the task
#
# To define the time you can provide concrete values for
# minute (m), hour (h), day of month (dom), month (mon),
# and day of week (dow) or use '*' in these fields (for 'any').#
# Notice that tasks will be started based on the cron's system
# daemon's notion of time and timezones.
#
# Output of the crontab jobs (including errors) is sent through
# email to the user the crontab file belongs to (unless redirected).
#
# For example, you can run a backup of all your user accounts
# at 5 a.m every week with:
# 0 5 * * 1 tar -zcf /var/backups/home.tgz /home/
#
# For more information see the manual pages of crontab(5) and cron(8)
#
# m h  dom mon dow   command
0 4   *   *   *    /sbin/shutdown -r +8
so the line
0 4 * * * /sbin/shutdown -r +8
would reboot your system every day at 4:08am. (4:00am + 8 minutes)
There are 5 fields before the actual command:
----- --------------
minute 0-59
hour 0-23
day of month 1-31
month 1-12 (or names)
day of week 0-7 (0 or 7 is Sun, or use names)
Note: Website crontab.guru to write a proper cron job . https://wdt.io/ can provide cron job monitor service. For example, reboot httpd service every four hour:
[root@ip-10-10-0-50 log]# vi /etc/crontab
SHELL=/bin/bash
PATH=/sbin:/bin:/usr/sbin:/usr/bin
MAILTO=root
HOME=/
# For details see man 4 crontabs
# Example of job definition:
# .---------------- minute (0 - 59)
# | .------------- hour (0 - 23)
# | | .---------- day of month (1 - 31)
# | | | .------- month (1 - 12) OR jan,feb,mar,apr ...
# | | | | .---- day of week (0 - 6) (Sunday=0 or 7) OR sun,mon,tue,wed,thu,fri,sat
# | | | | |
# * * * * * user-name command to be executed
0 */4 * * * root sudo service httpd restart && curl -sm 30 k.wdt.io/[email protected]/reboot_httpd_4h?c=0_*/4_*_*_*
Find Out My Linux Distribution Name and Version
[root@Linux01p ~]# cat /etc/*-release
Red Hat Enterprise Linux Server release 5.5 Beta (Tikanga) [root@Linux01p ~]# cat /proc/version Linux version 2.6.18-186.el5 ([email protected]) (gcc version 4.1.2 20080704 (Red Hat 4.1.2-46)) #1 SMP Wed Jan 27 18:14:15 EST 2010 Linux1:~# cat /proc/version Linux version 2.6.26-2-amd64 (Debian 2.6.26-27) ([email protected]) (gcc version 4.1.3 20080704 (prerelease) (Debian 4.1.2-25)) #1 SMP Wed Sep 21 03:36:44 UTC 2011 [root@Linux01p ~]# lsb_release -a LSB Version: :core-3.1-ia32:core-3.1-noarch:graphics-3.1-ia32:graphics-3.1-noarch Distributor ID: RedHatEnterpriseServer Description: Red Hat Enterprise Linux Server release 5.5 Beta (Tikanga) Release: 5.5 Codename: Tikanga Linux1:~# lsb_release -a No LSB modules are available. Distributor ID: Debian Description: Debian GNU/Linux 5.0.9 (lenny) Release: 5.0.9 Codename: lenny uname = (Unix Name), [root@Linux01p ~]# uname -a Linux Linux01p 2.6.18-186.el5 #1 SMP Wed Jan 27 18:14:15 EST 2010 i686 i686 i386 GNU/Linux [root@Linux01p ~]# uname -mrs Linux 2.6.18-186.el5 i686 |
One tells you about the kernel. The other tells you about the distribution.
/proc/versionhas the linux kernel version/etc/*-release (readhat-release, or os-release)has the version/release of OS that you're using.
If you upgrade your kernel, then /proc/version will change but /etc/*-release won't.
apt install lsb-release
- lsb-release -a
- lsb-rrelease -d
PS command
[Expert@CP]# ps aux --sort=-pcpu | head -5
USER PID %CPU %MEM VSZ RSS TTY STAT START TIME COMMAND admin 3935 14.9 1.0 33032 10344 ? Ss 09:27 5:13 /bin/confd admin 3941 5.0 58.1 559724 556864 ? Ss 09:27 1:46 /bin/monitord admin 4215 1.4 3.6 251040 35412 ? Ssl 09:28 0:28 cpd admin 3937 0.7 0.2 26076 2808 ? Ssl 09:27 0:15 /bin/searchd |
VI Command
Cut and paste:- Position the cursor where you want to begin cutting.
- Press v to select characters (or uppercase V to select whole lines).
- Move the cursor to the end of what you want to cut.
- Press d to cut (or y to copy).
- Move to where you would like to paste.
- Press P to paste before the cursor, or p to paste after.
Check Hardware Info
$ lscpu
For Memory :$ free -m (give you result by MB)
$ cat /proc/meminfo
For HDD:$ df -h (give you human readable result)
$ sudo fdisk -l
$ hdparm -i /dev/device (for example sda1, hda3...)
Check CPU cores and memory:
Install/Uninstall a software on Linux
$ yum install firefox
If you are using Red Hat Enterprise Linux, it happens that the package you are looking for is in EPEL, so you can install that:
sudo rpm -Uvh http://download.fedora.redhat.com/pub/epel/5/i386/epel-release-5-4.noarch.rpm
and then you can:
yum install ncdu.
For Ubuntu ( run this as root ) :
# apt-get install firefox
For Debian/Ubuntu
# aptitude install firefox
Change Time Zone
tzselect - "which opens a gui in terminal"
or
sudo cp /usr/share/zoneinfo/Canada/Eastern /etc/localtime
"Which will set timezone to EST or EDT."
ubuntu@ip-10-1-1-50:/var/log/apache2$ timedatectl list-timezones | grep Toronto
America/Toronto
ubuntu@ip-10-1-1-50:/var/log/apache2$ sudo timedatectl set-timezone America/Toronto
sudo: unable to resolve host ip-10-1-1-50
ubuntu@ip-10-1-1-50:/var/log/apache2$ date
Fri Sep 29 22:09:11 EDT 2017
[ec2-user@ip-10-10-0-50 ~]$ sudo su
[root@ip-10-10-0-50 ec2-user]# mv /etc/localtime /root/localtime.old
[root@ip-10-10-0-50 ec2-user]# ln -s /usr/share/zoneinfo/America/Toronto /etc/localtime
[root@ip-10-10-0-50 ec2-user]# date
Fri Sep 29 22:11:00 EDT 2017
[root@ip-10-10-0-50 ec2-user]#
Add/Remove Route
LinuxSvr:~# cat /etc/network/interfaces
# This file describes the network interfaces available on your system
# and how to activate them. For more information, see interfaces(5).

# The loopback network interface
auto lo
iface lo inet loopback

# The primary network interface
allow-hotplug eth0
iface eth0 inet static
        address 10.9.2.10
        netmask 255.255.255.0
        network 10.9.2.0
        broadcast 10.9.2.255
        gateway 10.94.22.1
        # dns-* options are implemented by the resolvconf package, if installed
        dns-nameservers 10.9.1.5
        dns-search accounts.intern gdc.intern intern
        #
        #up route add -net 19.18.0.0/16 gw 10.9.2.3
        #up route add -net 172.1.0.0/16 gw 10.9.2.3
        #up route add -net 10.0.0.0/24 gw 10.9.2.3
mta:~#
Remove Specific SSH Host Key
If you have remote server system has changed, your ssh session might failed because ssh fingerprint is not matching what you have now for that host. To fix this issue, you will just need to remove existing host's fingerprint.
users-Mac-mini:~ user$ ssh -lroot 111.67.205.98
@@@@@@@@@@@@@@@@@@@@@@@@@@@@@@@@@@@@@@@@@@@@@@@@@@@@@@@@@@@
@ WARNING: REMOTE HOST IDENTIFICATION HAS CHANGED! @
@@@@@@@@@@@@@@@@@@@@@@@@@@@@@@@@@@@@@@@@@@@@@@@@@@@@@@@@@@@
IT IS POSSIBLE THAT SOMEONE IS DOING SOMETHING NASTY!
Someone could be eavesdropping on you right now (man-in-the-middle attack)!
It is also possible that a host key has just been changed.
The fingerprint for the ECDSA key sent by the remote host is
SHA256:V9o8sh2Vxm56r+2q42minB4D88a8yTanlAPs4h/VAMY.
Please contact your system administrator.
Add correct host key in /Users/user/.ssh/known_hosts to get rid of this message.
Offending ECDSA key in /Users/user/.ssh/known_hosts:4
ECDSA host key for 111.67.205.98 has changed and you have requested strict checking.
Host key verification failed.
users-Mac-mini:~ user$ vim ~/.ssh/known_hosts
Move your cursor to the right line and hit
dd
then save it.
dd command in vi / vim is to delete whole line
Reference
- CentOS Basic Cofniguration
- Tutorial: Hosting a WordPress Blog with Amazon Linux
- Tutorial: Installing a LAMP Web Server on Amazon Linux


No comments:
Post a Comment