If you have your own domain, either purchased from domain registrar or applied it from some free domain service provider, you can add domain into Office 365 account to get you own domain's O365 service.
Free Domain and Free Email Service
Here are two posts for free domain service provider EU.ORG and PP.UA
- Get Permanent Free Domain Name from EU.ORG & Integrate with Cloudflare
- Free SubDomain from PP.UA and Integration with CloudFlare
Free Email Services:
| Zoho | Yandex | No Free | Microsoft | ||
|---|---|---|---|---|---|
| Domain | 1 | 1000 | 1 | Based on Subscription | Based on Subscription |
| User | 5 | Unlimited | 1 | Based on Subscription | Based on Subscription |
| Website | Zoho | Yandex | Microsoft | ||
| POP&IMAP |  |  | | | |
Get Free Microsoft 365 Subscription
You can have a free Microsoft 365 Developer subscription from this link:
https://developer.microsoft.com/en-us/microsoft-365/dev-program
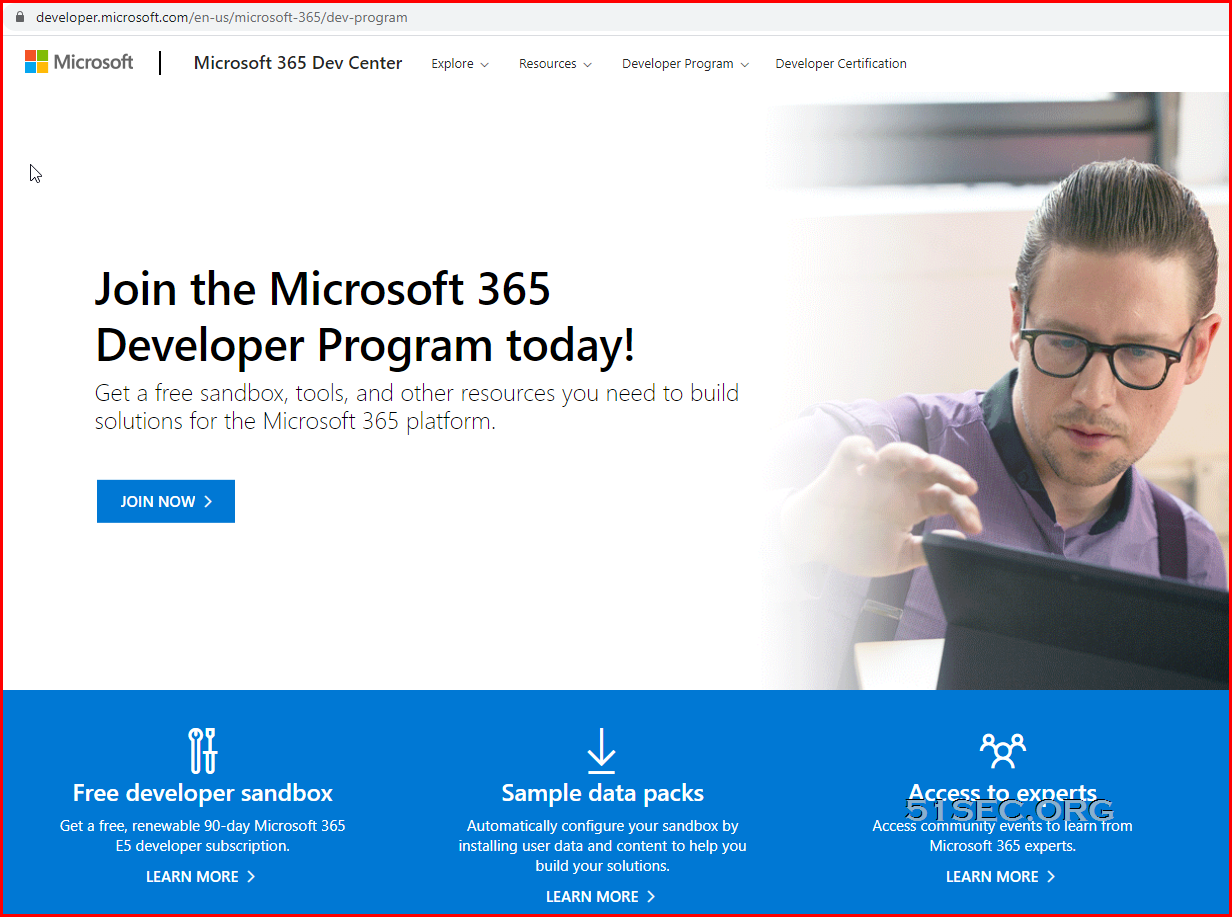
Get a free Microsoft 365 E5 developer subscription to be your own administrator and prototype apps and solutions on your sandbox subscription.
- Includes 25 user licenses for development purposes
- Access core Microsoft 365 workloads and capabilities (Windows not included), including:
- All Office 365 apps including SharePoint, OneDrive, Outlook/Exchange, Teams, Planner, Word, Excel, PowerPoint, and more
- Office 365 Advanced Threat Protection
- Advanced analytics with Power BI
- Enterprise Mobility + Security (EMS) for compliance and information protection
- Azure Active Directory for building advanced identity and access management solutions
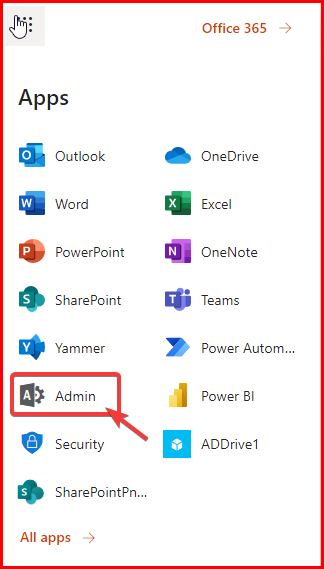
Add Domains
You can login into your O365 with your admin account, then select Admin app to start integrating your domain with your account:
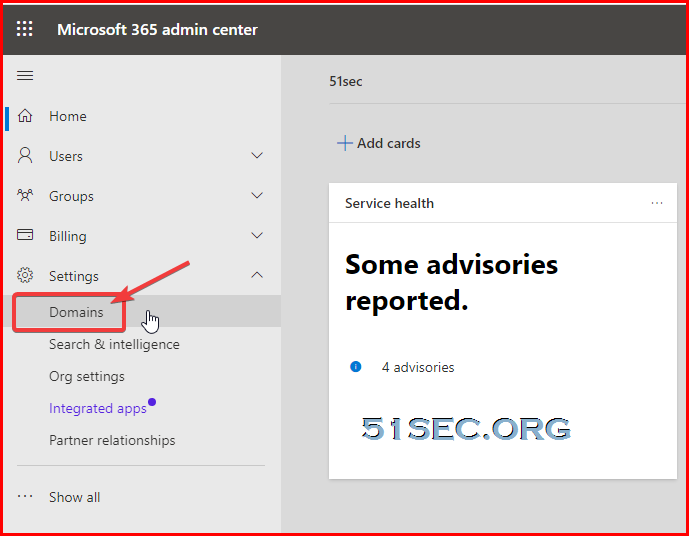
At Microsoft 365 admin center, click Settings -> Domains
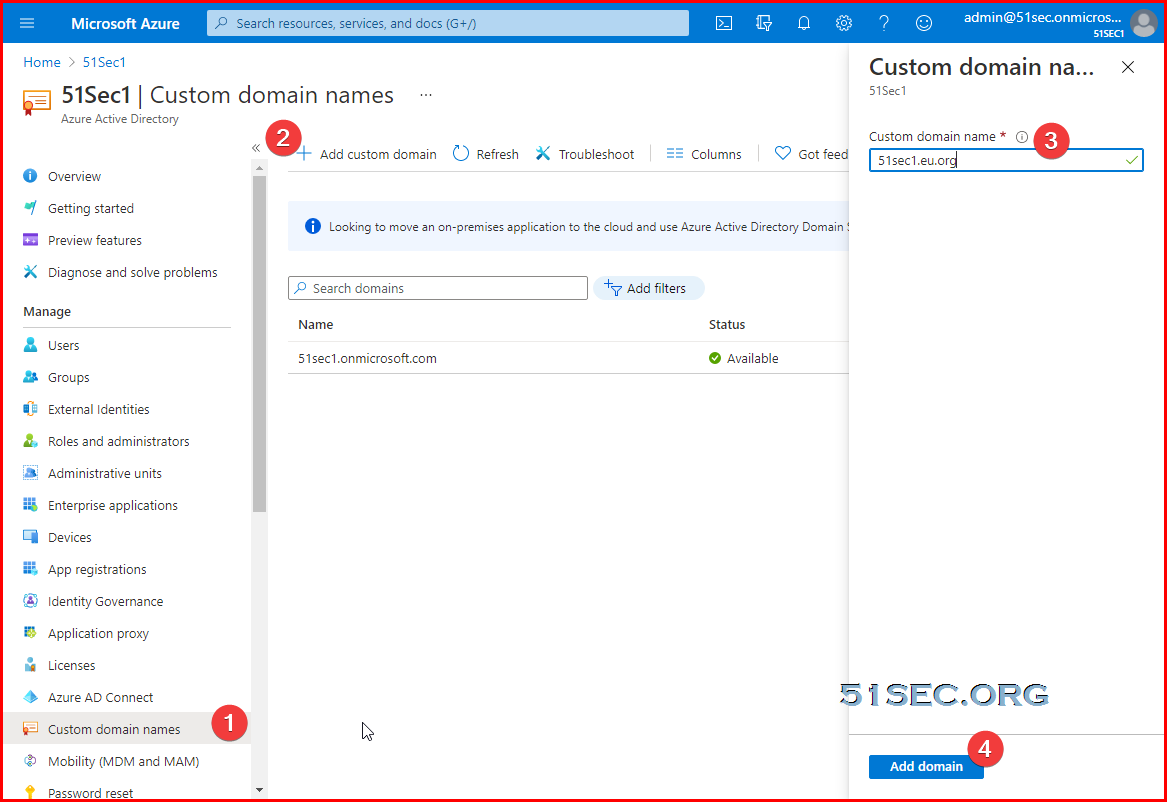
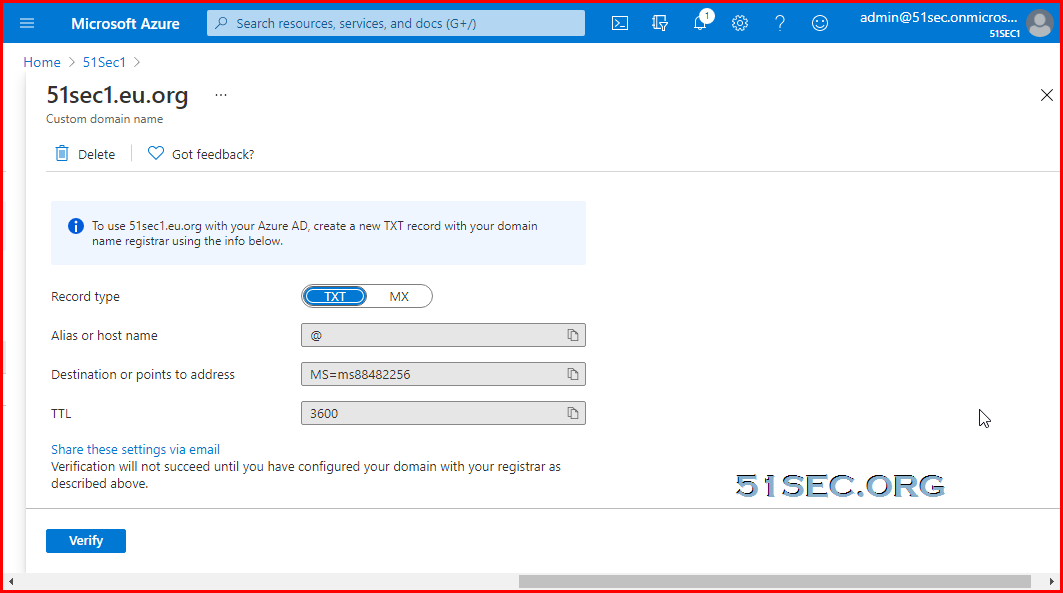
There are three different ways to verify your domain:
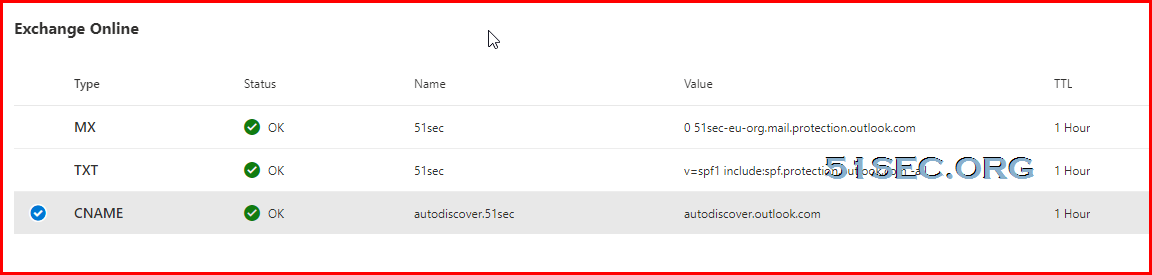
After verified your domain, there are three more dns records will need to be added into your domain name registrar: (from the admin center at https://admin.microsoft.com.)
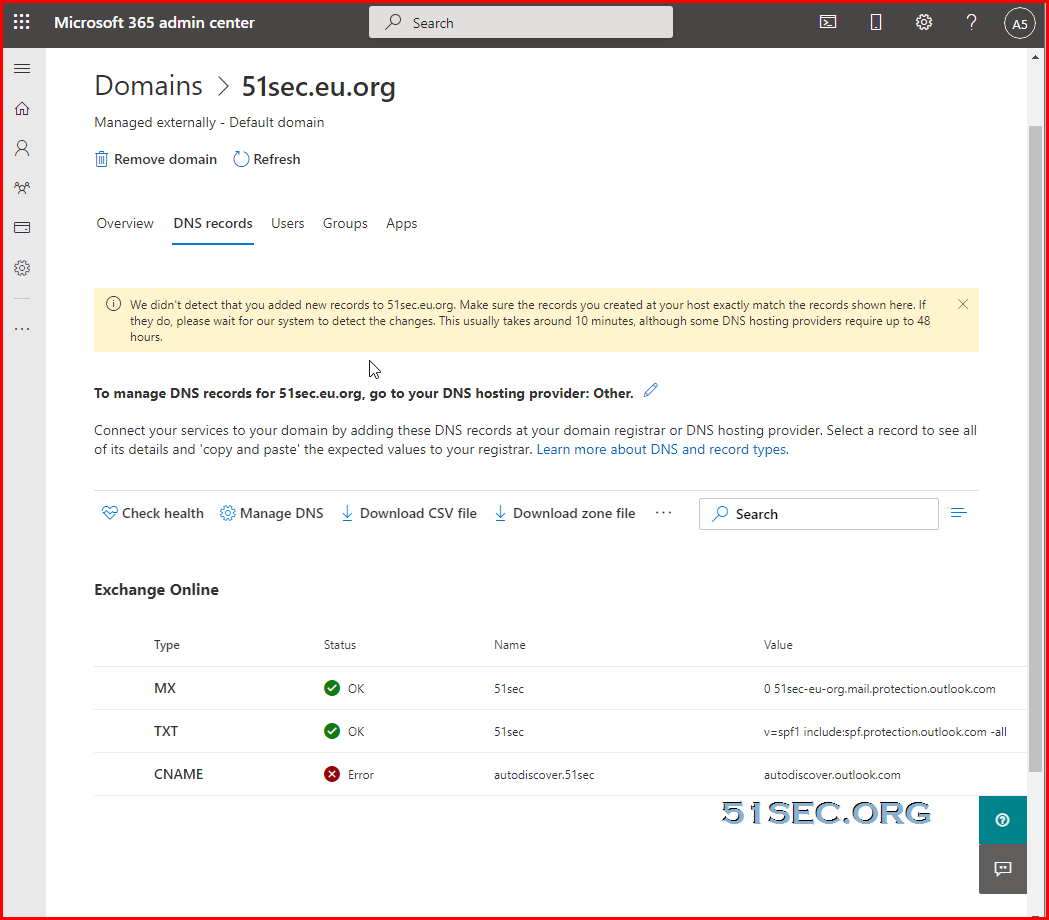
In Cloudflare, actually, I will have to put following values for those three dns records:
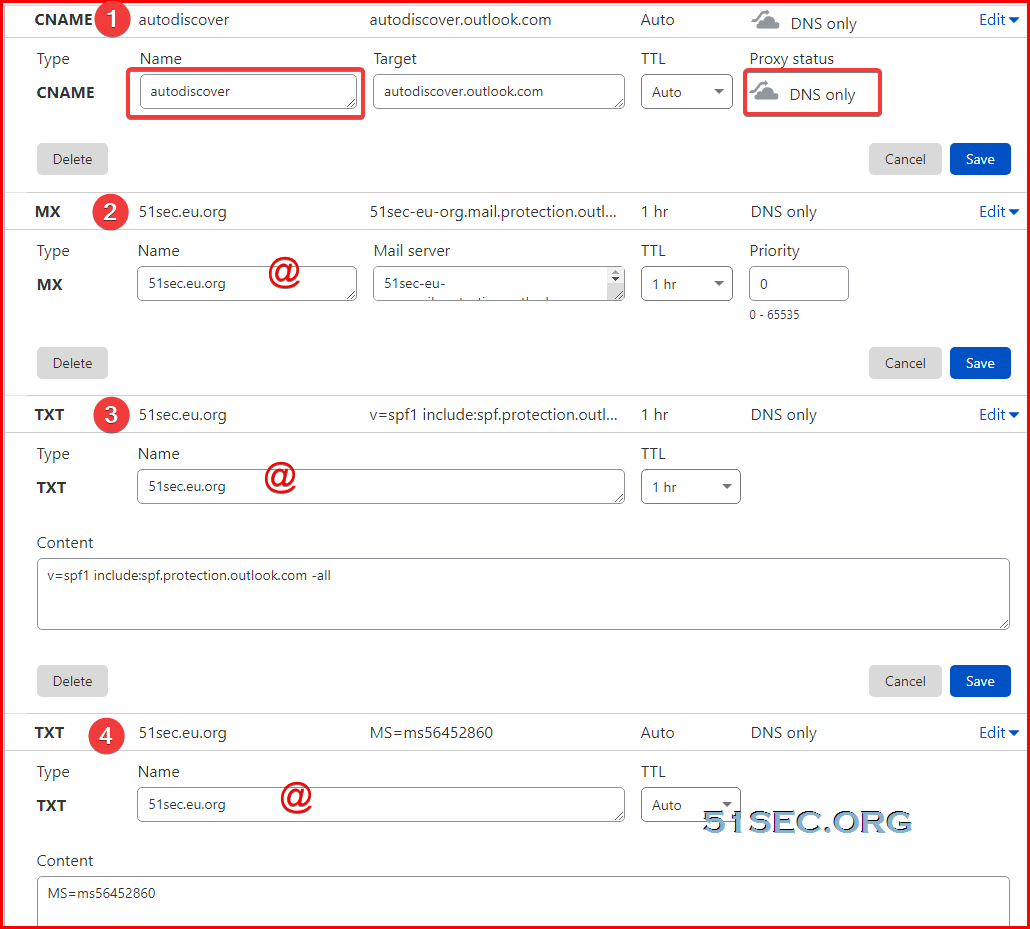
For cname record, you will have to disable proxy, and use dns only for proxy status. After disabled proxy for your cname record, you should get all green for your dns health status.
Add a domain for your Microsoft 365 (Office 365)
Your company might need multiple domain names for different purposes. For example, you might want to add a different spelling of your company name because customers are already using it and their communications have failed to reach you.
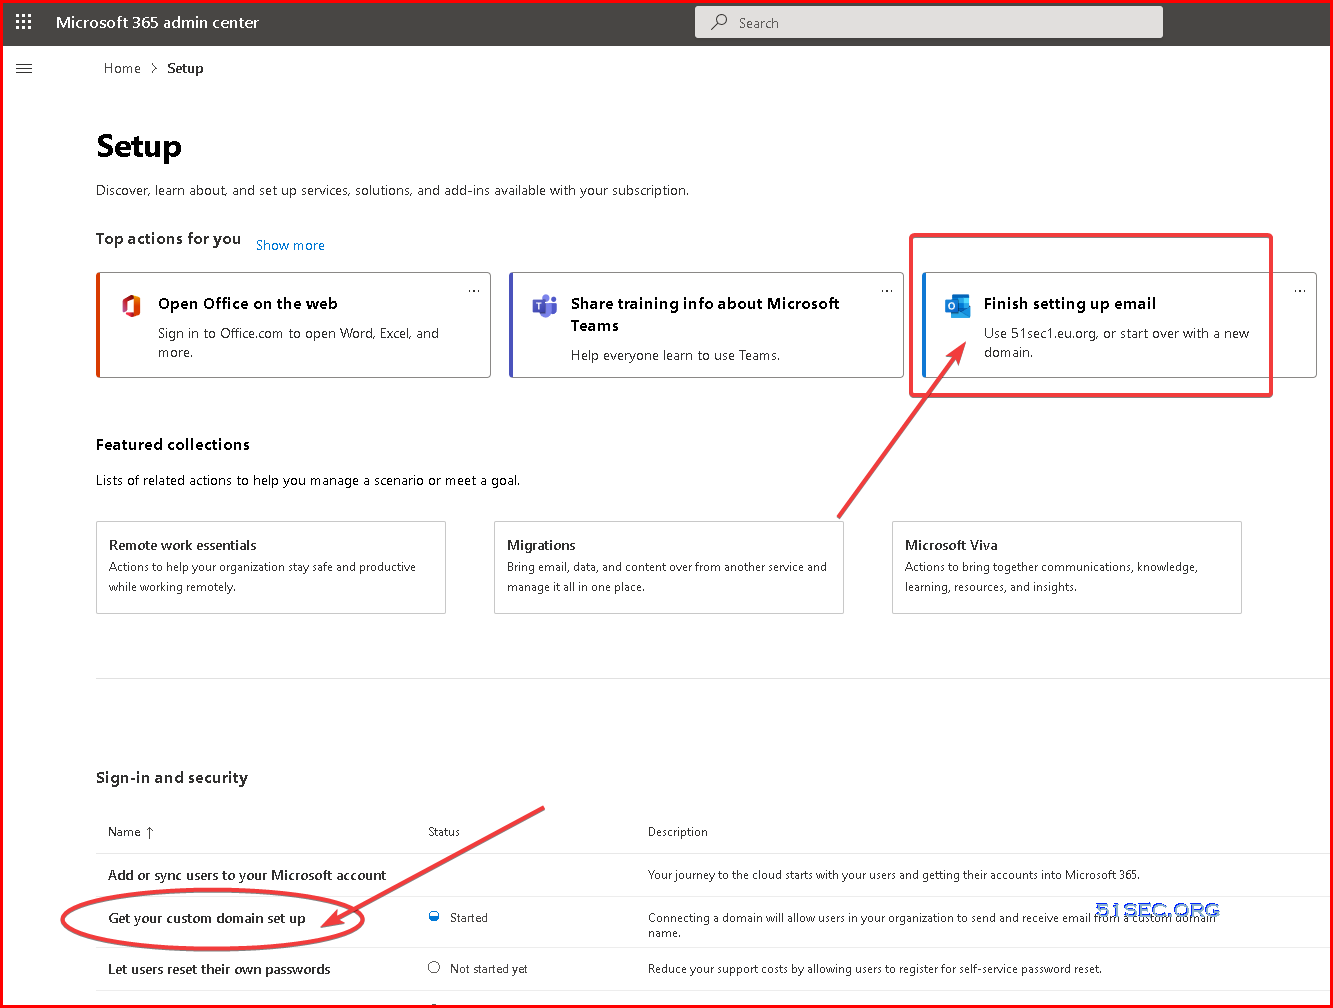
- In the Microsoft 365 admin center, choose Setup.
- Under Get your custom domain set up, select View > Manage > Add domain.
- Enter the new domain name that you want to add, and then select Next.
- Sign in to your domain registrar, and then select Next.
- Choose the services for your new domain.
- Select Next > Authorize > Next, and then Finish. Your new domain has been added.
Add a domain
Follow these steps to add, set up, or continue setting up a domain.
- Go to the admin center at https://admin.microsoft.com.
Go to the Settings > Domains page.
Select Add domain.
Enter the name of the domain you want to add, then select Next.
Choose how you want to verify that you own the domain.
- If your domain registrar uses Domain Connect, Microsoft will set up your records automatically by having you sign in to your registrar and confirm the connection to Microsoft 365. You'll be returned to the admin center and Microsoft will then automatically verify your domain.
- You can use a TXT record to verify your domain. Select this and select Next to see instructions for how to add this DNS record to your registrar's website. This can take up to 30 minutes to verify after you've added the record.
- You can add a text file to your domain's website. Select and download the .txt file from the setup wizard, then upload the file to your website's top level folder. The path to the file should look similar to:
http://mydomain.com/ms39978200.txt. We'll confirm you own the domain by finding the file on your website.
Choose how you want to make the DNS changes required for Microsoft to use your domain.
- Choose Add the DNS records for me if your registrar supports Domain Connect, and Microsoft will set up your records automatically by having you sign in to your registrar and confirm the connection to Microsoft 365.
- Choose I'll add the DNS records myself if you want to attach only specific Microsoft 365 services to your domain or if you want to skip this for now and do this later. Choose this option if you know exactly what you're doing.
If you chose to add DNS records yourself , select Next and you'll see a page with all the records that you need to add to your registrars website to set up your domain.
If the portal doesn't recognize your registrar, you can follow these general instructions.
If you don't know the DNS hosting provider or domain registrar for your domain, see Find your domain registrar or DNS hosting provider.
If you want to wait for later, either unselect all the services and click Continue, or in the previous domain connection step choose More Options and select Skip this for now.
Select Finish - you're done!
Add or edit custom DNS records
Follow the steps below to add a custom record for a website or 3rd party service.
Sign in to the Microsoft admin center at https://admin.microsoft.com.
Go to the Settings > Domains page.
On the Domains page, select a domain.
Under DNS settings, select Custom Records; then select New custom record.
Select the type of DNS record you want to add and type the information for the new record.
Select Save.
Create User to Test
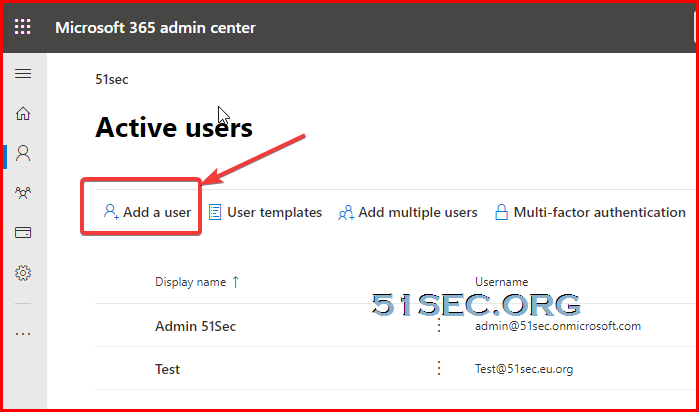
Note: make sure this user has a location defined when creating it. Else when you assign m365 license, it will give you an error for failed to assign license to this user.


No comments:
Post a Comment