Ezoic DNS and Hosting screwed up my site this morning. All of my root doman's A records are gone and even I added them back in, they are still not working. I am believing some of DNS configuration must be wrong in their backend. Support is not that much helping since it is out of their technical ability.
Fortunately I have a back up site created on my Oracle Cloud Arm64 machine. This post is to record all steps I did to switch from Ezoic hosting to my own hosting.
Make sure my backup wordpress site is up on one of my subdomain
All of my Nginx, Wordpress and DB dockers deployed by Portainer based on my previous post:- Using Portainer to Create Custom Wordpress Template on Arm64 Based VPS
- Install Docker, Docker-Compose, Portainer & Nginx on CentOS 8 & Ubuntu 20.04
Nginx configuration changed to add two websites in:
root@4ccb3643b7e4:/# cat /etc/nginx/conf.d/wp.conf
server {
    listen       80;
    server_name  opc2armwp.51sec.eu.org 51sec.org www.51sec.org;

location / {
    proxy_pass       http://mywp_wordpress_1;
    proxy_http_version         1.1;
    proxy_read_timeout 300;
    proxy_set_header Upgrade $http_upgrade;
    proxy_set_header Connection "upgrade";
    proxy_set_header Host $http_host;
    proxy_set_header X-Real-IP $remote_addr;
    proxy_set_header X-Real-PORT $remote_port;
           }

}
Install All-in-One WP Migration Plug-ins
Import the backup file into your wordpress site.
- All-in-one wp migration
- All-in-one wp migration unlimited extension or All-in-one wp migration file extension (512M limitation)
Other Backup Plug-ins:
Using UpdraftPlus as backup / restore solution
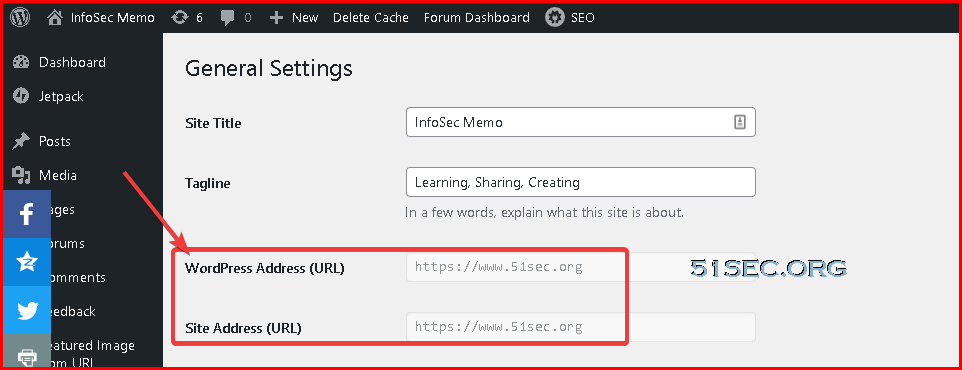
Backup / restoreWordpress configuration file change - wp-config.php
- define('WP_HOME','https://www.51sec.org');
- define('WP_SITEURL','https://www.51sec.org');
root@ddcb07417c01:/var/www/html# more wp-config.php
<?php
/**
 * The base configuration for WordPress
 *
 * The wp-config.php creation script uses this file during the installation.
 * You don't have to use the web site, you can copy this file to "wp-config.php"
 * and fill in the values.
 *
 * This file contains the following configurations:
 *
 * * MySQL settings
 * * Secret keys
 * * Database table prefix
 * * ABSPATH
 *
 * This has been slightly modified (to read environment variables) for use in Docker.
 *
 * @link https://wordpress.org/support/article/editing-wp-config-php/
 *
 * @package WordPress
 */

// IMPORTANT: this file needs to stay in-sync with https://github.com/WordPress/WordPress/blob/master/wp-config-sample.php
// (it gets parsed by the upstream wizard in https://github.com/WordPress/WordPress/blob/f27cb65e1ef25d11b535695a660e7282b98eb742/wp-admin/setup-config.php#L356-L392)

// a helper function to lookup "env_FILE", "env", then fallback
if (!function_exists('getenv_docker')) {
        // https://github.com/docker-library/wordpress/issues/588 (WP-CLI will load this file 2x)
        function getenv_docker($env, $default) {
                if ($fileEnv = getenv($env . '_FILE')) {
                        return rtrim(file_get_contents($fileEnv), "\r\n");
                }
                else if (($val = getenv($env)) !== false) {
                        return $val;
                }
                else {
                        return $default;
                }
        }
}


define('WP_HOME','https://www.51sec.org');
define('WP_SITEURL','https://www.51sec.org');
- service apache2 restart
Cloudflare configuration
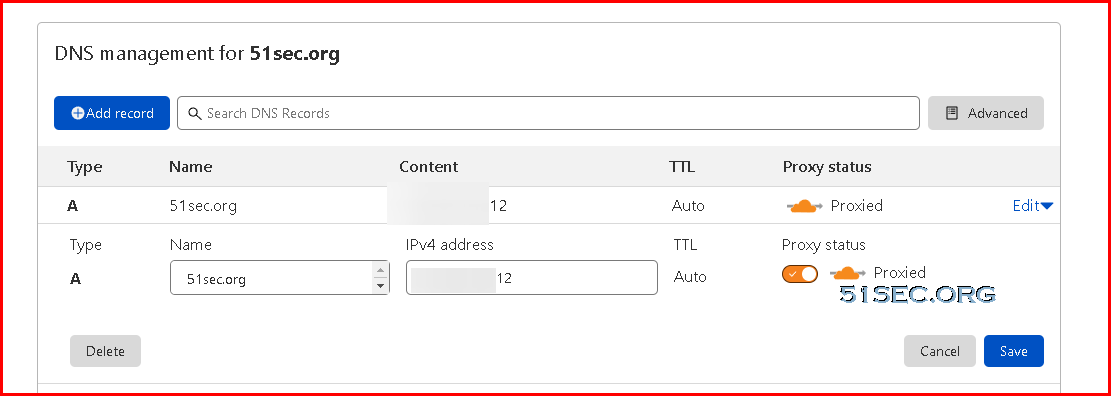
Add dns A record to point to my OCP's Arm64 machine's public IP. Remove all other Ezoic hosting's A records.| ALIAS | @ | lb1.wphosting.ezoic.com | 5 mins | YES |
| CNAME | www | 51sec.org | 5 mins | Yes |
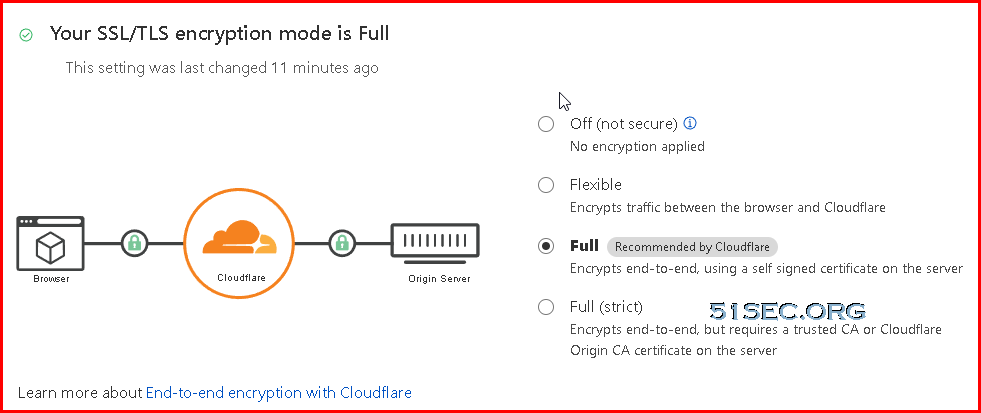
Make sure SSL/TLS encryption mode is full. Else, my photos URL which is using photo.51sec.org subdomain will fail to load. It will show an error to say there are too many redirections.
Install Certbot
- apt install certbot
- apt install python3-certbot-nginx
You will need both. Second command is to install Nginx plugin for Certbot.
Using following command to apply ssl cert for website www.51sec.org:
- certbot --nginx
After the step done, here is your wp.conf Nginx configuration looks like:
root@4ccb3643b7e4:/# cat /etc/nginx/conf.d/wp.conf
server {
    listen       80;
    server_name  armwp.51sec.org;

location / {
    proxy_pass       http://mywp_wordpress_1;
    proxy_http_version         1.1;
    proxy_read_timeout 300;
    proxy_set_header Upgrade $http_upgrade;
    proxy_set_header Connection "upgrade";
    proxy_set_header Host $http_host;
    proxy_set_header X-Real-IP $remote_addr;
    proxy_set_header X-Real-PORT $remote_port;
           }

    listen 443 ssl; # managed by Certbot
    ssl_certificate /etc/letsencrypt/live/www.51sec.org/fullchain.pem; # managed by Certbot
    ssl_certificate_key /etc/letsencrypt/live/www.51sec.org/privkey.pem; # managed by Certbot
    include /etc/letsencrypt/options-ssl-nginx.conf; # managed by Certbot
    ssl_dhparam /etc/letsencrypt/ssl-dhparams.pem; # managed by Certbot

}
root@4ccb3643b7e4:/#
To get 51sec.org and www.51sec.org websites up, you will need to re-run " certbot --nginx " command to issue a certificate to the site. Else, you wont be able to access your site.
Before change cert by running
- certbot --nginx
:
After changed cert:
root@aafaecffd2d1:/etc/nginx/conf.d# cat 51sec.conf
server {
    server_name  51sec.org www.51sec.org armwp.51sec.org;

location / {
    proxy_pass       http://my_wp_wordpress_1;
    proxy_http_version         1.1;
    proxy_read_timeout 300;
    proxy_set_header Upgrade $http_upgrade;
    proxy_set_header Connection "upgrade";
    proxy_set_header Host $http_host;
    proxy_set_header X-Real-IP $remote_addr;
    proxy_set_header X-Real-PORT $remote_port;
           }

    listen 443 ssl; # managed by Certbot
    ssl_certificate /etc/letsencrypt/live/www.51sec.org/fullchain.pem; # managed by Certbot
    ssl_certificate_key /etc/letsencrypt/live/www.51sec.org/privkey.pem; # managed by Certbot
    include /etc/letsencrypt/options-ssl-nginx.conf; # managed by Certbot
    ssl_dhparam /etc/letsencrypt/ssl-dhparams.pem; # managed by Certbot


}
server {
    if ($host = armwp.51sec.org) {
        return 301 https://$host$request_uri;
    } # managed by Certbot


    listen       80;
    server_name  armwp.51sec.org;
    return 404; # managed by Certbot


}
root@aafaecffd2d1:/etc/nginx/conf.d- service nginx restart
For my ITPROSEC site
2. From my own VPS, using ip:10000 to access the admin portal.
Upload everything you download from previous step.
3. Choose Restore action from uploaded backup.
4. wait all process done. Then log in admin again.
5. DNS change
From Ezoic DNS page, remove this record.
| ALIAS | @ | lb1.wphosting.ezoic.com |
Add A record pointing to NPM
| A | @ | 132.145.102.201 | 5 mins |
6. Change wordpress address and site address from http://13.14.10.20:10000 to https://itprosec.com
root@6cf4afd3d3dc:/var/www/html# sudo nano /var/www/html/wp-config.php
define('WP_HOME','https://itprosec.com');
define('WP_SITEURL','https://itprosec.com');
Final configuration:
| A | @ | 132.145.102.201 | 5 mins |
| CNAME | www | itprosec.com | 5 mins |
@NPM


No comments:
Post a Comment