This post summarize a easy way with detailed steps to enable SMB over QUIC using a Windows 2022 Azure Edition server in the Azure Cloud without joined domain or owning your own CA server.
It shows how to configure SMB over QUIC from Windows Admin Center and from Command Line. It also simplified the process how to get whole SMB over QUIC working in common environment, without domain, without CA server, no mgmt server for Windows Admin Center.
- Win2022 Azure Edition and Win11 (Win10 not supported yet)
- Workgroup - no need to join domain
- No need Windows Admin Center
- Free Certification - no need to create a CA server
- User transparent - no need to make special change on Win11 machine
Related Post:
- Mount Azure Cloud VM File Share Folder With Tcp Port 445 Blocked By ISP (Another way to mount file share across Internet if ISP blocked TCP 445 port.)
Introduction
QUIC only in the Azure Edition
Microsoft is therefore positioning SMB over QUIC for so-called edge file servers. These are servers that are accessible from outside and typically run in the cloud or in the DMZ of the local network.
Diagram
Win ACME
Installation Win-ACME
- Download the latest version of the program from this website.
- Unzip files to a non-temporary folder, so that the scheduled task will be able to run. We recommend using
%programfiles%\win-acmeorc:\win-acme. - Run
wacs.exe(this requires administrator privileges). - Follow the instructions on the screen to configure your first renewal.
Software version 2.1.23.1315 (release, pluggable, standalone, 64-bit)
Connecting to https://acme-v02.api.letsencrypt.org/...
Connection OK!
Scheduled task not configured yet
Please report issues at https://github.com/win-acme/win-acme
N: Create certificate (default settings)
M: Create certificate (full options)
R: Run renewals (0 currently due)
A: Manage renewals (0 total)
O: More options...
Q: Quit
Please choose from the menu: M
Running in mode: Interactive, Advanced
Source plugin IIS not available: No supported version of IIS detected.
Please specify how the list of domain names that will be included in the
certificate should be determined. If you choose for one of the "all bindings"
options, the list will automatically be updated for future renewals to
reflect the bindings at that time.
1: Read bindings from IIS
2: Manual input
3: CSR created by another program
C: Abort
How shall we determine the domain(s) to include in the certificate?: 2
Description: A host name to get a certificate for. This may be a
comma-separated list.
Host: quic.bestit.eu.org
Source generated using plugin Manual: quic.bestit.eu.org
Friendly name '[Manual] quic.bestit.eu.org'. <Enter> to accept or type desired name: <Enter>
The ACME server will need to verify that you are the owner of the domain
names that you are requesting the certificate for. This happens both during
initial setup *and* for every future renewal. There are two main methods of
doing so: answering specific http requests (http-01) or create specific dns
records (dns-01). For wildcard domains the latter is the only option. Various
additional plugins are available from https://github.com/win-acme/win-acme/.
1: [http-01] Save verification files on (network) path
2: [http-01] Serve verification files from memory
3: [http-01] Upload verification files via FTP(S)
4: [http-01] Upload verification files via SSH-FTP
5: [http-01] Upload verification files via WebDav
6: [dns-01] Create verification records manually (auto-renew not possible)
7: [dns-01] Create verification records with acme-dns (https://github.com/joohoi/acme-dns)
8: [dns-01] Create verification records with your own script
9: [tls-alpn-01] Answer TLS verification request from win-acme
C: Abort
How would you like prove ownership for the domain(s)?: 6
After ownership of the domain(s) has been proven, we will create a
Certificate Signing Request (CSR) to obtain the actual certificate. The CSR
determines properties of the certificate like which (type of) key to use. If
you are not sure what to pick here, RSA is the safe default.
1: Elliptic Curve key
2: RSA key
C: Abort
What kind of private key should be used for the certificate?: 2
When we have the certificate, you can store in one or more ways to make it
accessible to your applications. The Windows Certificate Store is the default
location for IIS (unless you are managing a cluster of them).
1: IIS Central Certificate Store (.pfx per host)
2: PEM encoded files (Apache, nginx, etc.)
3: PFX archive
4: Windows Certificate Store
5: No (additional) store steps
How would you like to store the certificate?: 4
1: [My] - General computer store (for Exchange/RDS)
2: [Default] - Use global default, currently My
Choose store to use, or type the name of another unlisted store: 2
1: IIS Central Certificate Store (.pfx per host)
2: PEM encoded files (Apache, nginx, etc.)
3: PFX archive
4: Windows Certificate Store
5: No (additional) store steps
Would you like to store it in another way too?: 5
Installation plugin IIS not available: No supported version of IIS detected.
With the certificate saved to the store(s) of your choice, you may choose one
or more steps to update your applications, e.g. to configure the new
thumbprint, or to update bindings.
1: Create or update bindings in IIS
2: Start external script or program
3: No (additional) installation steps
Which installation step should run first?: 3
Terms of service: C:\ProgramData\win-acme\acme-v02.api.letsencrypt.org\LE-SA-v1.3-September-21-2022.pdf
Open in default application? (y/n*) - no
Do you agree with the terms? (y*/n) - yes
Enter email(s) for notifications about problems and abuse (comma-separated): [email protected]
[quic.bestit.eu.org] Authorizing...
[quic.bestit.eu.org] Authorizing using dns-01 validation (Manual)
Domain: quic.bestit.eu.org
Record: _acme-challenge.quic.bestit.eu.org
Type: TXT
Content: "-QDr36wRwvaiX50c9UXAEsi8FI0VwhrJY9eHTOCqIx4"
Note: Some DNS managers add quotes automatically. A single set
is needed.
Please press <Enter> after you've created and verified the record
[quic.bestit.eu.org] Preliminary validation succeeded
[quic.bestit.eu.org] Preliminary validation succeeded
[quic.bestit.eu.org] Authorization result: valid
Domain: quic.bestit.eu.org
Record: _acme-challenge.quic.bestit.eu.org
Type: TXT
Content: "-QDr36wRwvaiX50c9UXAEsi8FI0VwhrJY9eHTOCqIx4"
Please press <Enter> after you've deleted the record
Downloading certificate [Manual] quic.bestit.eu.org
Store with CertificateStore...
Installing certificate in the certificate store
Adding certificate [Manual] quic.bestit.eu.org @ 2023/1/1 14:12:14 to store My
Adding Task Scheduler entry with the following settings
- Name win-acme renew (acme-v02.api.letsencrypt.org)
- Path C:\win-acme
- Command wacs.exe --renew --baseuri "https://acme-v02.api.letsencrypt.org/"
- Start at 09:00:00
- Random delay 04:00:00
- Time limit 02:00:00
Do you want to specify the user the task will run as? (y/n*) - no
Adding renewal for [Manual] quic.bestit.eu.org
Next renewal due at 2023/2/25 14:12:23
Certificate [Manual] quic.bestit.eu.org created
N: Create certificate (default settings)
M: Create certificate (full options)
R: Run renewals (0 currently due)
A: Manage renewals (1 total)
O: More options...
Q: Quit
Please choose from the menu:
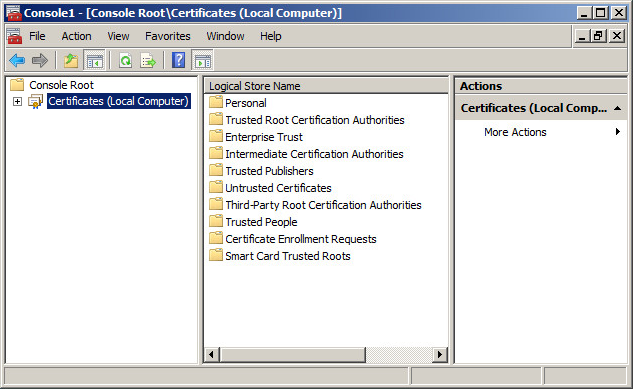
Open the local certificate store through MMC
Proceed as follows to open the local certificate store through the MMC Snap-in:
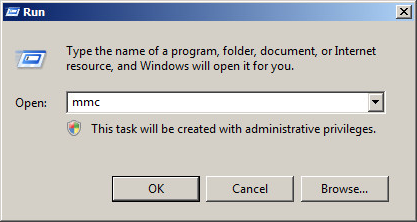
- Click Start → Run and type mmc followed by Enter.
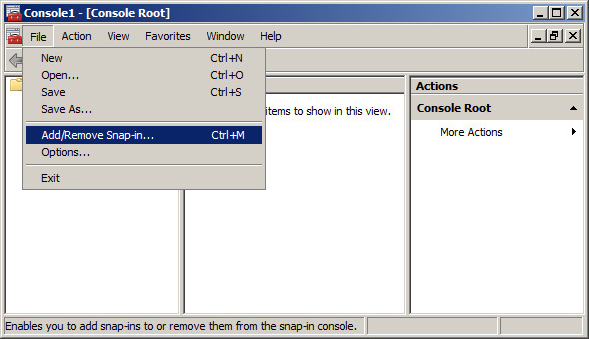
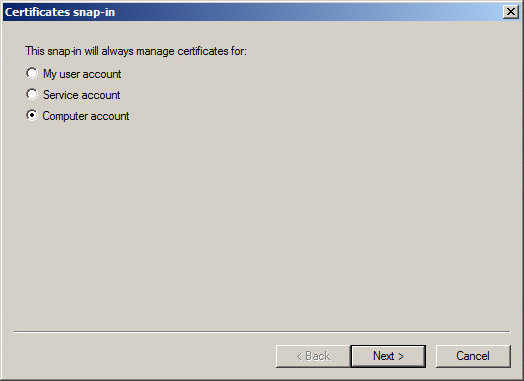
- Click File and select Add/Remove Snap in and click Add... in the next window
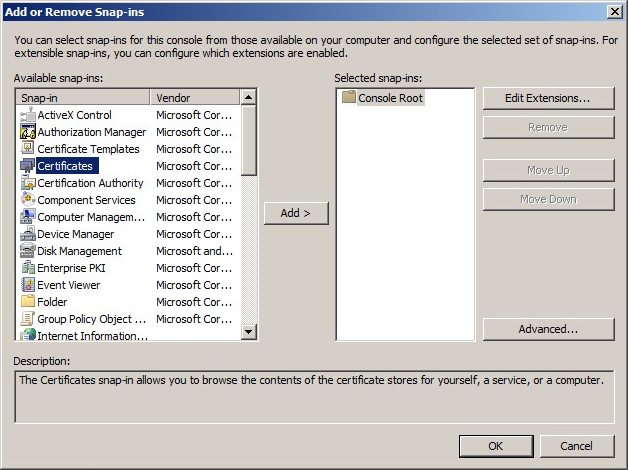
- Select Certificates in the Available snap-ins field and then click Add.
- Select Computer Account and then click Next.
- Select Local computer and click Finish.
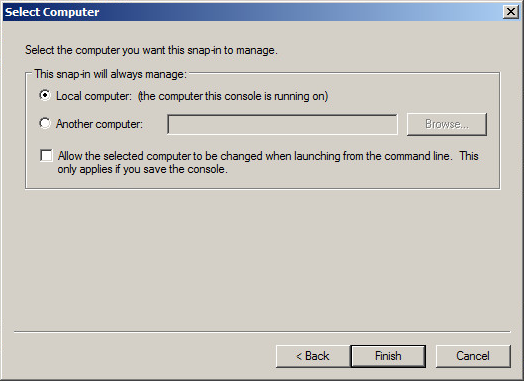
- Close the Add or Remove Snap-ins window by clicking OK.
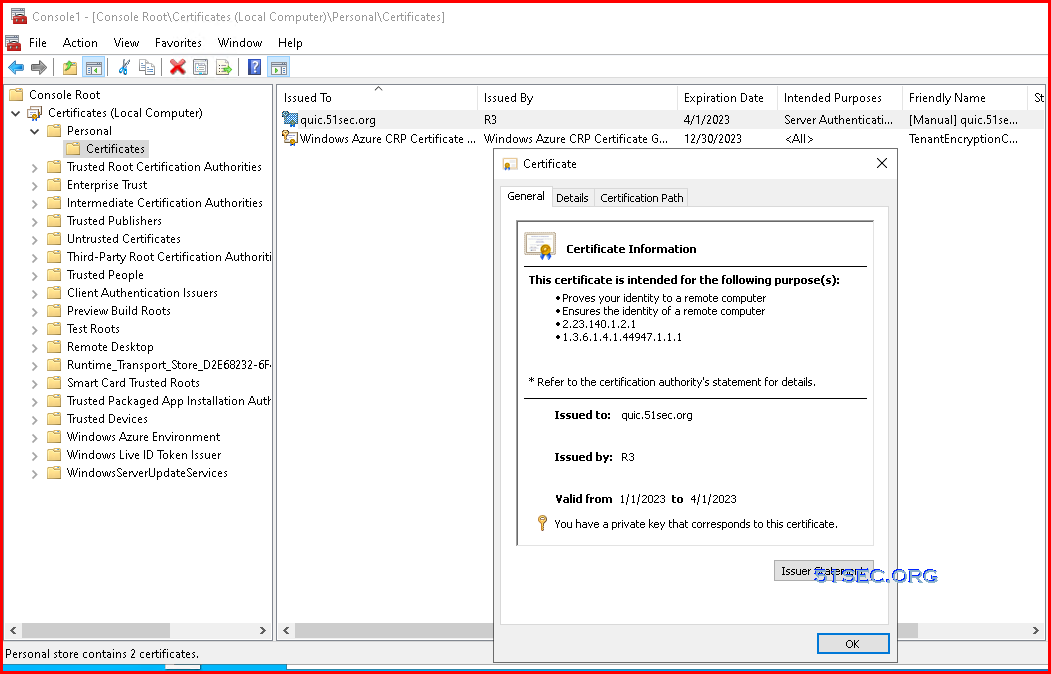
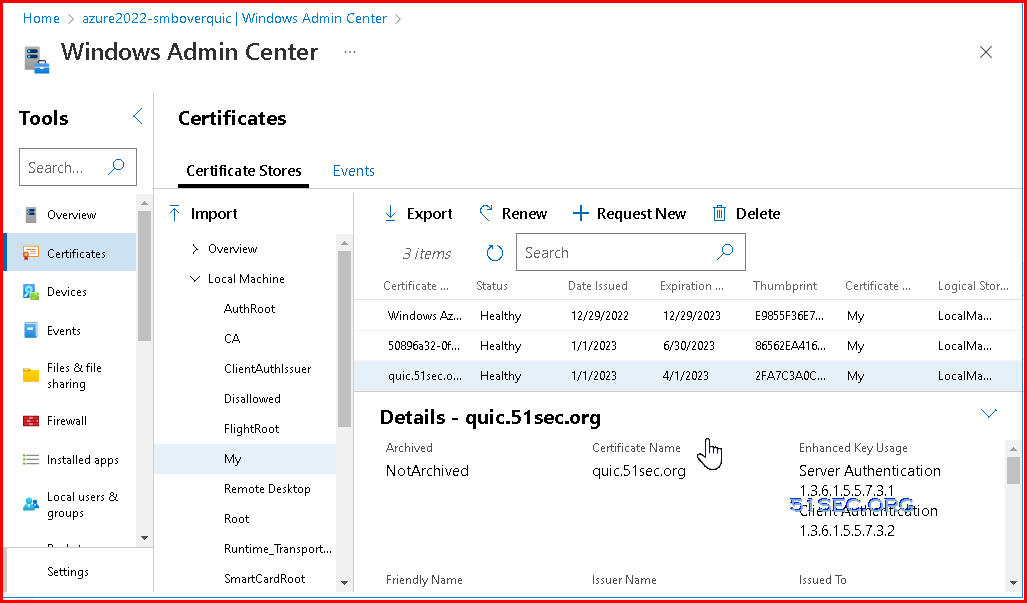
7. Expand Personal - Certificates folder to check this new Public Letsencrypt issued certificate for quic.bestit.eu.org

Windows Admin Center (Optional)
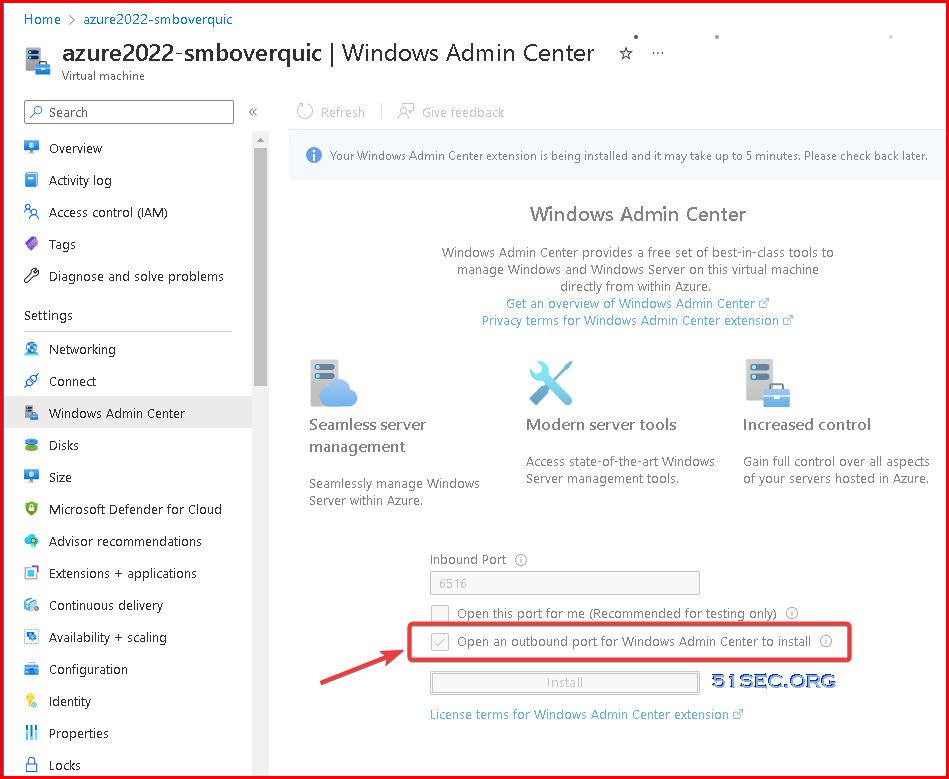
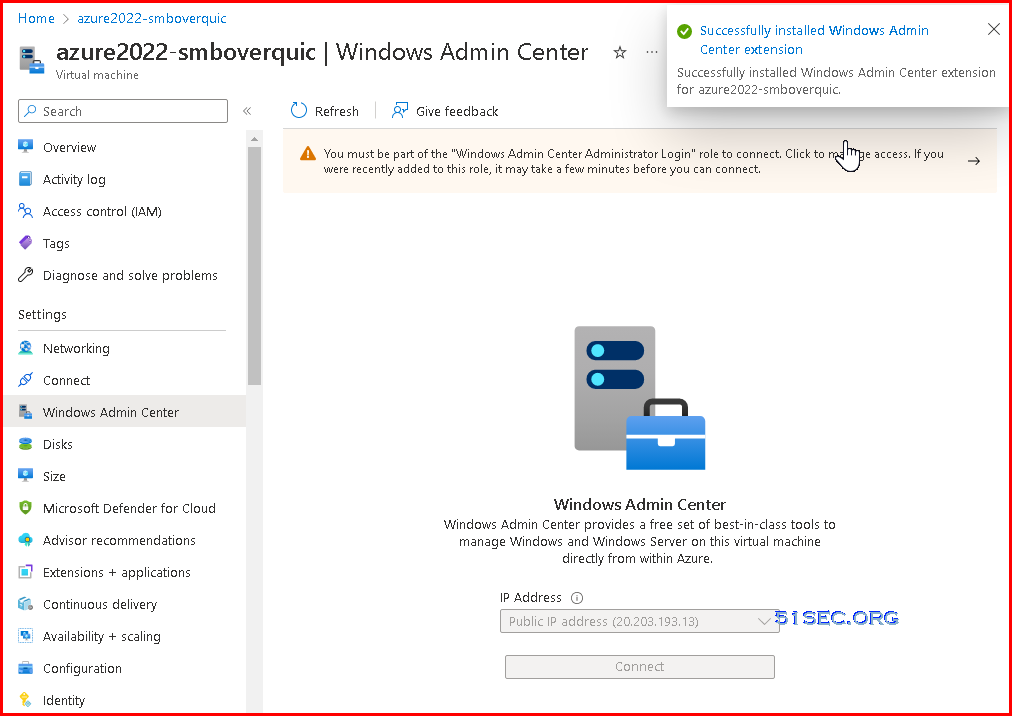
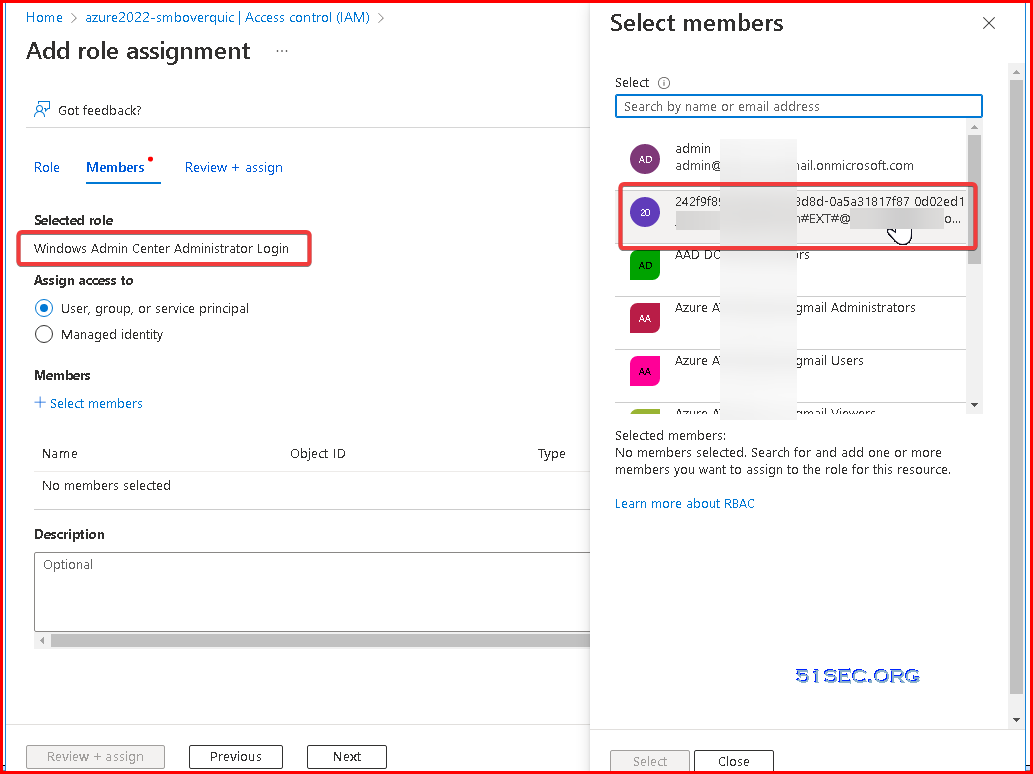
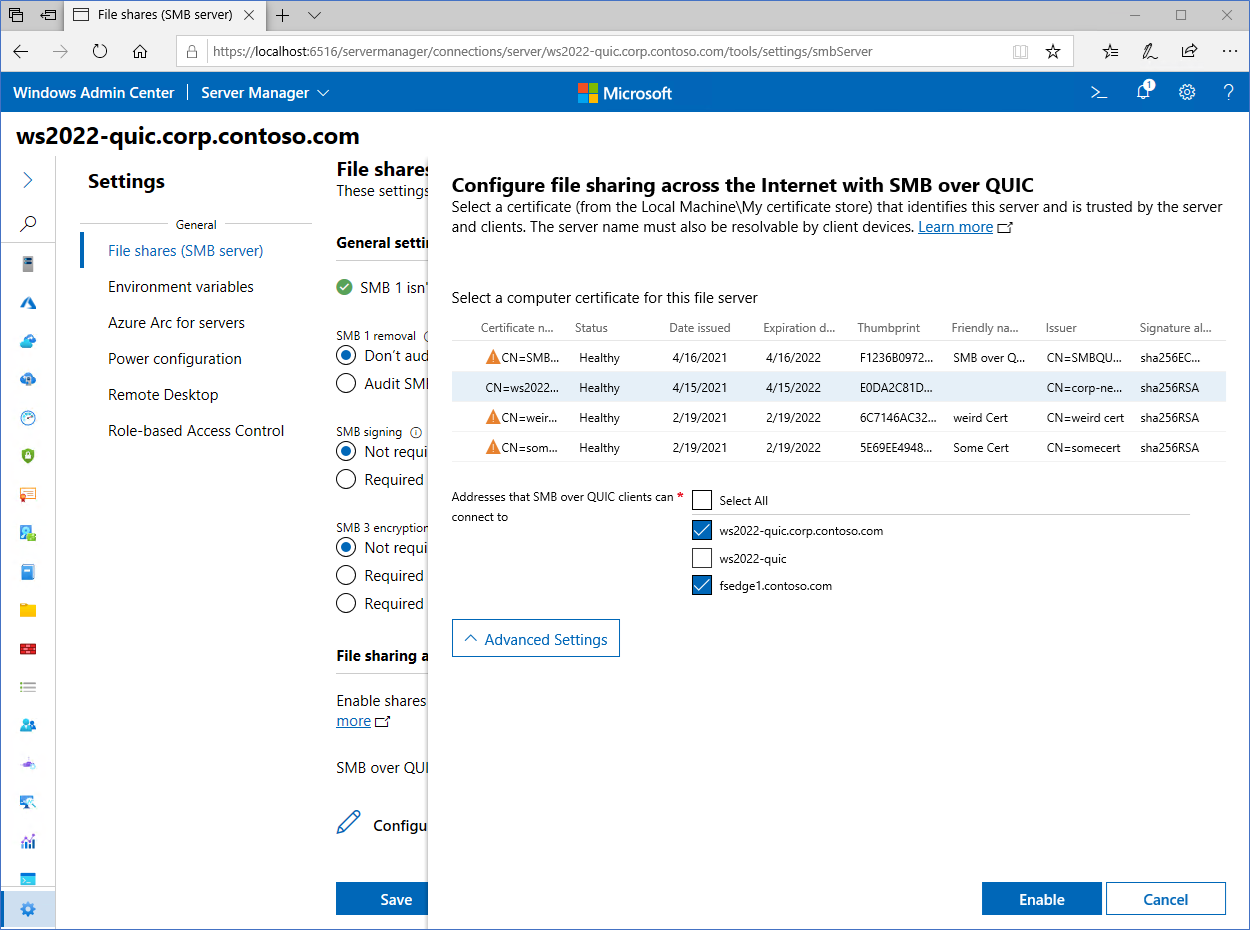
Enabling SMB over QUIC From Windows Admin Center (Optional)
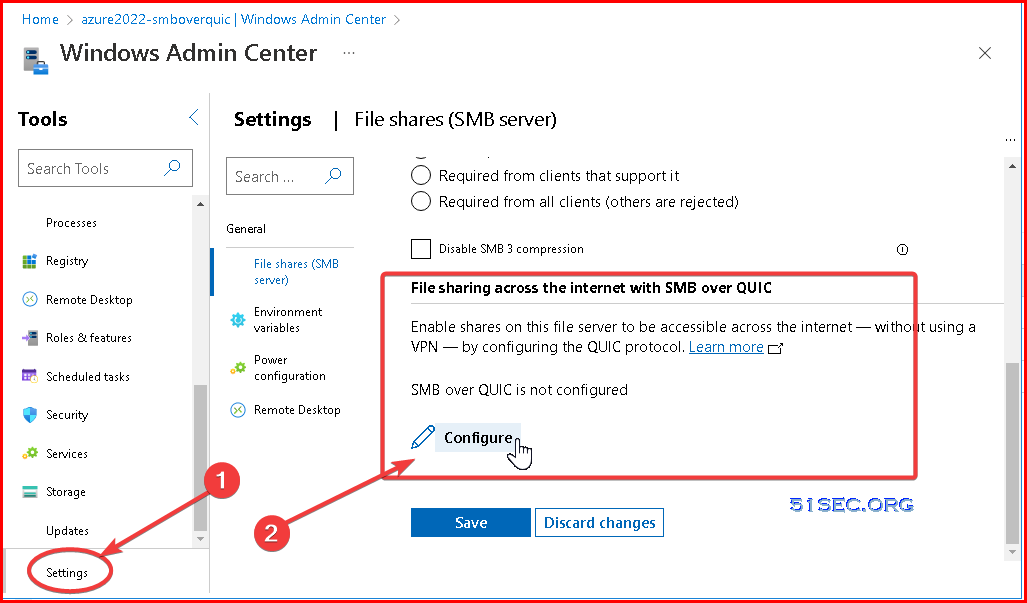
From my testing using Azure Windows Admin Center, this configuration window will not show up. I am not able to get same screen as Microsoft Learn page: https://learn.microsoft.com/en-us/windows-server/storage/file-server/smb-over-quic
If you are having same problem, you can check next section for doing same thing using command line commands.
Enabling SMB over QUIC From Command Line
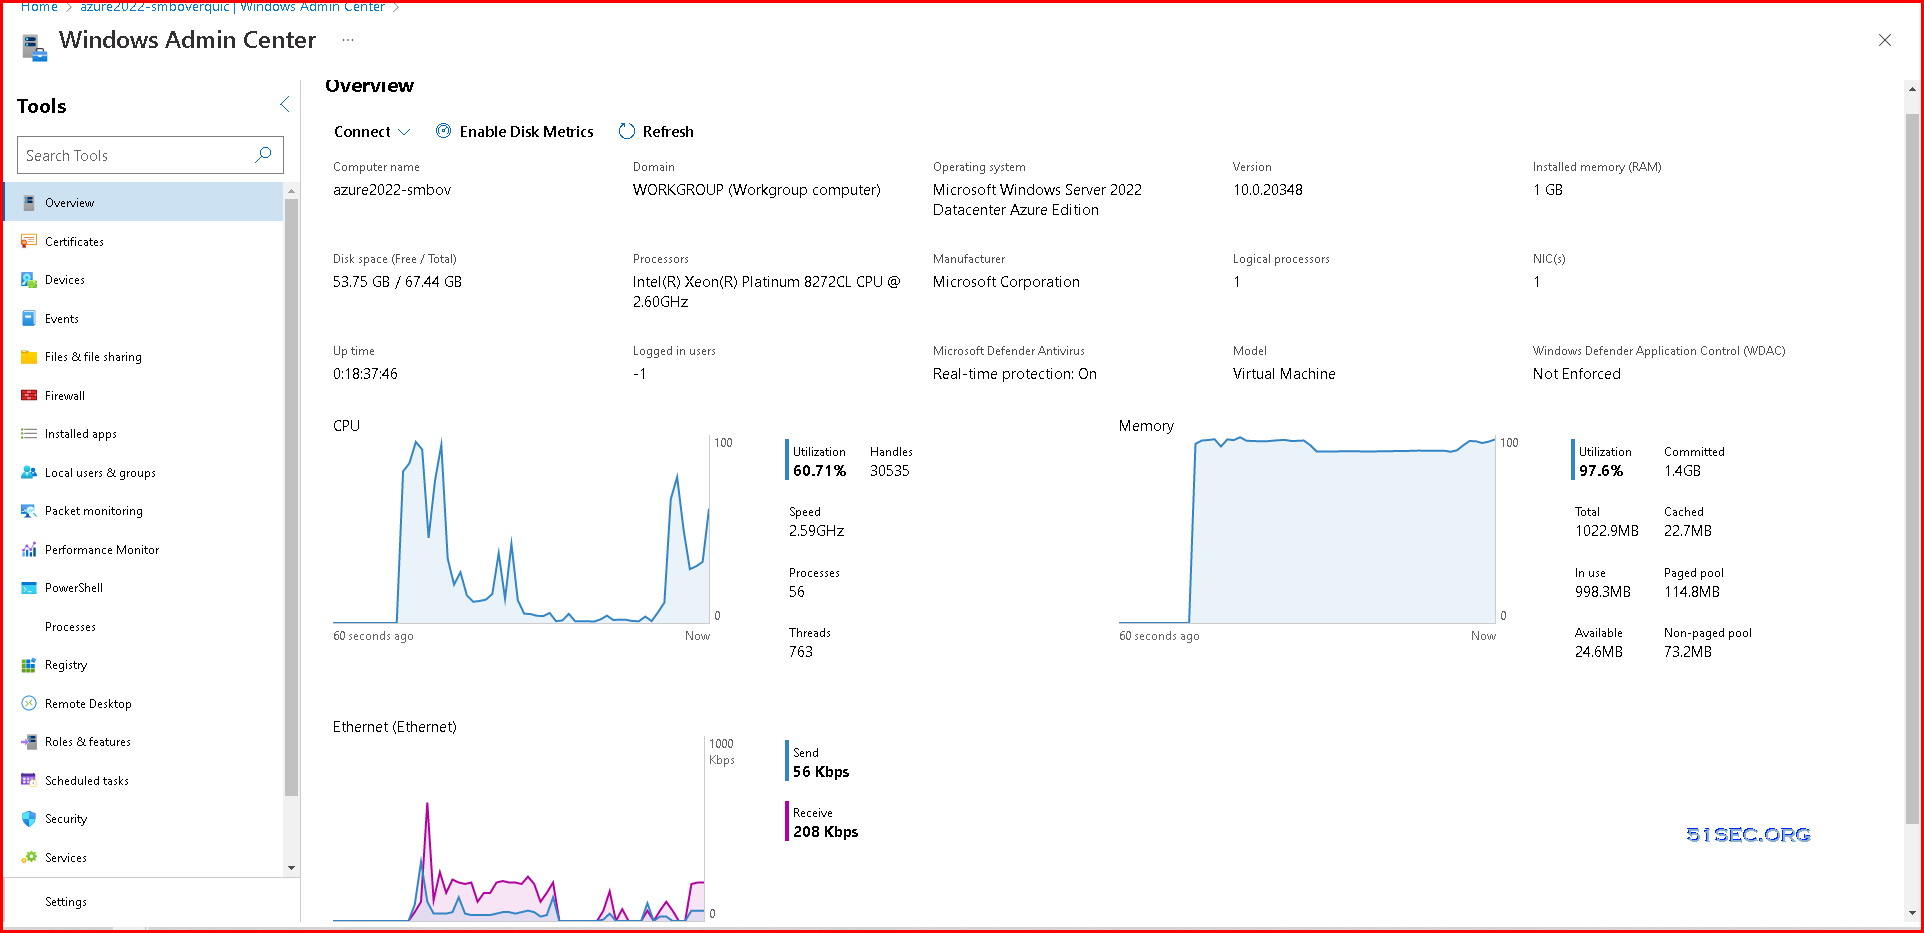
By default, SMB over QUIC has been enabled on Win 2022 Azure Edition, but it was not assosicated with any certificate(s).
PS C:\Users\netsec> Get-SmbServerConfiguration |select EnableSMBQUIC, RestrictNamedPipeAccessViaQuic, DisableSmbEncryptionOnSecureConnection

EnableSMBQUIC RestrictNamedPipeAccessViaQuic DisableSmbEncryptionOnSecureConnection
------------- ------------------------------ --------------------------------------
         True                           True                                   True
You then change them according to this pattern, but it is not necessary to make those changes:
The other two settings are also available as parameters.
Here are steps to map your Certificate to SMB configuration:
Other than doing this from Windows Admin Center, you can achieve the same with PowerShell, as shown below. You need to gather the data from the chosen cert and enter any DNS name from the Subject Alternate Names field that you want to use for access via SMB over QUIC.
$CertName = 'quic.bestit.eu.org'
$Thumbprint = '2fa7c3a0cf7d7155aafde7aa8f2d0d8bf2391e44'
$MyCertDnsNamesToAllow = @('quic.bestit.eu.org')
$Subject = 'CN=quic'
$DisplayName = 'quic.bestit.eu.org'
Foreach ($DnsName in $MyCertDnsNamesToAllow ){
New-SmbServerCertificateMapping -Name $DnsName -Thumbprint $Thumbprint -StoreName My -subject $Subject -DisplayName $DisplayName -Type QUIC -Flags None
}
Run Get-SmbServerCertificateMapping to watch your mapping result:
PS C:\Users\ns> Get-SmbServerCertificateMapping
Name           Subject           Thumbprint                               DisplayName                                 StoreName Type Flags
----           -------           ----------                               -----------                                 --------- ---- -----
quic.bestit.eu.org CN=quic.bestit.eu.org 2fa7c3a0cf7d7155aafde7aa8f2d0d8bf2391e44 [Manual] quic.bestit.eu.org @ 2023/1/1 14:12:14 My        QUIC None

PS C:\Users\ns>
If you want to remove the configuration, you can do so, as shown below
Verify that they are gone with Get-SmbServerCertificateMapping.
After verified the certificate has been mapped to your SMB over QUIC configuraiton, you will find the result also from WAC (Windows Admin Center):
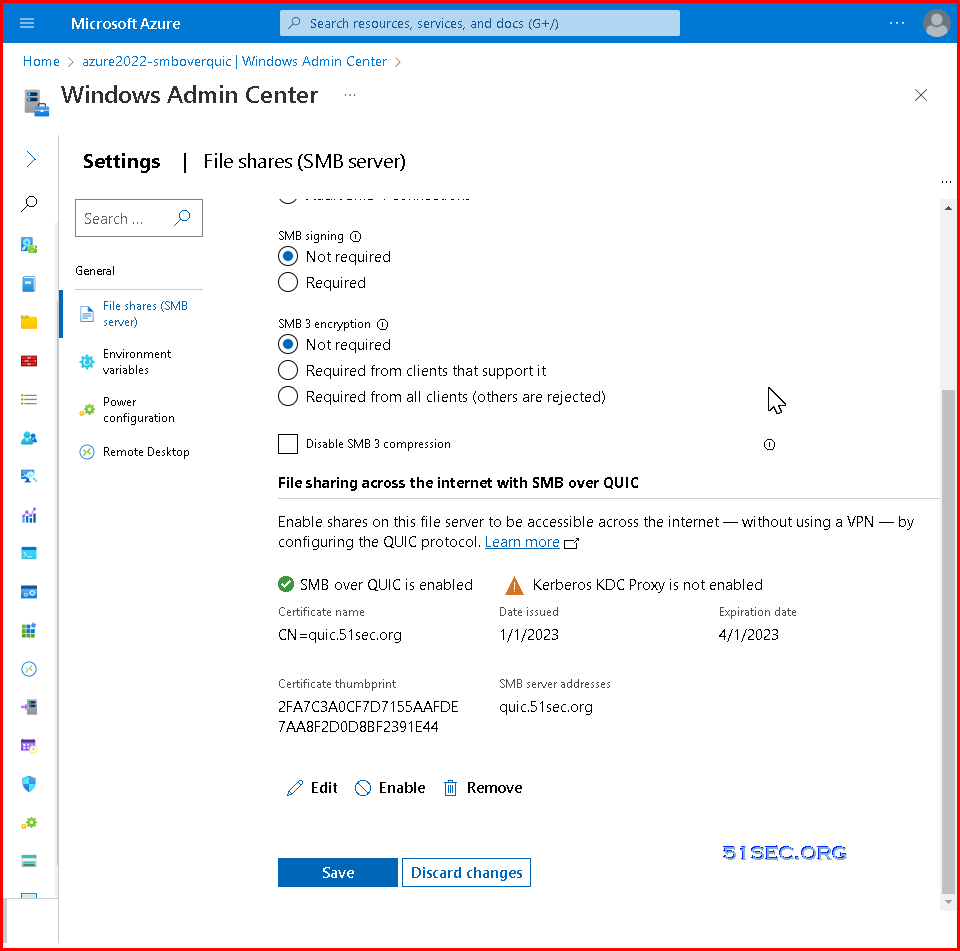
Connect Shares Using SMB over QUIC from Windows 11 Client
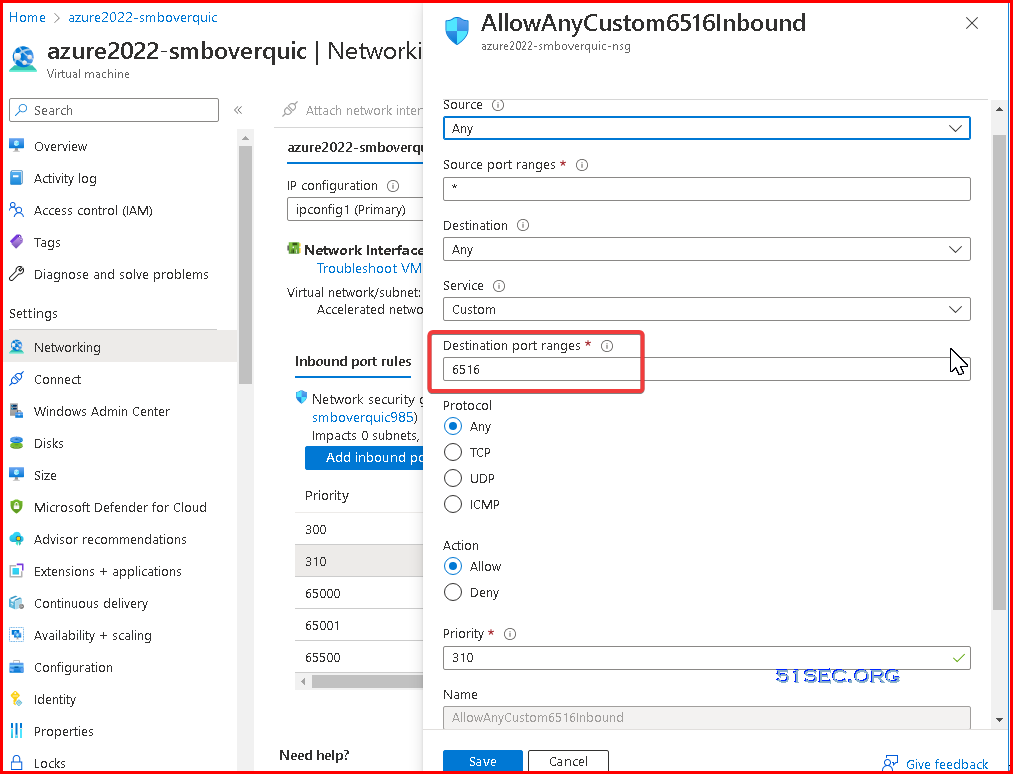
After you made a share from your Winodws 2022 Azure Edition Server, you can try this now. To make sure we are going to use SMB over QUIC, you need to make sure your Windows Azure Firewall blocking tcp 445.
Only Windows 11 supported. Windows 10 stll not supporting and no ETA when it will be , as Jan 2023.
In following screenshot, it shows UDP 443 has been opened (SMB over QUIC). And DenyAllInBound rule will block tcp 445 (Normal SMB traffic).
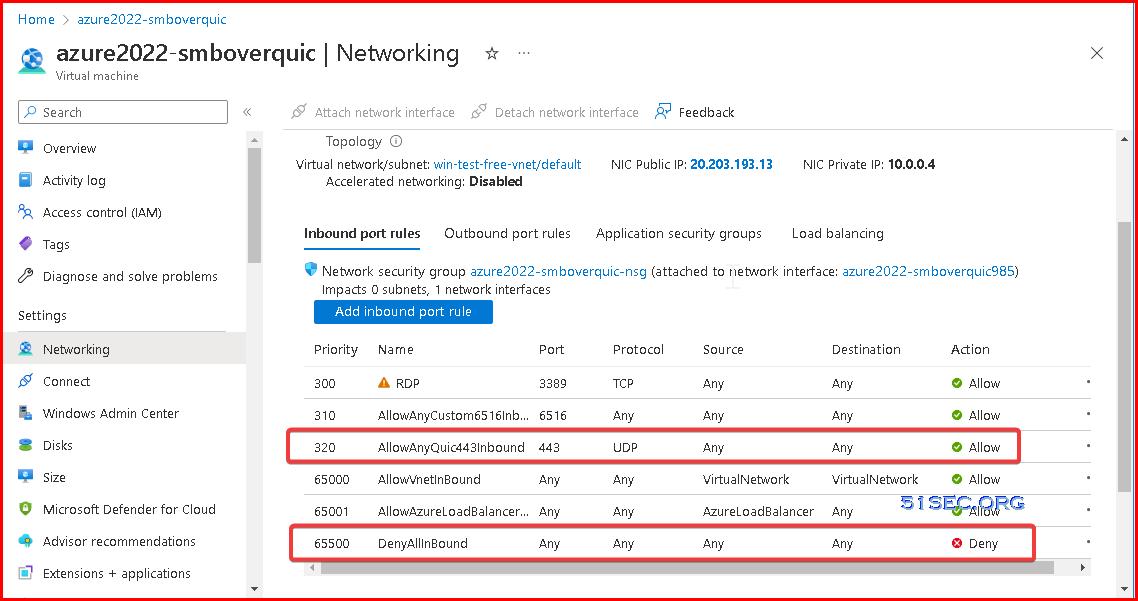
By default if a Windows Client SMB connection cannot be established via TCP 445 , the client automatically switches to QUIC. Admins can force this behavior by blocking TCP:445 in the firewall.
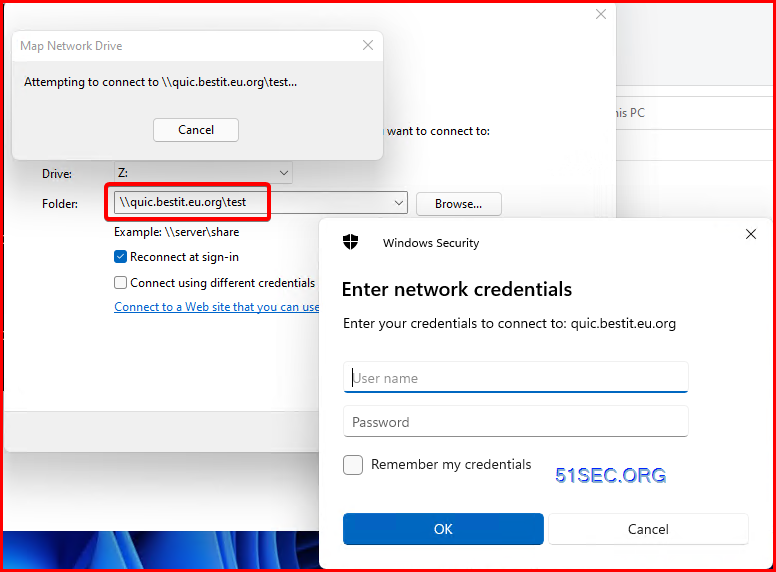
- Test account (Read Only) username and password: testuser1 / Test4SMBOverQUIC!
As an alternative, a network drive can be mapped on the client such that SMB over QUIC is explicitly activated. To do so, use the new switch /transport: quic for net use and the TransportType QUIC parameter with the New-SmbMapping cmdlet.
C:\Users\admin>net use * \\quic.bestit.eu.org\test /TRANSPORT:QUIC
Enter the user name for 'quic.bestit.eu.org': administrator1
Enter the password for quic.bestit.eu.org:
Drive Z: is now connected to \\quic.bestit.eu.org\test.

The command completed successfully.


C:\Users\admin>netstat -na | find "443"
  TCP    10.10.1.130:49676      52.226.139.121:443     ESTABLISHED
  TCP    10.10.1.130:49766      52.226.139.180:443     ESTABLISHED
  UDP    0.0.0.0:50293          20.203.193.13:443
  UDP    [::]:50293             [::ffff:20.203.193.13]:443

C:\Users\admin>
- If you are using a self-signed certificate, you can add a name resultion record into your client machine's host file.
- Test account (Read Only) username and password: testuser1 / Test4SMBOverQUIC!
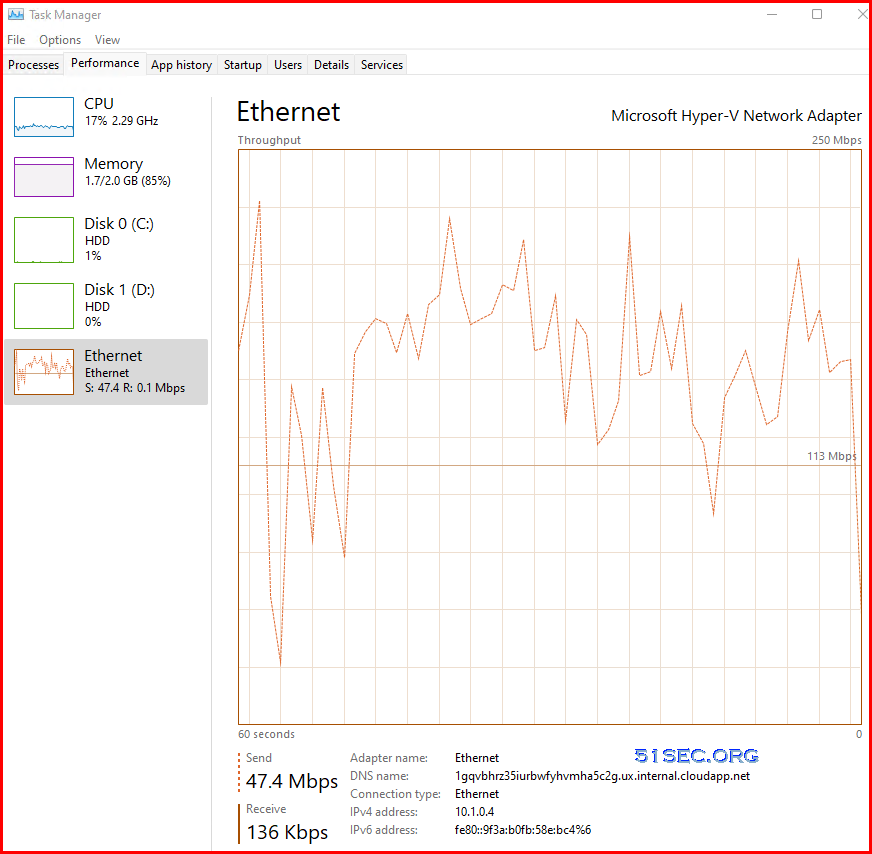
Speed Testing
Testing speed performance for SMB Over Quic
- fsutil file createnew c:\temp\test.bin 1024000000

Testing Speed Performance for SMB over 445
Video
References
- How to use SMB over QUIC in Windows Server 2022
- SMB over QUIC Testing Guide – Part I
- SMB over QUIC Testing Guide – Part II
- SMB over QUIC certificate issuance - https://www.youtube.com/watch?v=L0yl5Z5wToA
- SMB over QUIC configuration and usage - https://www.youtube.com/watch?v=OslBSB8IkUw
- Access Azure File Shares with SMB over QUIC (Third Party Certificate)
- MAKING SMB ACCESSIBLE WITH NTLMQUIC (Linux Quic-Go)
- SMB over QUIC


No comments:
Post a Comment