CyberArk Identity makes it very easy to map AD Security Groups to Roles to integrate SSO, Multi-Factor Authentication (MFA), and endpoint security policies. This feature allows AD data to be managed in the cloud without duplication.
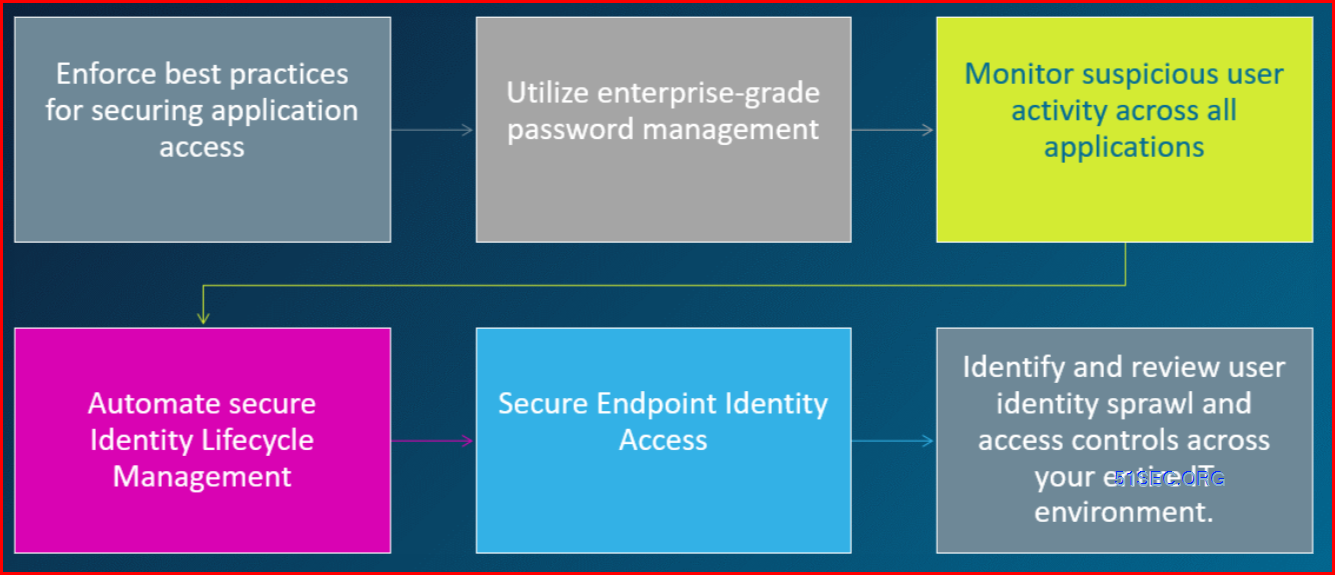
Diagram

- Enforce Best Practice
- Utilize Enterprise-Grade Password Mgmt
- Monitor Suspicious user activity across all applications
- Automate secure Identity Lifecycle mgmt
- Secure Endpoint Identity Access
- Identify and review user identity sprawl and access controls across whole IT envirtonment
Workforce Identity Free Trial account
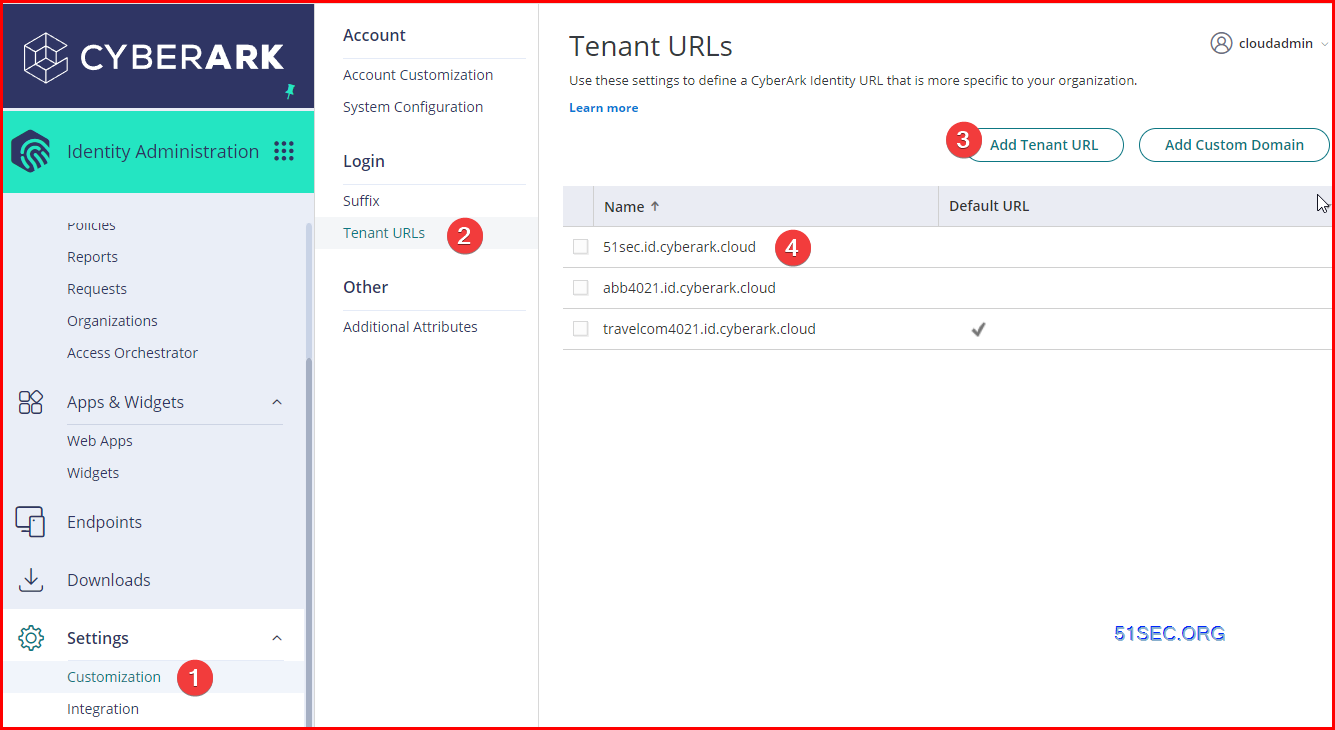
Customize your own Tenant URL:
- https://51sec.id.cyberark.cloud
- https://travelcom4021.id.cyberark.cloud/
- https://abb4021.id.cyberark.cloud/
Identity Setup
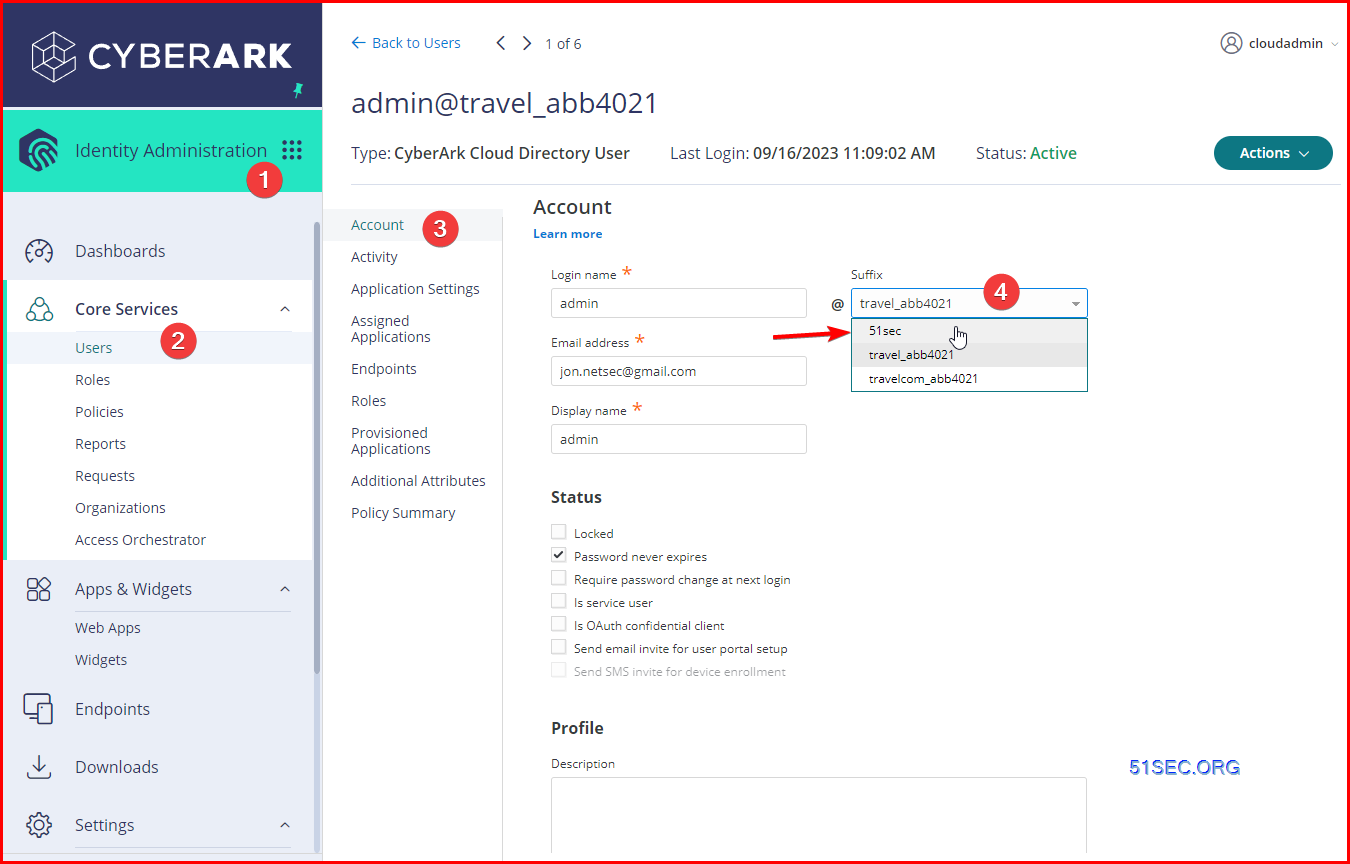
1. Change suffix
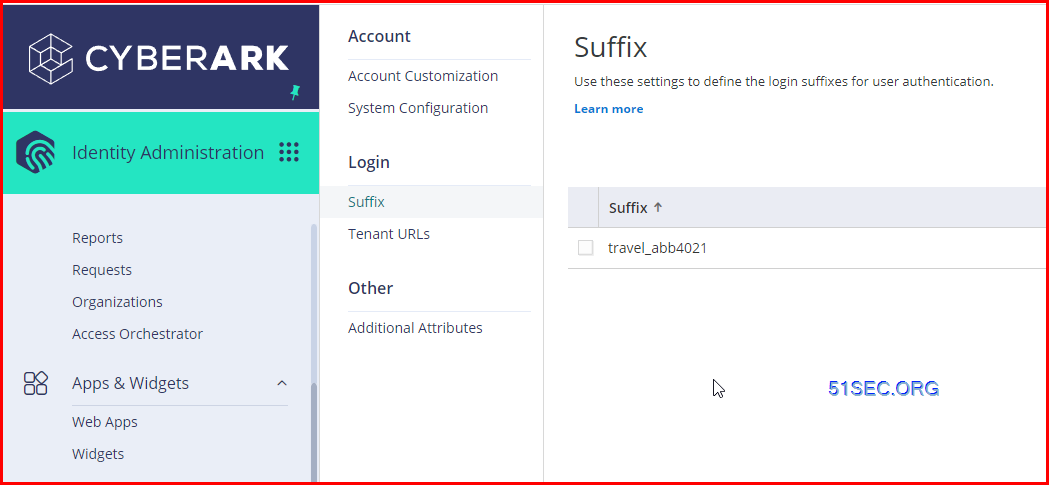
Here is an example I added 51sec as suffix, which has to be unique across all cyberark cloud. The change will take a couple of hours to be synced in all backend system in the CyberArk cloud.
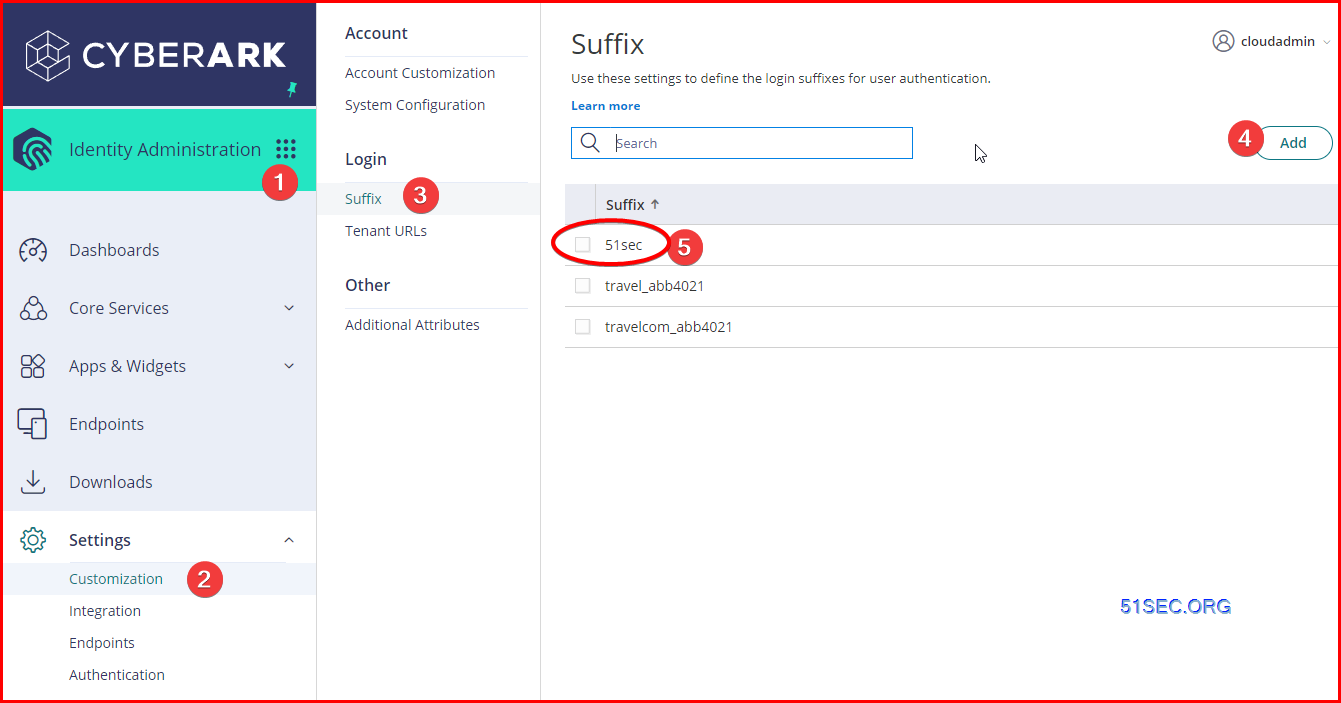
Change user's suffix. And Save. Now you can log in with admin@51sec this account into your Identity Cloud.
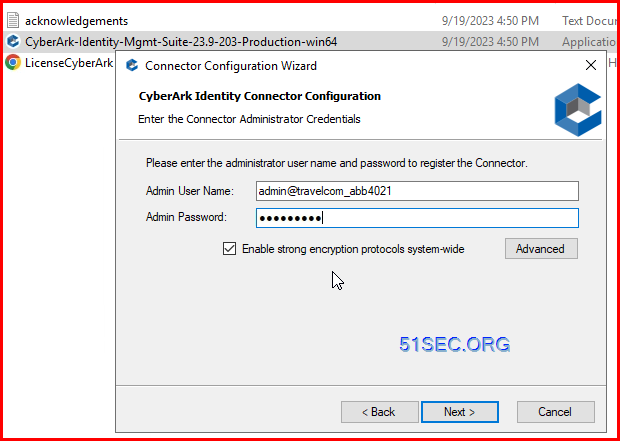
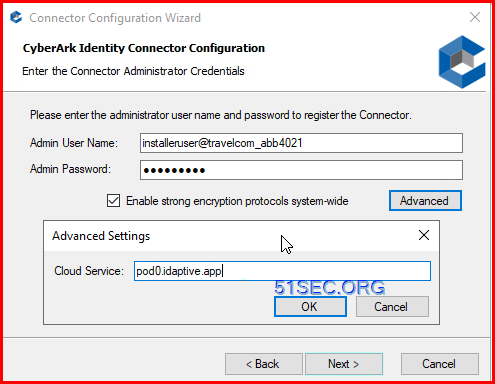
2. Create / update Installeruser
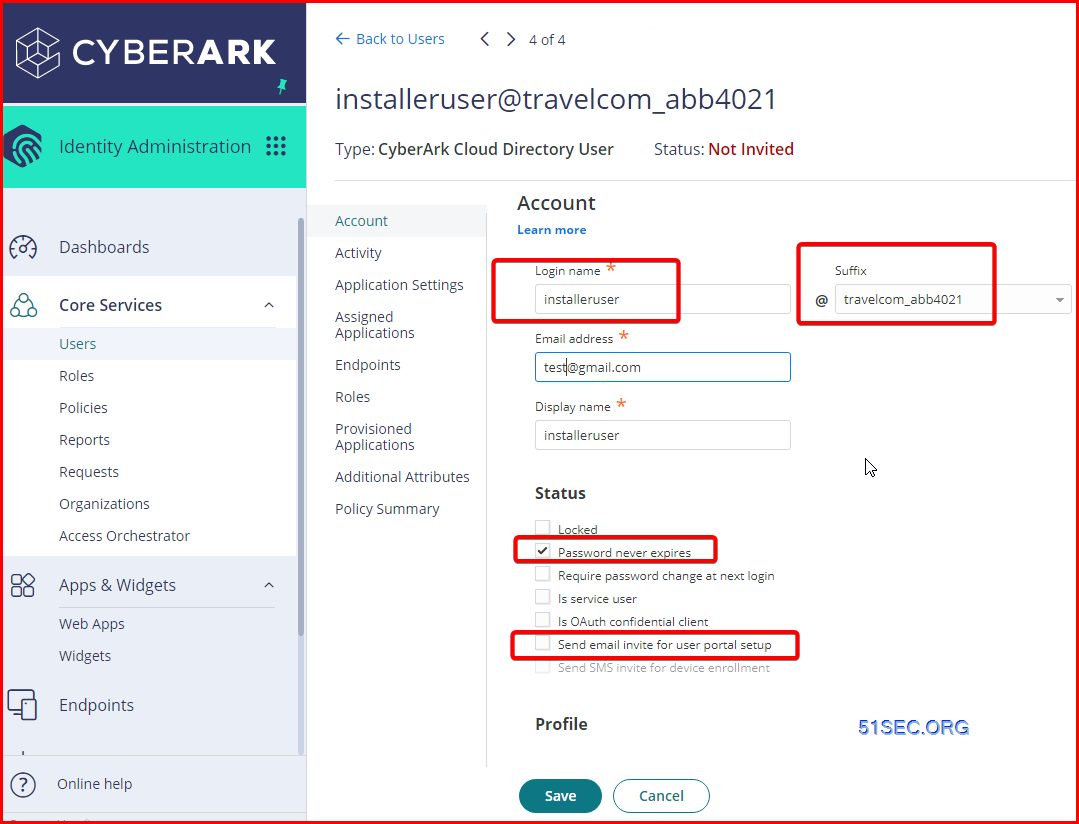
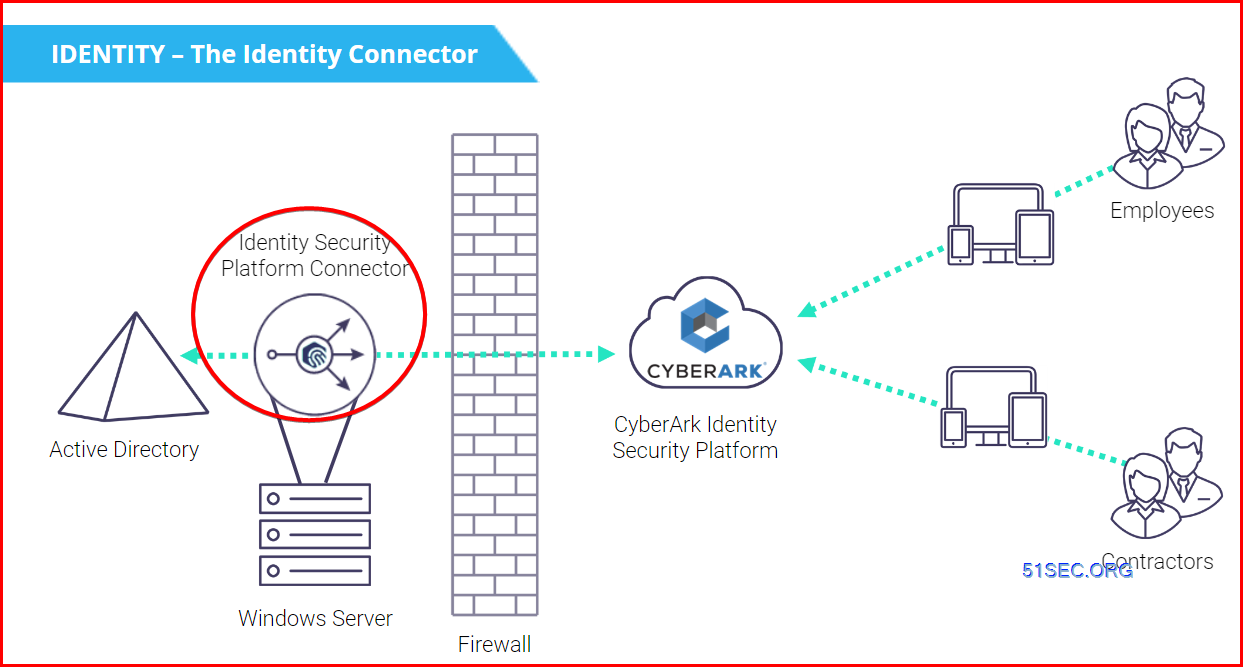
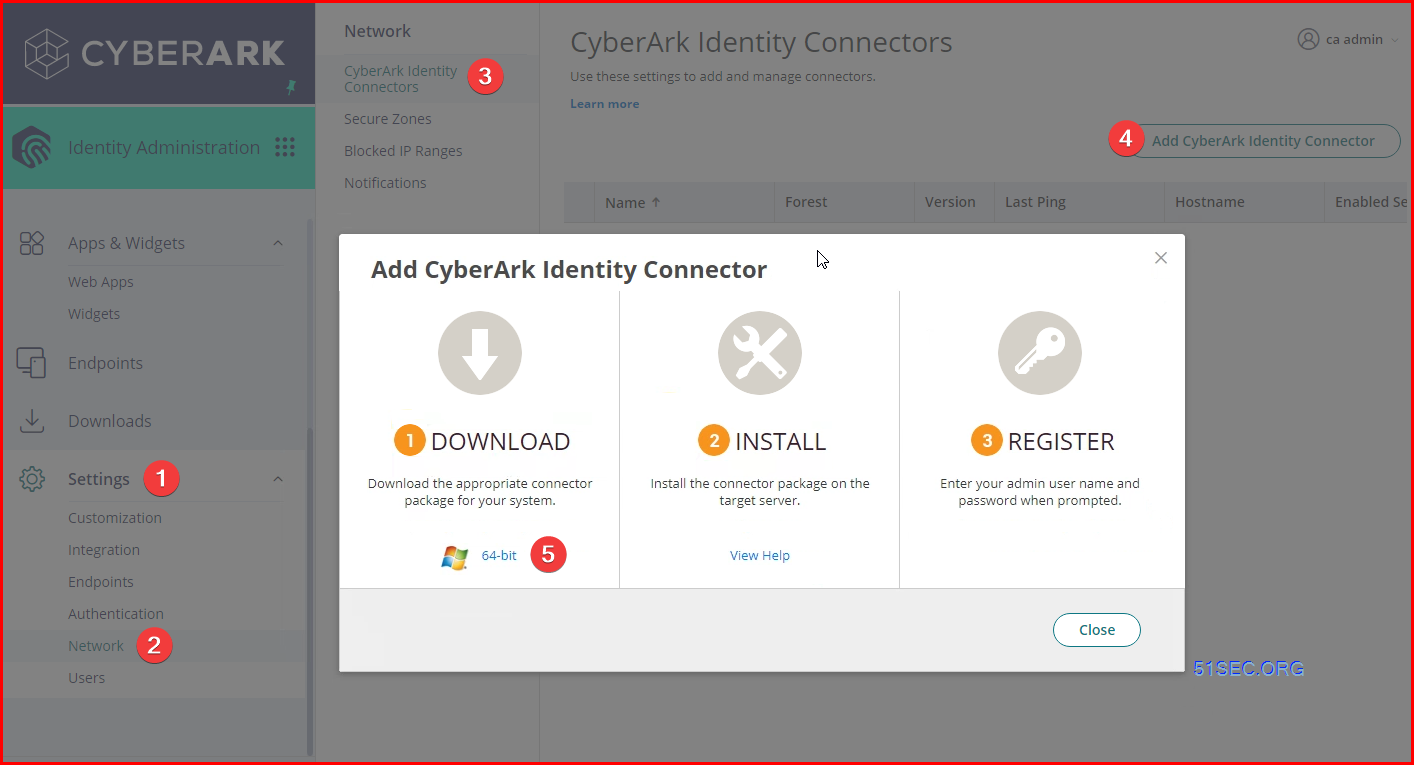
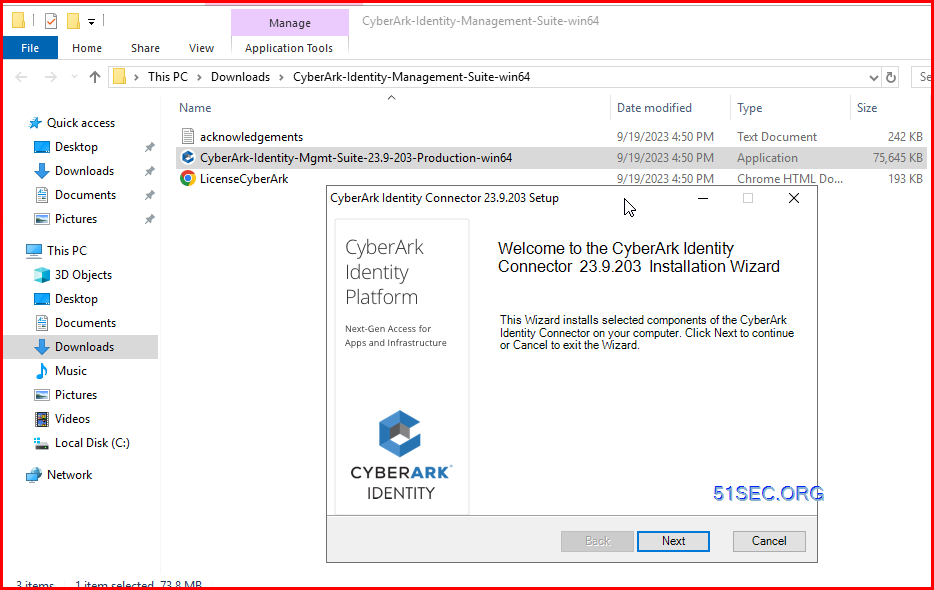
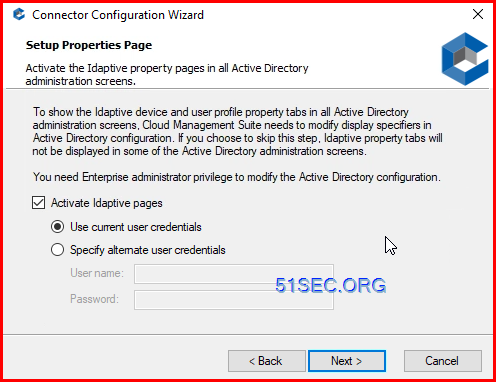
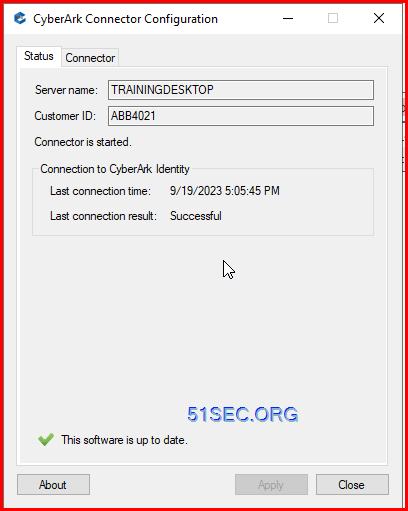
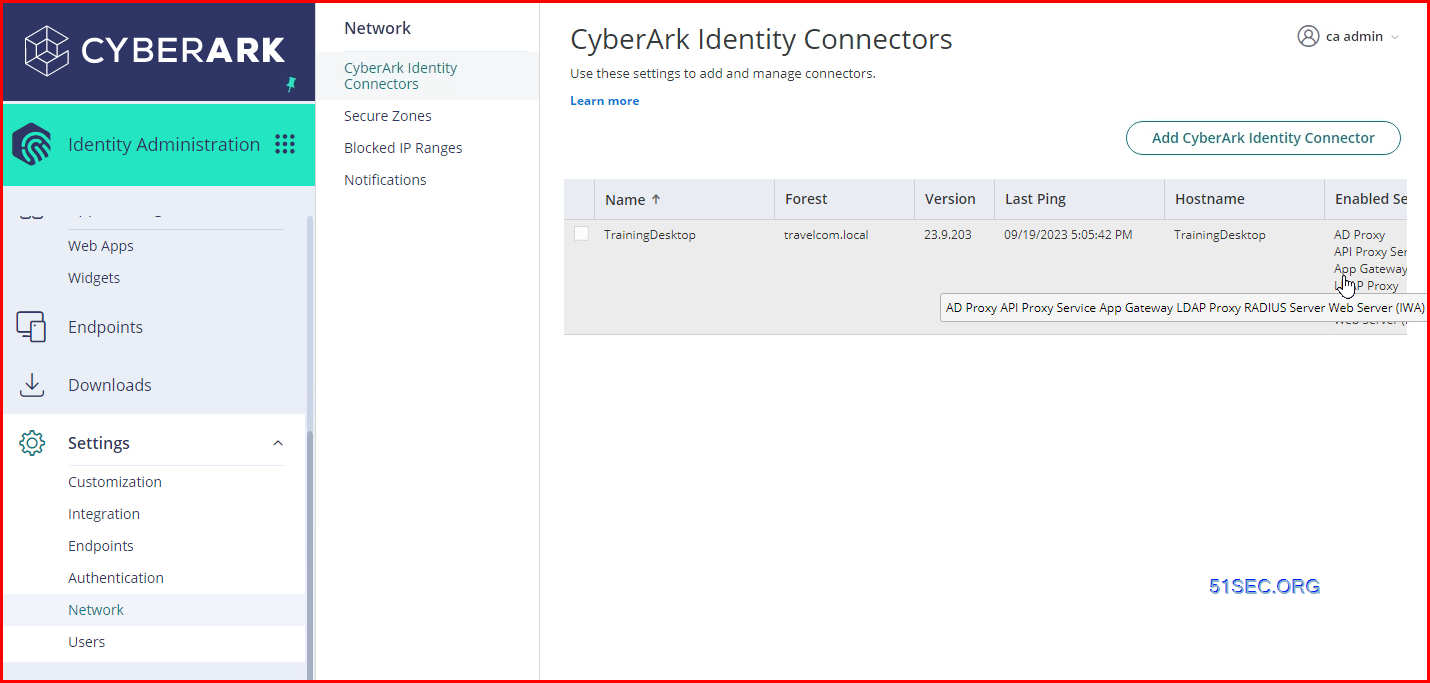
Install Identity Connector

Create / Modify user
- template download
3. Check User's Policy Summary
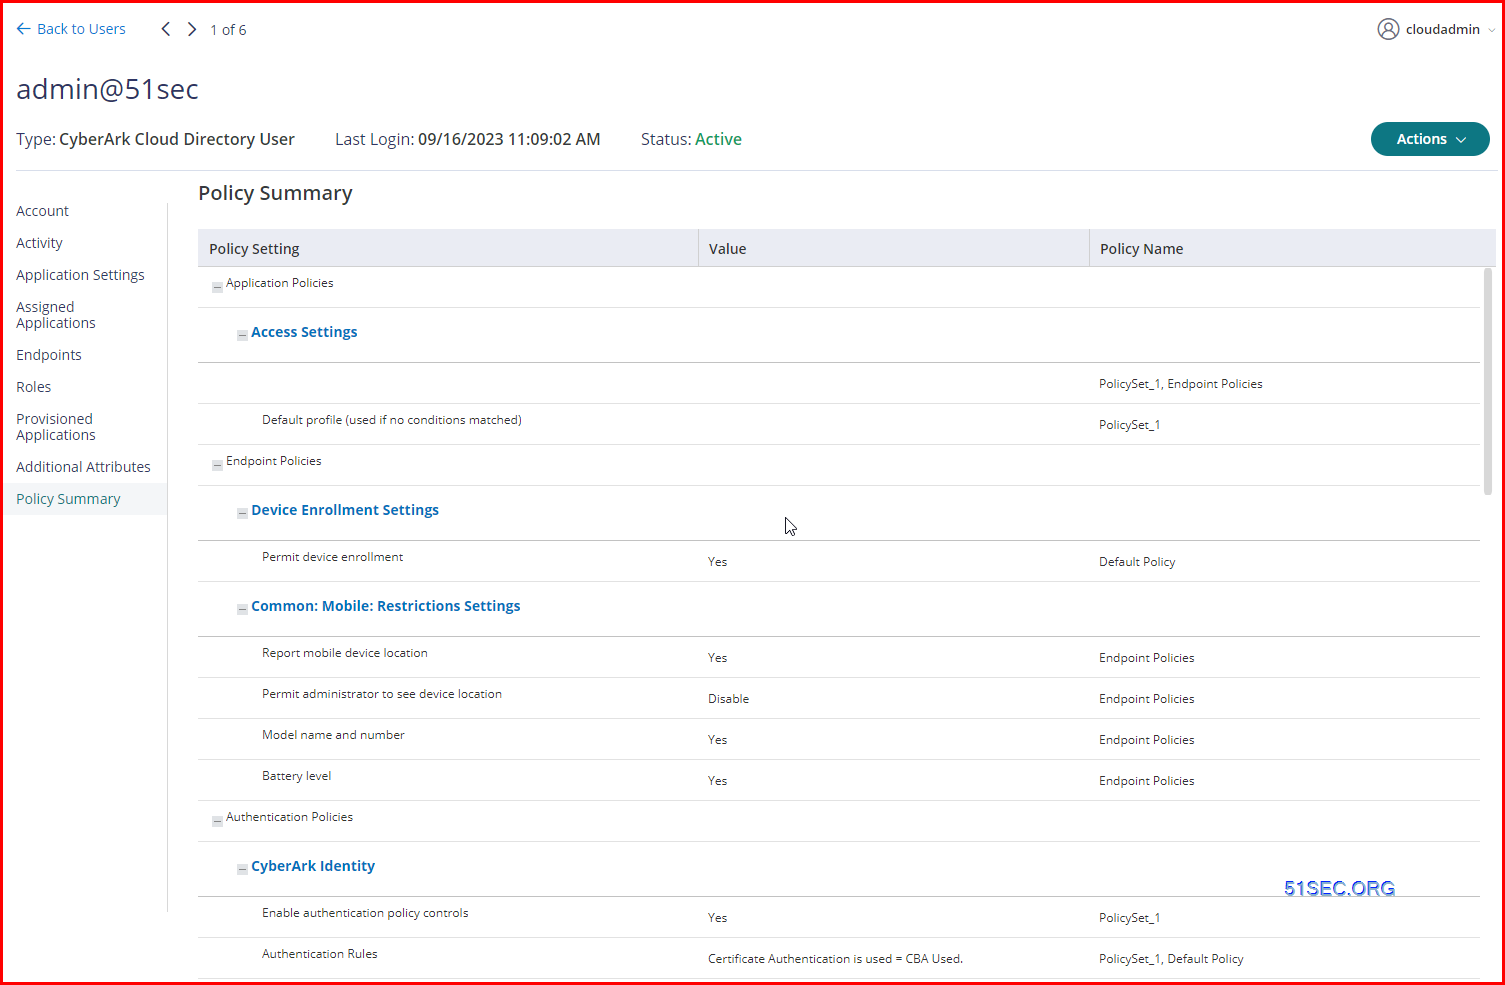
Identity Roles (Similar as Group)
NOTE: Only Global Administrators can create and manage policies in CyberArk Identity.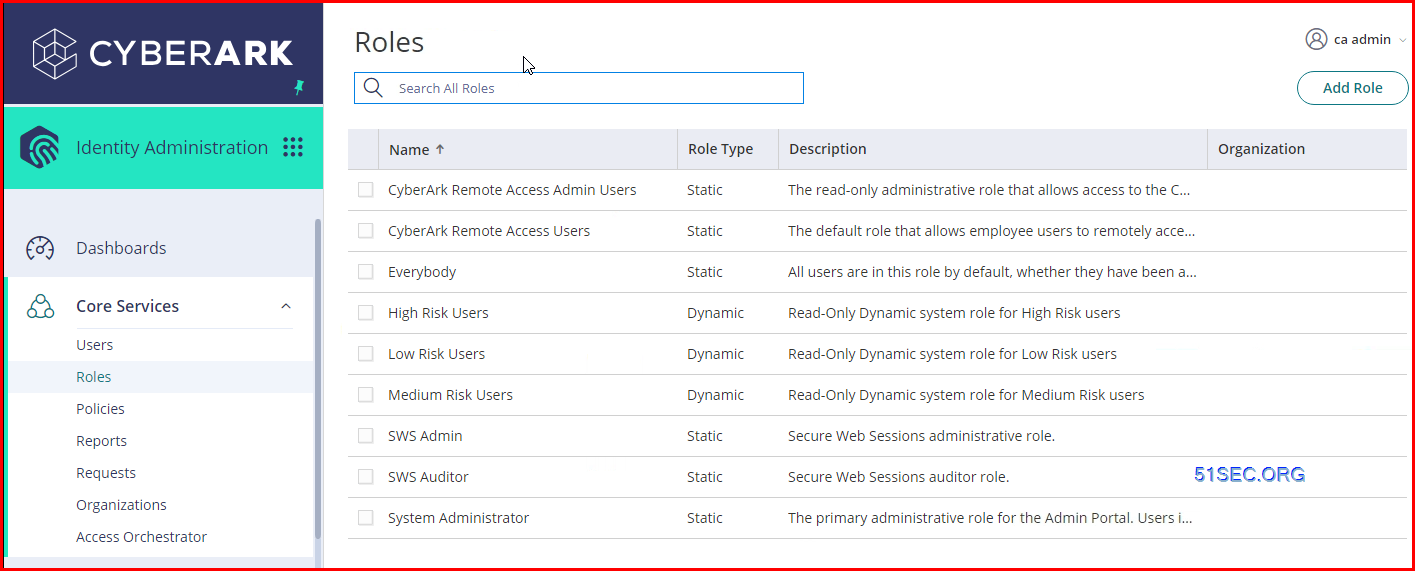
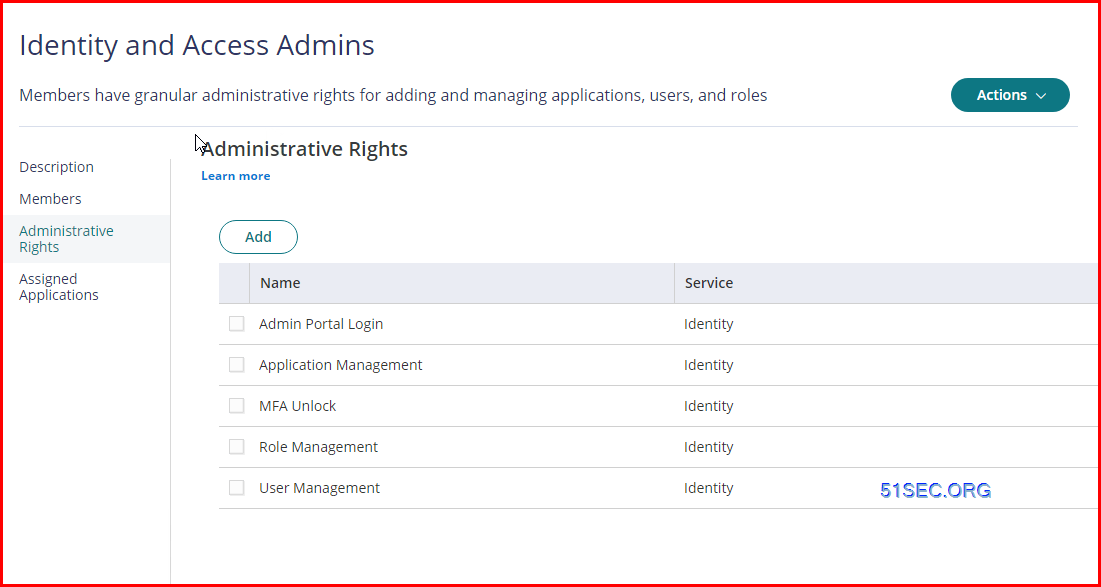
CyberArk Identity uses Organizations to delegate user administrative tasks to certain individuals. Delegated Administrators can create and manage users, roles, and web apps.
NOTE: Only Global Administrators can create and manage policies in CyberArk Identity.
Users and Delegated Administrators can only exist in one Organization at a time.
Individual Users can also be added to Organizations. This can be a manual update or a bulk user update.
Adding an Individual User
Inside the Organization, users can be added from the Members option. This process is similar to any other process where you add users and roles.
Delegating Web App Management
Delegated admins can manage web apps that are assigned to their organization only. This reduces the amount of management required by the global admin and allows the delegated admin to grant and manage these web apps for their organization.
Assign and Deploy Web Apps for Delegated Admins
1 Add the web app, choosing which Organization to associate. This will create multiple instances of a web app. Use the Organization column to identify which web app to open.
2 Assign the Grant, View, Manage permissions to the web app to the delegated admin. This can be an individual or a group.
3 Verify the web app is set to Deployed.
Added Security - Step Up Authentication
As an added level of security, step-up authentication can be added to the Admin Portal. This could be used to force Delegated Administrators to provide additional verification before getting to the Admin Portal.
Scenario : create a Contractors role
Objectives:
- View the CyberArk Identity Default roles.
- Explore the relationship between roles and policies.
- Create an Identity and Access Management (IAM) Admin role.
- Create roles to map to an AD security groups.
- Create an Identity Cloud Directory role for contractors.
Identity makes it very easy to map AD Security Groups to Roles to integrate SSO, Multi-Factor Authentication (MFA), and endpoint security policies. This feature allows AD data to be managed in the cloud without duplication.
BEST PRACTICE:
- Create and use roles to provision policies and applications using Roles Based Access Controls (RBAC).
- When you are ready to assign tenant admin rights, create a role specifically for thatpurpose. It is NOT recommended to ever create admin rights for the Everybody role.
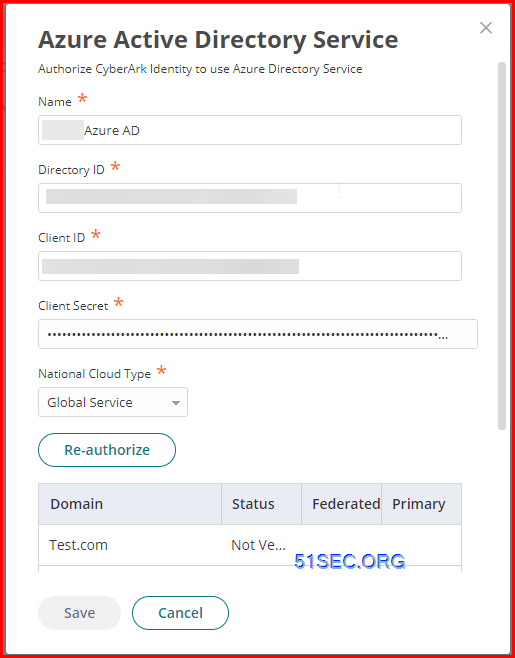
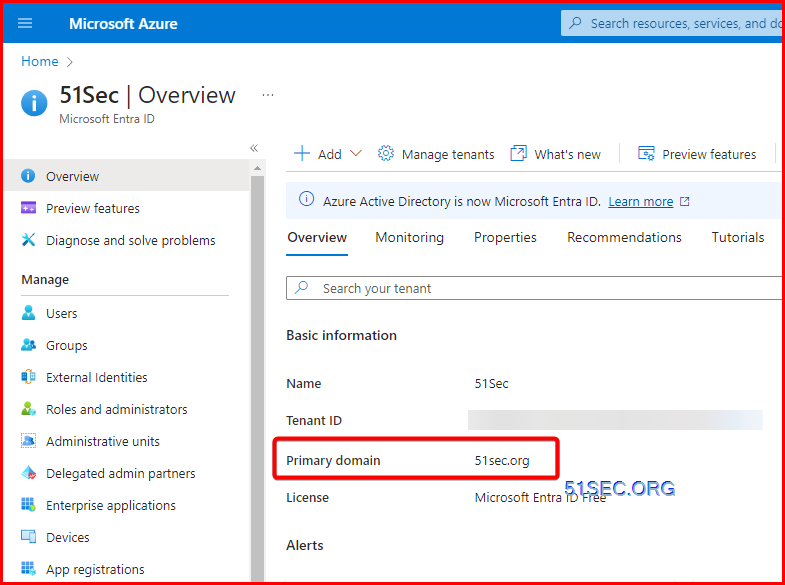
Add Azure Active Directory as a directory service
Enable MFA for Users
To configure MFA for all users
Step 1: Add a new policy set
Log in to the Identity Administration portal.
Go to Core Services > Policies and click Add Policy Set to create a new one.
Name the policy set and select All users and devices.
Step 2: Enable authentication policy controls
Go to Authentication Policies > CyberArk Identity.
Select Yes in the Enable authentication policy controls drop-down.
Step 3: Create an authentication profile
In the Authentication Rules area, select Add New Profile from the Default Profile drop-down list.
- Enter a unique name for each profile.
Select the authentication mechanism(s) from either Multiple Authentication Mechanisms or Single Authentication Mechanism.
Configure MFA for service users
Enforce MFA for users accessingStep 1: Add a new policy set
Log in to the Identity Administration portal.
Go to Core Services > Policies and click Add Policy Set to create a new one.
Name the policy set and select Specified Roles.
Add the
Step 2: Enable authentication policy controls
Go to Authentication Policies > CyberArk Identity.
Select Yes in the Enable authentication policy controls drop-down.
Step 3: Create an authentication profile
In the Authentication Rules area, select Add New Profile from the Default Profile drop-down list.
- Enter a unique name for each profile.
Select the authentication mechanism(s) from either Multiple Authentication Mechanisms or Single Authentication Mechanism.
Introduction
- alero-integration-user$@company.suffix
- identity-dpa-privilege-integration-user$@company.suffix
- identity-privilege-integration-user$@company.suffix
- installeruser@company.suffix
- saascorps-ui@company.suffix
Step-by-step instructions
- Go to Identity Admin portal->Core Services-Roles
- Click on Add Role->Name it "CyberArk Service Users - No MFA"
- Add one of the required service users from the list above
- Go to Core Services->Policies->Add Policy set->Name it "CyberArk Service Users - No MFA"
- Under Policy Assignment, select Specified Role and select the newly created Role from Step 2
- Go to Authentication Policies->CyberArk Identity and set Enable authentication policy controls to "Yes"
- Click the Default Profile dropdown menu and scroll down to "Add new Profile"
- Name it "CyberArk Service Users - No MFA"
- Select Password under Challenge 1 and click "OK"
- Click "Save" on the Add Policy Set screen
Identity Security Platform Shared Services Policies
- Allow users to add apps
- Define authentication rules
- Control user permissions
- Allow endpoint access
- Integrate third-party apps
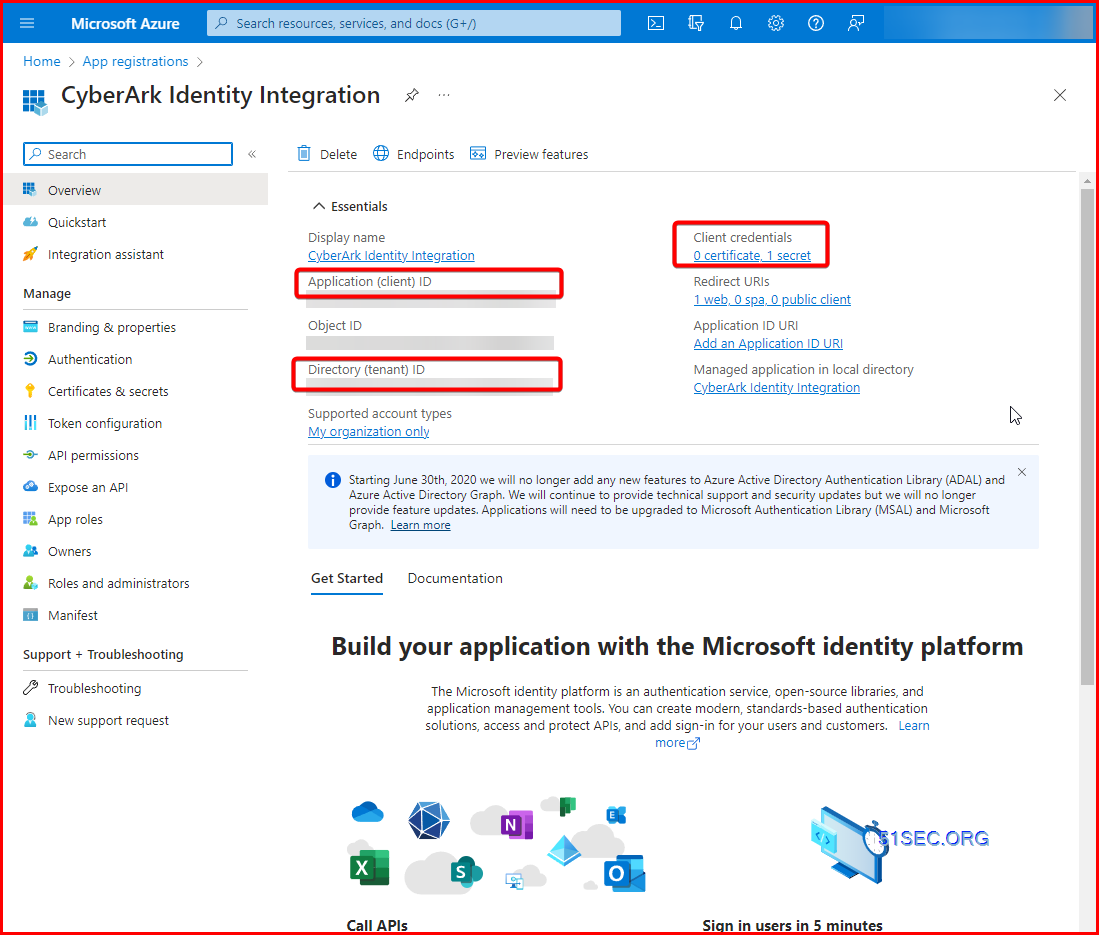
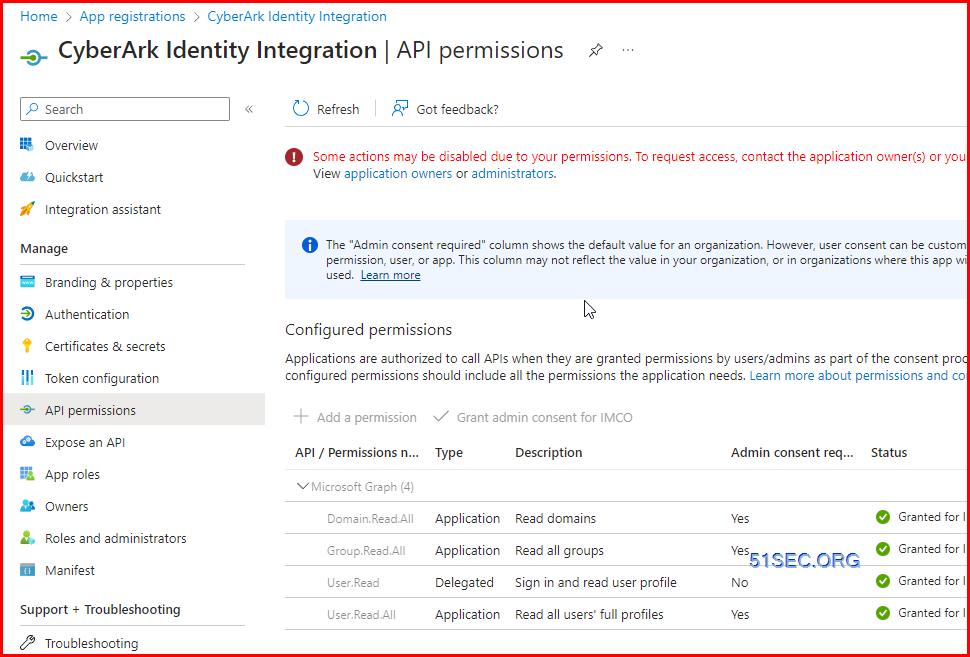
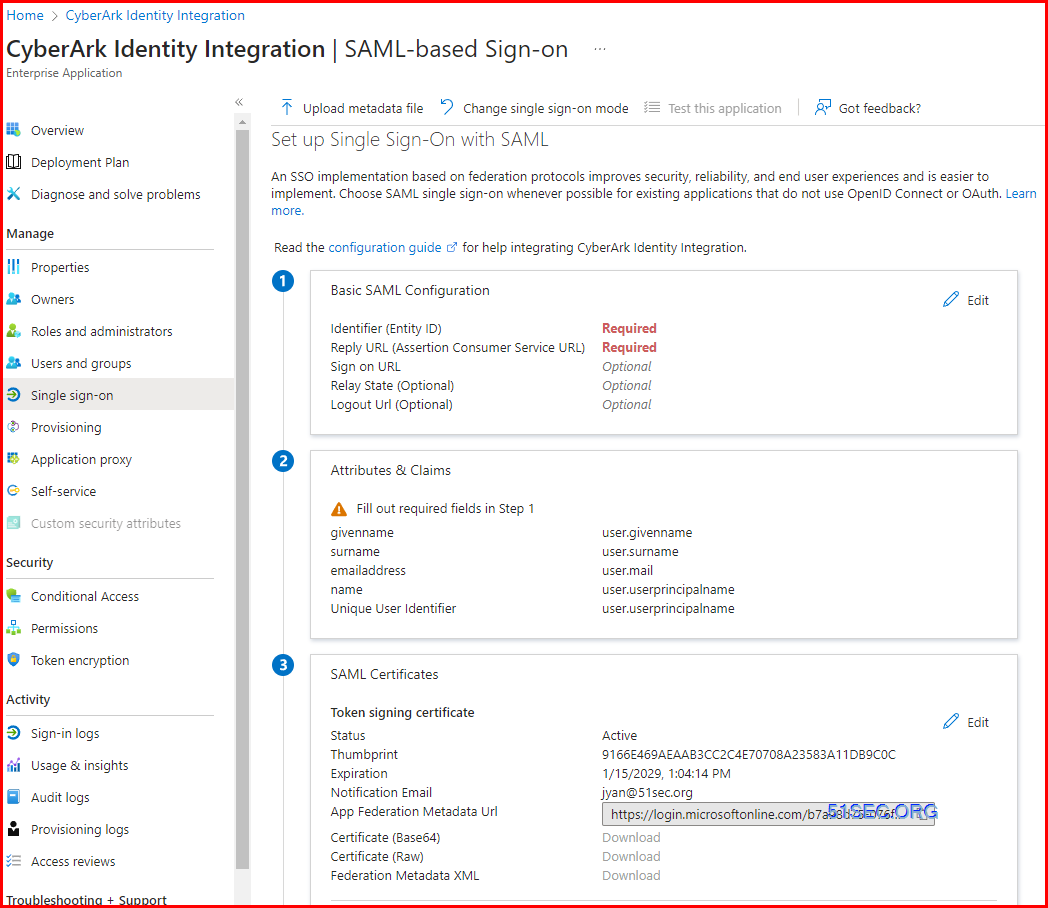
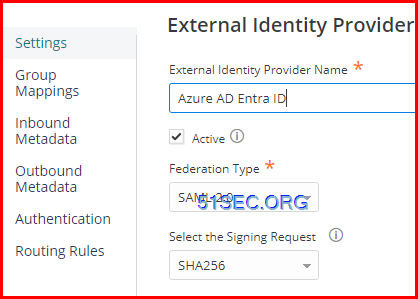
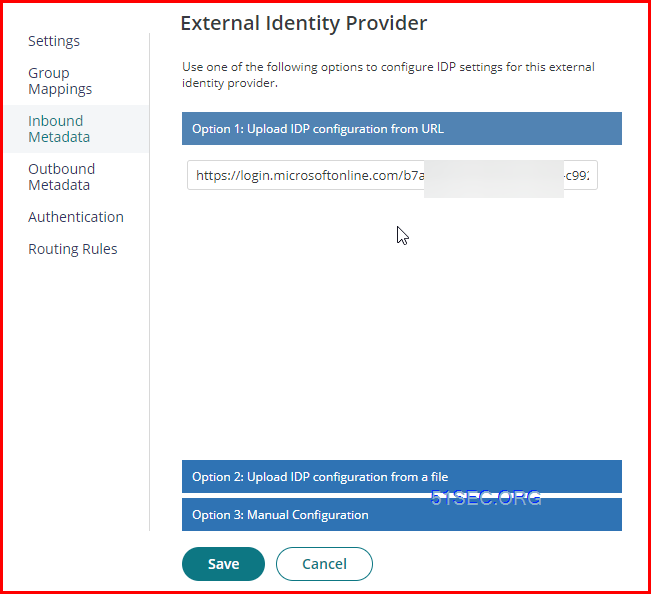
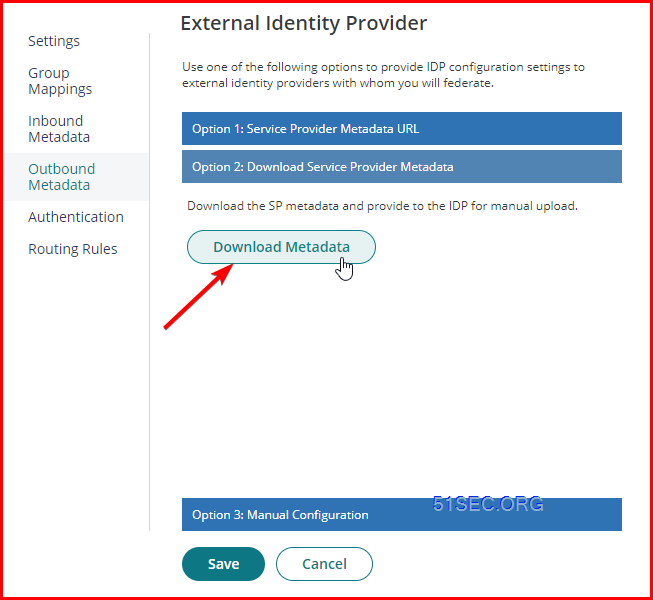
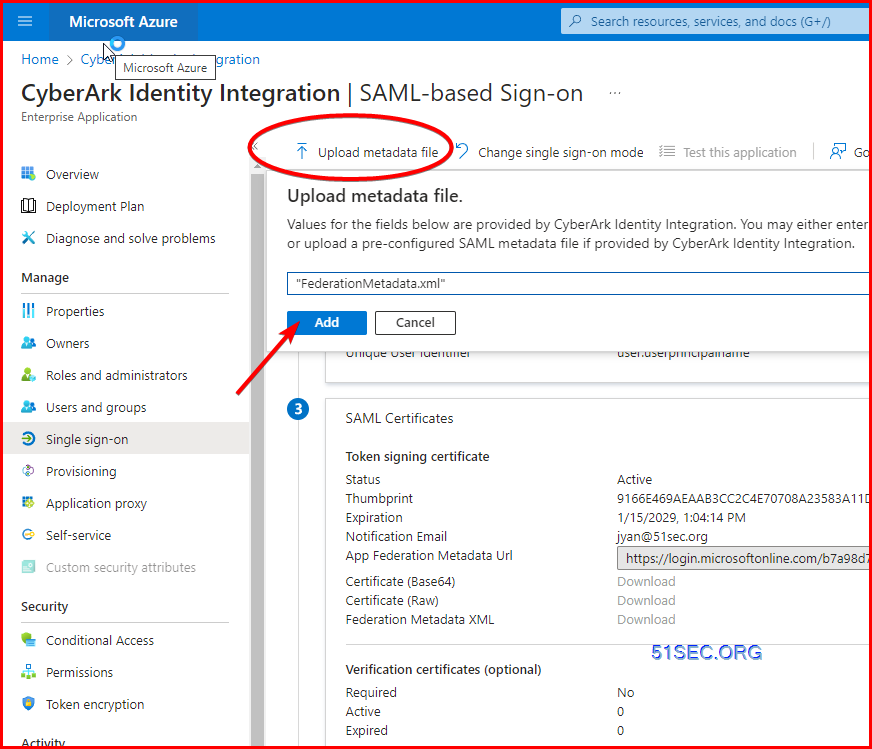
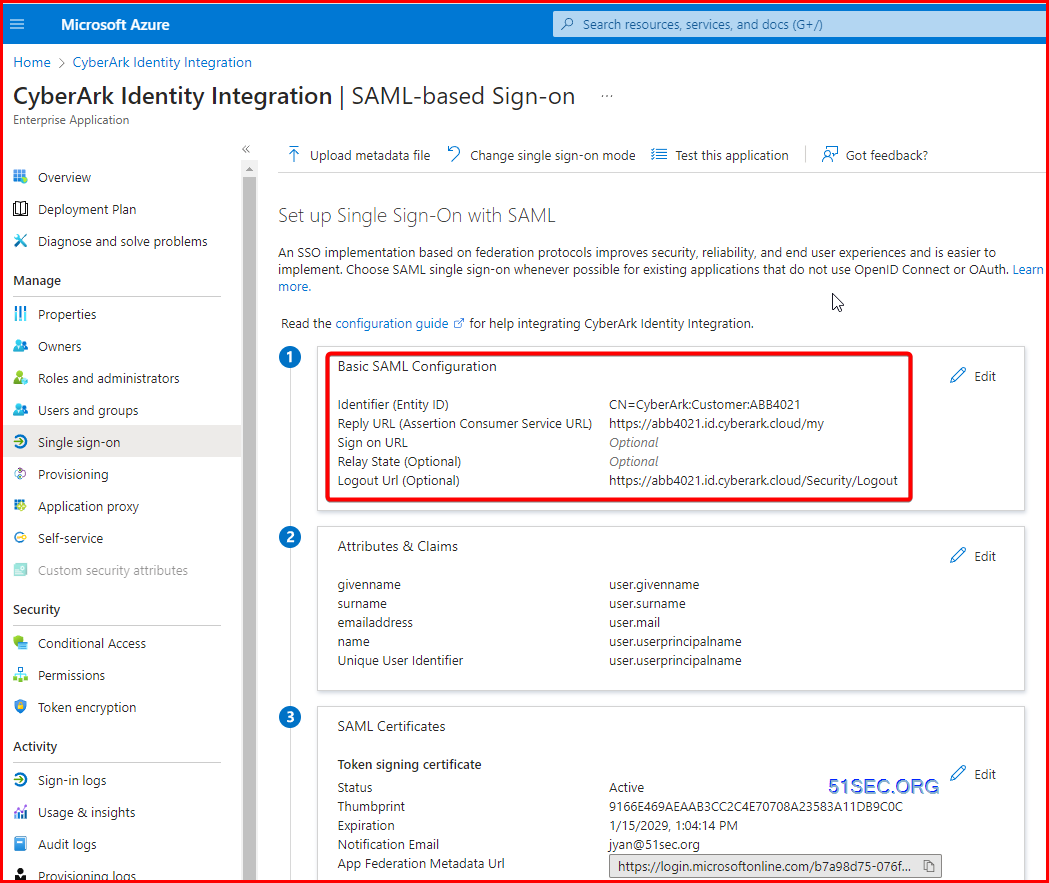
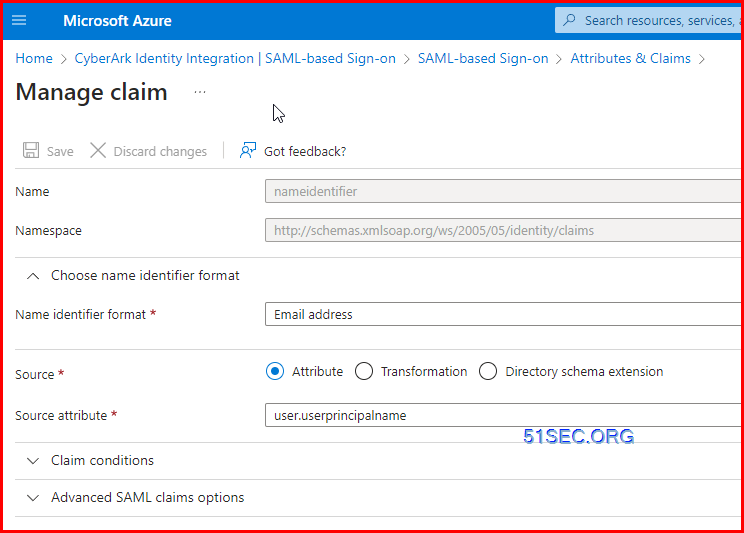
Setting Up Azure AD SSO For Identity
- Name example: CyberArk Identity Integration
- Set up single sign on from the overview page of CyberArk Identity Integration app
- Select a single sign-on, SAML
CyberArk Useful Links
- Main CyberArk Site
- CyberArk Support Portal
- CyberArk Secure File Exchange (SFE) Support Vault
- UNOFFICIAL CyberArk REST API v9.8 Live Documentation (Postman)
- CyberArk REST API on GitHub.io
- RegEx101 - for configuring AllowedSafes++
- CyberArk Official YouTube
- https://www.youtube.com/@Sennovate/videos - Tons of Identity related videos


No comments:
Post a Comment