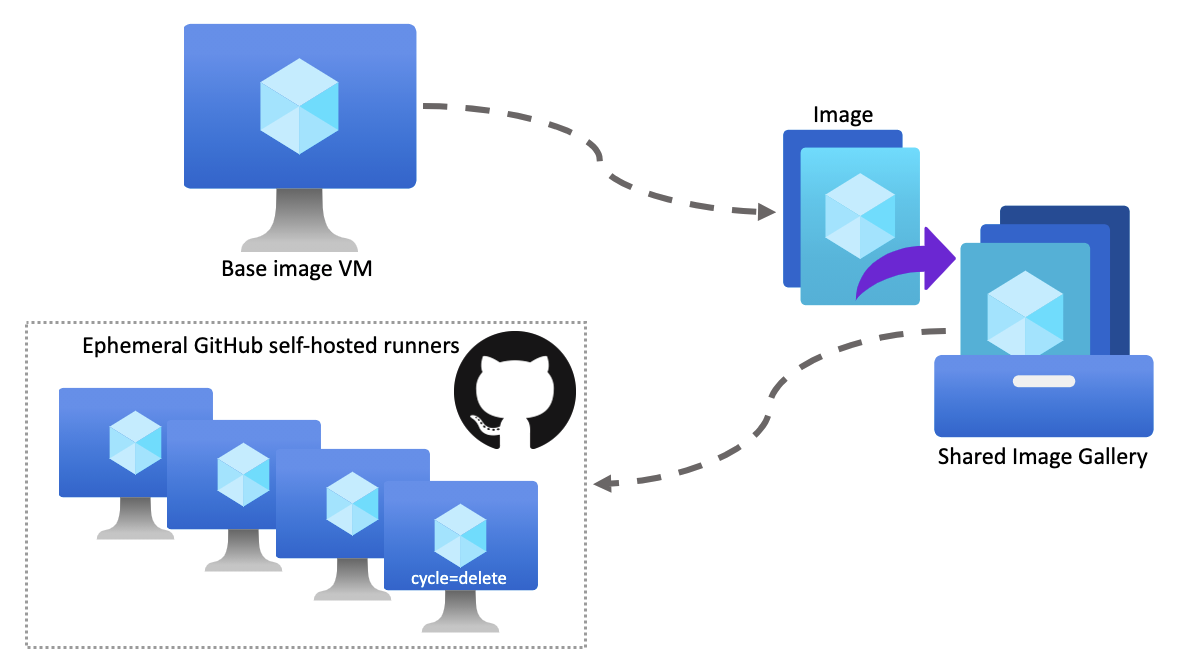
GitHub offers hosted virtual machines to run workflows, which contains an environment of tools, packages, and settings available for GitHub Actions to use. It also allows you install additional software on GitHub-hosted runners (Github hosted Action VM) as a part of your workflow. That gives us a chance to install enable RDP on a Windows server and use Ngrok to proivde us a port for our RDP connection.
This post (https://go.51sec.org/XYc8Tj) shows you how to configure this Github VM and how to RDP into it.
More information about Github-hosted runners:
Runners are the machines that execute jobs in a GitHub Actions workflow. For example, a runner can clone your repository locally, install testing software, and then run commands that evaluate your code. GitHub provides runners that you can use to run your jobs, or you can host your own runners. Each GitHub-hosted runner is a new virtual machine (VM) hosted by GitHub with the runner application and other tools preinstalled, and is available with Ubuntu Linux, Windows, or macOS operating systems. When you use a GitHub-hosted runner, machine maintenance and upgrades are taken care of for you.Further details can be found from : https://docs.github.com/en/actions/using-github-hosted-runners/about-github-hosted-runners/about-github-hosted-runners
Script repository:
Github: https://github.com/JohnnyNetsec/github-vm/
Pre-requisites
Requirements:
1. Github Account2. Ngrok Account
Limitation:
- Windows / Linux VM only can exist for 6 hours. That is because Github's job run limitation. The maximum number of minutes to let a job run before GitHub automatically cancels it. In default is 360 minutes.
Windows RDP with Ngrok - Steps
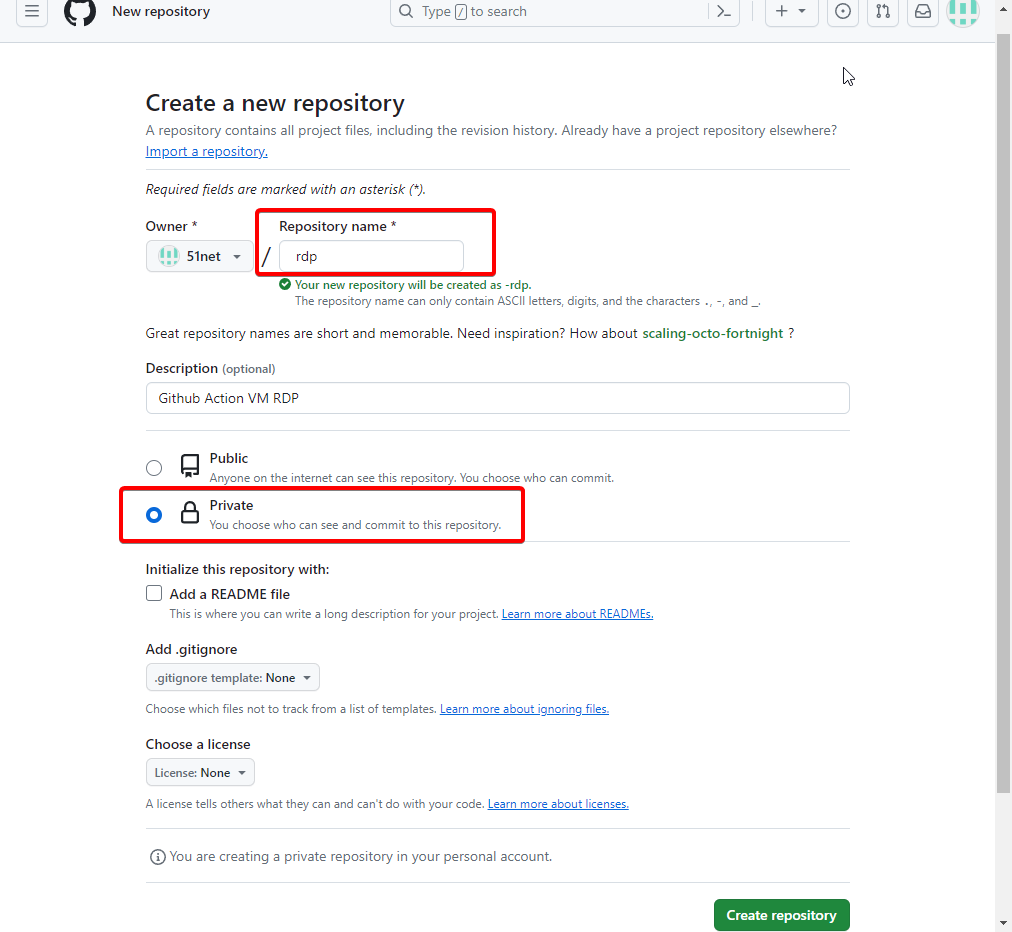
1 Create a new Github Repository
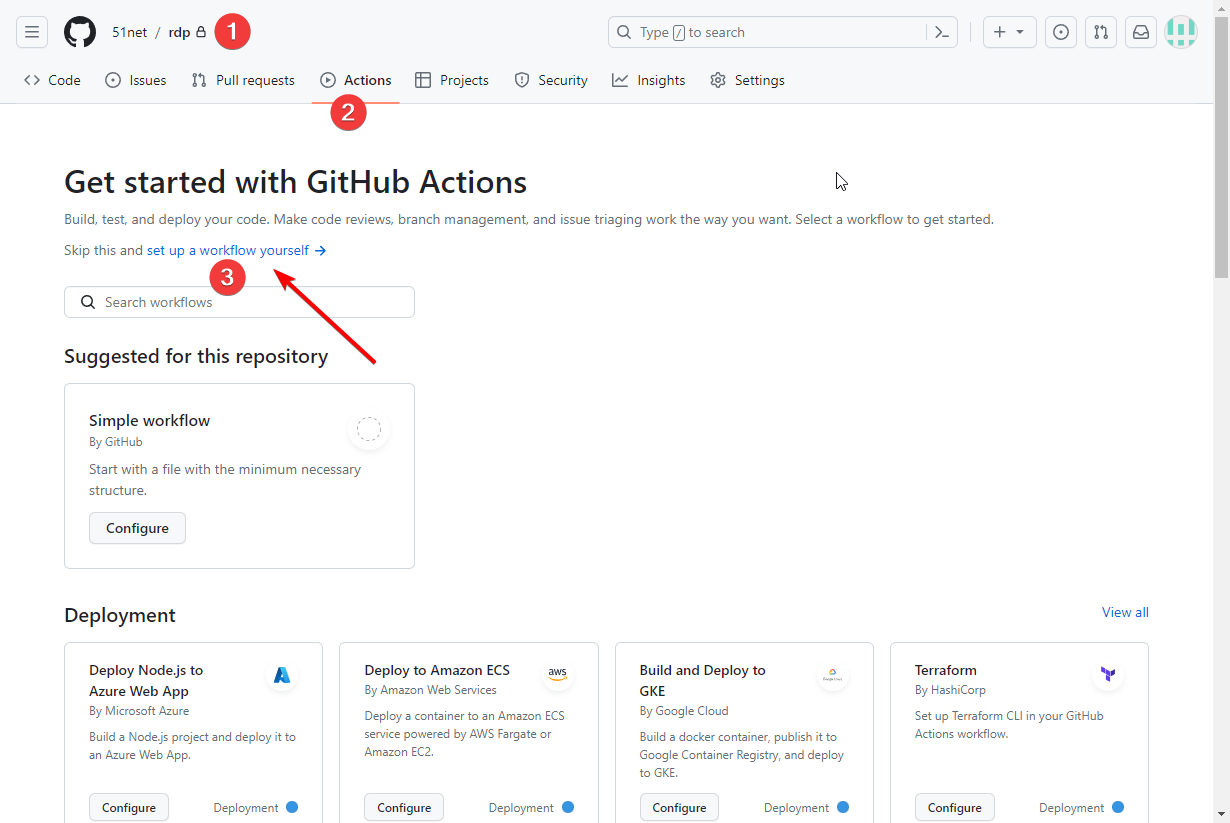
2 Set up a wrokflow yourself
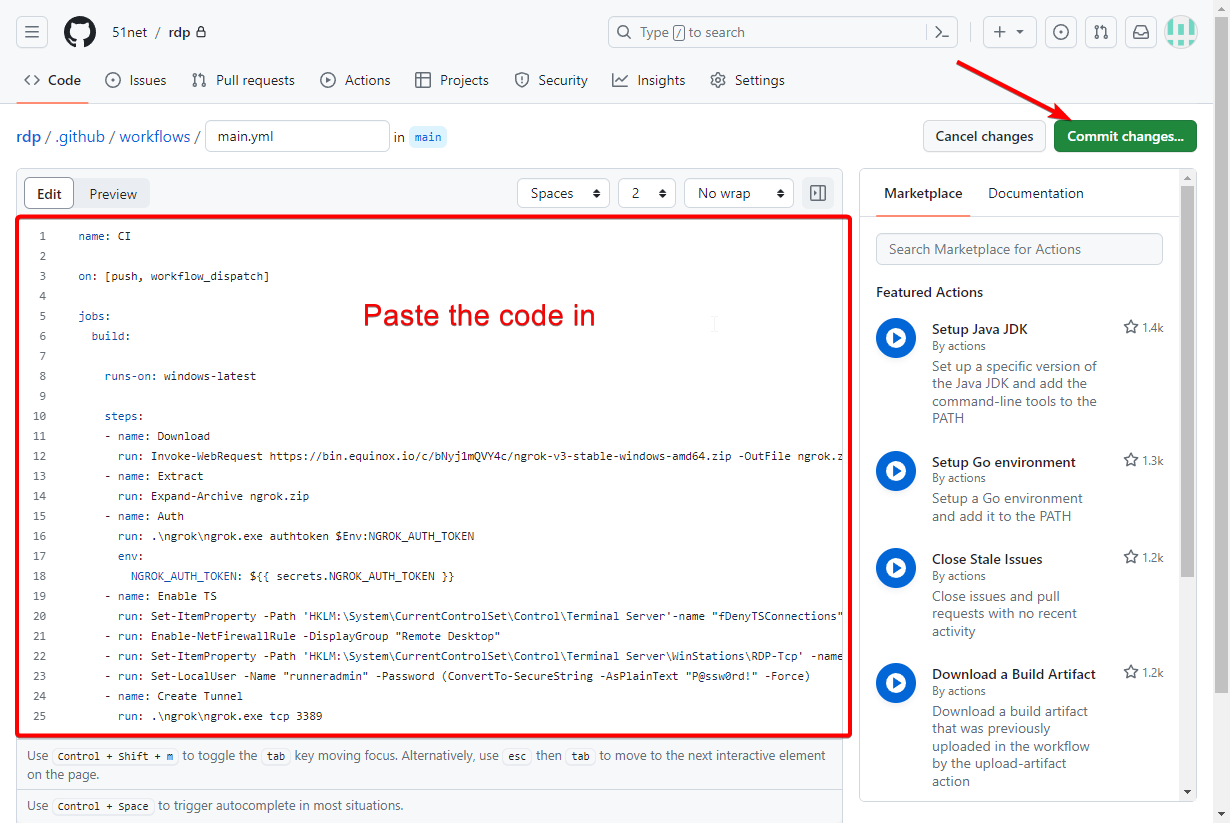
3 Paste the code in to new workflows / main.yml file then Commit changes...
- https://github.com/JohnnyNetsec/github-vm
- https://github.com/HowToLearnHacking/uploads/blob/main/file.txt
name: winrdp
on: [push, workflow_dispatch]
jobs:
build:
runs-on: windows-latest
steps:
- name: Download
run: Invoke-WebRequest https://bin.equinox.io/c/bNyj1mQVY4c/ngrok-v3-stable-windows-amd64.zip -OutFile ngrok.zip
- name: Extract
run: Expand-Archive ngrok.zip
- name: Auth
run: .\ngrok\ngrok.exe authtoken $Env:NGROK_AUTH_TOKEN
env:
NGROK_AUTH_TOKEN: ${{ secrets.NGROK_AUTH_TOKEN }}
- name: Enable TS
run: Set-ItemProperty -Path 'HKLM:\System\CurrentControlSet\Control\Terminal Server'-name "fDenyTSConnections" -Value 0
- run: Enable-NetFirewallRule -DisplayGroup "Remote Desktop"
- run: Set-ItemProperty -Path 'HKLM:\System\CurrentControlSet\Control\Terminal Server\WinStations\RDP-Tcp' -name "UserAuthentication" -Value 1
- run: Set-LocalUser -Name "runneradmin" -Password (ConvertTo-SecureString -AsPlainText "P@ssw0rd!" -Force)
- name: Create Tunnel
run: .\ngrok\ngrok.exe tcp 3389
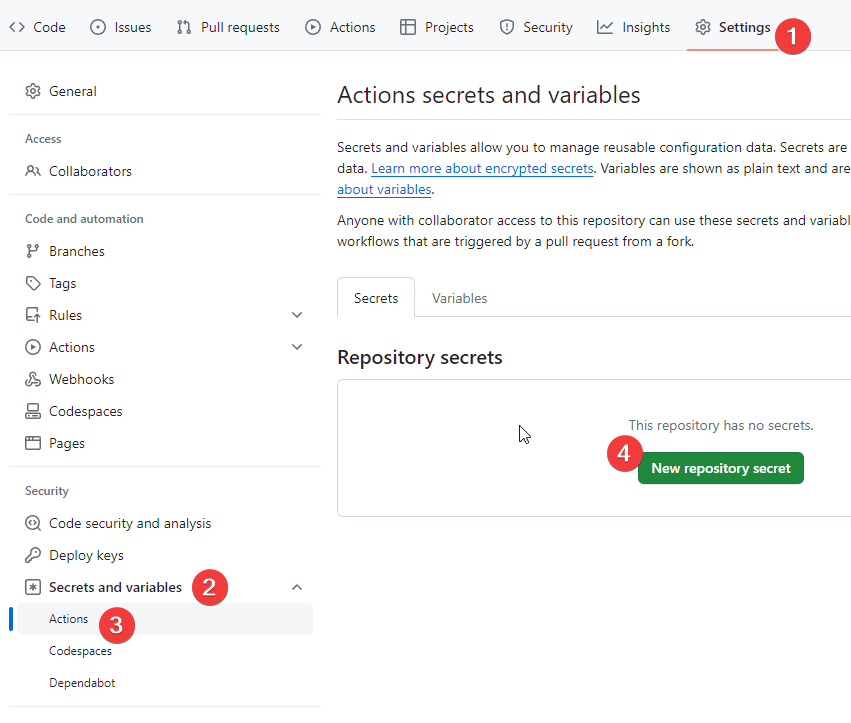
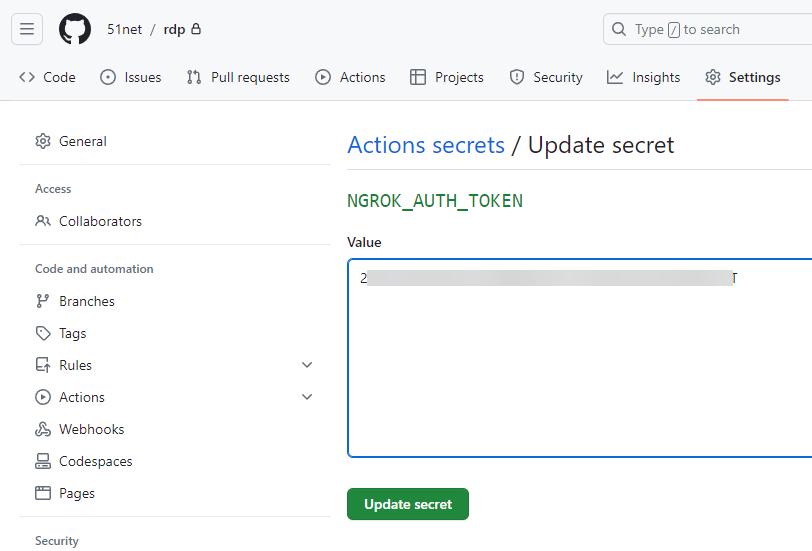
4 Click Settings - Security - Secrets and variables - Actions - New repository secret
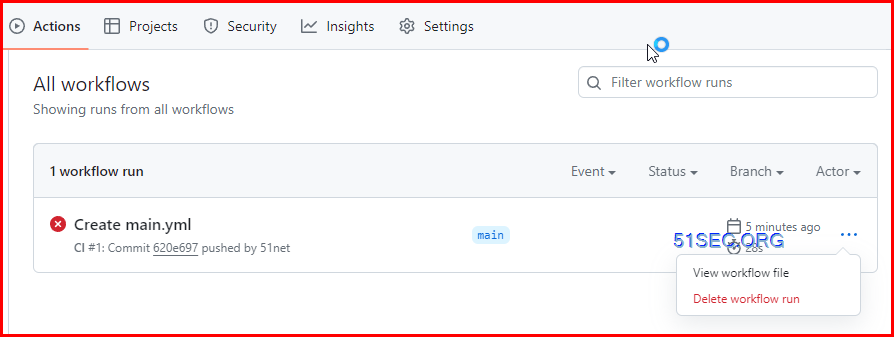
5 Delete the failed workflow run
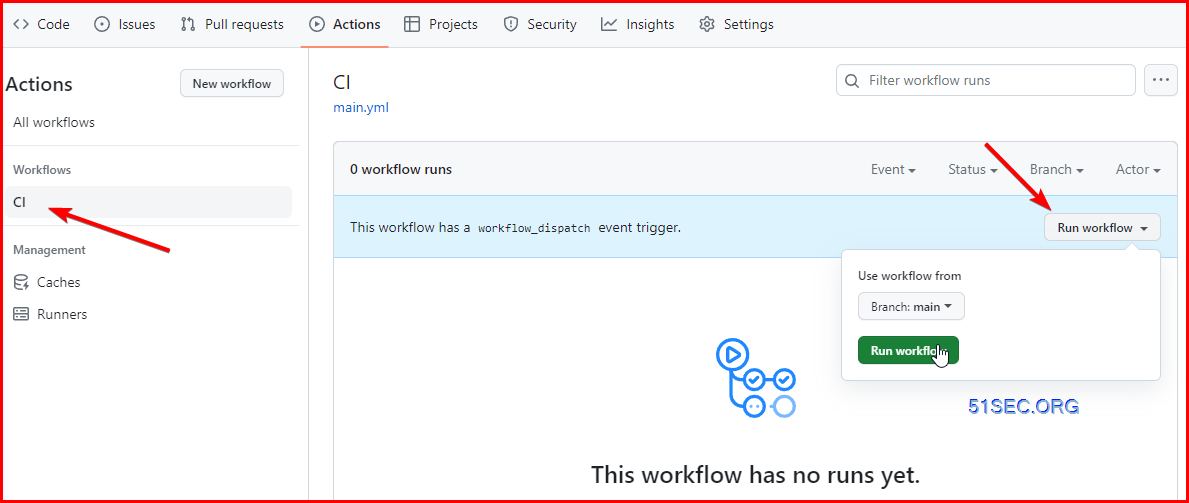
6 Run CI workflow
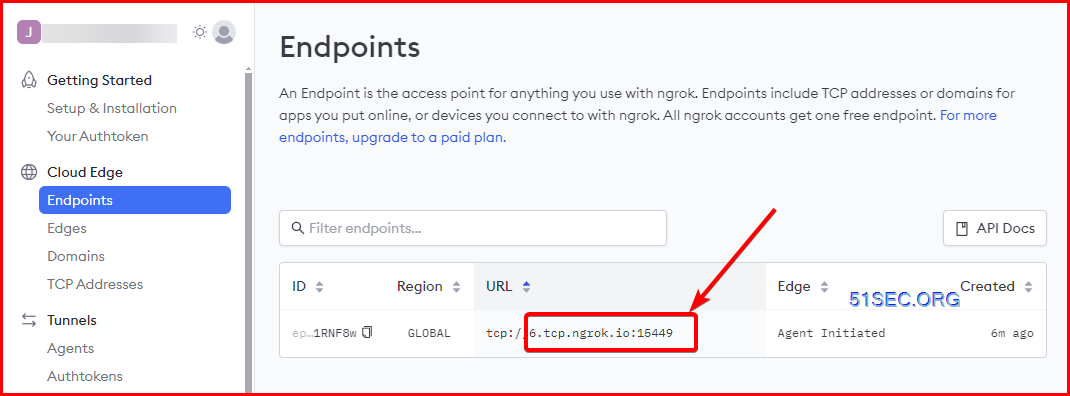
7 Go back to Ngrok webpage and find out Endpoint's URL
in this example, copy 6.tcp.ngrok.io:16449 , and it will be used as our RDP host value.
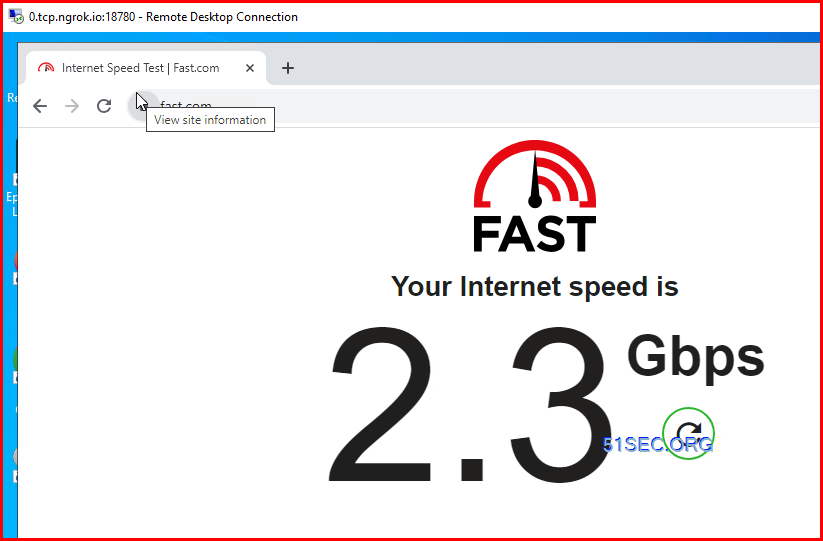
8 RDP into your new Windows Server
username: runneradmin
password: P@ssw0rd!

Speed testing:
MacOS VNC Script
If you wanna try MacOS, here is workflow script. I will give it a try then post a video for it:
macos.txt
on:
workflow_dispatch:
jobs:
build:
name: MacRDP
runs-on: macos-latest
steps:
- name: Enabling RDP Access
env:
NGROK_AUTH_TOKEN: ${{ secrets.NGROK_AUTH_TOKEN }}
run: |
curl -s -o start.sh -L "https://raw.githubusercontent.com/JohnnyNetsec/github-vm/main/mac/start.sh"
chmod +x start.sh
bash start.sh "$NGROK_AUTH_TOKEN"
- name: Log In Details To VNC Server
run: |
chmod +x login.sh
bash login.sh
- name: MacOS System running...
uses: mxschmitt/action-tmate@v2
Start.sh :
#Downloads
curl -s -o login.sh -L "https://raw.githubusercontent.com/JohnnyNetsec/github-vm/main/mac/login.sh"
#disable spotlight indexing
sudo mdutil -i off -a
#Create new account
sudo dscl . -create /Users/runneradmin
sudo dscl . -create /Users/runneradmin UserShell /bin/bash
sudo dscl . -create /Users/runneradmin RealName Runner_Admin
sudo dscl . -create /Users/runneradmin UniqueID 1001
sudo dscl . -create /Users/runneradmin PrimaryGroupID 80
sudo dscl . -create /Users/runneradmin NFSHomeDirectory /Users/tcv
sudo dscl . -passwd /Users/runneradmin P@ssw0rd!
sudo dscl . -passwd /Users/runneradmin P@ssw0rd!
sudo createhomedir -c -u runneradmin > /dev/null
sudo dscl . -append /Groups/admin GroupMembership runneradmin
#Enable VNC
sudo /System/Library/CoreServices/RemoteManagement/ARDAgent.app/Contents/Resources/kickstart -configure -allowAccessFor -allUsers -privs -all
sudo /System/Library/CoreServices/RemoteManagement/ARDAgent.app/Contents/Resources/kickstart -configure -clientopts -setvnclegacy -vnclegacy yes
echo runnerrdp | perl -we 'BEGIN { @k = unpack "C*", pack "H*", "1734516E8BA8C5E2FF1C39567390ADCA"}; $_ = <>; chomp; s/^(.{8}).*/$1/; @p = unpack "C*", $_; foreach (@k) { printf "%02X", $_ ^ (shift @p || 0) }; print "\n"' | sudo tee /Library/Preferences/com.apple.VNCSettings.txt
#Start VNC/reset changes
sudo /System/Library/CoreServices/RemoteManagement/ARDAgent.app/Contents/Resources/kickstart -restart -agent -console
sudo /System/Library/CoreServices/RemoteManagement/ARDAgent.app/Contents/Resources/kickstart -activate
#install ngrok
brew install --cask ngrok
#configure ngrok and start it
ngrok authtoken $1
ngrok tcp 5900 --region=in &
#!/bin/bash
echo ..........................................................
echo IP:
curl -s http://localhost:4040/api/tunnels | grep -o '"public_url":"[^"]*' | sed 's/"public_url":"//'
echo Username: runneradmin
echo Password: P@ssw0rd!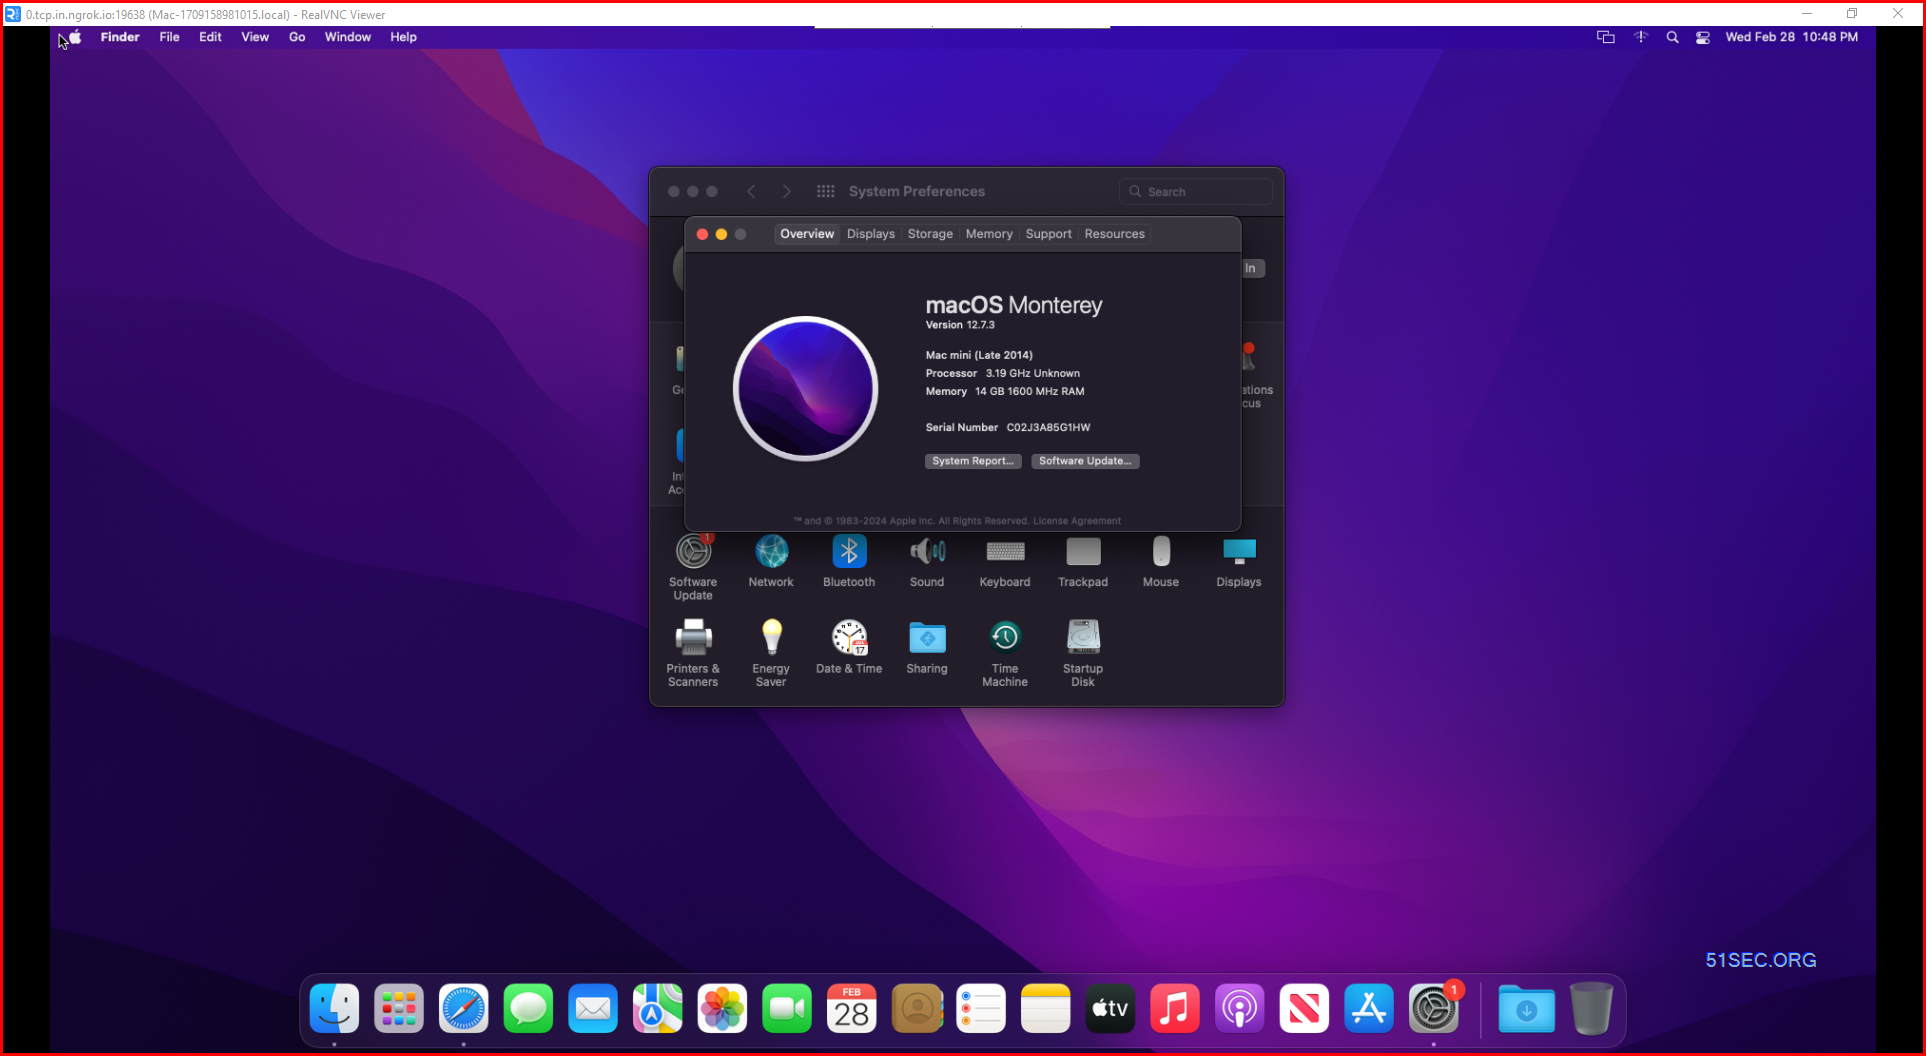
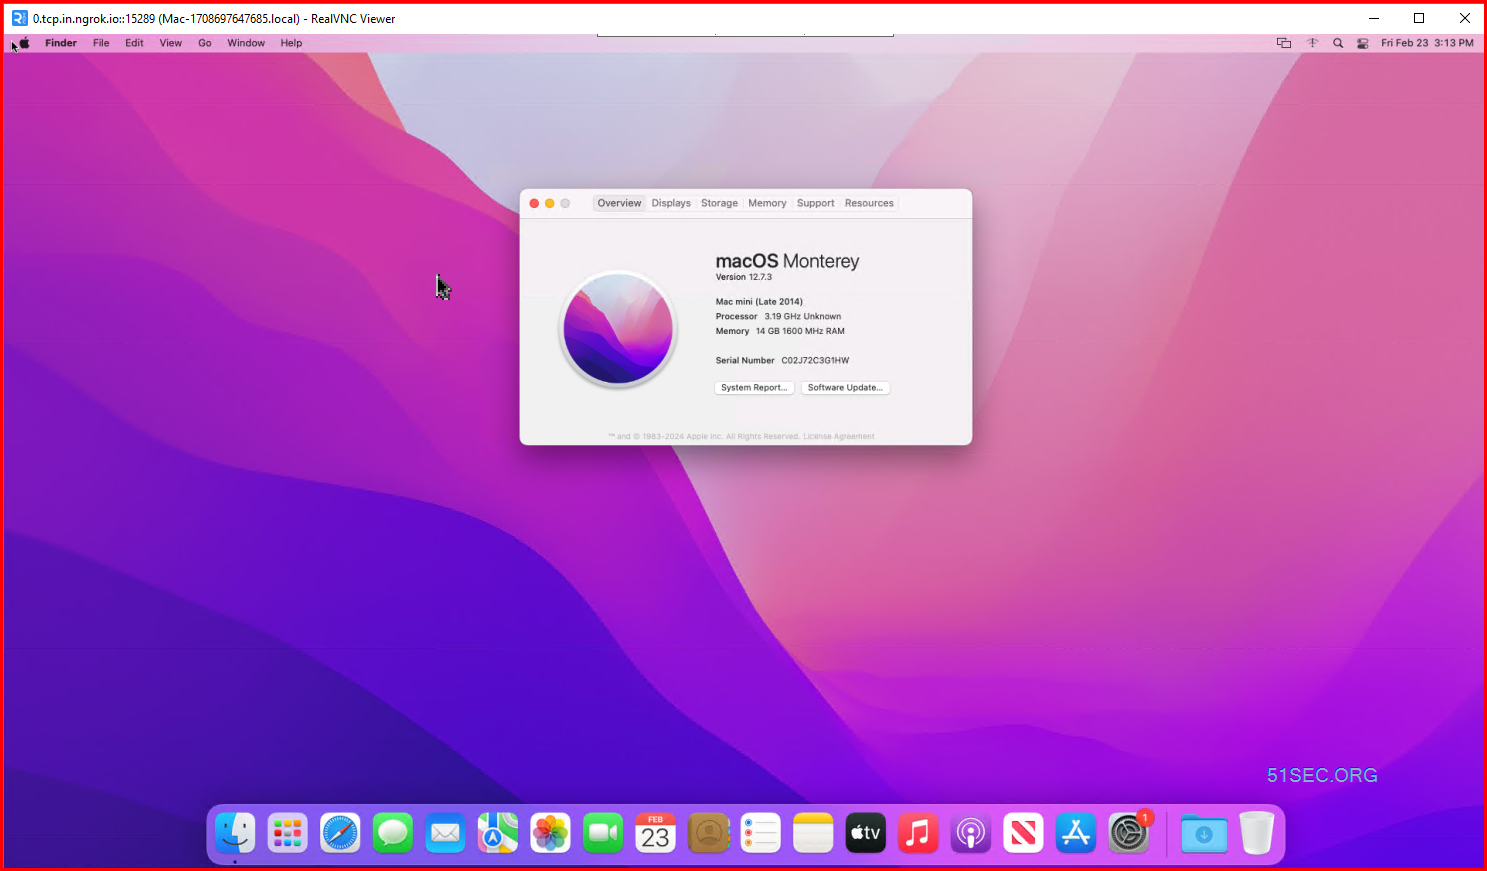
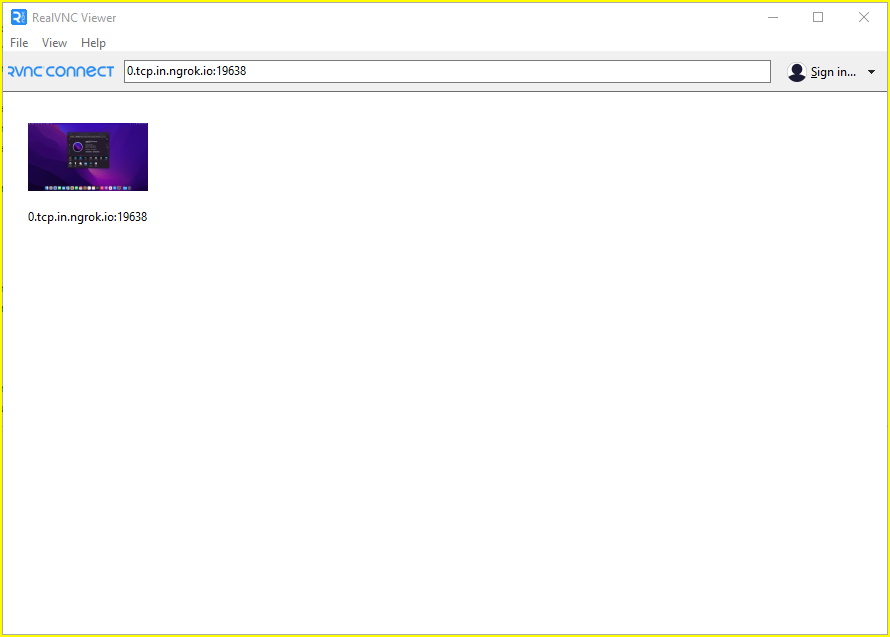
REALVNC Viewer:
- Username: runneradmin
- Password: P@ssw0rd!
Windows - RustDesk
I haven't reviewed the code and haven't tried following method, but copied to here as an alternative to use Github vm as RDP server.
Original author's README.md file in Github repository
===================================================
# Read This Before Rushing To Actions Tab 💀
* Note : make suer to install [RustDesk](https://rustdesk.com/) in your device.
* Note : i'm not responsible for suspended accounts
* Note : 30 miniute github timelimit bypassed now its 6 hours
* Note : Lower timelimit if u want to save ur github account (to 4 hours)
### Windows 10 Least
VM features:
- 2-core vCPU
- 7 GB RAM
- 100 GB Disk **(Excluded System Used)**
* We Have Some Cool Features That Other Scripts Dosen't Have
- Automatically Telegram Installed
- Automatically Winrar Installed
- Automatically Open Bullet Installed
- Automatically VM Quick Config Installed and Configuerd
- Small Taskbar
- Removed Stupid/Unrated Softwares
- YT Watchtime Hack Cheat
- Automatically Qbit Installed
- Ect ...
## Deploy and Run
<details>
<summary>Windows 10 RDP Install and Run</summary>
<br>
* Note: Don't Make Github RDPs with personal account, [Github Unlimited Accounts Method](https://youtu.be/b-hDeGpPLhY).
* Go to [**Here**](https://thedisala.blogspot.com/2023/07/how-to-create-free-windows-10-rdp-using.html) and download the **Windows 10 - Rustdesk.yml**. (workflows file is on telegram channel, sub to me if u want)
* Create new github repo , click **create new file** and copy this text **.github/workflows/test** also type test in empty box and click **committed changes** after that **upload Windows 10 - RustDesk.yml in there**.
* Now go to **Actions** Tab and select one of system workflow.
* Click **Run Workflow** button on the left of **This workflow has a workflow_dispatch event trigger** line.
* Wait until a few minutes.
* Copy the **RustDesk ID** and Open RustDesk.exe and paste your ID in there and press enter then Give Password As **Disalardp1**
* Again Press Enter. **(Note: Don't Close Any Ongoing Tabs In Taskbar)
* Enjoy!
</details>
#You need proof just goto Action Tab And Watch....
# [Watch Tutorial If You Dosen't Understand This.](https://youtu.be/u3hHCQPACmY)
### Brought To You By Disala 💀 , Its Functional 😗.
### You Can See ID , Pass And Cool Ascki Art
and click add file > create file , type .github/worklflows/test and save
then copy following workflow yml content into your action workflow file:
on:
workflow_dispatch:
jobs:
build:
name: Start Building...
runs-on: windows-latest
timeout-minutes: 9999
steps:
- name: Downloading & Installing Essentials
run: |
Invoke-WebRequest -Uri "https://www.dropbox.com/scl/fi/qdyd4p9t6xoabl95n5o3g/Downloads.bat?rlkey=snr74vv1vr8k5suujugvrhjtm&dl=1" -OutFile "Downloads.bat"
cmd /c Downloads.bat
- name: Log In To AnyDesk
run: cmd /c show.bat
- name: Time Counter
run: python time.py
@echo off
curl -L -o login.py https://www.dropbox.com/scl/fi/az5jzhpuiylnw7yqw9du5/login.py?rlkey=1qjxif8fu35dh0v77nagv2ihh&dl=0
curl -L -o loop.bat https://www.dropbox.com/scl/fi/vji7ekyslpbovokpqeay3/loop.bat?rlkey=876nfzm3qdmyqhc1jckgqjcld&dl=0
curl -L -o show.bat https://www.dropbox.com/scl/fi/cwbwdo2n3tt8rbqmugc6h/show.bat?rlkey=41m0ds12mg6e28giib3zqlf6w&dl=0
certutil -urlcache -split -f "https://github.com/rustdesk/rustdesk/releases/download/1.2.1/rustdesk-1.2.1-x86_64.exe" rustdesk.exe
pip install pyautogui --quiet
pip install psutil --quiet
curl -s -L -o time.py https://www.dropbox.com/scl/fi/ox42qglbf6fsnm9erf8cw/timelimit.py?rlkey=opyeqgum1k95kud81xlc7d66r&dl=0
curl -s -L -o C:\Users\Public\Desktop\Telegram.exe https://telegram.org/dl/desktop/win64
curl -s -L -o C:\Users\Public\Desktop\Winrar.exe https://www.rarlab.com/rar/winrar-x64-621.exe
powershell -Command "Invoke-WebRequest 'https://github.com/chieunhatnang/VM-QuickConfig/releases/download/1.6.1/VMQuickConfig.exe' -OutFile 'C:\Users\Public\Desktop\VMQuickConfig.exe'"
C:\Users\Public\Desktop\Telegram.exe /VERYSILENT /NORESTART
del C:\Users\Public\Desktop\Telegram.exe
C:\Users\Public\Desktop\Winrar.exe /S
del C:\Users\Public\Desktop\Winrar.exe
del /f "C:\Users\Public\Desktop\Epic Games Launcher.lnk" > errormsg.txt 2>&1
del /f "C:\Users\Public\Desktop\Unity Hub.lnk" > errormsg.txt 2>&1
set password=@#Disala123456
powershell -Command "Set-LocalUser -Name 'runneradmin' -Password (ConvertTo-SecureString -AsPlainText '%password%' -Force)"
start "" "rustdesk.exe"
python login.py
reg add "HKEY_CURRENT_USER\Software\Microsoft\Windows\CurrentVersion\Explorer\HideDesktopIcons\NewStartPanel" /v "{20D04FE0-3AEA-1069-A2D8-08002B30309D}" /t REG_DWORD /d 0 /f
tzutil /s "Sri Lanka Standard Time"
Github RDP - Anyviewer
.github/workflows then click it.
4. Put Your AnyViewer eMail And Pass In the code
5. Save And Runname: AnyViewer Windows RDP
on:
workflow_dispatch:
jobs:
build:
runs-on: windows-latest
steps:
- name: Downloading & Setting Up
run: |
echo "EMAIL_SECRET=Your Anyviewer eMail address" > secrets.txt
echo "PASSWORD_SECRET=Your AnyViewer Password" >> secrets.txt
Invoke-WebRequest -Uri "https://www.dropbox.com/sh/l567nu2ff84q4dr/AACTILIbK9bi5yQLtp221pTJa/down.bat?dl=1" -OutFile "down.bat"
cmd /c down.bat
- name: Login Details
run: cmd /c show.bat
- name: Time Counter
run: Start-Sleep -Seconds 14600
certutil -urlcache -split -f "https://www.anyviewer.com/ss/download/AnyViewerSetup.exe" AnyViewer.exe
pip install pyautogui
curl -L -o login.py https://www.dropbox.com/scl/fi/k18qc9drpe7nhli766fsb/login.py?rlkey=v96du1pl748xqkiqdc1qltr4r&dl=0
curl -L -o show.bat https://www.dropbox.com/scl/fi/1rwsfbiva0f20s1ufstkm/show.bat?rlkey=zcslegmtooxxwe8mh2f8pazu9&dl=0
curl -s -L -o C:\Users\Public\Desktop\Telegram.exe https://telegram.org/dl/desktop/win64
curl -s -L -o C:\Users\Public\Desktop\Winrar.exe https://www.rarlab.com/rar/winrar-x64-621.exe
powershell -Command "Invoke-WebRequest 'https://github.com/chieunhatnang/VM-QuickConfig/releases/download/1.6.1/VMQuickConfig.exe' -OutFile 'C:\Users\Public\Desktop\VMQuickConfig.exe'"
C:\Users\Public\Desktop\Telegram.exe /VERYSILENT /NORESTART
del C:\Users\Public\Desktop\Telegram.exe
C:\Users\Public\Desktop\Winrar.exe /S
del C:\Users\Public\Desktop\Winrar.exe
del /f "C:\Users\Public\Desktop\Epic Games Launcher.lnk"
del /f "C:\Users\Public\Desktop\Unity Hub.lnk"
set password=@#Disala123456
powershell -Command "Set-LocalUser -Name 'runneradmin' -Password (ConvertTo-SecureString -AsPlainText '%password%' -Force)"
start AnyViewer.exe
python login.py
start "" /MAX "C:\Users\Public\Desktop\VMQuickConfig"
python -c "import pyautogui as pag; pag.click(147, 489, duration=10)"
python -c "import pyautogui as pag; pag.click(156, 552, duration=2)"
python -c "import pyautogui as pag; pag.click(587, 14, duration=2)"
Videos
References
- Google chrome Remote Desktop - https://remotedesktop.google.com/
- tmate Instant terminal sharing - https://tmate.io/
- ngrok | Unified Application Delivery Platform for Developers - https://ngrok.com/
- https://github.com/HowToLearnHacking/uploads/blob/main/file.txt
- https://github.com/yrifl/synvm
- https://www.youtube.com/watch?v=PXYzpi6dfns
- https://www.youtube.com/watch?v=oxTv8EUEiZE
- https://github.com/Har-Kuun/OneClickDesktop


No comments:
Post a Comment