Some related posts:
Github address: https://github.com/Davenchy/live-torrent
Tested at https://labs.play-with-docker.com/
Github url:https://github.com/boypt/simple-torrent
BU-Trackers server list:
https://trackerslist.com/all.txt
Installation
docker run --restart=always --name simple-torrent -d \ -p 3000:3000 \ -v ~/downloads:/downloads \ -v ~/torrents:/torrents \ boypt/cloud-torrent
Then access the
Tested at https://labs.play-with-docker.com/
Reference: https://www.moerats.com/archives/1023/
It will need 1G RAM. If it is only 512M RAM, you will need to add Swap memory.
docker run --name send -d -p 8888:1443 moerats/send
You can visit site by ip:8888.
Create Dockerfile:
#将下面一起复制进SSH客户端运行 cat > Dockerfile <<EOF FROM alpine EXPOSE 8001 RUN wget https://github.com/pldubouilh/gossa/releases/download/v0.0.7/gossa-linux64 && mv gossa-linux64 /gossa && chmod +x /gossa ENTRYPOINT [ "/gossa", "-h", "0.0.0.0", "/shared" ] EOF
Make a docker image:
docker build -t gossa .
Run docker image:
docker run --name gossa -d -p 8002:8001 -v /root/netsec:/shared gossa
The folder path is /root/netsec and access address is ip:8002
git clone https://github.com/wahyd4/aria2-ariang-x-docker-compose.git cd aria2-ariang-x-docker-compose/filerun docker-compose up -d
To install NextCloud:
git clone https://github.com/wahyd4/aria2-ariang-x-docker-compose.git cd aria2-ariang-x-docker-compose/nextcloud docker-compose up -d
Enable External Storage Support
Settings - Admin - External Storage
the files downloaded by Aria2 will be at /user-files/ folder.
Add a new local storage folder into settings - admin - external storage. Any Aria2 download file will be in NextCloud.
Change Docker Configuration
docker-compose stop
vi docker-compose.yml
docker-compose up -d
Upgrade Docker Image:
docker-compose stop # 将 docker 镜像暂时关掉 git pull origin master # 获取最近代码 docker-compose up -d # 运行最新版本的镜像
ljdyw/ubuntu-novnc
docker run -dit -p 8080:8080 -p 6080:6080 -p 5901:5901 -v /改成自己下载目录:/root/下载 --name ubuntu1 ljdyw/ubuntu-novnc:latest
- Collection for Interesting Docker Images
- Collection for Cyber Security Related Dockers
- Collection for Cloud Storage and Downloading Docker
- Docker Usage Introduction (Tips and Tricks)
- Portainer Usage Introduction
Live Torrent Docker
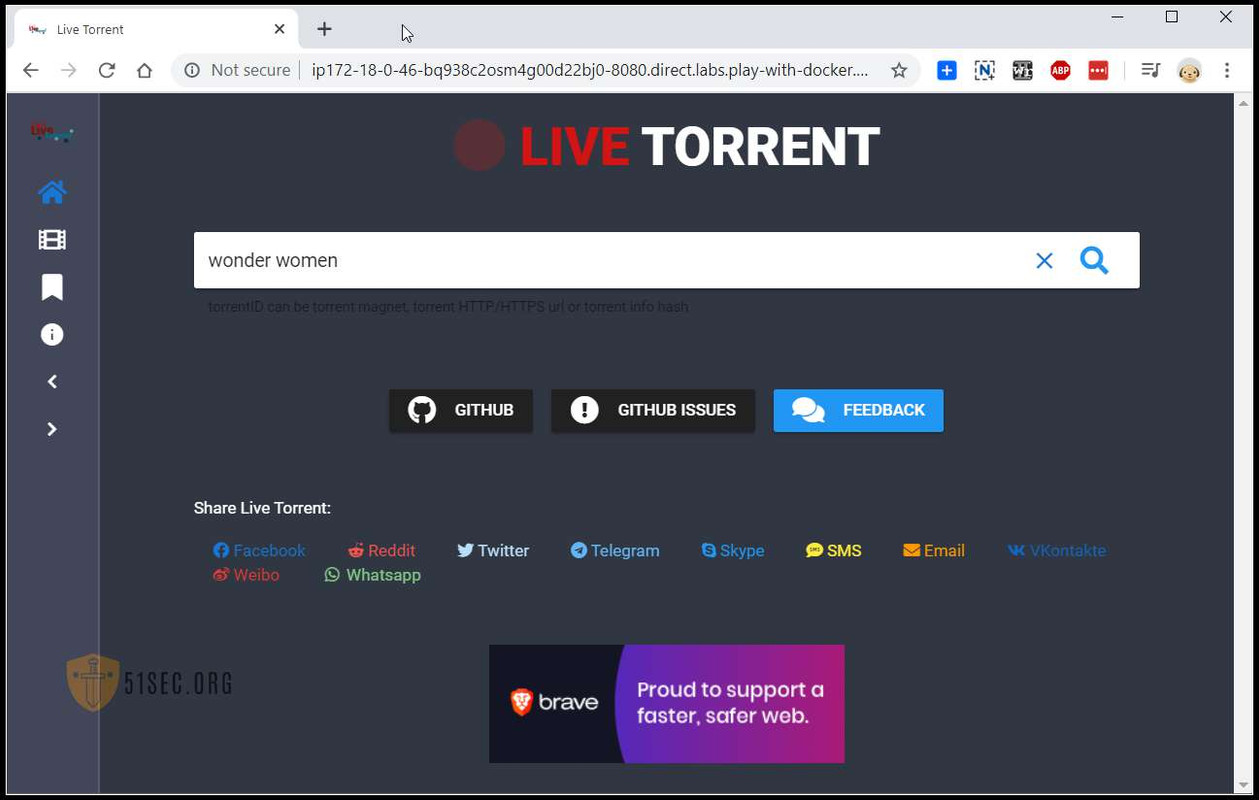
live-torrent is a powerful BT Web client tool that supports BT search and cloud broadcasting. We can directly use the built-in engine of the program to search for resources, and we can also upload seed files or magnetic links to add tasks. The program supports automatic Identify the video files in the seed and click the play button to play directly online. The program supports docking with OpenSubtitles to automatically add subtitles to the video. It also provides a list of popular movies, and provides corresponding resources for you to play and download. However, the only regret is that online search for Chinese resources is not supported, so Chinese resources can only upload seed files for identification, playback and download.Github address: https://github.com/Davenchy/live-torrent
Install live-torrent
$ docker run --restart=always --name live-torrent -d -p 8080:8080 davenchy/live-torrent
Unable to find image 'davenchy/live-torrent:latest' locally
latest: Pulling from davenchy/live-torrent
c0c53f743a40: Pull complete
66997431d390: Pull complete
0ea865e2909f: Pull complete
584bf23912b7: Pull complete
3c4c73959f29: Pull complete
63e05266fc4b: Pull complete
b00869e1130e: Pull complete
45b49819ba5a: Pull complete
87465fce1a7f: Pull complete
e933a1a9b620: Pull complete
16cfa451c2c6: Pull complete
a1a6c250b031: Pull complete
b1001fc608c6: Pull complete
83bfb28f25da: Pull complete
ba5eb8f2f5b4: Pull complete
Digest: sha256:e1f2d28e6db1ae740ae1ad1f110841a5d138fd5e423ed92cccf238d2ab563ff1
Status: Downloaded newer image for davenchy/live-torrent:latest
0e2134565d750513593571b4ff411ad8dc2cd28328536bb6b72f5405e76b1ba0
Then access the
Web client via ip:8080 .Simple Torrent Docker
Simple Torrent project is based on Cloud Torrent . Some applicable functions, download / upload speed restrictions, no copyright restrictions, RSS subscriptions and custom addition of BT-Trackers etc., and there is an api interface, and it also supports automatic calling of external commands after downloading. For example, like aria2 , we can automatically upload the downloaded resources to OneDrive or Google Drive and other network disks. The blogger probably used it. I feel it is okay. Share it here.Github url:https://github.com/boypt/simple-torrent
BU-Trackers server list:
https://trackerslist.com/all.txt
Installation
docker run --restart=always --name simple-torrent -d \ -p 3000:3000 \ -v ~/downloads:/downloads \ -v ~/torrents:/torrents \ boypt/cloud-torrent
Then access the
Web client via ip:3000 .$ docker run --restart=always --name simple-torrent -d \
> -p 3000:3000 \
> -v ~/downloads:/downloads \
> -v ~/torrents:/torrents \
> boypt/cloud-torrent
Unable to find image 'boypt/cloud-torrent:latest' locally
latest: Pulling from boypt/cloud-torrent
aad63a933944: Pull complete
c0e72d70fc32: Pull complete
dca2be6dbc56: Pull complete
Digest: sha256:079290f5325f27840539718332013a0db5313f28dc1ec41bb8b9a0ee03075952
Status: Downloaded newer image for boypt/cloud-torrent:latest
3b7a7a271b5c01b337633c3df7f67bb34ac613068294e21e5dff1becfce57df2
[node1] (local) [email protected] ~
$
Tested at https://labs.play-with-docker.com/
Reference: https://www.moerats.com/archives/1023/
A Temp File Sharing Site
Firefox Send has been open shared and this docker is built based on Firefox Send code at Github: https://github.com/mozilla/sendIt will need 1G RAM. If it is only 512M RAM, you will need to add Swap memory.
docker run --name send -d -p 8888:1443 moerats/send
You can visit site by ip:8888.
A simple multimedia file server: Gossa
Github地址:https://github.com/pldubouilh/gossaCreate Dockerfile:
#将下面一起复制进SSH客户端运行 cat > Dockerfile <<EOF FROM alpine EXPOSE 8001 RUN wget https://github.com/pldubouilh/gossa/releases/download/v0.0.7/gossa-linux64 && mv gossa-linux64 /gossa && chmod +x /gossa ENTRYPOINT [ "/gossa", "-h", "0.0.0.0", "/shared" ] EOF
Make a docker image:
docker build -t gossa .
Run docker image:
docker run --name gossa -d -p 8002:8001 -v /root/netsec:/shared gossa
The folder path is /root/netsec and access address is ip:8002
FileRun
FileRun is a self-hosted Google Drive alternative. It is a full featured web based file manager with an easy to use user interface. It is great for managing your photo, movie, audio collection, or sharing files with your family and friends. demo : https://demo.filerun.co/
Create a text file named
docker-compose.yml and paste the following inside:version: '2'
services:
db:
image: mariadb:10.1
environment:
MYSQL_ROOT_PASSWORD: your_mysql_root_password
MYSQL_USER: your_filerun_username
MYSQL_PASSWORD: your_filerun_password
MYSQL_DATABASE: your_filerun_database
volumes:
- /filerun/db:/var/lib/mysql
web:
image: afian/filerun
environment:
FR_DB_HOST: db
FR_DB_PORT: 3306
FR_DB_NAME: your_filerun_database
FR_DB_USER: your_filerun_username
FR_DB_PASS: your_filerun_password
APACHE_RUN_USER: www-data
APACHE_RUN_USER_ID: 33
APACHE_RUN_GROUP: www-data
APACHE_RUN_GROUP_ID: 33
depends_on:
- db
links:
- db:db
ports:
- "80:80"
volumes:
- /filerun/html:/var/www/html
- /filerun/user-files:/user-files
Please note the above
volumes configuration. There are two folders you need to configure. One for the FileRun application files. It can be located in any empty folder and must have the mount path set to /var/www/html and one for the FileRun user files, with the mount path set to /user-files. In other words, if you use the above configuration text as it is, you just need to create two empty folders, /filerun/html and /filerun/user-files and you can starting the FileRun Docker container up:mkdir /filerun /filerun/html /filerun/user-files
And start FileRun up using the following command:
docker-compose up -d
FileRun should be now up and running and you can access it with your browser.
The default FileRun credentials are as follows:
* Username: superuser
* Password: superuser
FileRun + AriaNG + Aria2
git clone https://github.com/wahyd4/aria2-ariang-x-docker-compose.git cd aria2-ariang-x-docker-compose/filerun docker-compose up -d
Filerun:http://ip:8000 (superuser / superuser)AriaNg:http://ip:8000/aria2/ (admin / password)NextCloud + AriaNG + Aria2
git clone https://github.com/wahyd4/aria2-ariang-x-docker-compose.git cd aria2-ariang-x-docker-compose/nextcloud docker-compose up -d
Nextcloud: http://ipAriaNg:http://ip/uiNextcloud Configure Eexternal-storage
Top right - AppsEnable External Storage Support
Settings - Admin - External Storage
the files downloaded by Aria2 will be at /user-files/ folder.
Add a new local storage folder into settings - admin - external storage. Any Aria2 download file will be in NextCloud.
Change Docker Configuration
docker-compose stop
vi docker-compose.yml
docker-compose up -d
Upgrade Docker Image:
docker-compose stop # 将 docker 镜像暂时关掉 git pull origin master # 获取最近代码 docker-compose up -d # 运行最新版本的镜像
CCAA=AriaNg + Aria2 + FileBrowser
- CCAA Github Project:https://github.com/helloxz/ccaa
- Docker hub:https://hub.docker.com/repository/docker/helloz/ccaa
docker run --name="ccaa" -d -p 6080:6080 -p 6081:6081 -p 6800:6800 -p 51413:51413 \
    -v /data/ccaaDown:/data/ccaaDown \
    -e PASS="xiaoz.me" \
    helloz/ccaa \
sh -c "dccaa pass && dccaa start"- 第一个
/data/ccaaDown为本地目录,CCAA下载后的内容会保存在此目录,请根据自身情况设置 xiaoz.me为Aria2密钥,运行的时候请修改为自己的密码- 文件管理默认用户名为
ccaa,密码为admin,登录后可在后台修改
放行端口
CCAA使用的TCP端口为:
6080/6081/6800/51413,请注意在防火墙和安全组进行放行,否则无法访问。#如果使用的iptables
iptables -I INPUT -p tcp --dport 6080 -j ACCEPT
iptables -I INPUT -p tcp --dport 6081 -j ACCEPT
iptables -I INPUT -p tcp --dport 6800 -j ACCEPT
iptables -I INPUT -p tcp --dport 51413 -j ACCEPT
service iptables save
service iptables restart
#如果使用的firewalld
firewall-cmd --zone=public --add-port=6080/tcp --permanent
firewall-cmd --zone=public --add-port=6081/tcp --permanent
firewall-cmd --zone=public --add-port=6800/tcp --permanent
firewall-cmd --zone=public --add-port=51413/tcp --permanent
firewall-cmd --reload
端口放行后访问
http://IP:6080端口即可看到AriaNG界面#启动CCAA
docker start ccaa
#停止CCAA
docker stop ccaa
#重启CCAA
docker restart ccaa
#如果需要CCAA随系统开机启动
docker update --restart=always ccaa
Aria2 + AriaNg
8000本地则是你暴露出对外访问的 AriaNg 图形界面的端口,~/data/是你所有通过 Aria2 下载的文件目录。--rm : remove if existdocker run -d -i --restart=always --name ariang -p 8000:80 -p 6800:6800 -v ~/data/:/data wahyd4/aria2-ariang
-d : backgroun-i :interactive
Zfile
- 项目:https://github.com/zhaojun1998/zfile
- Docker:https://hub.docker.com/r/zhaojun1998/zfile
- 演示:https://zfile.jun6.net/
Dockhub : https://hub.docker.com/r/koalang/zfile
  docker run -d --name zfile \
      -p 8080:8080 --restart=always \
      -v ~/zfile/config:/root/.zfile \
      -v ~/zfile/data:/zfile \
      koalang/zfile
用户前台: http://127.0.0.1:8080/#/main
初始安装: http://127.0.0.1:8080/#/install
管理后台: http://127.0.0.1:8080/#/admin
Cloudreve
DockerHub : https://hub.docker.com/r/xavierniu/cloudreve
mkdir -p /dockercnf/cloudreve \
&& touch /dockercnf/cloudreve/conf.ini \
&& touch /dockercnf/cloudreve/cloudreve.db
docker run -d \
--name cloudreve \
-e PUID=1000 \
-e PGID=1000 \
-e TZ="Asia/Shanghai" \
-p 5212:5212 \
--restart=always \
-v /dockercnf/cloudreve/:/cloudreve/uploads \
-v /dockercnf/cloudreve/conf.ini:/cloudreve/conf.ini \
-v /dockercnf/cloudreve/cloudreve.db:/cloudreve/cloudreve.db \
-v /dockercnf/cloudreve/avatar/:/cloudreve/avatar \
xavierniu/cloudreve
- 首次启动后请执行
docker logs -f cloudreve获取初始密码
Ubuntu-novnc - a Linux Desktop for downloading
- 访问端口6080
- 22是ssh的端口
- 5901是vnc端口
- 连接密码 root333
- root密码 root333
- 修改密码 进入桌面后右键打开终端 输入 vncpasswd 回车-输入密码-回车-再次输入密码-回车
- 8080是qb访问端口
- 默认用户名admin
- 默认密码password 目录 /root/下载


No comments:
Post a Comment