The purpose of the CyberArk Dashboard entry is to provide Remote Desktop Manager users with an interface that eliminates the need to use Password Vault Web Access (PVWA) to see the list of safes and credentials that the currently logged on user has access to. Combined with password-less scenarios and/or our rich role-based access control (RBAC), this means that a user does NOT need to know the CyberArk credentials to be presented with a list of accounts they have access to. Additionally, since the dashboard is meant to authenticate once to your server and, most importantly, maintain an active session for as long as it is active, it has the significant advantage of only requiring MFA once when you launch the dashboard.
How it is working
How it is working for Devolutions RDM integrating with CyberArk PAM solution:
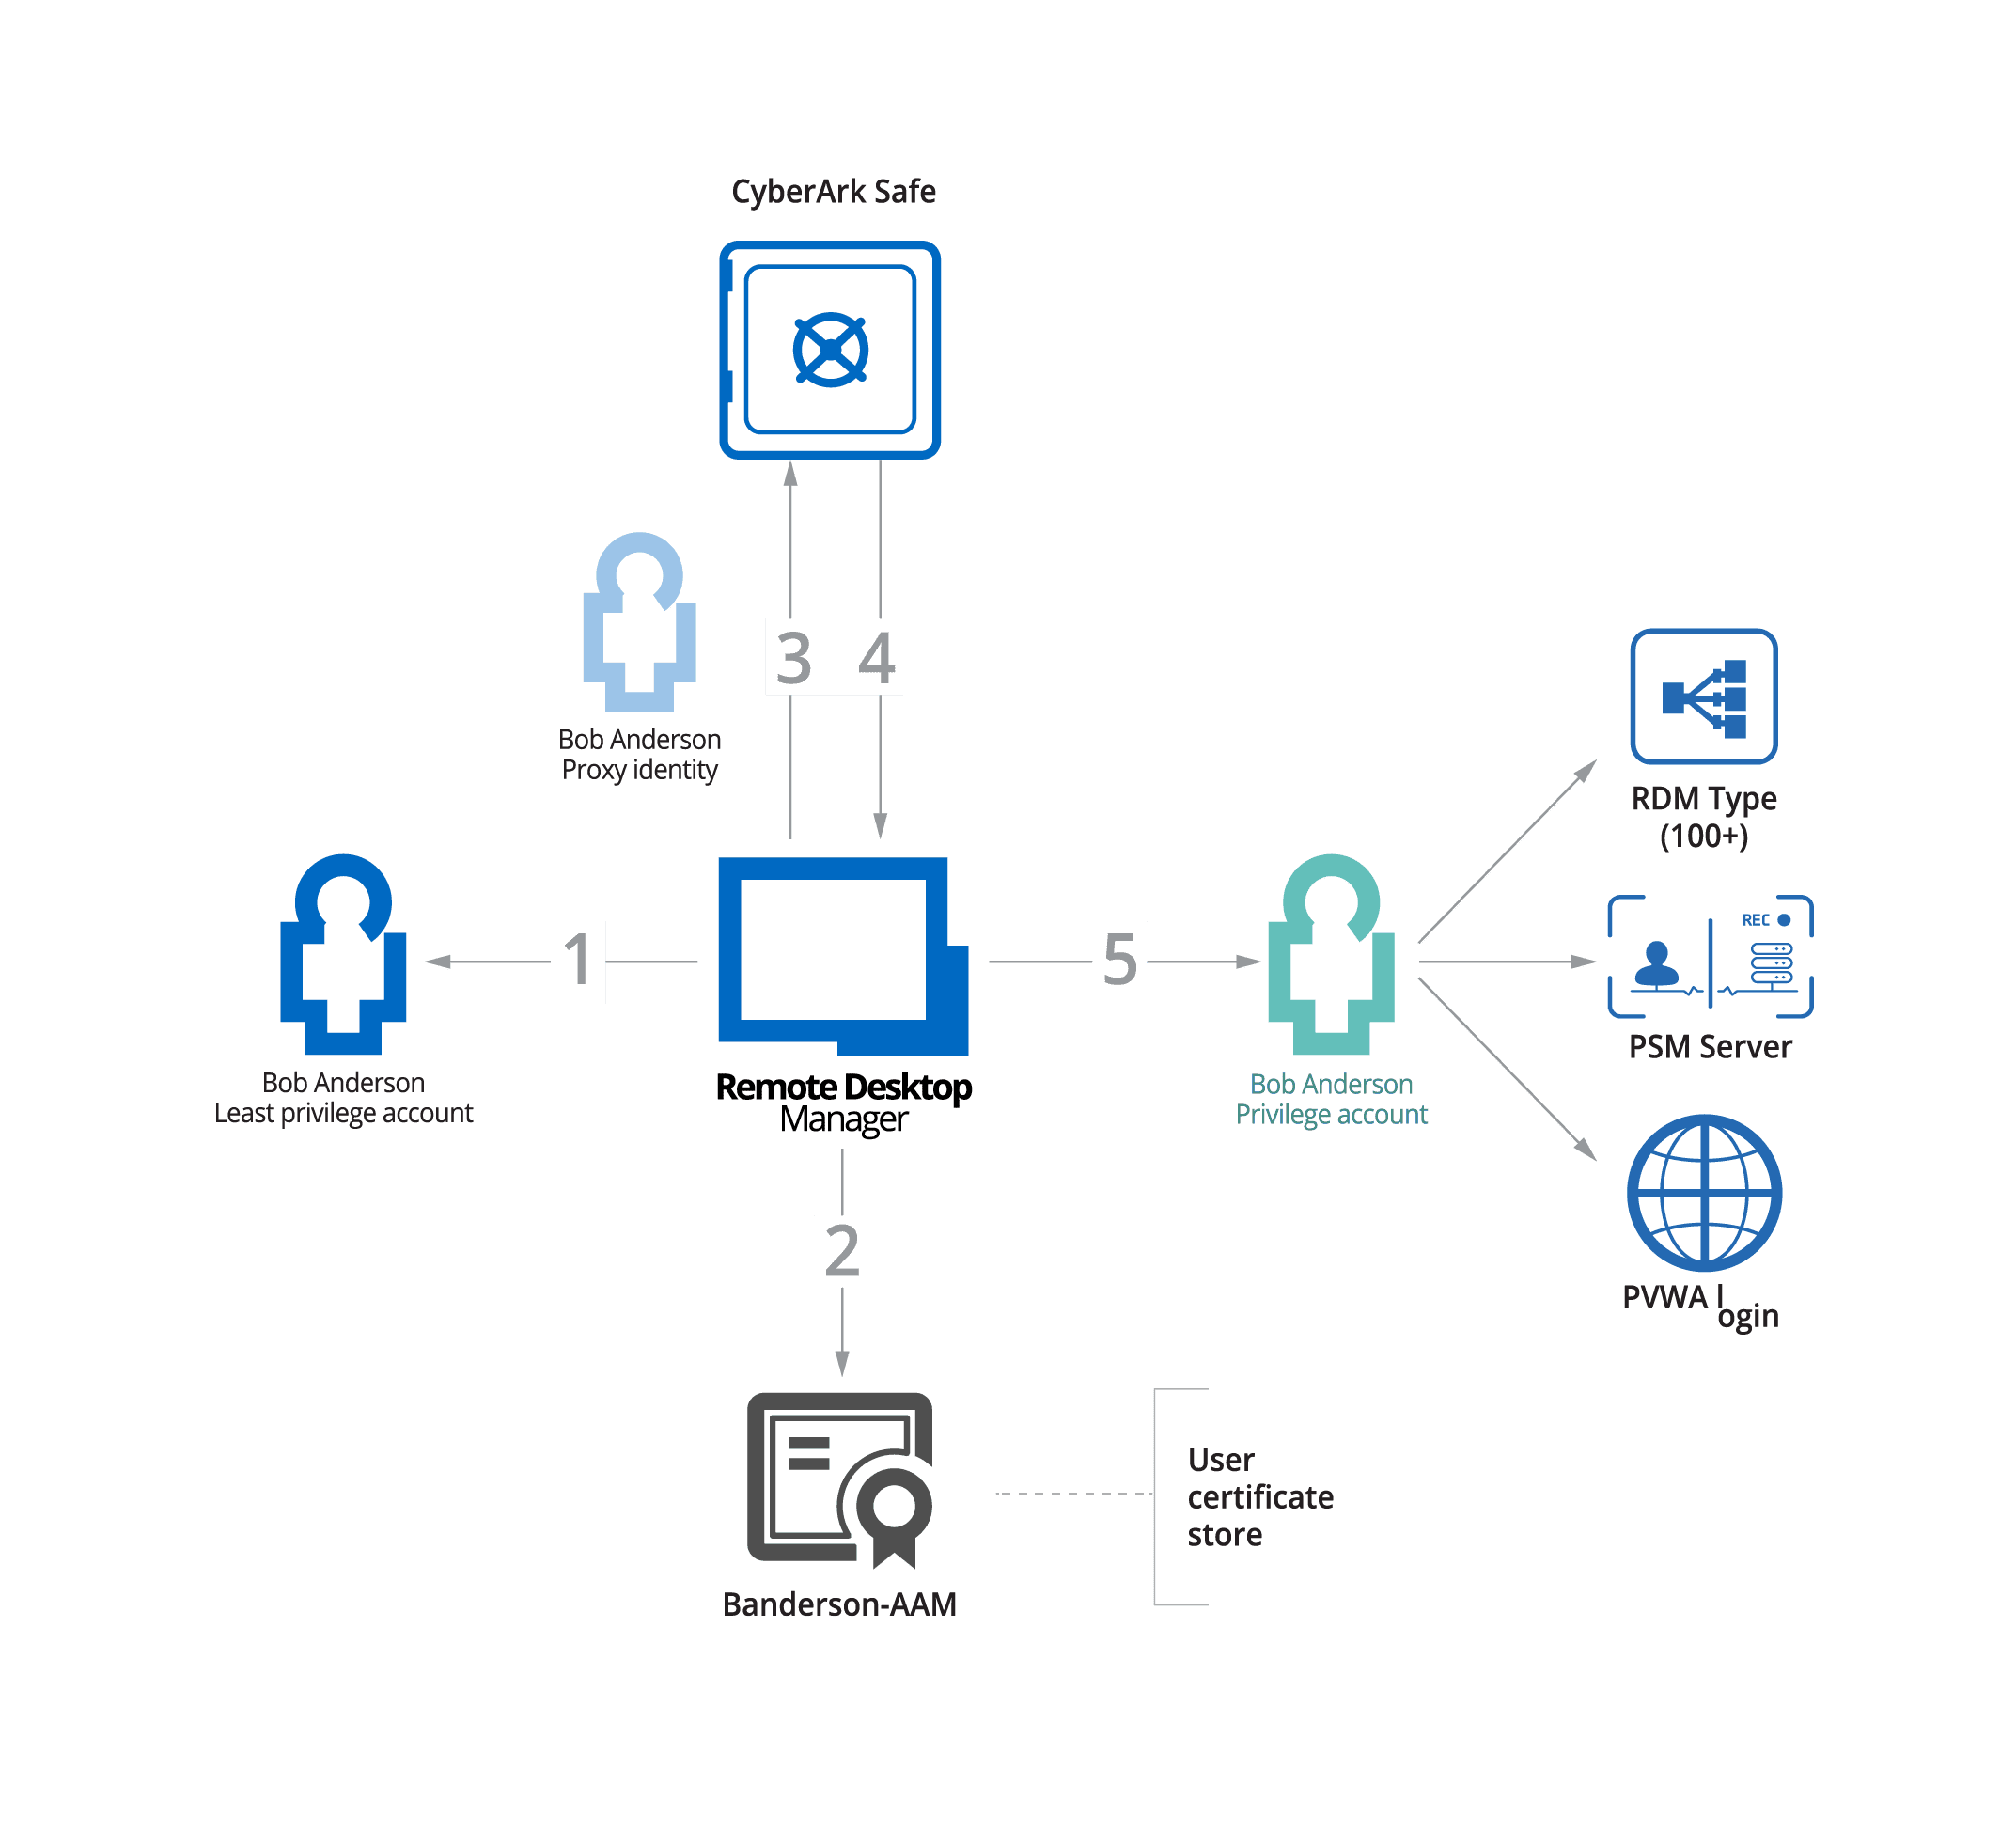
Below is an example diagram demonstrating how Remote Desktop Manager integrates with CyberArk’s PAM Solution

- The end-user attempts to access a privileged remote connection through RDM.
- RDM confirms that the end user’s certificate is valid.
- RDM connects to CyberArk and requests the necessary credentials.
- CyberArk accepts the request and sends the credentials to RDM.
- The credentials are used to grant the end-user access, so they can complete their work-related task.
Basic Devolutions RDM Operation
1. Add new data source
2. Add License
Create PSM Integration
- psm /u [email protected] /a 192.168.111.25 /c PSM-RDP
- [email protected] is the privilege account
- 192.168.111.25 - PSM server ip address
You will not need to grant following settings:
On the PSM server, no need to allow domain users to log on through RDS:
Devolutions RDM CyberArk Dashboard
1. Select CyberArk Template
2. Use CyberArk Dashboard Template
3. Advanced Settings
Synchronizer
GitHub Project for PSM Template
Steps
- Install RDM from Devolutions
- Start RDM and log in (either with a free account or an enterprise account)
- Import the template from this repo
- Create a folder if you want to group connections
- Add entry -> Add from template
- Select the template you imported in step 3 and replace information thats within brackets <>, including the brackets
The target account is defined as username@address, where the fields corrosponds with the fields in CyberArk.
Devolutions RDM
PSM-SSH or Other Remote APP
Edit Entries In Batch
$connection.ConnectUsingDashboardOnDoubleClick = "True";$RDM.Save();
Video
References
- Configure Remote Connection RDP Tools (MSTSC, RDCM, MobaXterm, RDM) Integrate with PSM
- Thycotic Secret Server Connection Manager Installation and Upgrade
- https://kb.devolutions.net/kb_rdm_cyberark_dashboard_configuration.html
- https://blog.devolutions.net/2020/10/going-passwordless-with-remote-desktop-manager-and-cyberark/
- https://github.com/Slasky86/CyberArk-Powershell/tree/main/Devolutions%20RDM


No comments:
Post a Comment