Onenav has following features:
Original Github : https://github.com/helloxz/onenav
You can find more information from the Github page. This post will focus on deployment process and how to deploy it, also how to integrate with own domain which is managed by Cloudflare.
You will need to install Docker and Docker Compose first. Get system update & upgrade it as well. It is also your choice to have portainer installed to manage your Dockers.
Create your own bridge network, and let all of your containers join into it.
Using Portainer to Deploy


Backend admin page: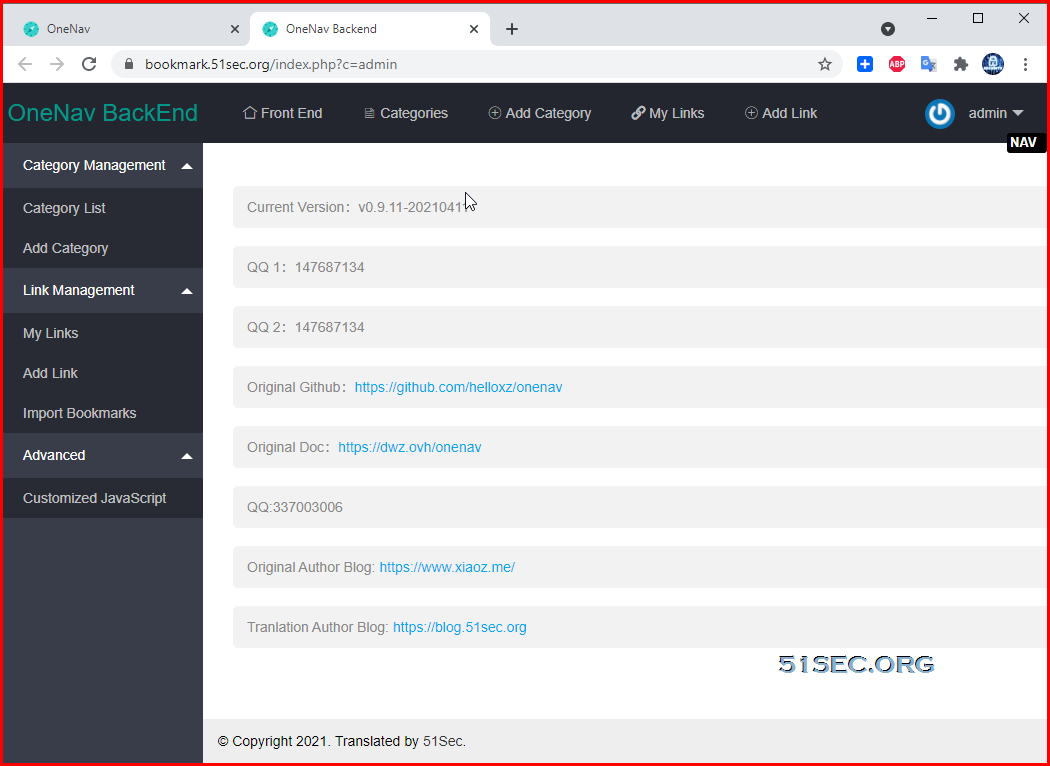
- Support background management
- Support private link
- Supports batch import of bookmarks
- Support multiple theme styles (2 sets of templates are built in by default)
- Support automatic identification of link information
- Support API
Related posts:
Original Github : https://github.com/helloxz/onenav
You can find more information from the Github page. This post will focus on deployment process and how to deploy it, also how to integrate with own domain which is managed by Cloudflare.
Environment Requirements
Please check post: https://blog.51sec.org/2021/05/docker-dockercompose-portainer-nginx.html
Here are some commands we will need to use: (using Ubuntu 20.04 as an example)
Here are some commands we will need to use: (using Ubuntu 20.04 as an example)
Check System Public IP:
[root@OCP1-Ubuntu ~]# curl https://ip.51sec.org/api
132.145.100.226
Update system to latest:
[root@OCP1-Ubuntu ~]# apt upgrade -y && apt update -y
If your host environment memory is less than 1GB, you might also want to add 1024MB swap file size using following command:
wget https://raw.githubusercontent.com/51sec/swap/main/swap.sh && bash swap.sh
Install Docker on Ubuntu 20.04:
#Ubuntu 20.04
sudo apt install docker.io
Install Docker Compose on Ubuntu 20.04:
#Ubuntu 20.04
sudo apt install docker-compose
Make following firewall ports opened on your VPS's firewall: 80, 443, 8100, 9000. Port 8100 and 9000 can be closed after completed deployment.
Deploy it Using Portainer
Portainer Installation
Please make sure your VPS's firewall port 80, 443 and 9000 has been opened. We can close 9000 later.
[root@OCP1-CentOS8-Aria-Rclone-Portainer ~]# docker volume create portainer_data
portainer_data
[root@OCP1-CentOS8-Aria-Rclone-Portainer ~]# docker run -d -p 9000:9000 --name portainer --restart always -v /var/run/docker.sock:/var/run/docker.sock -v portainer_data:/data portainer/portainer-ce:latest
Verify Portainer from Internet by visiting http://<VPS's Public IP>:9000
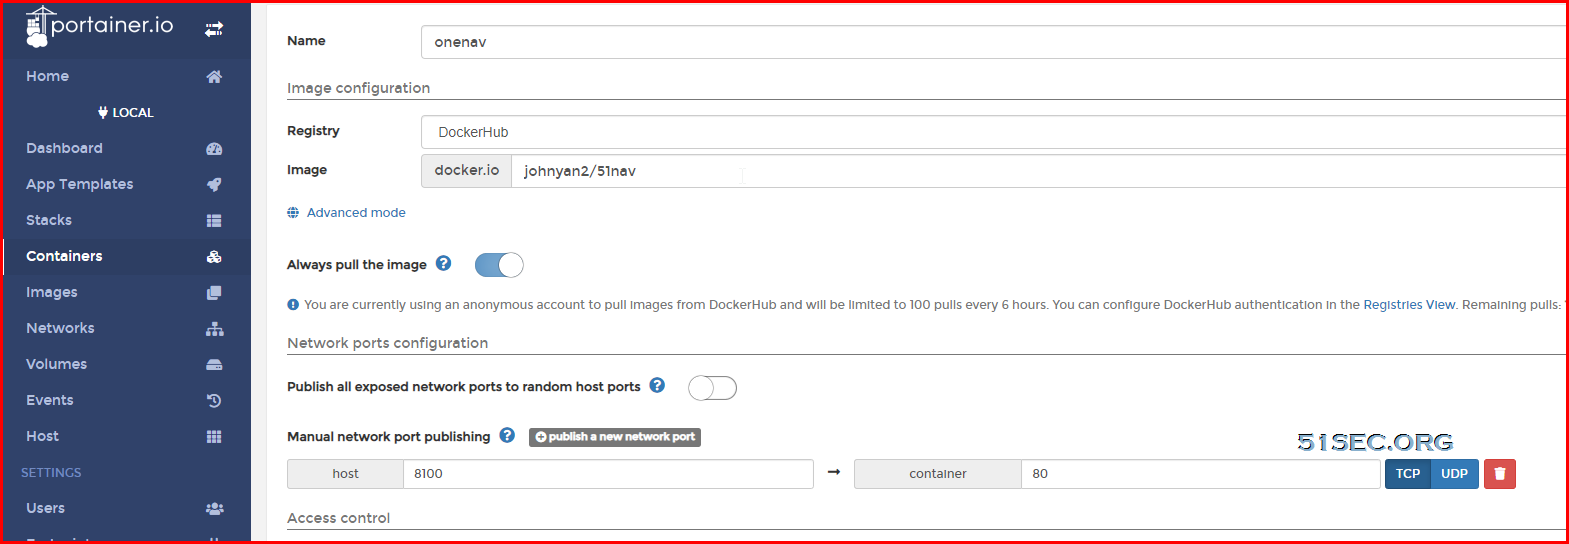
Using Portainer to Deploy
Docker Run Deployment
You also can use Docker Run Command to deploy it from command line. You can use your own port to replace 8100, and use your own username and password to replace those configuration in the command.
docker run -itd --name="onenav" -p 8100:80 \
-e USER='admin' -e PASSWORD='password' \
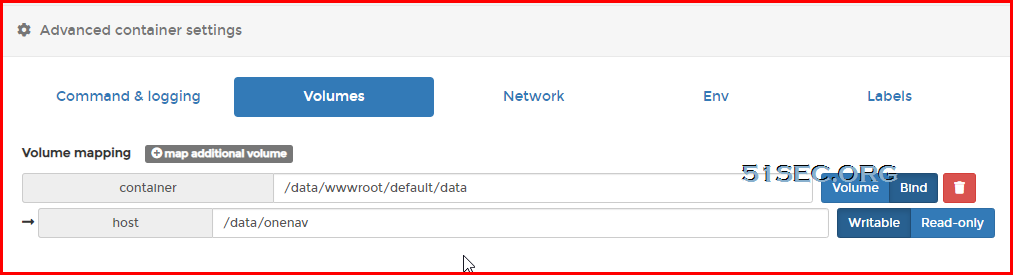
-v /data/onenav:/data/wwwroot/default/data \
johnyan2/51nav
If you have your own bridge network created before, you can use following command to join your own bridge network:
.
docker run -itd --name="onenav" -p 8100:80 \
    -e USER='admin' -e PASSWORD='password' \
    -v /data/onenav:/data/wwwroot/default/data \
    --network mybridge
    johnyan2/51nav
Docker hub image is the one I created with WebUI and admin page already translated from Chinese to English : johnyan2/51nav
Actually, I found the environment variables are not working for user and password. It is controlled at your host folder \data\onenav\config.php file. Here is default setting for backend administration:
username: admin
password: password
You might want to change it to something else once your Docker is fully configured.
.
[root@OCP1-CentOS8 onenav]# cat config.php
<?php
//载入数据库配置
require 'class/Medoo.php';
use Medoo\Medoo;
$db = new medoo([
    'database_type' => 'sqlite',
    'database_file' => 'data/onenav.db3'
]);

//用户名
define('USER','admin');
//密码
define('PASSWORD','password');
//邮箱,用于后台Gravatar头像显示
define('EMAIL','[email protected]');
//token参数,API需要使用
define('TOKEN','password');
//主题风格
define('TEMPLATE','default');

//站点信息
$site_setting = [];
//站点标题
$site_setting['title']          =   'OneNav';
//文字Logo
$site_setting['logo']          =   'OneNav';
//站点关键词
$site_setting['keywords']       =   'OneNav,OneNav导航,OneNav书签,开源导航,开源书签,简洁导航,云链接,个人导航,个人书签';
//站点描述
$site_setting['description']    =   'OneNav是一款使用PHP + SQLite3开发的简约导航/书签管理器,免费开源。';

//这两项不要修改
$site_setting['user']           =   USER;
$site_setting['password']       =   PASSWORD;
So, the final docker run command will be:.
docker run -itd --name="onenav" -p 8100:80/tcp \
    -v /data/onenav:/data/wwwroot/default/data \
    --network mybridge
    johnyan2/51nav
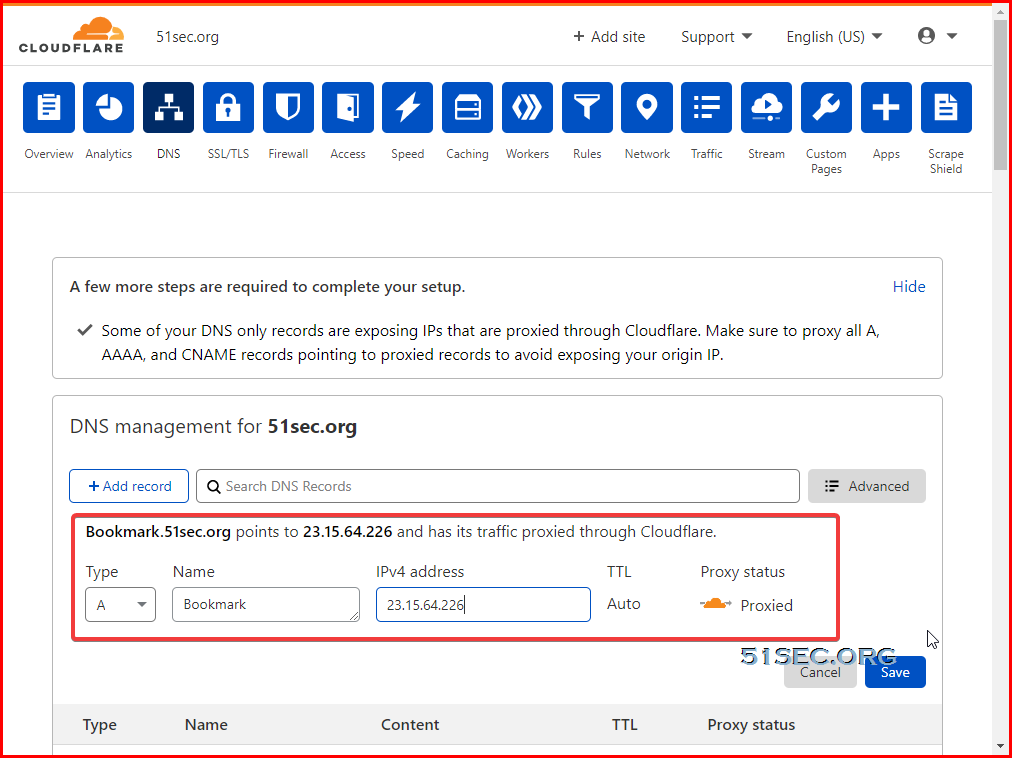
Cloudflare DNS Configuration
From your DNS management platform , add one A record with ip address pointing to your VPS's ip.
Nginx Reverse Proxy Configuration
Use Portainer to install Nginx and make sure Nginx's network joined into the one same as Portainer and other containers, which is not default bridge network.
Configure Nginx as Reverse Proxy
Connect into Nginx console from Portainer portal or command: docker exec -it nginx bin/bash. or docker exec -it nginx sh
root@ba4a30ab7371:/# apt update -y && apt install nano -y
nano /etc/nginx/conf.d/bookmarkconf
server {
    listen       80;
    server_name  bookmark.51sec.eu.org;

location / {
    proxy_pass       http://onenav;
    proxy_http_version         1.1;
    proxy_read_timeout 300;
    proxy_set_header Upgrade $http_upgrade;
    proxy_set_header Connection "upgrade";
    proxy_set_header Host $http_host;
    proxy_set_header X-Real-IP $remote_addr;
    proxy_set_header X-Real-PORT $remote_port;
           }
}
Enable HTTPS
Connect into Nginx console from Portainer portal or command: docker exec -it nginx bin/bash.
apt update
apt install certbot python-certbot-nginx
certbot --nginx
Run Certbot to configure Nginx
root@ba4a30ab7371:/# certbot --nginxTest
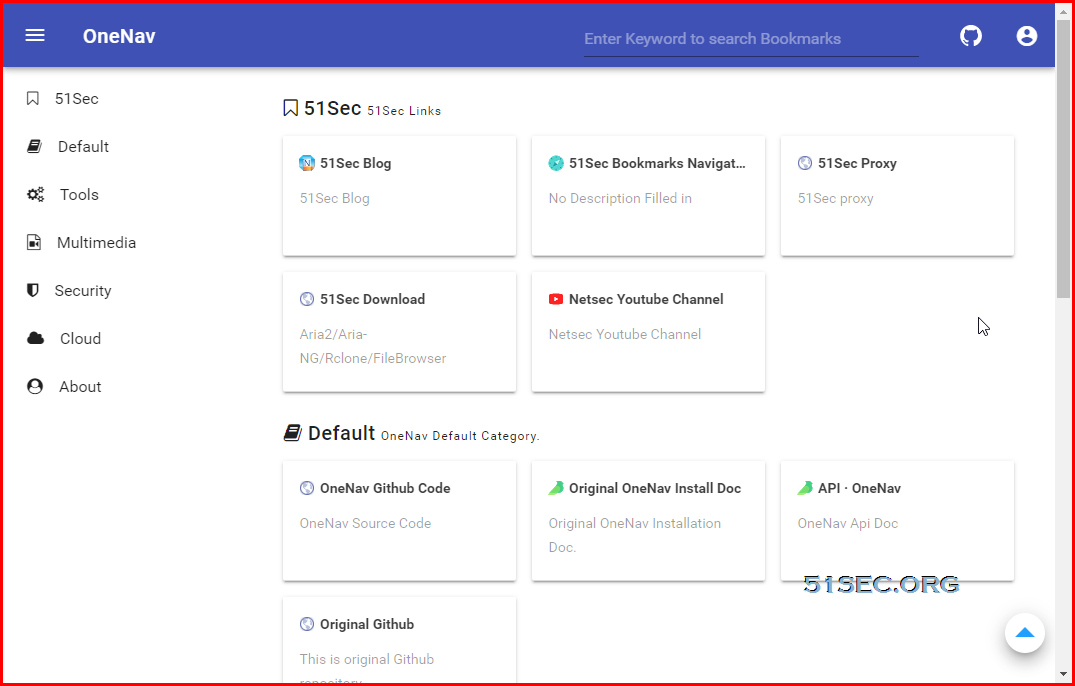
Frontend web GUI:
Backend admin page:


No comments:
Post a Comment