This post summarizs the steps to deploy your P-Cloud.
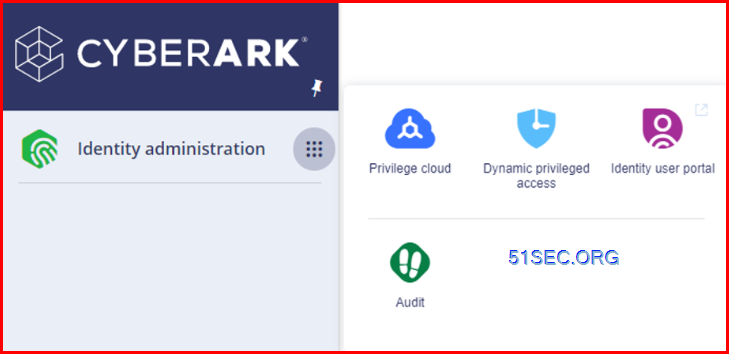
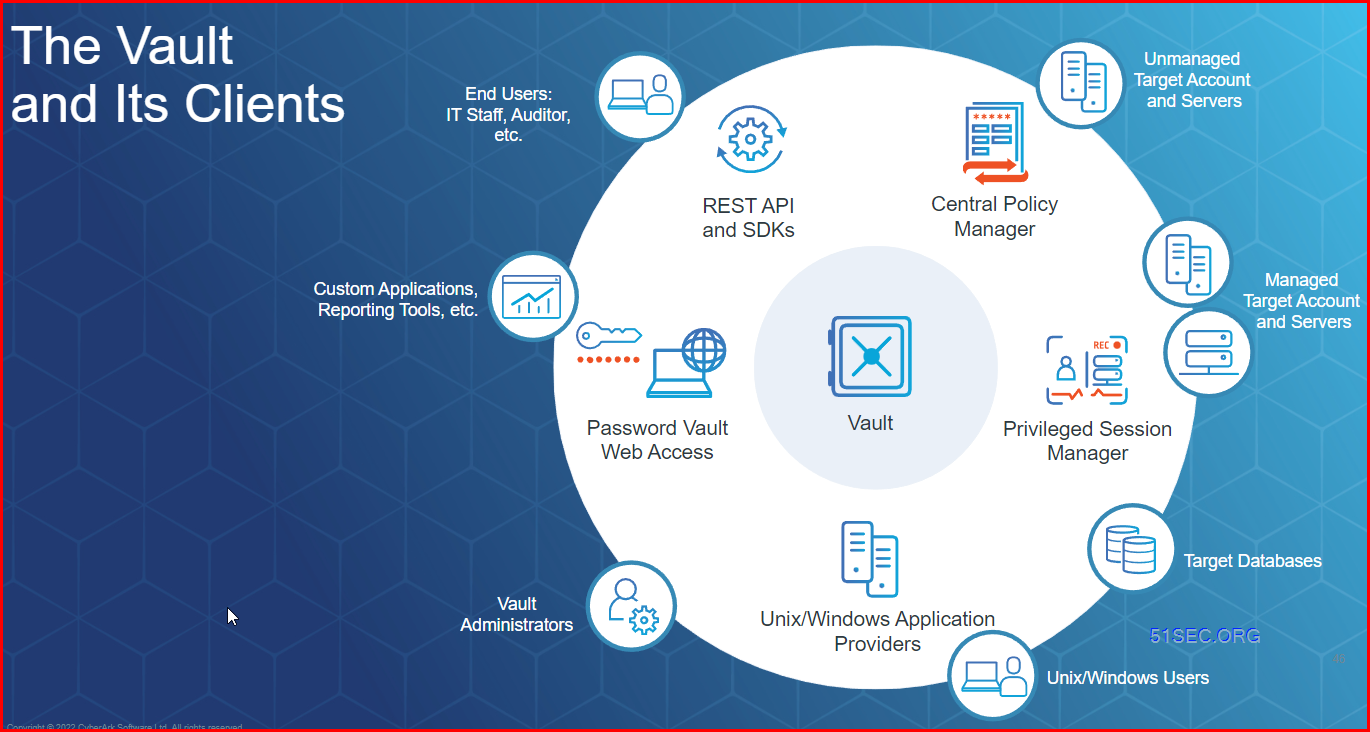
Privilege Cloud Interface
Connector Server
1 CyberArk Identity Connector Service
Creates a secure Websocket Tunnel between the Identity tenant and the on premise LDAPS system
LDAPS , Radius
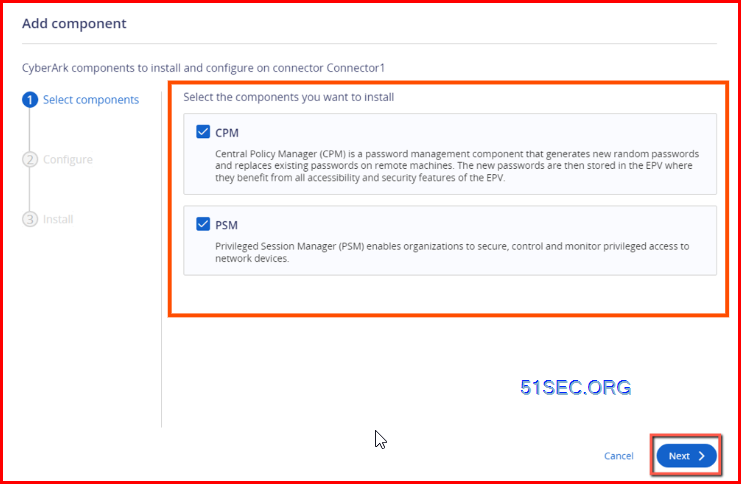
2 CyberArk Password Manager
All password management and rotation capabilities
3 CyberArk Privileged Session Manager
4 CyberArk Privilege Cloud Secure tunnel Service
SIEM and HTML5 Gateway integration
5 Install Identity Connector
6 From Connector Management, generate script to install Connector Management Agent
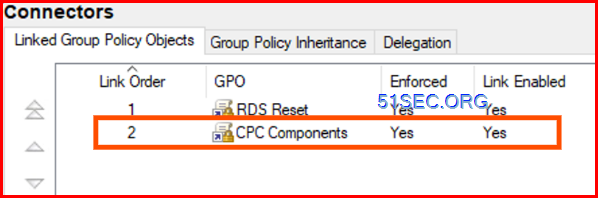
7 Applying the hardening GPO
Local security policies are configured during installation.
One unified domain GPO (for CPM and PSM) must be applied at domain level.
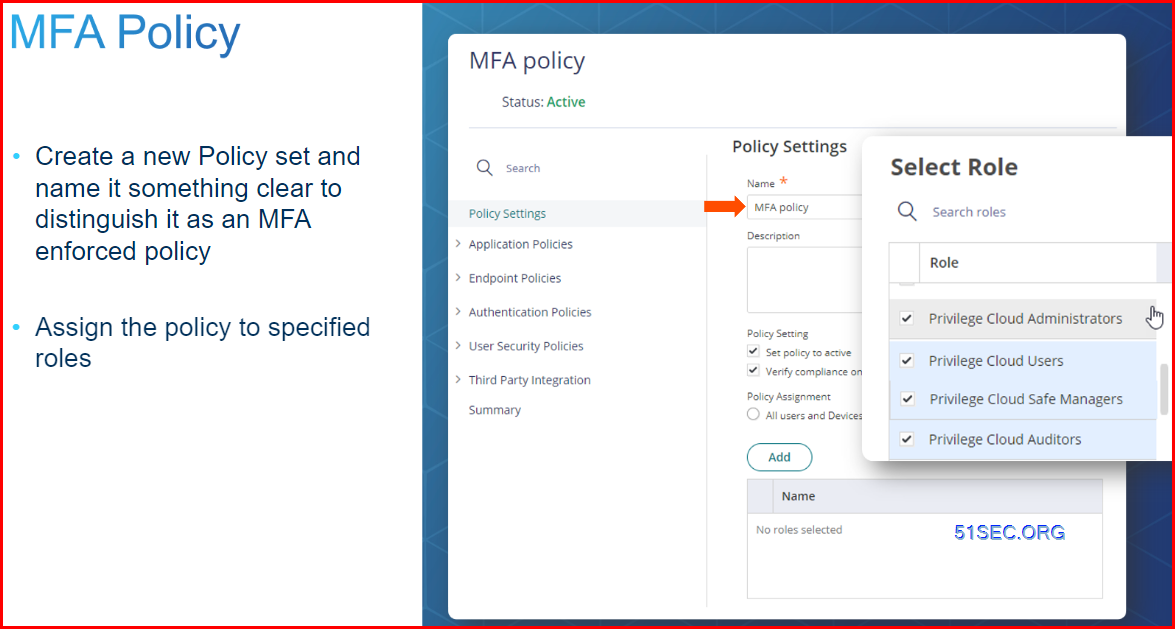
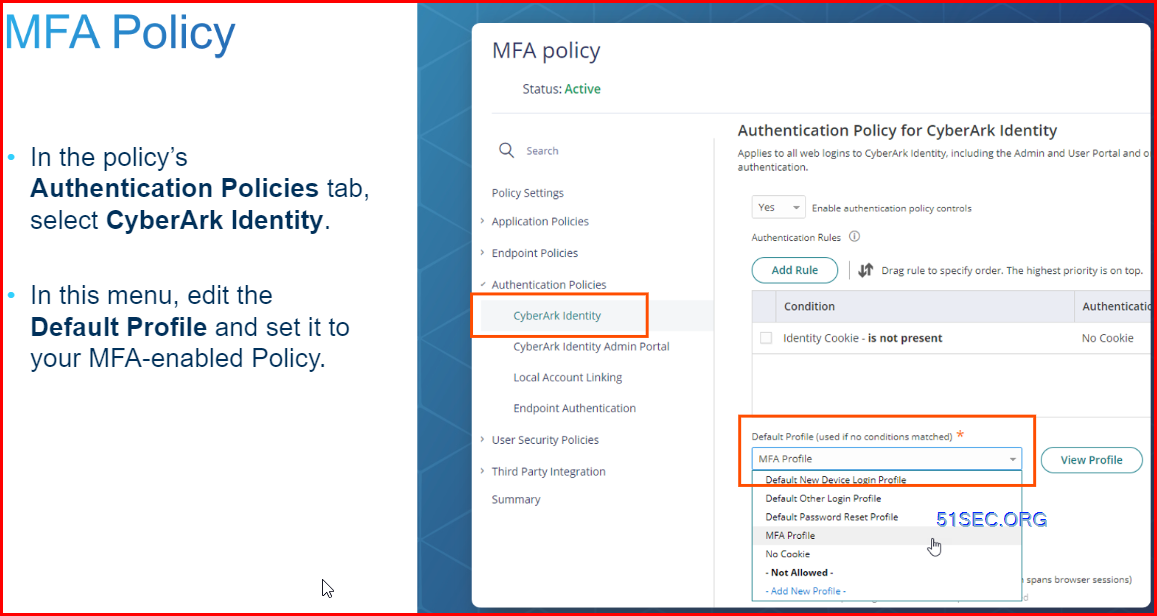
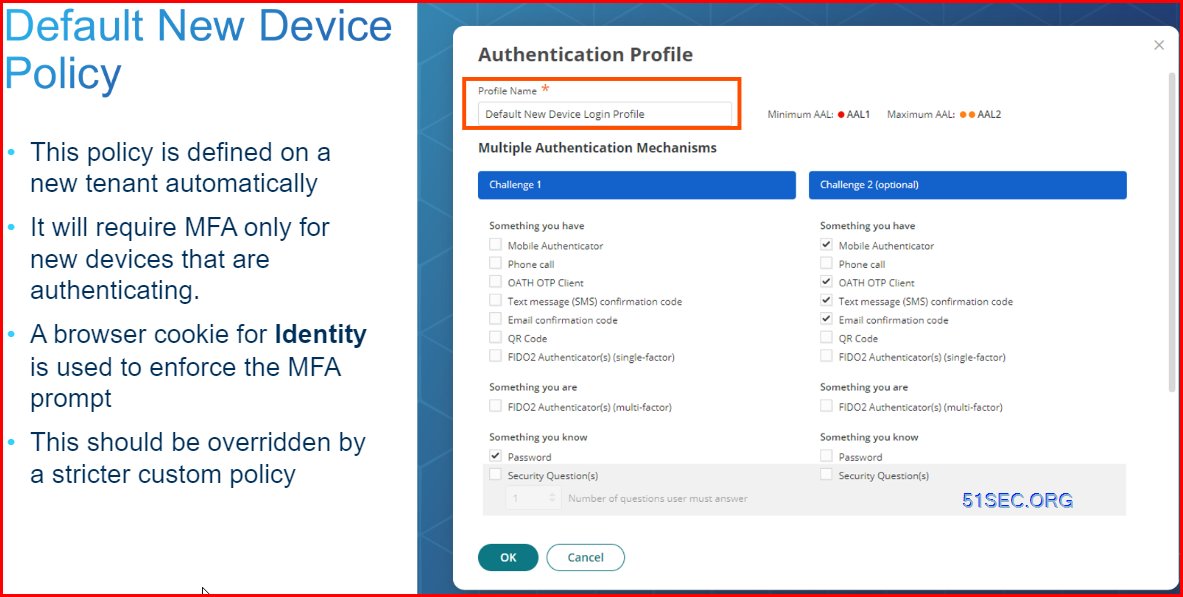
8 Enabling MFA
a. Authentication Profile

The Vault and Its Clients
Pre-implementation
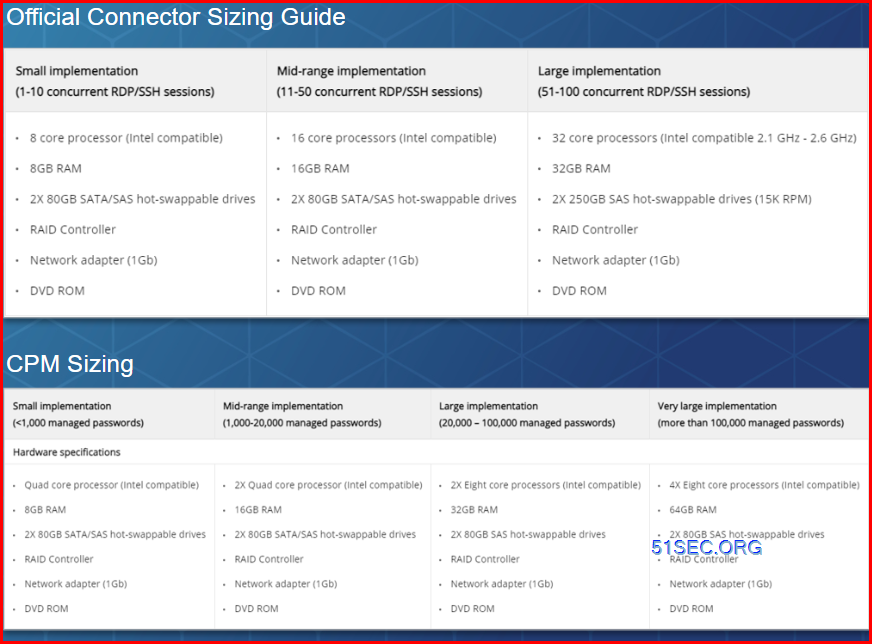
1 Server Sizing
- Separate CPM and PSM if needed
- PSM and CPM will have different size requirements
- PSM (1-10, 11-50, 51-100) sessions
- CPM (<1000, 1000-20000,20000-100000, 100000+ ) managed passwords
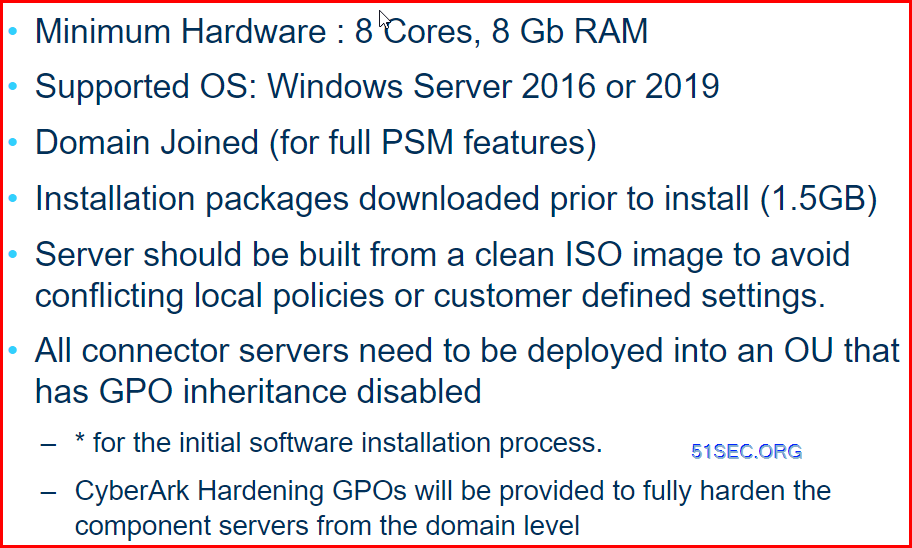
- 8 Cores, 8GB RAM
- Windows Server 2016 or 2019
- Domain Joined (for full PSM features)
- All connector servers need to be deployed into an OU that has GPO inheritance disabled
- Components : PSM, CPM, Identity Connector (2 for resilience ), Secure Tunnel (2)
- PSM best practice for HA
- CPM Active /DR best practice
- AAM - separate VM
- PSM for Unix - Separate
- Domain Joined
- LDAPS
- Read permissions on the deleted objects container
- Domain admin
- Delegate read permissions to a service account
- https://docs.cyberark.com/Product-Doc/OnlineHelp/Idaptive/Latest/en/Content/CoreServices/Connector/Add-AD.htm?tocpath=Setup%7CAdd%20Users%7CAdd%20users%20from%20an%20external%20directory%20service%7C_____1#Userandpermissionrequirements
- RDS license server
- RDS Cal on your connector server
- Windows 2019 Per-User CAL if Connector Server OS is 2019
- Per-device CAL
- RDS should not be installed prior to the implementation
- script to validate required network traffic and local settings: https://cyberark-customers.force.com/s/article/Privilege-Cloud-How-to-run-the-PSMCheck
- Privilege Cloud Checklist: https://cyberark-customers.force.com/s/article/Privilege-Cloud-Remote-Access-PreImplementation-Checklist
- Remtoe Access for Privilege Cloud: https://cyberark-customers.force.com/s/article/Privilege-Cloud-PreImplementation-Checklist
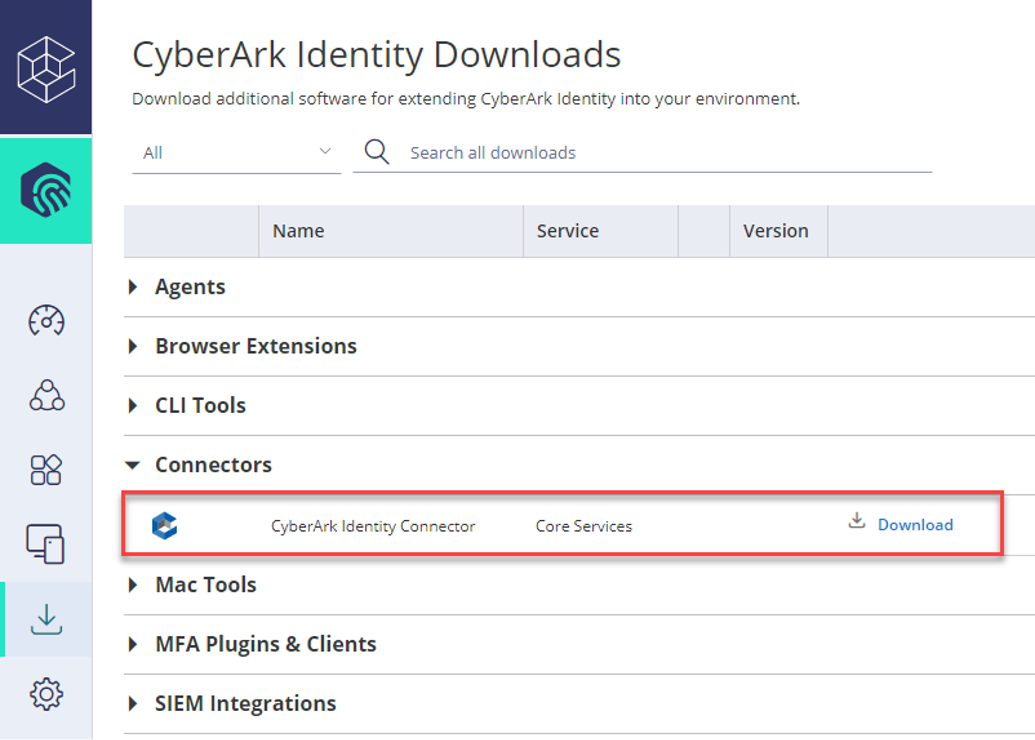
Identity Connector Installation
CyberArk Identity Connector- installeruser
- reset passowrd. and password will expire 24 hours
- No MFA
Connector Management
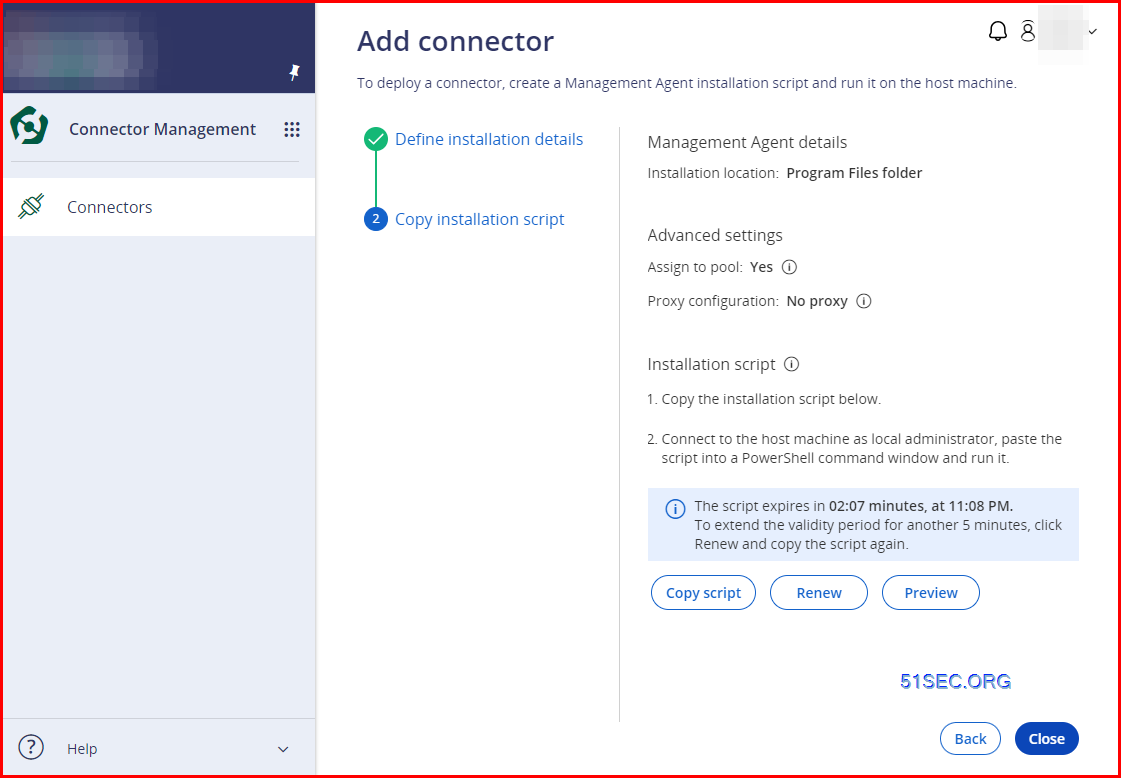
Install Connector to a new Connector server
To deploy a new connector, you first generate the installation script and then run it on the connector host machine.
To perform the following steps, your user must be assigned to the System Administrator role in Identity Administration.
Sign in to the CyberArk Identity Security Platform Shared Services using the link provided in the CyberArk email.
Click the service picker, and select Connector Management.

On the Connectors page, click Add a connector.
In the Add connector wizard > Define installation details tab define the following details for the Management Agent in the host machine:

Click Next.
In the Copy installation script tab, review the connector settings you defined:


Click Copy script to later copy it to the connector host machine.
The script is available for 5 minutes.
Optionally:
Click Renew to renew the script availability for an additional 5 minutes
Click Preview to view the script format
Click Close.

Upgrade CPM and Other Components
At this moment, Jan 2024, it is still not able to upgrade PSM from Connector Management page.

Connector shows components details

Upgrade Components page
You will need to get your [email protected] credential to process. Reset the installeruser password first since it will be changed in 24 hours after reset.


No comments:
Post a Comment