EPV = Digital Vault + PVWA + CPM
OBJECTIVES
By the end of this post you will be able to:
• Describe the main components of the Enterprise Password Vault
• Understand the Digital Vault Security Standard
• Describe the Vault server environment
• Describe the different Layers of Security that protect the Vault Data
• Install the Vault
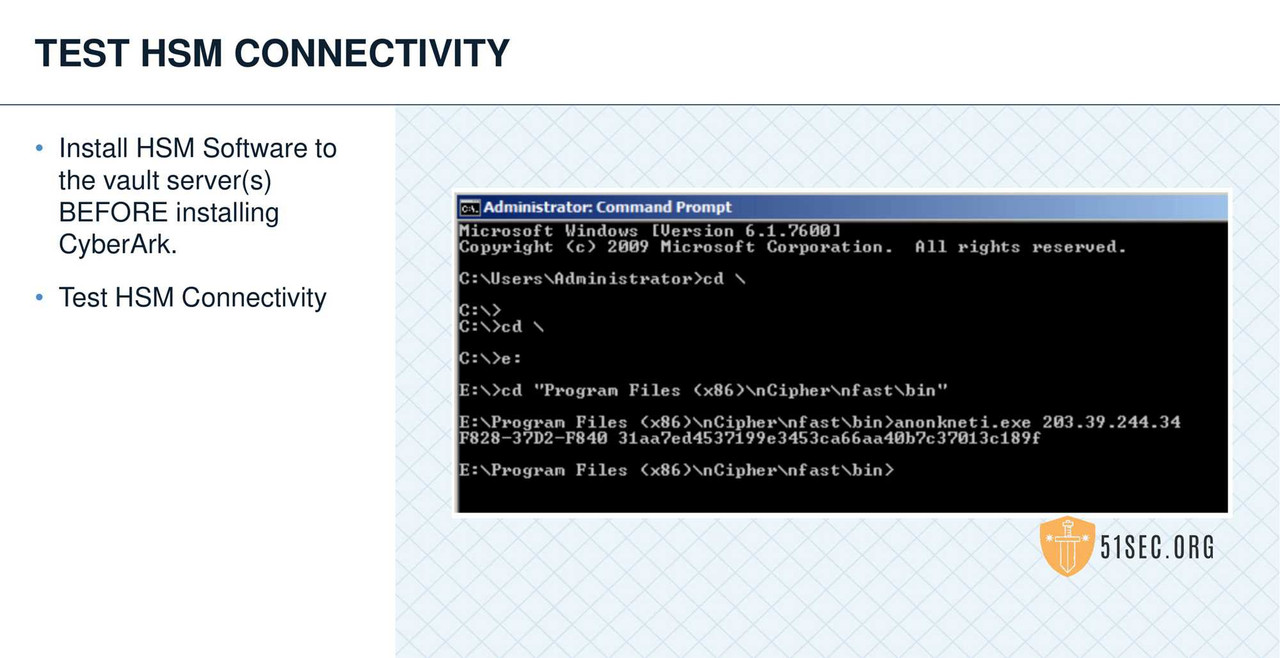
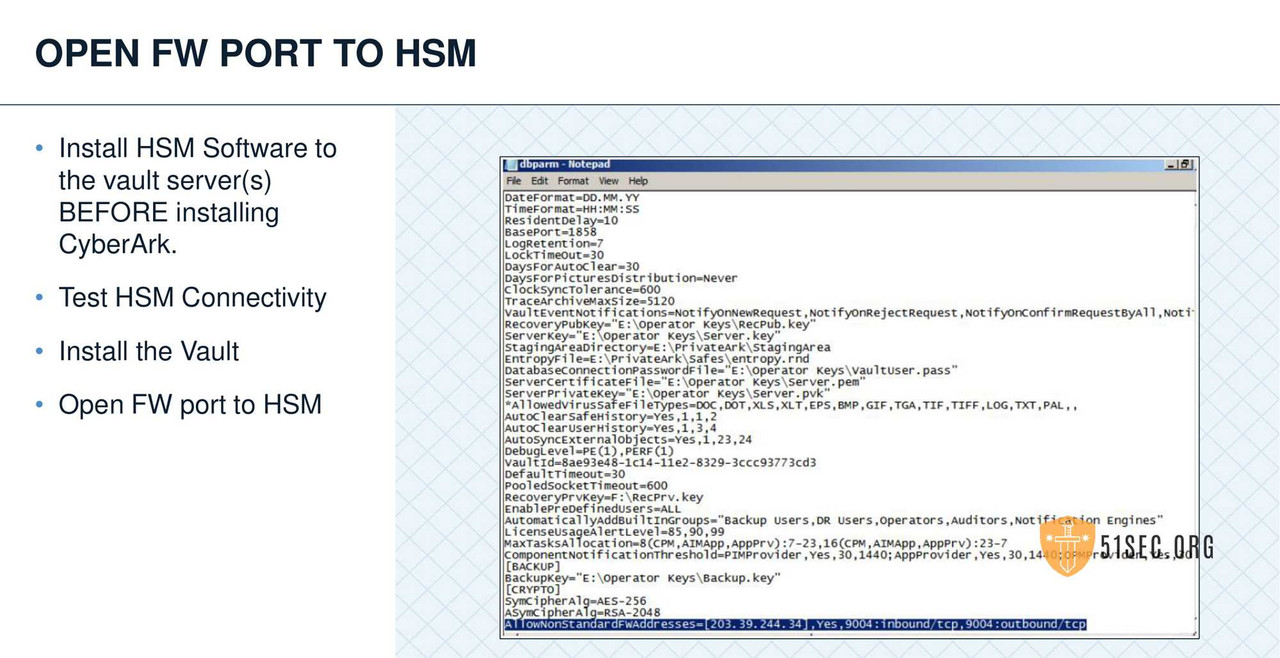
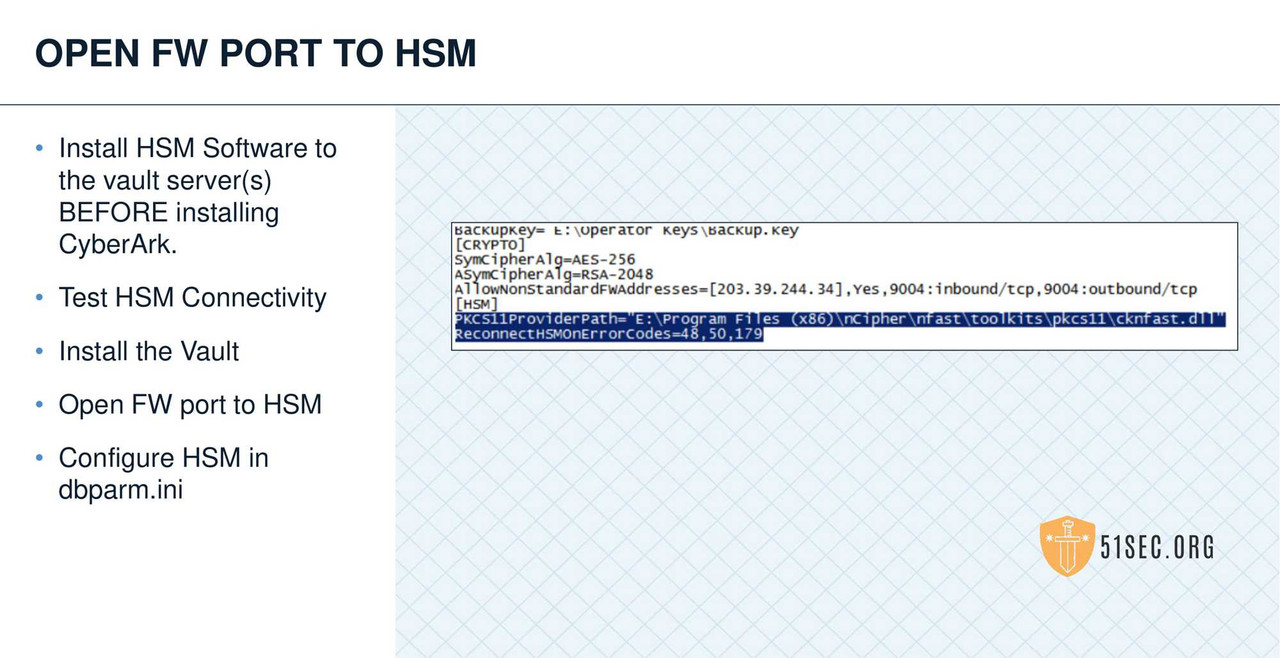
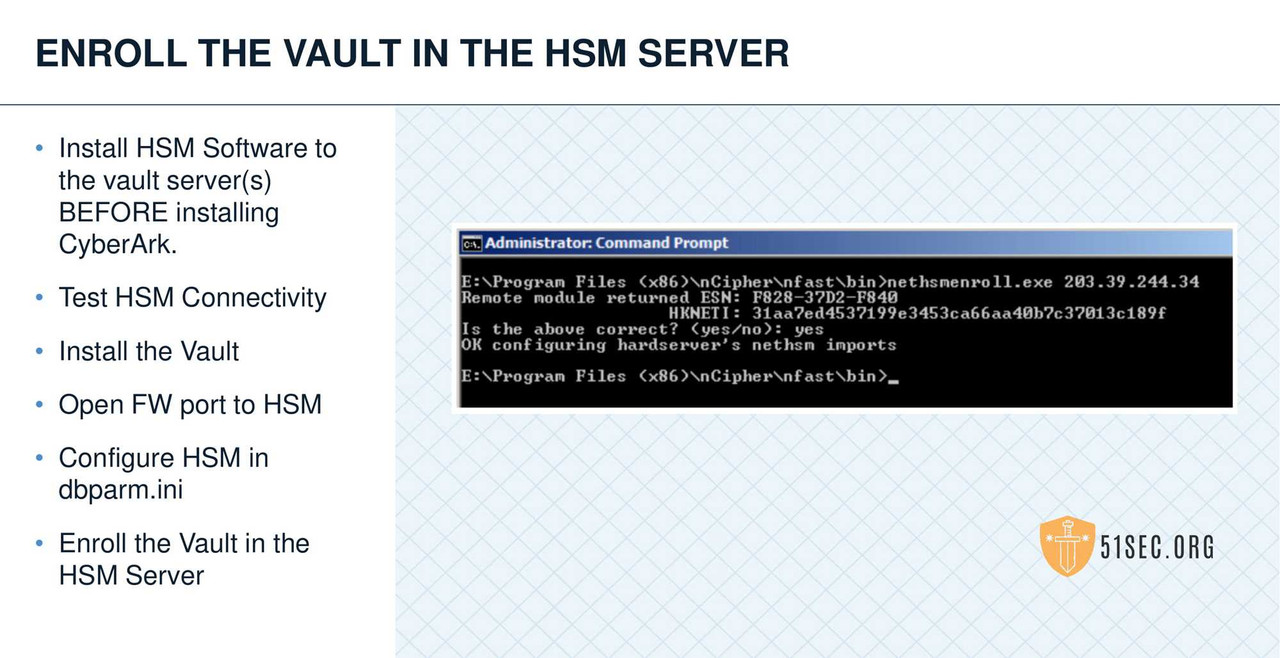
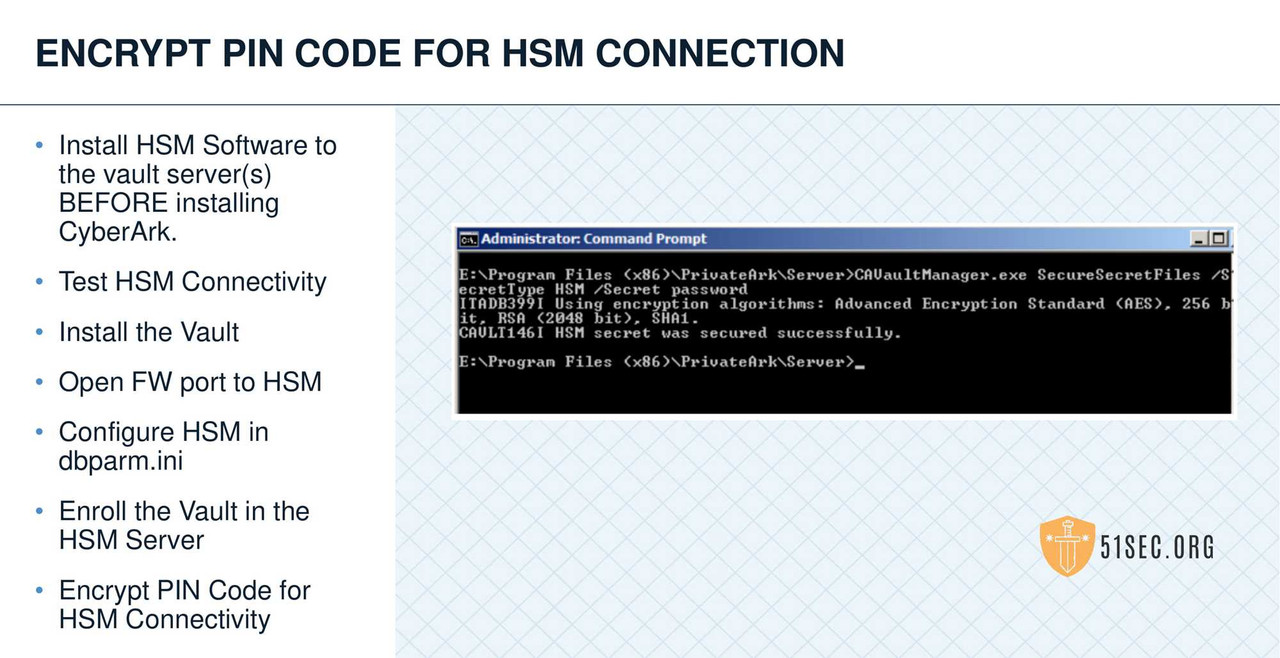
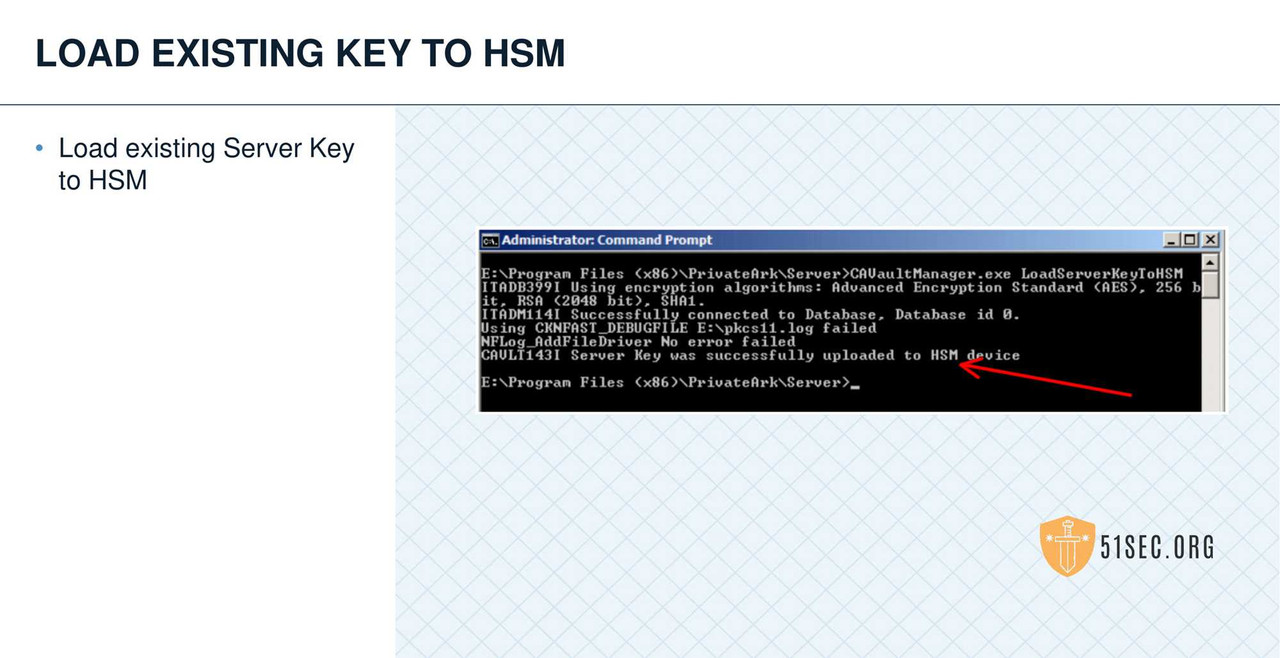
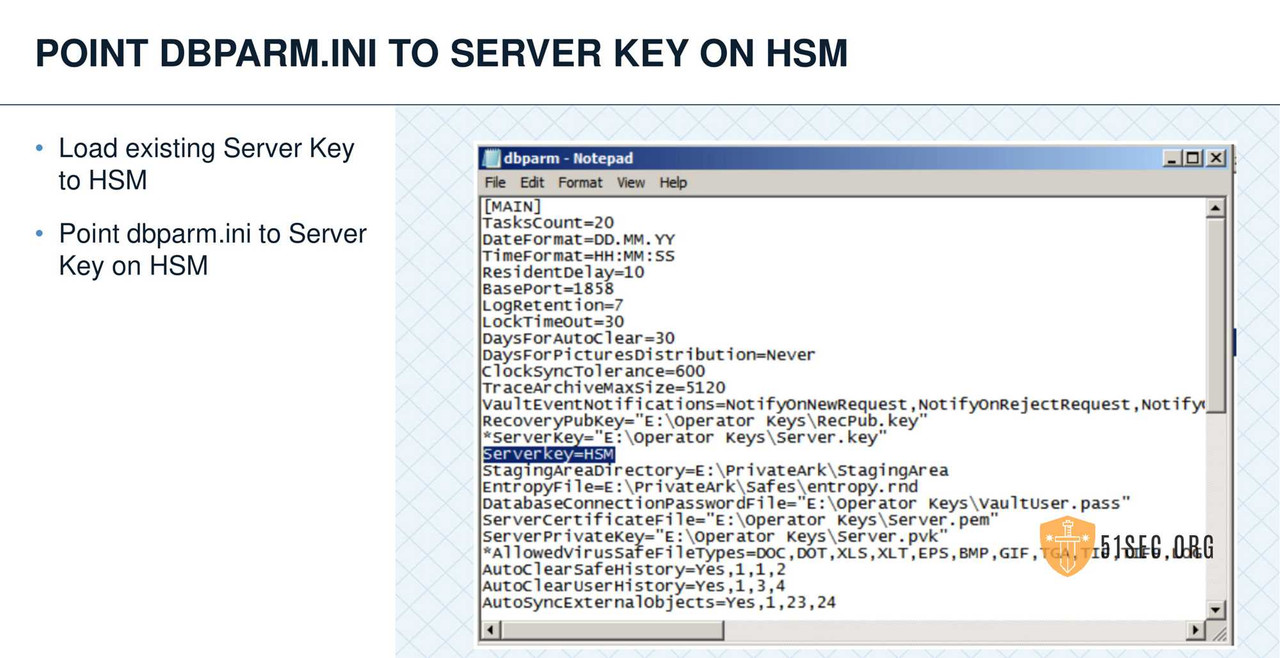
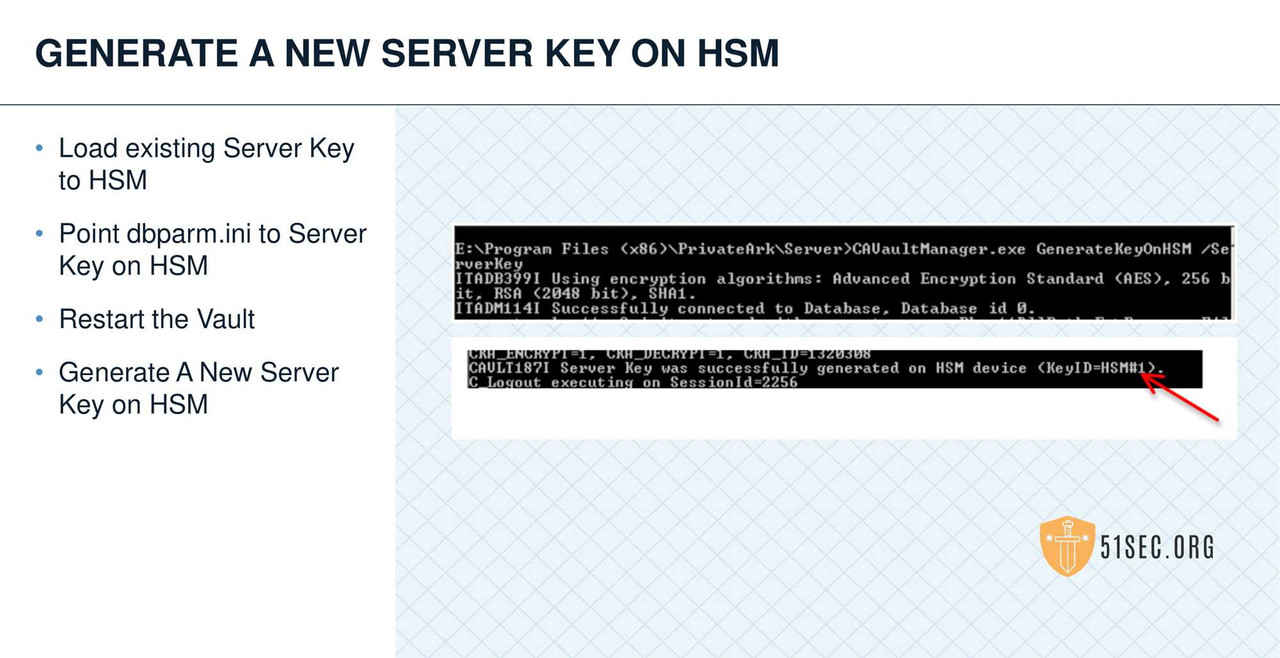
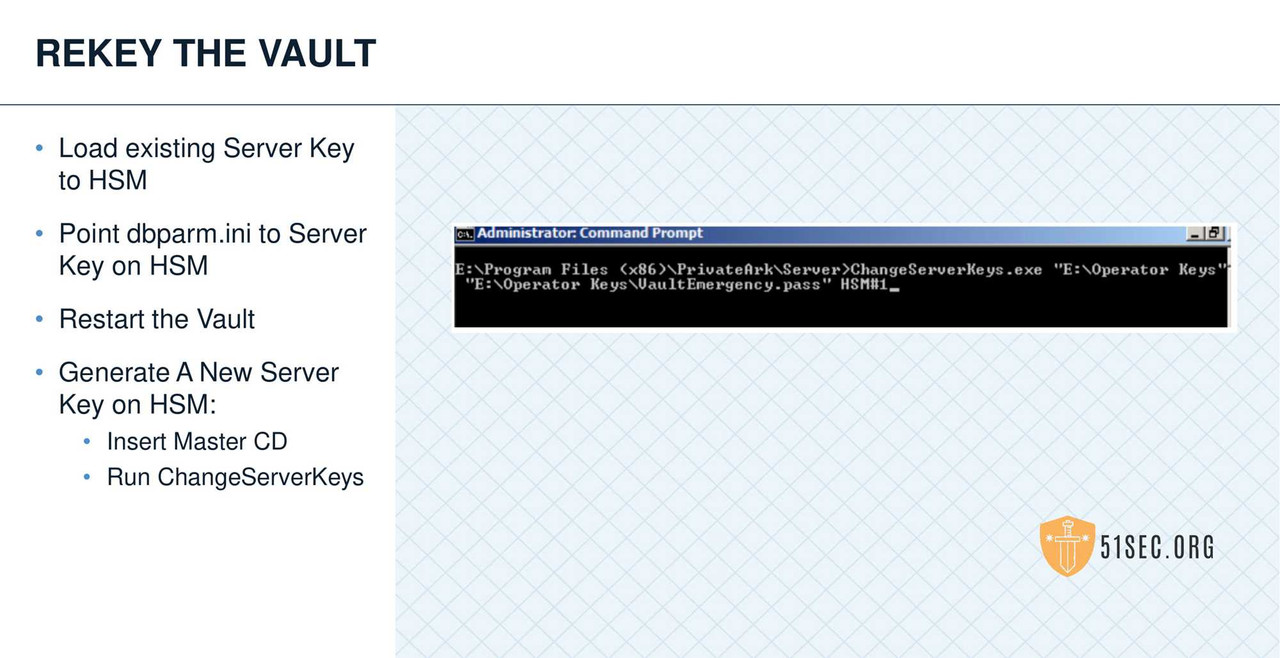
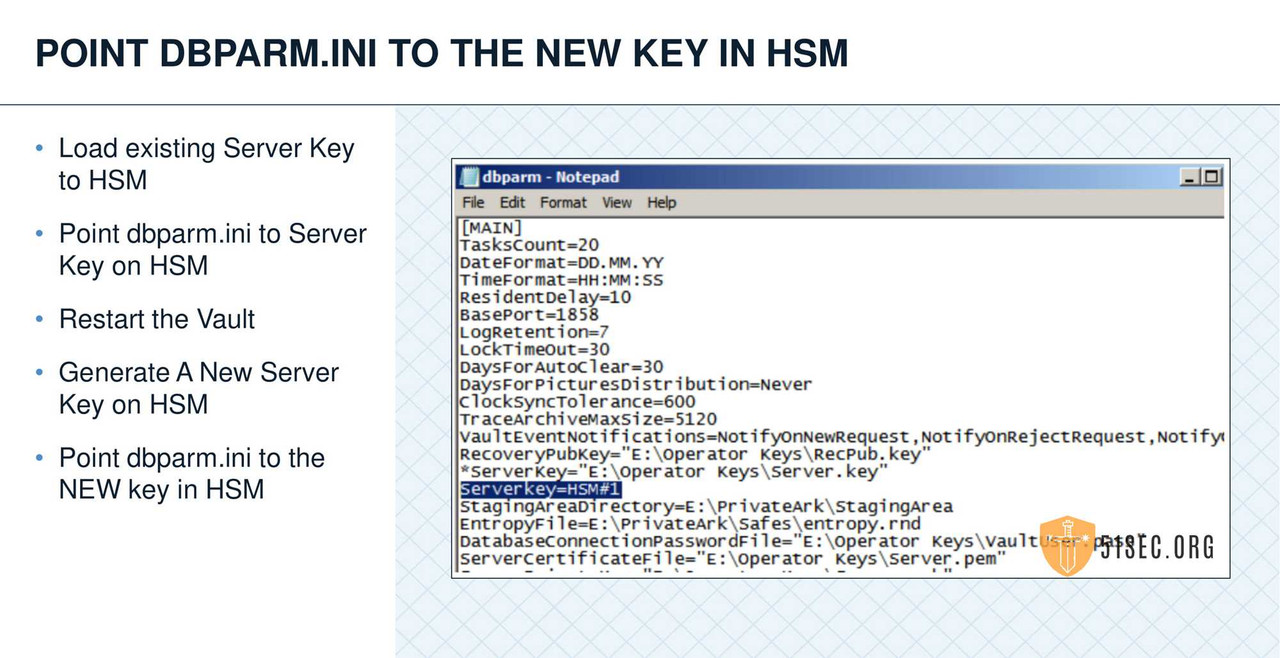
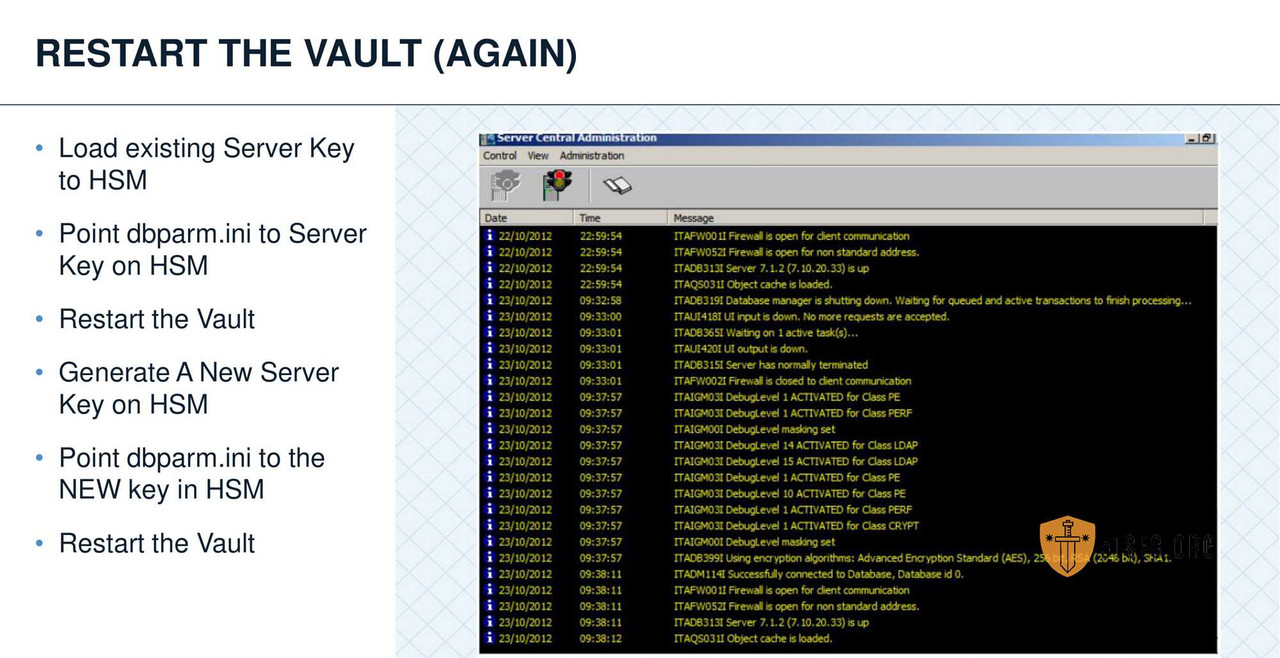
• Review the process for HSM integration
Related Posts:
MULTIPLE LAYERS OF SECURITY
ENTERPRISE PASSWORD VAULT OVERVIEW
The Enterprise Password Vault (EPV) is:
• The core of CyberArk’s PAS (Privileged Account Security) solution
• The secure storage location for all privileged account information
• Secured using CyberArk’s patented Vaulting technology

There are 7 layers security between Vault users and Stored Credentials
- Session Encryption
- Firewall
- Authtication
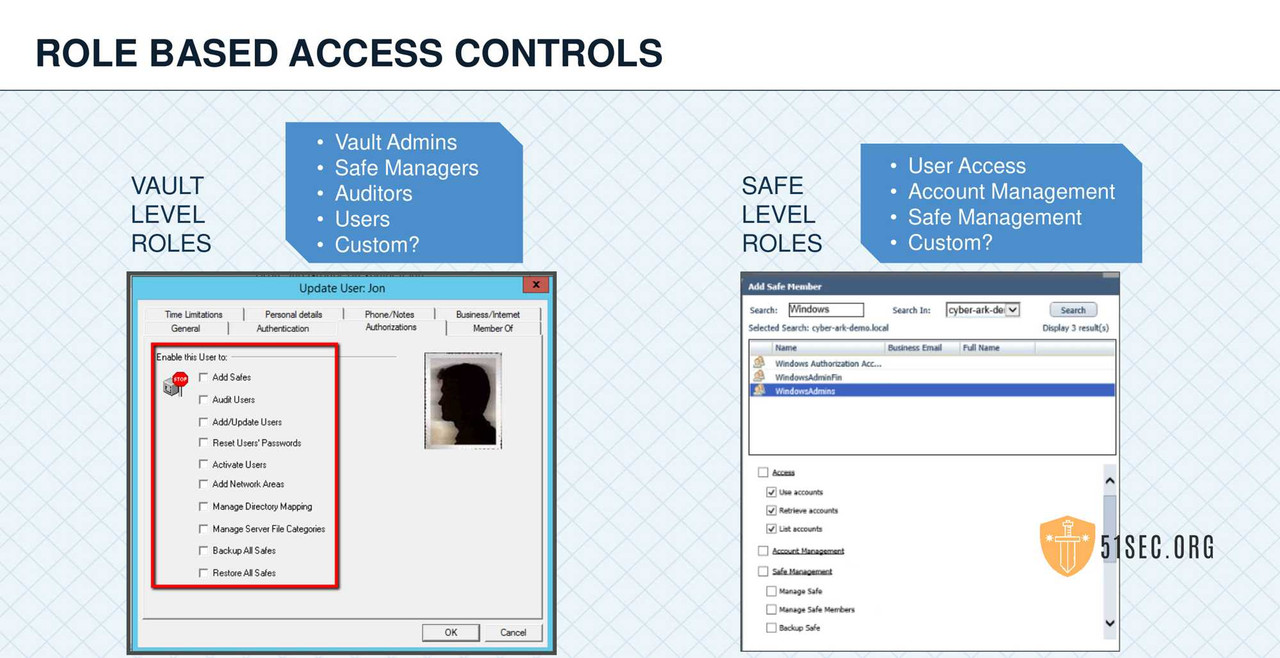
- RBAC=Role Based Access Control
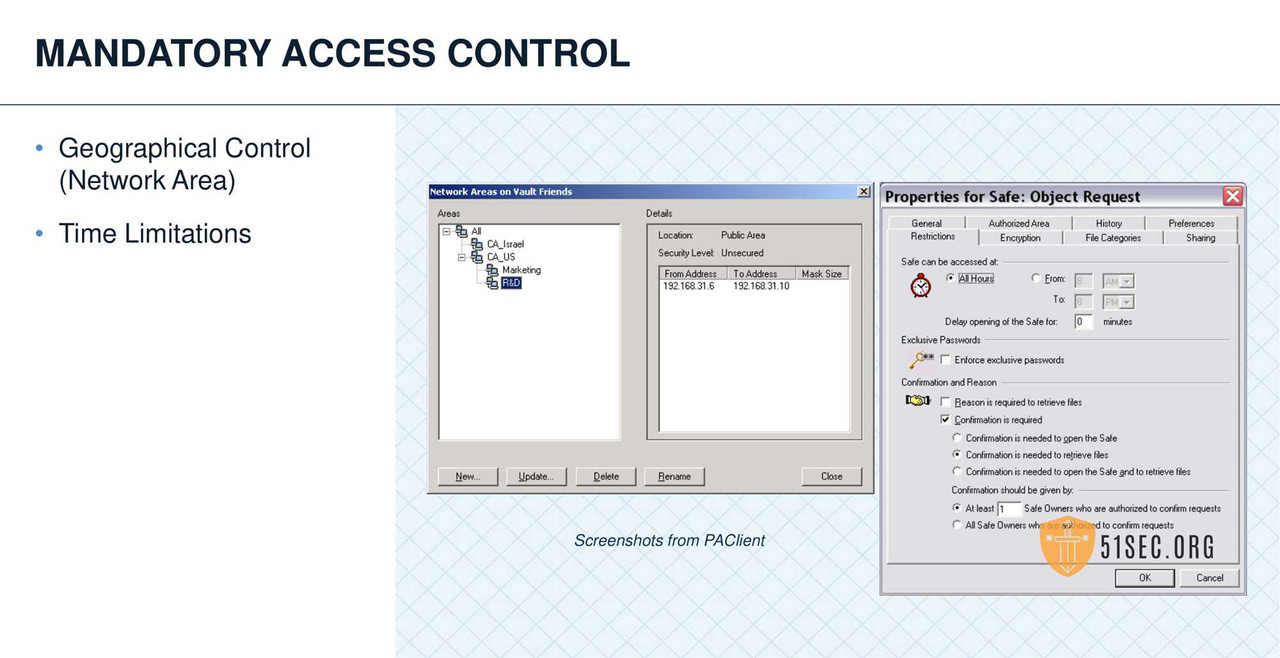
- MAC=Mandatory Access Control
- Auditing
- File Encryption
CyberArk Proprietary Protocol : TCP 1858

FIREWALL
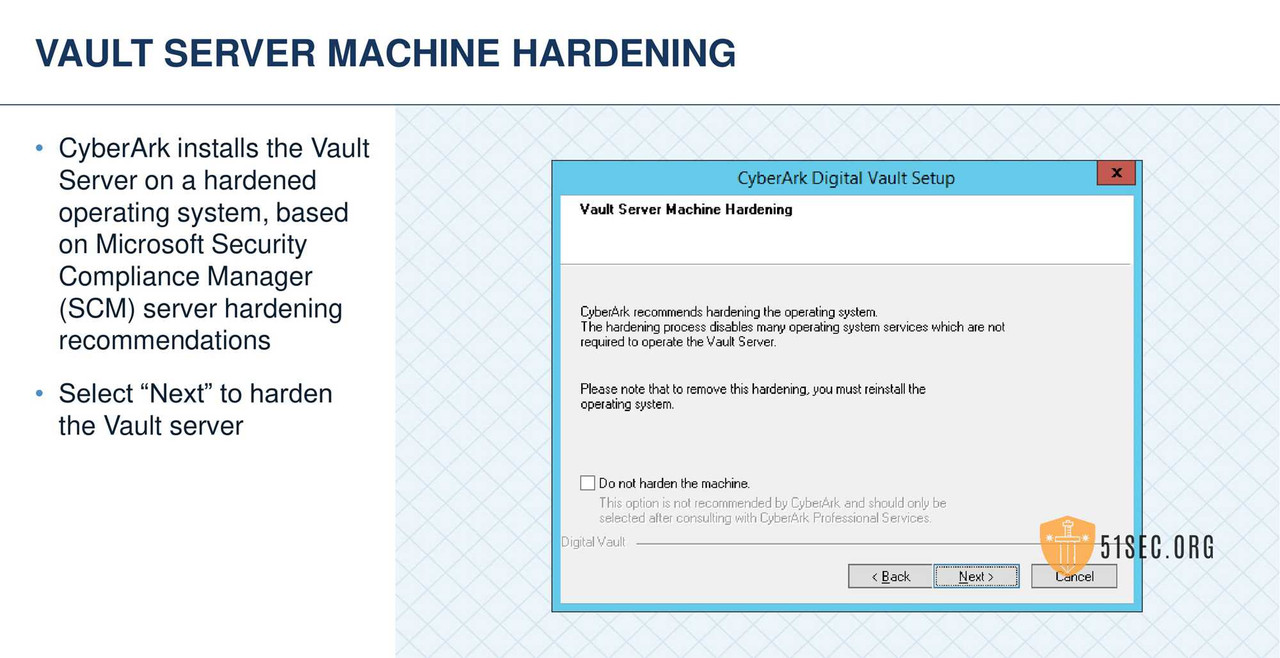
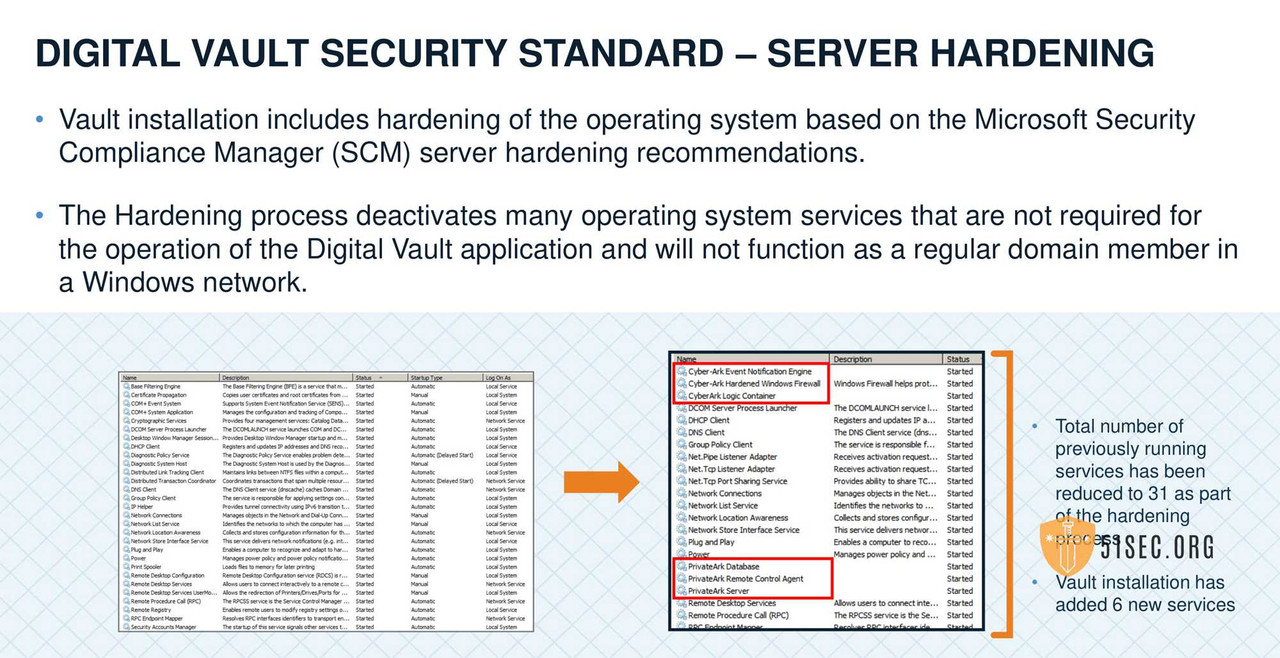
•During installation, the Vault takes control of the Windows firewall and re-brands it the “CyberArk
Hardened Windows Firewall”
•By default, only the CyberArk Proprietary Protocol is allowed, via port (TCP 1858)
•The CyberArk Hardened Windows Firewall should be managed through CyberArk configuration files and not through the Windows OS tools
•If the Vault is down, the firewall is down and no external communication is allowed


FILE ENCRYPTION
Modular structure Encryption, Hashing, and Authentication modules can be replaced by
the customer
Supported Encryption and Hash Algorithms
AES 256 / AES 128
RSA 2048 / RSA 1024
3DES
SHA 256
Every object has a unique encryption key
When a user is removed from the system, they hold no encryption key
Secure recovery mechanism for encryption keys
Backups are always encrypted and always recoverable
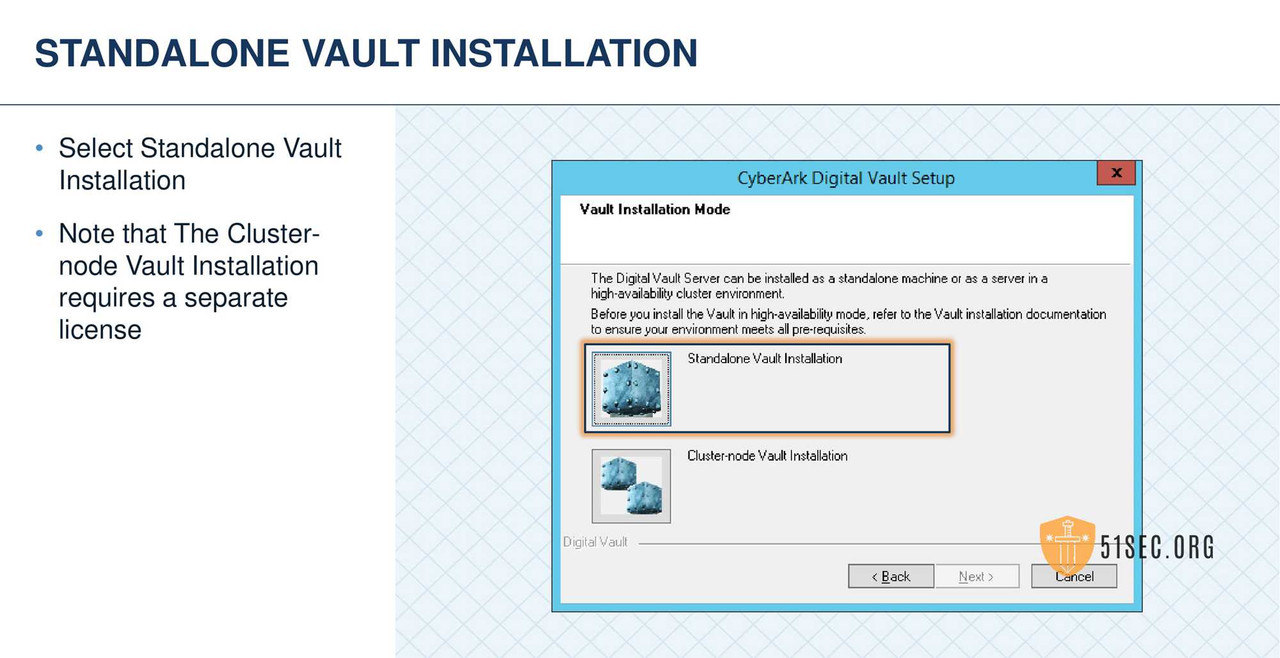
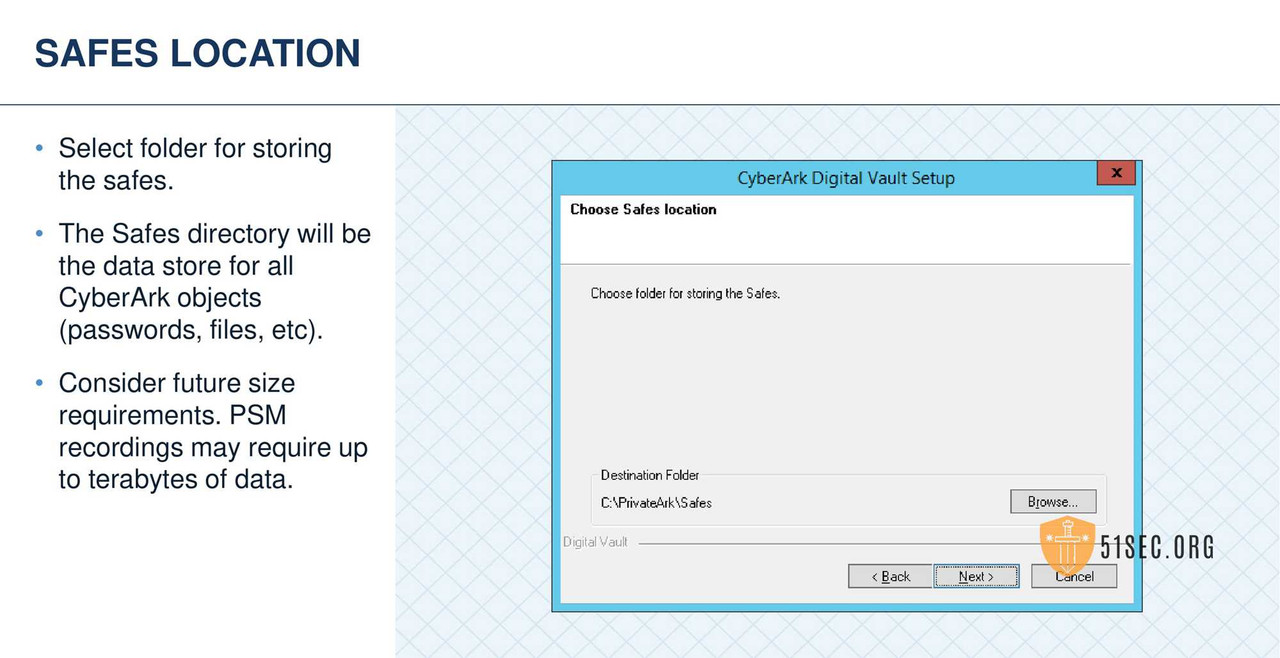
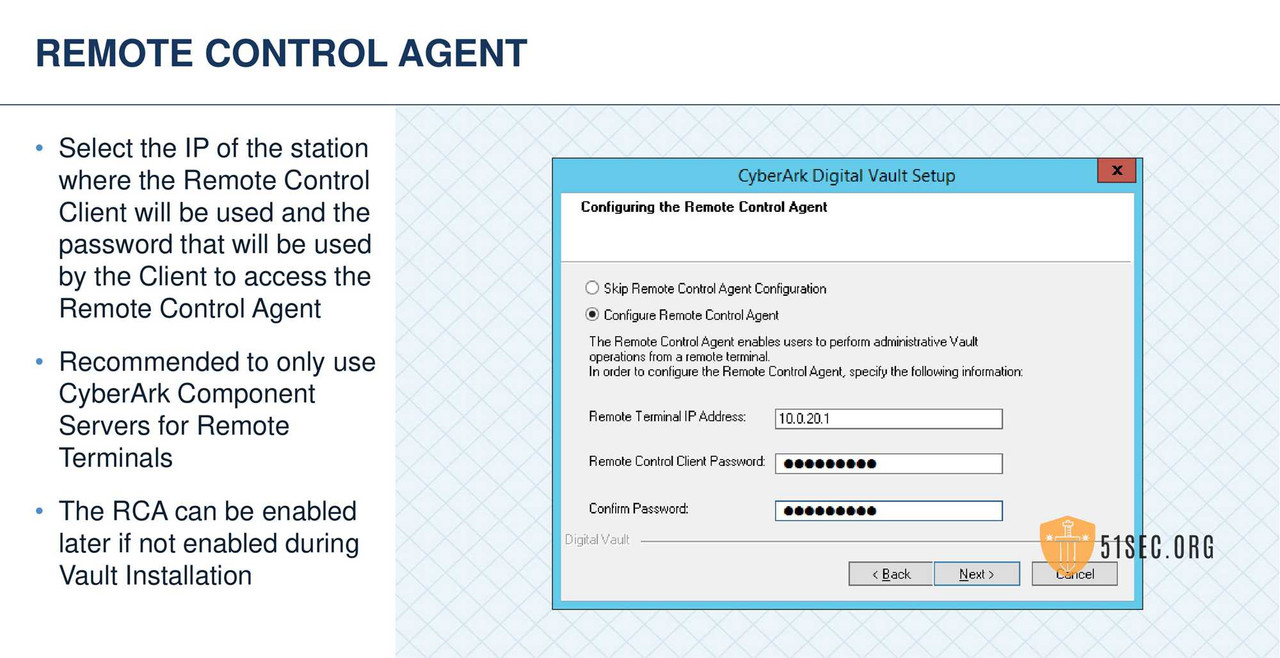
STANDALONE VAULT INSTALLATION
HOW ENCRYPTION KEYS ARE DISTRIBUTED
Every New Customer will receive an Installation package consisting of:
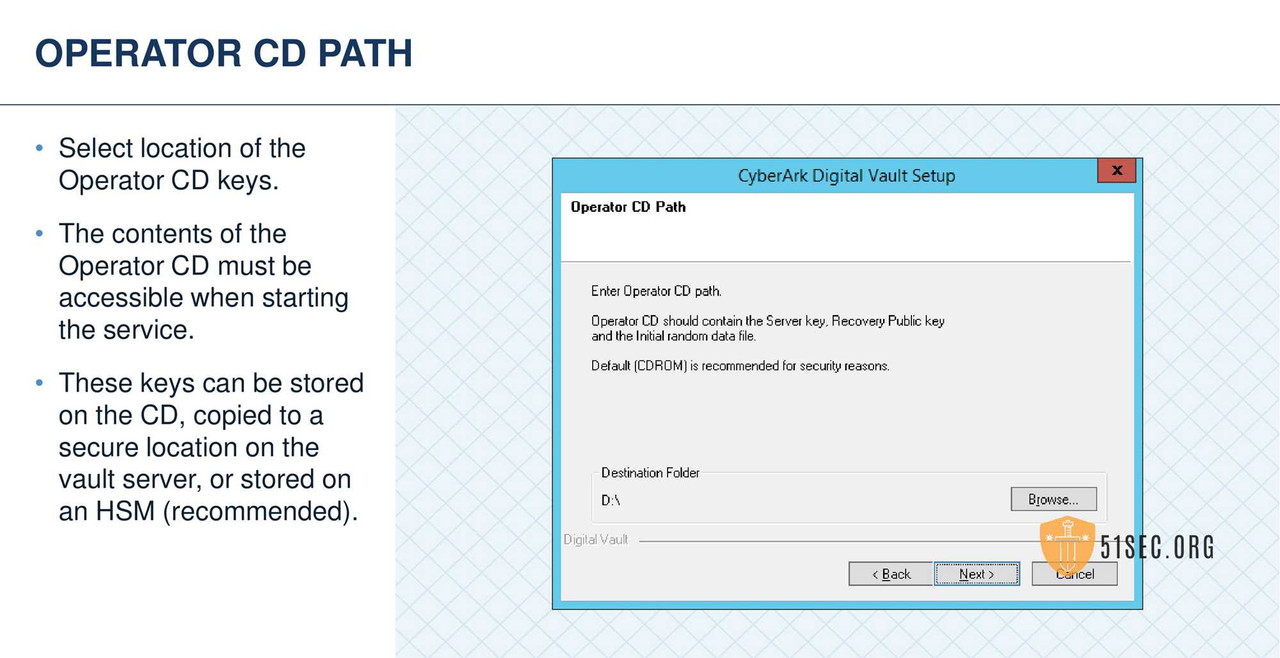
• Two copies of the Operator CD
- • Operator CD contains:
- • Server Key
- • Recovery Public Key
- • Operator CD keys are required to install and start the Vault server
- • The Master CD contains the contents of the Operator CD plus;
- • Recovery Private Key
- • Master CD should only be used in emergency situations
INSTALLATION PACKAGE
• Vault Installation Package:
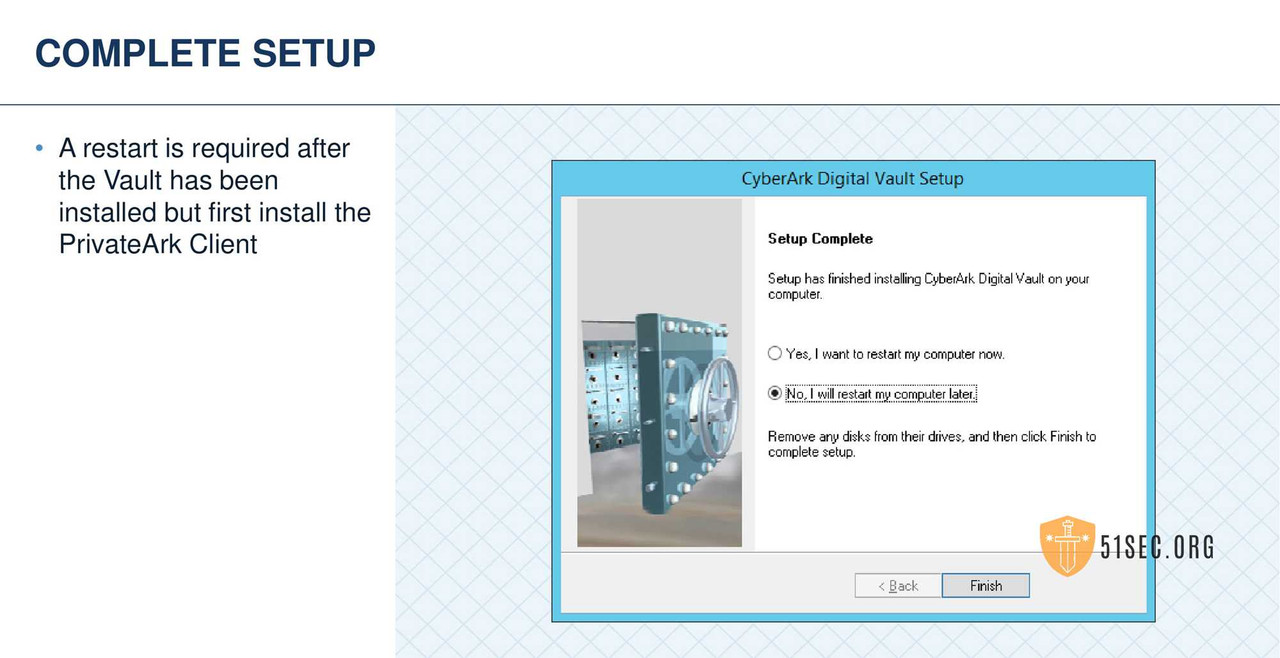
- • Ensure that the following items are copied locally to the Vault Server before hardening.
- • CyberArk Server and Client Installation software
- • Operator CD, can be copied locally in preparation for HSM integration (recommended) or inserted into CD drive
- • CyberArk License File
- • Digital Certificates installed in support of LDAP Integration




VERIFY INSTALLATION SERVER AND VAULT ENVIRONMENT


VAULT HARDENING AND SECURITY
DIGITAL VAULT SECURITY STANDARD
• By implementing the CyberArk Digital Vault in accordance with the Digital Vault Security Standard at https://docs.cyberark.com/, customers will be able to apply the highest levels of protection to this
highly sensitive system.
• It is imperative that customers implement the security standard described in this document in order
to maintain the level of security that is built in to Digital Vault software and used to protect your most
sensitive information.
DIGITAL VAULT SECURITY STANDARD KEY RECOMMENDATIONS
• The Digital Vault should be installed on a dedicated physical machine (recommended)
from original Microsoft installation media.
• The dedicated Digital Vault Server should be built from the original Microsoft installation media,
and NO third party software , such as anti virus or remote management solutions, should be
installed.
• The Digital Vault Server shall NOT be a member of any enterprise domain Installing
the Digital Vault software on a domain member server requires enabling protocols and services
and exposes the Digital Vault to a wider array of attacks).




VAULT HARDENING AND SECURITY SUMMARY
• Isolate the Server
- • Consider placing the Vault in a secure VLAN.
- • No domain membership or trusts.
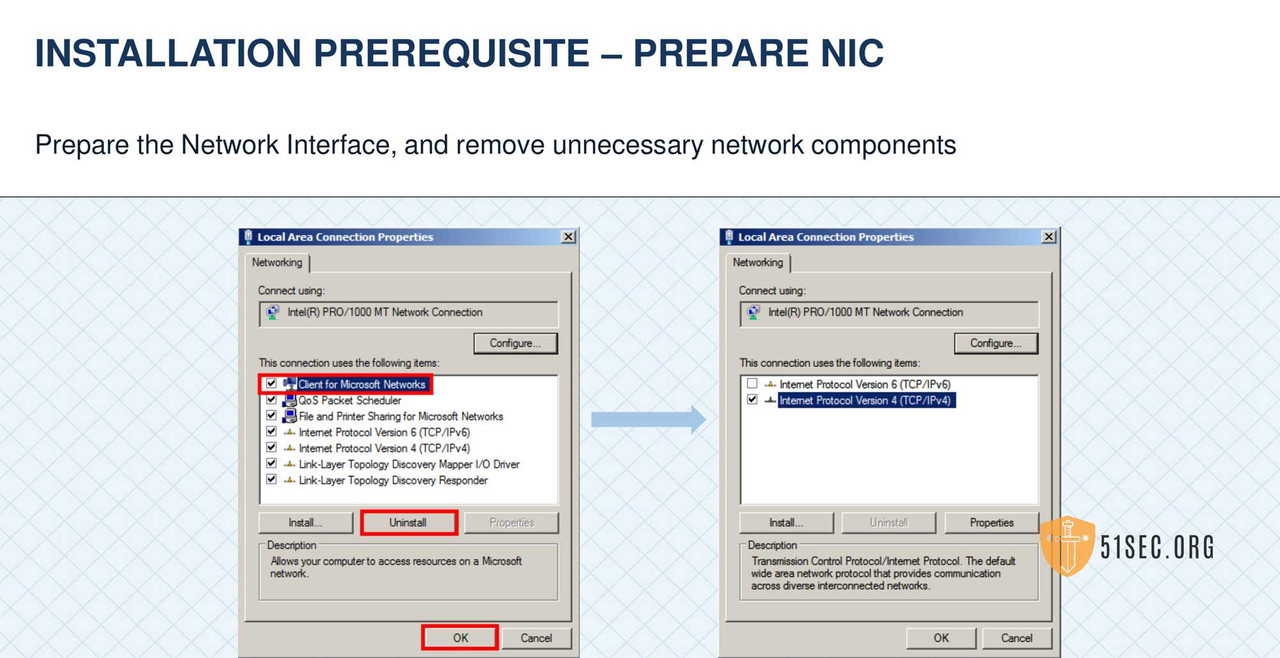
- • Only TCP/IP v 4
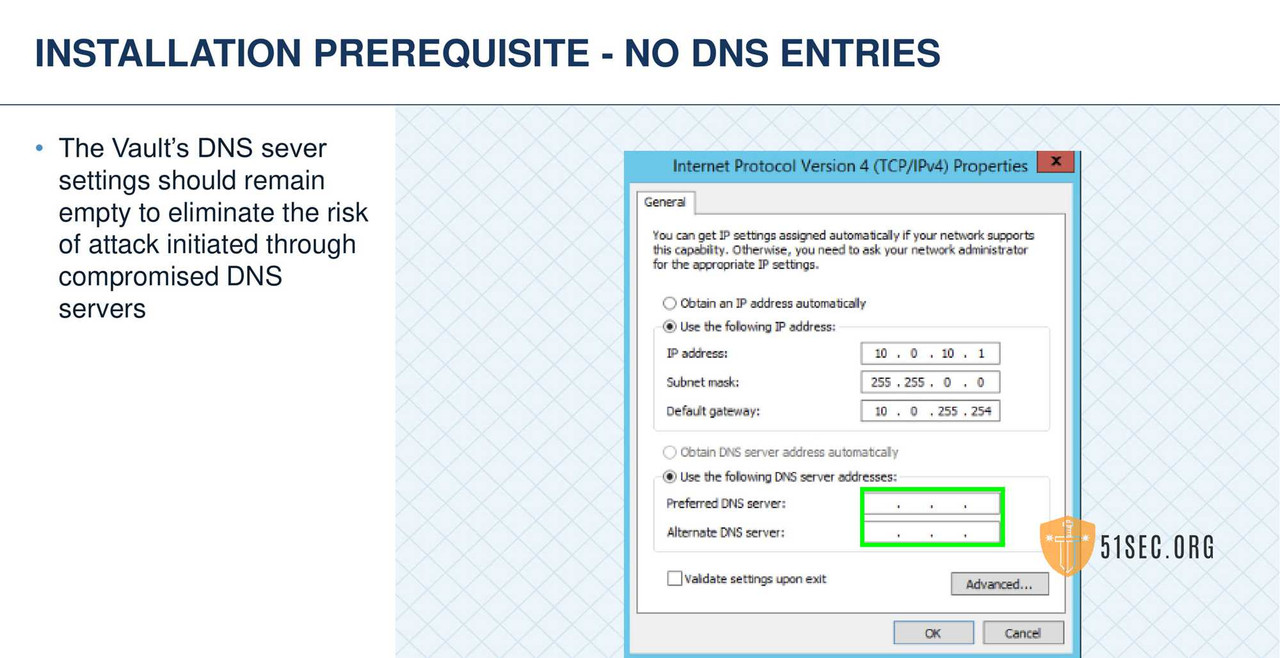
- • No DNS or WINS.
- • Uses a manually configured Host file when host name resolution is required.
• Harden the Server
- • Remove unnecessary services.
- • Restrict network access to CyberArk protocol only
- • Only Vault Server and PrivateArk Client should be installed
- • No 3 rd party applications or agents assuring a sterile environment.
HSM INTEGRATION



SUMMARY
This post covered:
• Hardened Vault Server
• Multiple Layers of Security Controls
• Installing a Standalone Vault Server
• CyberArk Digital Vault Standard
• Leverage an HSM when possible to store the Operator key.


No comments:
Post a Comment