ALS - Another Looking-Glass Server
- RAM: 32MB or more
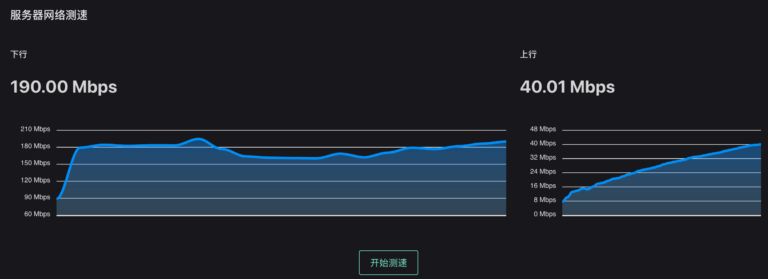
- HTML 5 Speed Test
- Ping - IPv4 / IPv6
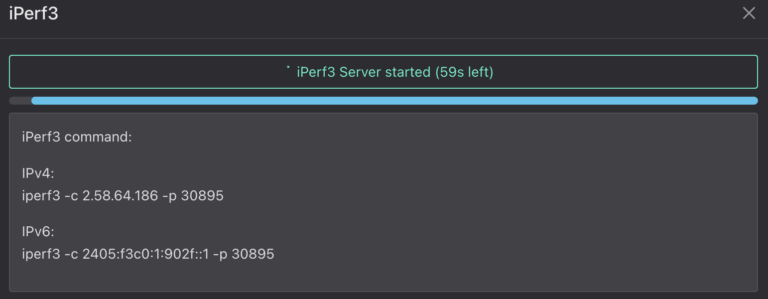
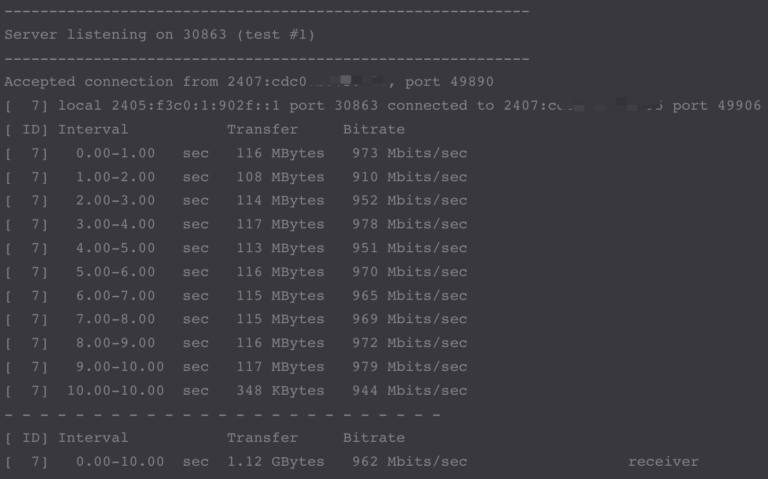
- iPerf3 server
- Streaming traffic graph
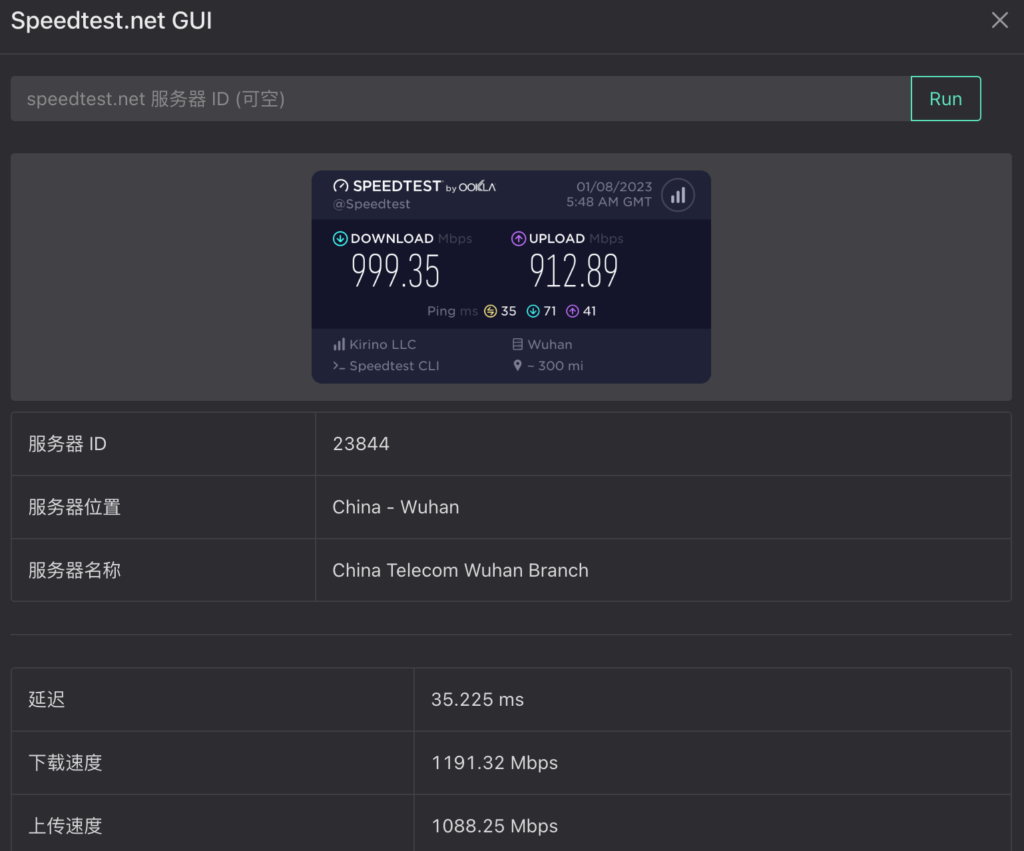
- Speedtest.net Client
- Online shell box (limited commands)
- NextTrace Support
Github : https://github.com/wikihost-opensource/als
- http://lg.hk1-bgp.hkg.50network.com/
- http://lg.korea-bgp.icn.50network.com/
- https://glass.51sec.eu.org/
Docker Playground
1 Log into https://labs.play-with-docker.com/
2 Create an instance then paste following docker run command in
COPY: ctrl + ins
PASTE: ctrl + shift + v
docker run -d --name looking-glass --restart always --network host wikihostinc/looking-glass-server
3 Click port 80 to open Looking-glass server page in a new tab
Change configuration
# you need pass -e KEY=VALUE to docker command
# you can find the KEY below the [Image Environment Variables]
# for example, change the listen port to 8080
docker run -d \
    --name looking-glass \
    -e HTTP_PORT=8080 \
    --restart always \
    --network host \
    wikihostinc/looking-glass-server
Basic Usage
1 Browser to open http://<Public IP>:Port
2 Click "Begin test" button to start the speed test.
3 Click iPerf3 to start iperf3 server for speed test.
4 Click Speedtest.net to test speed
4 Click Shell to run other commands such as ping/mtr/traceroute/nexttrace/speedtest:
ALS > help
Error: unknown command "help" for ""
Run ' --help' for usage.

ALS > --hlp
Error: unknown flag: --hlp
Usage:
   [command]

Available Commands:
  mtr
  nexttrace
  ping
  speedtest
  traceroute

Flags:
  -h, --help   help for this command

Use " [command] --help" for more information about a command.

ALS >
Using Your Own Domain
Run it in Northflank free tier docker
Northflank.com is a developer platform which provides a comprehensive suite of features to support developers to automatate DevOps lifecycle.Free Developer Sandbox provides test drive the Northflank experience with access to all our platform essentials. (https://northflank.com/pricing)
Trial the Northflank platform
Includes 2 services, 2 jobs, and 1 addon
1 BYOC cluster
Limited resources and plans
Upgrade at any time
- docker.io/wikihostinc/looking-glass-server:latest
Self Hosted Docker Installation Pre-requirements
Free resources you might need to complete this docker project:
- Server: Oracle Free VPS, Azure Free VPS, Google Cloud Free VPS, and others
- Create a Free Tier Windows/Linux Azure VPS VM
- [Free VPS] GCP (Google Cloud Platform) Tips and Tricks (Free 16G RAM, 4 vCPU VPS)
- System: Cloud Vendor Ubuntu, Debian, or DD an original version
- SWAP size increase: wget https://raw.githubusercontent.com/51sec/swap/main/swap.sh && bash swap.sh
- Enable Password ssh login
- Enable BBR
- systemctl restart docker
- Domain: (Optional) EU.ORG to get a free one, free Cloudflare account to manage your domain
- Confirm port has not been used (you might need to install lsof using command : apt install lsof):
- lsof -i:8088
Pre-installed services:
- Docker,
- apt update
- apt install docker.io
- apt install docker-compose
- apt upgrade docker.io
- mkdir /root/data/docker_data/<docker_name>
- Docker-Compose (Using Ubuntu OS for the commands)
- Docker-compose down
- Optional command : use following command to backup your Docker data. You might need to change your folder name based on your docker configuraiton
- cp -r /root/data/docker_data/<docker_name> /root/data/docker_data_backup/<docker_name>
- docker-compose pull
- docker-compose up -d
- docker image prune
- Portainer (Optional)
- docker volume create portainer_data
- docker run -d -p 9000:9000 --name portainer --restart always -v /var/run/docker.sock:/var/run/docker.sock -v portainer_data:/data portainer/portainer-ce:latest
- Install some applications: apt install wget curl sudo vim git (Optional)
- aapanel with Nginx (Optional)
- Nginx Proxy Manager (Optional)
- Install screen (Optional)
- Install screen (Depends on the Linux Distribution if it came pre installed or not) : yum install screen
- Initiate a Screen : screen or screen -S <screen name> <command to execute>
- Detach from the screen : "CTRL+A,D" not "CTRL+A+D"
- List all the screen currently working : screen -ls
- Reattach to a screen : screen -r <session number> or screen -r <screen name>
- Kill specific screen: screen -X -S <screen name> quit
- Kill all screens : pkill screen
Monitoring Usage
- Docker stats
- ncdu
- apt install ncdu
Remove Docker and Related folders
- docker stop <Docker Name> # stop the docker but not remove anything.
- docker rm -f <Docker Name> # remove speficic container, but will not delete mapped volumes
- rm -rf /root/data/docker_data/<Docker Mapped Volumns> # remove all mapped volumes
Restrick Journal Log File Size:
- journalctl --vacuum-size=100M
- Limit it to 25M:
SystemMaxUse=25M
systemctl restart systemd-journald.service
sudo bash -c 'echo "SystemMaxUse=100M" >> /etc/systemd/journald.conf'
sudo systemctl restart systemd-journald
Enable IPv6 and Limit Log File Size (Ubuntu)
sudo sh -c 'truncate -s 0 /var/lib/docker/containers/*/*-json.log'
cat > /etc/docker/daemon.json << EOF
{
    "log-driver": "json-file",
    "log-opts": {
        "max-size": "20m",
        "max-file": "3"
    },
    "ipv6": true,
    "fixed-cidr-v6": "fd00:dead:beef:c0::/80",
    "eixperimental":true,
    "ip6tables":true
}
EOFcat <<EOF > /etc/docker/daemon.json { "live-restore": true, "storage-driver": "overlay2", "log-opts": { "max-size": "10m" } } EOF
systemctl restart dockerLimit number of log files:
cat /etc/logrotate.d/rsyslog
/var/log/syslog
/var/log/mail.info
/var/log/mail.warn
/var/log/mail.err
/var/log/mail.log
/var/log/daemon.log
/var/log/kern.log
/var/log/auth.log
/var/log/user.log
/var/log/lpr.log
/var/log/cron.log
/var/log/debug
/var/log/messages
{
    rotate 4
    weekly
    missingok
    notifempty
    compress
    delaycompress
    sharedscripts
    postrotate
        /usr/lib/rsyslog/rsyslog-rotate
    endscript
}
You can change 4 to some other value, such as 1, so that only one file is stored.
Videos
References
- https://www.74110.net/tutorial/docker/als/


No comments:
Post a Comment