Calibre is a powerful and easy to use e-book manager. In fact, Calibre-web is a new project which is a web app that offers a clean and intuitive interface for browsing, reading, and downloading eBooks using a valid Calibre database.
Calibre is designed as a desktop app, although it is having a content server to serve web interface, but Calibre-web gives you a better design and easy configuration, less headache for managing Calibre server.
This Post Shortened URL: https://g.51sec.org/books
Project Calibre Web
Calibre-web is a fork of the Library project which aims to provide a modern web interface to a Calibre database and is Python based. It requires Python 3 and is very easy to install.Features:
- Modern and responsive Bootstrap 3 HTML5 interface
- Full graphical setup
- Comprehensive user management with fine-grained per-user permissions
- Admin interface
- Multilingual user interface supporting 20+ languages (supported languages)
- OPDS feed for eBook reader apps
- Advanced search and filtering options
- Custom book collection (shelves) creation
- eBook metadata editing and deletion support
- Metadata download from various sources (extensible via plugins)
- eBook conversion through Calibre binaries
- eBook download restriction to logged-in users
- Public user registration support
- Send eBooks to E-Readers with a single click
- Sync Kobo devices with your Calibre library
- In-browser eBook reading support for multiple formats
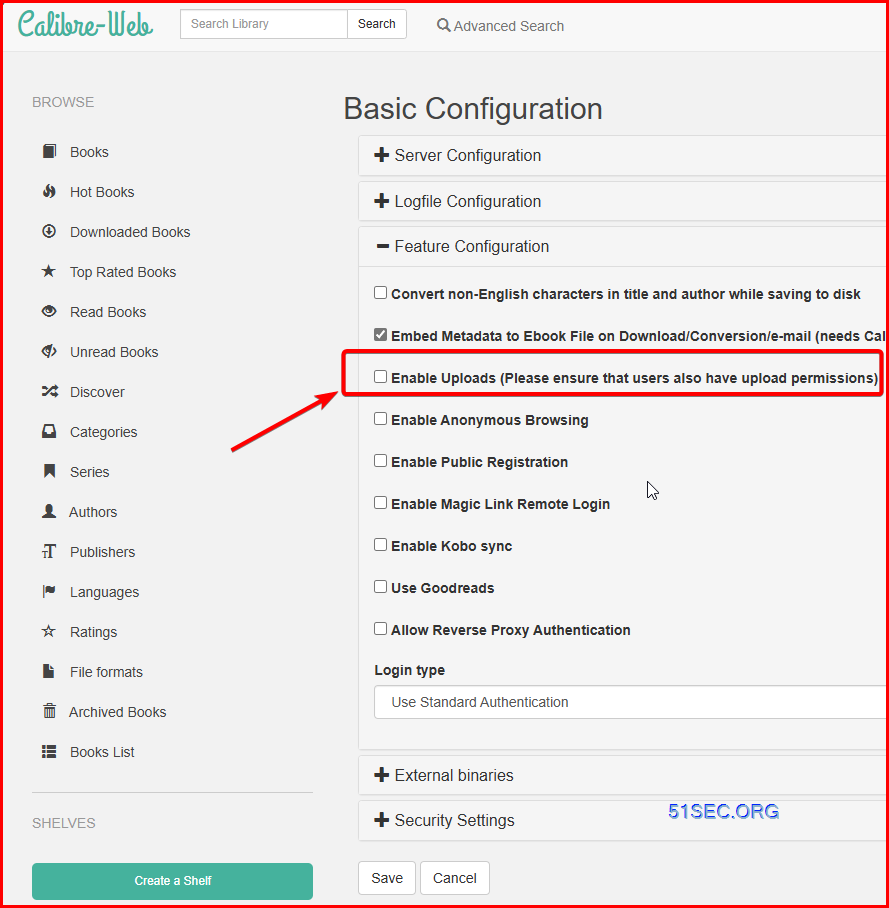
- Upload new books in various formats, including audio formats
- Calibre Custom Columns support
- Content hiding based on categories and Custom Column content per user
- Self-update capability
- "Magic Link" login for easy access on eReaders
- LDAP, Google/GitHub OAuth, and proxy authentication support
Docker Image
- Docker Hub: linuxserver/calibre-web
- GitHub: linuxserver/docker-calibre-web
- Optional Calibre layer: linuxserver/docker-mods
Application Setup
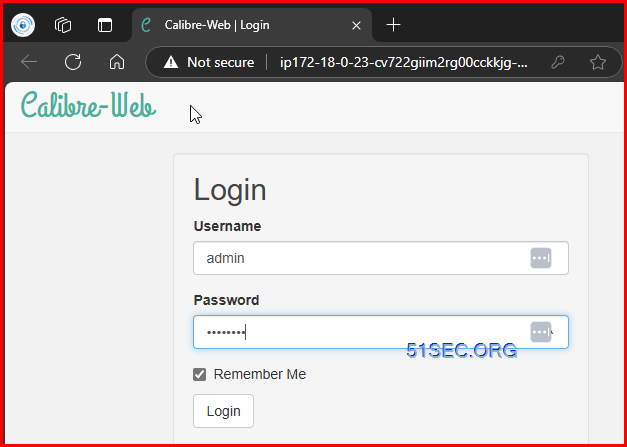
- Webui can be found at
http://your-ip:8083 - On the initial setup screen, enter
/booksas your calibre library location. - Default admin login: Username: admin Password: admin123
Docker Configuration Steps
1 log into linux vps
- sudo -i
- apt update
2 (optional) increase swap size if needed
- SWAP size increase: wget https://raw.githubusercontent.com/51sec/swap/main/swap.sh && bash swap.sh
3 install docker & docker compose
- apt install docker.io
- apt install docker-compose
- (optional) apt upgrade docker.io
4 Create docker data structure
- mkdir /root/data/docker_data/calibre
- (optional) mkdir /root/data/docker_data/calibre/data
- (optional) mkdir /root/data/docker_data/calibre/library
- cd /root/data/docker_data/calibre
Root User to Run Docker
- vi docker-compose.yml
services:
  calibre-web:
    image: lscr.io/linuxserver/calibre-web:latest
    container_name: calibre-web
    environment:
      - PUID=0
      - PGID=0
      - TZ=America/Toronto
    volumes:
      - ./data:/config
      - ./library:/books
    ports:
      - 8083:8083
    restart: unless-stopped
- check your PUID and PGID using ID command from linux command line
- host data folder is used to store configuraiton file.
- host library data is used to store book library.
Docker run command:
docker run -d --name calibre-web -e PUID=0 -e PGID=0 -e TZ=America/Toronto -v ./data:/config -v ./library:/books -p 8083:8083 --restart unless-stopped lscr.io/linuxserver/calibre-web:latest
- Docker Compose to Docker Run: https://www.decomposerize.com/
- Docker run to Docker compose: https://www.composerize.com/
Download a fresh DB and Database Config
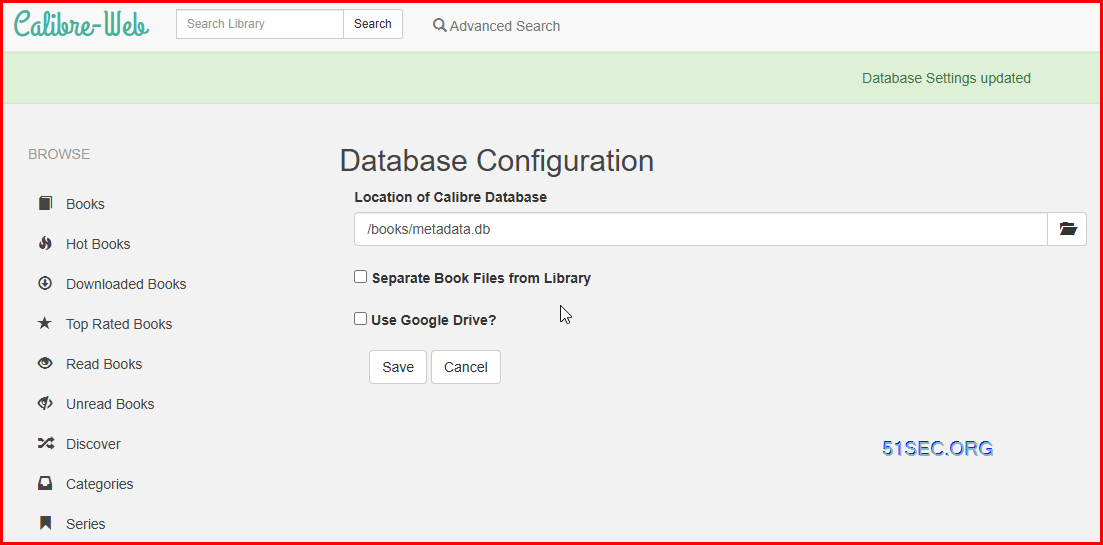
"Needing an existing calibre db" means : having the calibre.db file in the folder that you use as library root for calibre-web.
You can even create it manually if you want (and know how to). But the simpler way is : spin up calibre wherever you want, create a library (it can be empty).
Stop it, migrate the db file/folder to the root of the library you'll use in calibre-web, spin up calibre-web.
- cd /root/data/docker_data/calibre/library
- wget https://od.51sec.org/TGM_51Sec_EU/Sharing/Software/Developer/Calibre-web/metadata.db
- wget https://drive.usercontent.google.com/u/0/uc?id=189tv5i5SNT6rivLLLvCmC2JeLtODmSS1&export=download
- mv uc\?id\=189tv5i5SNT6rivLLLvCmC2JeLtODmSS1 metadata.db
- docker exec -it calibre-web sh #enter into Calibre-web container
- chmod a+w /books/metadata.db # add write permission
- exit
Database Configuration
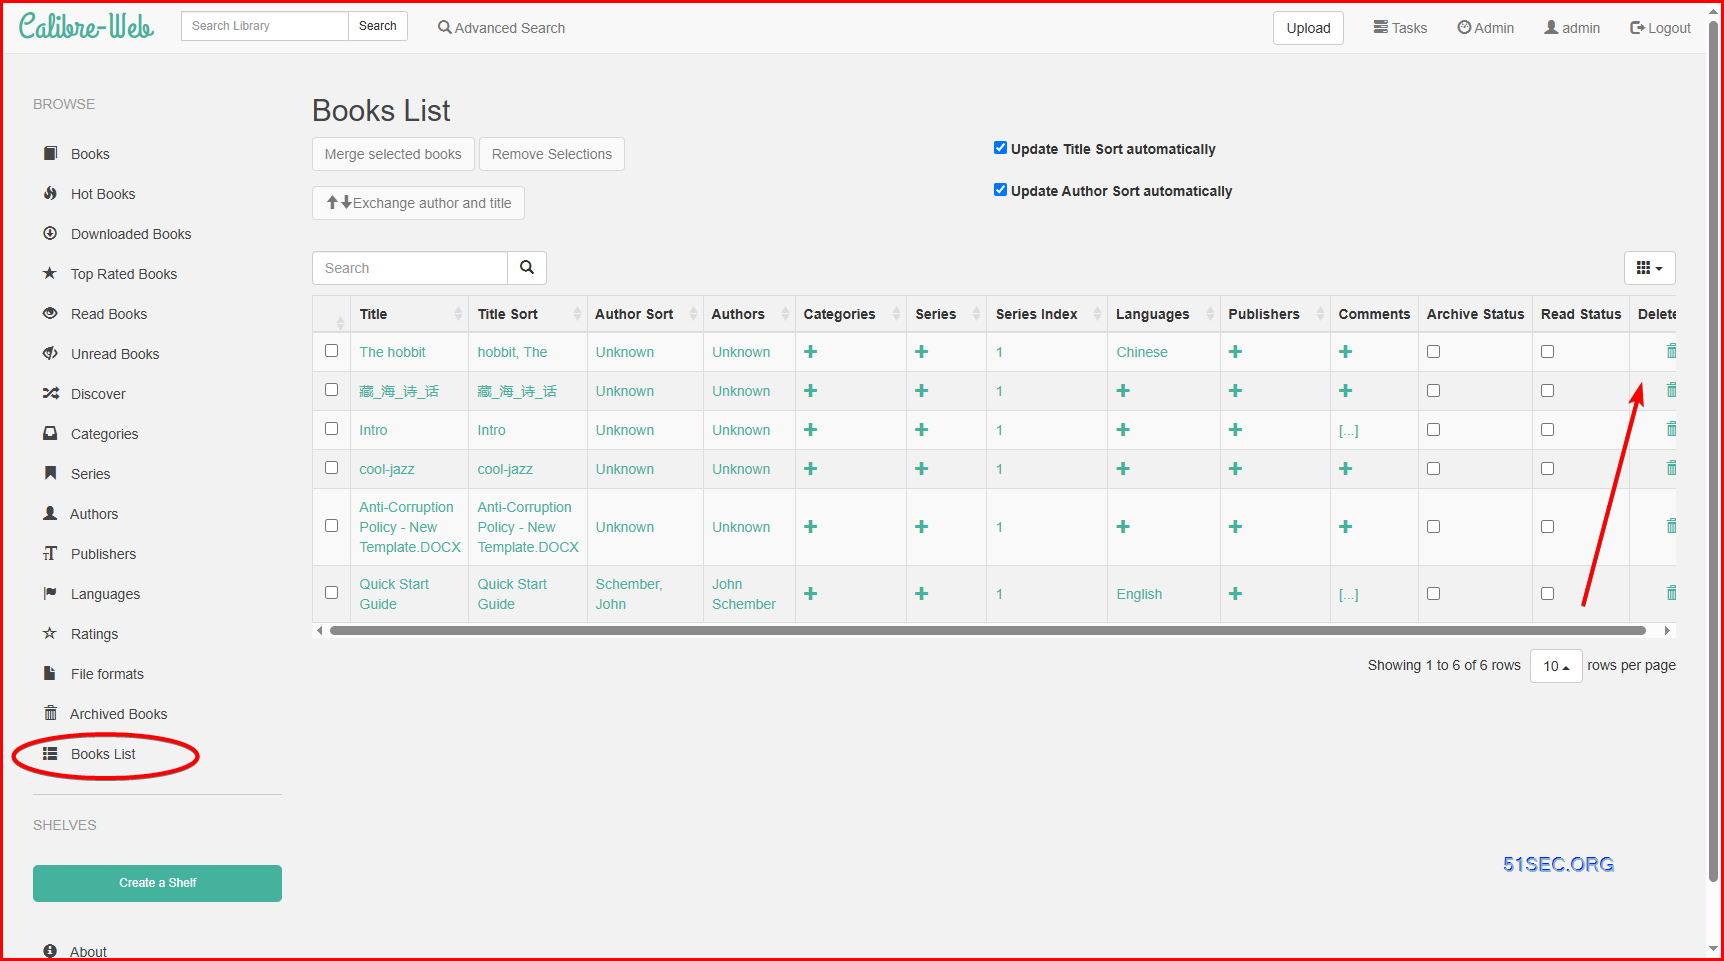
Import / Upload / Delete Books
Upload Books
Change Admin Permission to Allow Uploads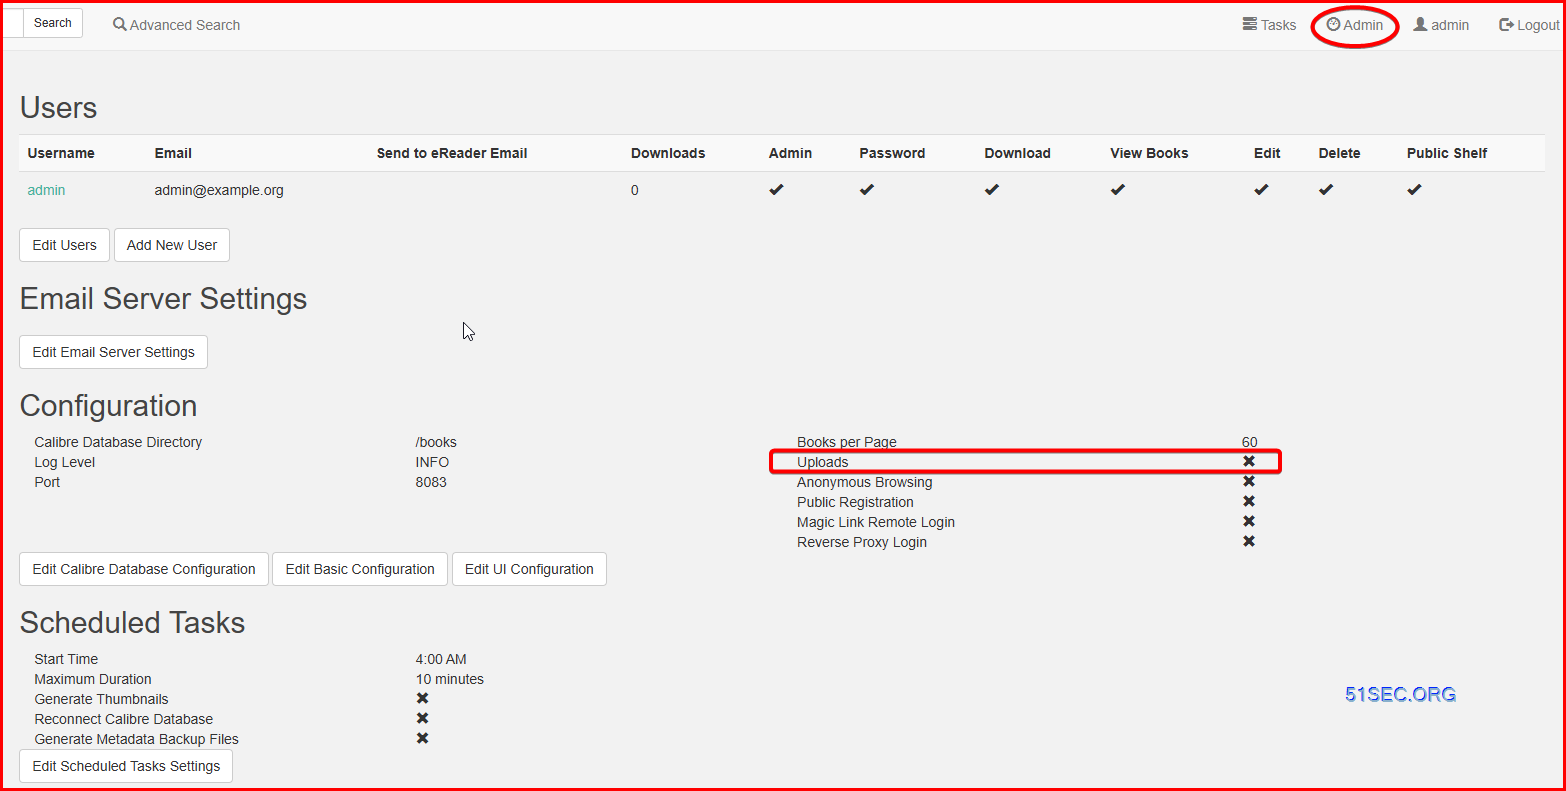
Delete Books:
Share Your Library with Others
Self Hosted Docker Installation Pre-requirements
Free resources you might need to complete this docker project:
- Server: Oracle Free VPS, Azure Free VPS, Google Cloud Free VPS, and others
- Create a Free Tier Windows/Linux Azure VPS VM
- [Free VPS] GCP (Google Cloud Platform) Tips and Tricks (Free 16G RAM, 4 vCPU VPS)
- System: Cloud Vendor Ubuntu, Debian, or DD an original version
- SWAP size increase: wget https://raw.githubusercontent.com/51sec/swap/main/swap.sh && bash swap.sh
- Enable Password ssh login
- Enable BBR
- systemctl restart docker
- Domain: (Optional) EU.ORG to get a free one, free Cloudflare account to manage your domain
- Confirm port has not been used (you might need to install lsof using command : apt install lsof):
- lsof -i:8088
Pre-installed services:
- Docker,
- apt update
- apt install docker.io
- apt install docker-compose
- apt upgrade docker.io
- mkdir /root/data/docker_data/<docker_name>
- Docker-Compose (Using Ubuntu OS for the commands)
- Docker-compose down
- Optional command : use following command to backup your Docker data. You might need to change your folder name based on your docker configuraiton
- cp -r /root/data/docker_data/<docker_name> /root/data/docker_data_backup/<docker_name>
- docker-compose pull
- docker-compose up -d
- docker image prune
- Portainer (Optional)
- docker volume create portainer_data
- docker run -d -p 9000:9000 --name portainer --restart always -v /var/run/docker.sock:/var/run/docker.sock -v portainer_data:/data portainer/portainer-ce:latest
- Install some applications: apt install wget curl sudo vim git (Optional)
- aapanel with Nginx (Optional)
- Nginx Proxy Manager (Optional)
- Install screen (Optional)
- Install screen (Depends on the Linux Distribution if it came pre installed or not) : yum install screen
- Initiate a Screen : screen or screen -S <screen name> <command to execute>
- Detach from the screen : "CTRL+A,D" not "CTRL+A+D"
- List all the screen currently working : screen -ls
- Reattach to a screen : screen -r <session number> or screen -r <screen name>
- Kill specific screen: screen -X -S <screen name> quit
- Kill all screens : pkill screen
Monitoring Usage, especially for disk usage
- Docker stats
- ncdu
- apt install ncdu
Remove Docker and Related folders
- docker stop <Docker Name> # stop the docker but not remove anything.
- docker rm -f <Docker Name> # remove speficic container, but will not delete mapped volumes
- rm -rf /root/data/docker_data/<Docker Mapped Volumns> # remove all mapped volumes
Restrick Journal Log File Size:
- journalctl --vacuum-size=100M
- Limit it to 25M:
SystemMaxUse=25M
systemctl restart systemd-journald.service
sudo bash -c 'echo "SystemMaxUse=100M" >> /etc/systemd/journald.conf'
sudo systemctl restart systemd-journald
Enable IPv6 and Limit Log File Size (Ubuntu)
sudo sh -c 'truncate -s 0 /var/lib/docker/containers/*/*-json.log'
cat > /etc/docker/daemon.json << EOF
{
    "log-driver": "json-file",
    "log-opts": {
        "max-size": "20m",
        "max-file": "3"
    },
    "ipv6": true,
    "fixed-cidr-v6": "fd00:dead:beef:c0::/80",
    "eixperimental":true,
    "ip6tables":true
}
EOFcat <<EOF > /etc/docker/daemon.json { "live-restore": true, "storage-driver": "overlay2", "log-opts": { "max-size": "10m" } } EOF
systemctl restart dockerLimit number of log files:
cat /etc/logrotate.d/rsyslog
/var/log/syslog
/var/log/mail.info
/var/log/mail.warn
/var/log/mail.err
/var/log/mail.log
/var/log/daemon.log
/var/log/kern.log
/var/log/auth.log
/var/log/user.log
/var/log/lpr.log
/var/log/cron.log
/var/log/debug
/var/log/messages
{
    rotate 4
    weekly
    missingok
    notifempty
    compress
    delaycompress
    sharedscripts
    postrotate
        /usr/lib/rsyslog/rsyslog-rotate
    endscript
}
You can change 4 to some other value, such as 1, so that only one file is stored.
Videos
References
- https://github.com/linuxserver/docker-calibre-web/issues/30
- https://www.bookfusion.com/reading/cloud-library
- https://blog.laoda.de/archives/docker-compose-install-calibre-web?cid=5184


![[5 Mins Docker] Deploy FreshRSS Using Docker Run Command and Deploy To Fly.io](https://lh3.googleusercontent.com/blogger_img_proxy/AEn0k_ugDazkJd9Ac1Y80hVp5fo60JQI1gBMu7qKfyAh-8zTkvl53_BrXG-fSZ4NbtBmOd-KHdXqxOC7cgUfRMllpj54pyxA84tiBHJ_0932FjxZRQ)


No comments:
Post a Comment