I found RSS aggregator service could help for my this problem. But all of this kind of online service are not free or not free enough for me to get what I need. I decided to look for a self-hosted RSS aggregator solution. That is how I started this post.
- https://reader.miniflux.app/
Introduction
- Tiny Tiny RSS
- FreshRSS
- miniflux
- Stringer
miniflux
- Github page: https://github.com/miniflux/v2
- Official website: https://miniflux.app
- Documentation site: https://miniflux.app/docs/ (Man page)
- Installation : https://miniflux.app/docs/installation.html
If it does happen, and you can try another project, FreshRSS:
Self Hosted Docker Installation Pre-requirements
Free resources you might need to complete this docker project:
- Server: Oracle Free VPS, Azure Free VPS, Google Cloud Free VPS, and others
- Create a Free Tier Windows/Linux Azure VPS VM
- [Free VPS] GCP (Google Cloud Platform) Tips and Tricks (Free 16G RAM, 4 vCPU VPS)
- System: Cloud Vendor Ubuntu, Debian, or DD an original version
- SWAP size increase: wget https://raw.githubusercontent.com/51sec/swap/main/swap.sh && bash swap.sh
- Enable Password ssh login
- Enable BBR
- systemctl restart docker
- Domain: (Optional) EU.ORG to get a free one, free Cloudflare account to manage your domain
- Confirm port has not been used (you might need to install lsof using command : apt install lsof):
- lsof -i:8088
Pre-installed services:
- Docker,
- apt update
- apt install docker.io
- apt install docker-compose
- apt upgrade docker.io
- mkdir /root/data/docker_data/<docker_name>
- Docker-Compose (Using Ubuntu OS for the commands)
- Docker-compose down
- Optional command : use following command to backup your Docker data. You might need to change your folder name based on your docker configuraiton
- cp -r /root/data/docker_data/<docker_name> /root/data/docker_data_backup/<docker_name>
- docker-compose pull
- docker-compose up -d
- docker image prune
- Portainer (Optional)
- docker volume create portainer_data
- docker run -d -p 9000:9000 --name portainer --restart always -v /var/run/docker.sock:/var/run/docker.sock -v portainer_data:/data portainer/portainer-ce:latest
- Install some applications: apt install wget curl sudo vim git (Optional)
- aapanel with Nginx (Optional)
- Nginx Proxy Manager (Optional)
- Install screen (Optional)
- Install screen (Depends on the Linux Distribution if it came pre installed or not) : yum install screen
- Initiate a Screen : screen or screen -S <screen name> <command to execute>
- Detach from the screen : "CTRL+A,D" not "CTRL+A+D"
- List all the screen currently working : screen -ls
- Reattach to a screen : screen -r <session number> or screen -r <screen name>
- Kill specific screen: screen -X -S <screen name> quit
- Kill all screens : pkill screen
Installation from Docker
Docker Registries:
- Docker Hub Registry:
docker.io/miniflux/miniflux - GitHub Container Registry:
ghcr.io/miniflux/miniflux
Docker Architectures:
amd64arm64arm/v7arm/v6
1 Log in to Play With Dcker website and create a new instance
URL: https://labs.play-with-docker.com/
2 In the new instance session command line, create a new file: basic.yml
You can find out this basic.yml file and other version's yml file from this url:
https://github.com/miniflux/v2/tree/master/contrib/docker-compose
- vi basic.yml
3 In this new basic.yml file, paste into follow text:
version: '3.4'
services:
miniflux:
image: miniflux/miniflux:latest
ports:
- "80:8080"
depends_on:
- db
environment:
- DATABASE_URL=postgres://miniflux:secret@db/miniflux?sslmode=disable
- RUN_MIGRATIONS=1
- CREATE_ADMIN=1
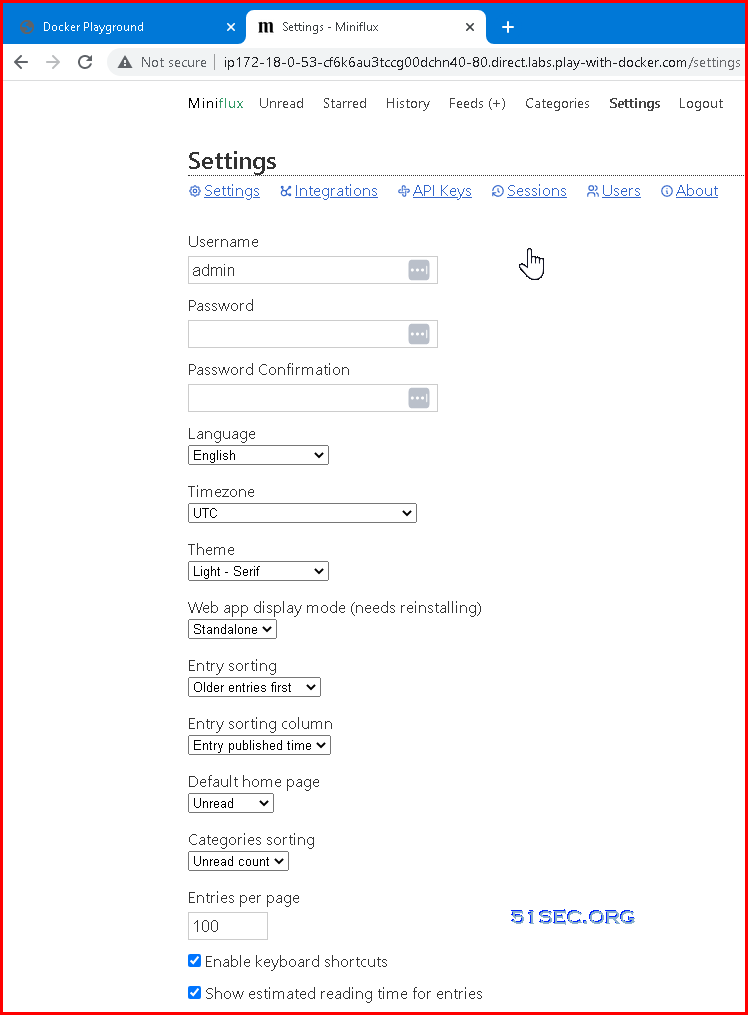
- ADMIN_USERNAME=admin
- ADMIN_PASSWORD=test123
db:
image: postgres:15
environment:
- POSTGRES_USER=miniflux
- POSTGRES_PASSWORD=secret
volumes:
- miniflux-db:/var/lib/postgresql/data
healthcheck:
test: ["CMD", "pg_isready", "-U", "miniflux"]
interval: 10s
start_period: 30s
volumes:
miniflux-db:
4 start dockers
[node1] (local) [email protected] ~
$ docker-compose -f basic.yml up -d
[+] Running 2/2
 ⠿ Container postgres  Started                                                                                                   2.0s
 ⠿ Container miniflux  Started                                                                                                    3.5s
[node1] (local) [email protected] ~
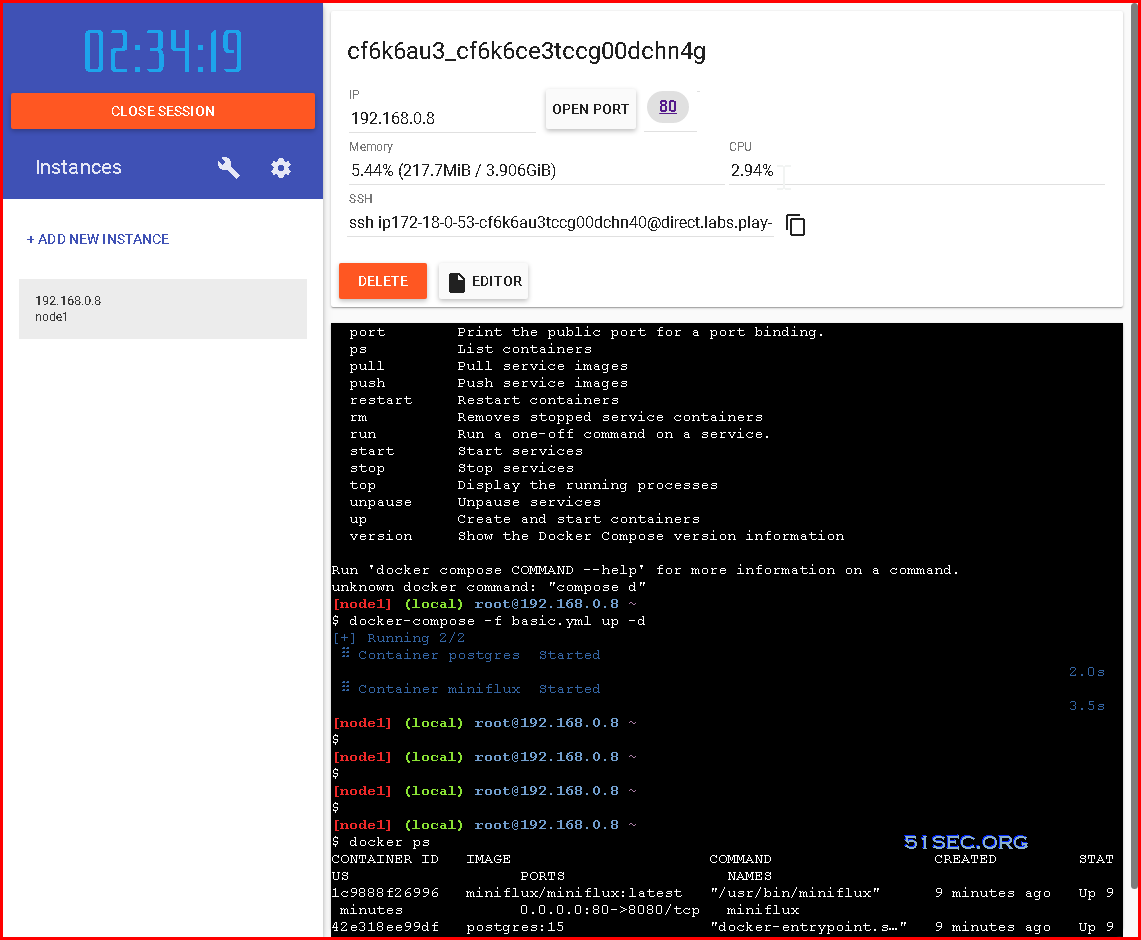
5 Open Port 80 to visit this website

Installation from Portainer
You can find out this basic.yml template file and other version's yml file from this url:
https://github.com/miniflux/v2/tree/master/contrib/docker-compose
version: '3.4'
services:
  miniflux:
    image: ${MINIFLUX_IMAGE:-miniflux/miniflux:latest}
    container_name: miniflux
    restart: always
    ports:
      - "8010:8080"
    depends_on:
      - db
    environment:
      - DATABASE_URL=postgres://miniflux:secret@db/miniflux?sslmode=disable
      - RUN_MIGRATIONS=1
      - CREATE_ADMIN=1
      - ADMIN_USERNAME=admin
      - ADMIN_PASSWORD=test123
      - DEBUG=1
    # Optional health check:
    # healthcheck:
    #  test: ["CMD", "/usr/bin/miniflux", "-healthcheck", "auto"]
  db:
    image: postgres:15
    container_name: postgres
    environment:
      - POSTGRES_USER=miniflux
      - POSTGRES_PASSWORD=secret
    volumes:
      - miniflux-db:/var/lib/postgresql/data
    healthcheck:
      test: ["CMD", "pg_isready", "-U", "miniflux"]
      interval: 10s
      start_period: 30s
volumes:
  miniflux-db:

- Ports: default port is 80, you might already used 80 for something else, I would suggest change it to others, such as , 8010.
- You might also need to change your VPS's firewall port to allow 8010
- Default password for user admin.
Integrate with your own domain and enable HTTPS
You can find out this traefik.yml file as template for your reverse proxy configuration to integrate your own domain and enable https to your URL:https://github.com/miniflux/v2/tree/master/contrib/docker-compose
version: '3.4'
services:
  traefik:
    image: "traefik:v2.3"
    container_name: traefik
    command:
      - "--providers.docker=true"
      - "--providers.docker.exposedbydefault=false"
      - "--entrypoints.websecure.address=:443"
      - "--certificatesresolvers.myresolver.acme.tlschallenge=true"
      - "--certificatesresolvers.myresolver.acme.email=[email protected]"
      - "--certificatesresolvers.myresolver.acme.storage=/letsencrypt/acme.json"
    depends_on:
      - miniflux
    ports:
      - "443:443"
    volumes:
      - "./letsencrypt:/letsencrypt"
      - "/var/run/docker.sock:/var/run/docker.sock:ro"
  miniflux:
    image: ${MINIFLUX_IMAGE:-miniflux/miniflux:latest}
    container_name: miniflux
    depends_on:
      - db
    expose:
      - "8080"
    environment:
      - DATABASE_URL=postgres://miniflux:secret@db/miniflux?sslmode=disable
      - RUN_MIGRATIONS=1
      - CREATE_ADMIN=1
      - ADMIN_USERNAME=admin
      - ADMIN_PASSWORD=test123
      - BASE_URL=https://rss.51sec.org
    labels:
      - "traefik.enable=true"
      - "traefik.http.routers.miniflux.rule=Host(`rss.51sec.org`)"
      - "traefik.http.routers.miniflux.entrypoints=websecure"
      - "traefik.http.routers.miniflux.tls.certresolver=myresolver"
  db:
    image: postgres:15
    container_name: postgres
    environment:
      - POSTGRES_USER=miniflux
      - POSTGRES_PASSWORD=secret
    volumes:
      - miniflux-db:/var/lib/postgresql/data
    healthcheck:
      test: ["CMD", "pg_isready", "-U", "miniflux"]
      interval: 10s
      start_period: 30s
volumes:
  miniflux-db:
Other Deployments
Deploy Miniflux on Heroku
https://gist.github.com/tho/b24cdc1edfec60844eb2de493f030483Since the version 2.0.6, you can deploy Miniflux on Heroku in few seconds.
- Clone the repository on your machine:
git clone https://github.com/miniflux/v2.git - Switch to latest stable version
git checkout $(git describe --tags --abbrev=0)(master is the development branch) - Commit to master
git checkout -B master(Heroku only deploy master by default) - Create a new Heroku application:
heroku apps:create - Add the Postgresql addon:
heroku addons:create heroku-postgresql:hobby-dev
Defines the environment variables to configure the application:
# Creates all tables in the database.
heroku config:set RUN_MIGRATIONS=1

# Creates the first user.
heroku config:set CREATE_ADMIN=1
heroku config:set ADMIN_USERNAME=admin
heroku config:set ADMIN_PASSWORD=test123
Then, deploy the application to Heroku:
git push heroku master
Once the application is deployed successfully, you don’t need these variables anymore:
heroku config:unset CREATE_ADMIN
heroku config:unset ADMIN_USERNAME
heroku config:unset ADMIN_PASSWORD
- To watch the logs, use
heroku logs. - You can also run a one-off container to run the commands manually:
heroku run bash. The Miniflux binary will be located into thebinfolder. - To update Miniflux, pull the new version from the repository and push to Heroku again.
Deploy Miniflux on Google App Engine
If you have experience with Terraform and want a setup that works out of the box, consider using this Terraform module. Alternatively, you can follow these instructions:- Create a Postgresql instance via Google Cloud SQL, then create a user and a new database
- Clone the repository and create a
app.yamlfile in the project root directory
runtime: go111
env_variables:
    CLOUDSQL_CONNECTION_NAME: INSTANCE_CONNECTION_NAME
    CLOUDSQL_USER: replace-me
    CLOUDSQL_PASSWORD: top-secret

    CREATE_ADMIN: 1
    ADMIN_USERNAME: foobar
    ADMIN_PASSWORD: test123
    RUN_MIGRATIONS: 1
    DATABASE_URL: "user=replace-me password=top-secret host=/cloudsql/INSTANCE_CONNECTION_NAME dbname=miniflux"
Replace the values according to your project configuration. As you can see, the database connection is made over a Unix socket on App Engine.
Last step, deploy your application:
gcloud app deploy
Refer to Google Cloud documentation for more details:
- https://cloud.google.com/appengine/docs/standard/go111/building-app/
- https://cloud.google.com/appengine/docs/standard/go111/using-cloud-sql
Deploy Miniflux on Fly.io
flyctl launch --copy-config --no-deploy --image "ghcr.io/miniflux/miniflux:X.Y.Z-distroless"
flyctl postgres create --name "$APP_NAME-db" --vm-size shared-cpu-1x --initial-cluster-size 1 --volume-size 1
flyctl postgres attach "$APP_NAME-db" --database-name miniflux2 --database-user miniflux
flyctl deploy
flyctl ssh console --command "miniflux -create-admin"
flyctl openCreate a new app based off of the template
fly.tomlfile (part of this gist).flyctl launch --copy-config --no-deploy --image "ghcr.io/miniflux/miniflux:X.Y.Z-distroless"Store the app name in an environment variable for easy reference.
APP_NAME="<APP_NAME>"If you chose to use an auto-generated name, see the output of
flyctl launchorfly.tomlfor the app name.Create a postgres cluster (Development - Single node, 1x shared CPU, 256MB RAM, 1GB disk).
flyctl postgres create --name "$APP_NAME-db" --vm-size shared-cpu-1x --initial-cluster-size 1 --volume-size 1Attach the postgrges cluster to the app.
flyctl postgres attach "$APP_NAME-db" --database-name miniflux2 --database-user minifluxDeploy the app.
flyctl deploy
Create an admin user.
flyctl ssh console --command "miniflux -create-admin"Open
https://APP_NAME.fly.devin your browser.Alternatively, run
flyctl open.Log in as admin and create regular user(s).
Settings > Users > Add user
Videos
References
Relate blog posts for Docker:
- [5 Minutes Docker Series] Deploy A Free RSS Aggregator Website - miniflux
- [5 Minutes Docker Series] Deploy A Free File List App for Multiple Cloud Storages - Alist
- [5 Mins Docker Series] Minimalist Web Notepad - A Simple Online Notepad
- [5 Mins Docker Series] Koel - An Open Source Personel Music Streaming Software
- Deploy Aria2 Docker To Download Files to Cloud Drives (Google Drive, One Drive etc)
- Using Portainer to Deploy Guacamole As Web Based Remote Access Gateway (Updated)
- Run Pi-hole Docker in Ubuntu for Family Internet Safety and Ads Blocking
- Using Portainer to Deploy OpenWRT Docker
- Install n.eko (A Self Hosted Virtual Browser Docker) in Low Memory VPS (1GB)
- Using Docker+Portainer to Install Open Source Password Manager - BitWarden
- Deploy Docker, Docker-Compose, Portainer and NPM (Nginx Proxy Manager)
- Install NextCloud Docker and Integrate with Nginx and LetsEncrypt SSL Certificate
- Install Docker, Docker-Compose, Portainer & Nginx on CentOS 8 & Ubuntu 20.04
- Portainer Usage Tips and Tricks
- Docker Usage Tips and Tricks


No comments:
Post a Comment